
Install the Git client
Install Miniconda 3
- Download Miniconda 3 for your operating system from https://docs.conda.io/en/latest/miniconda.html
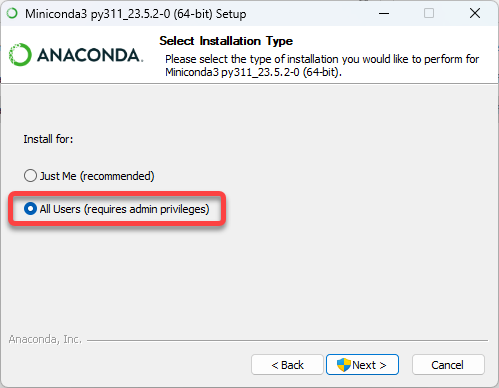
- Start the downloaded installer and make sure to install it for All users
Clone the Stable Diffusion GitHub repository
- Create a directory for the Stable Diffusion folders and open it in a terminal
- Clone the repository from https://github.com/CompVis/stable-diffusion.git
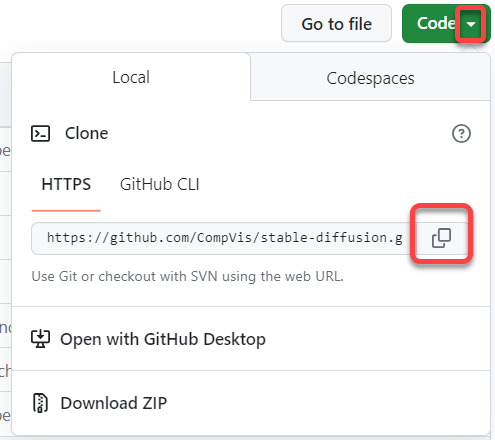
- This will create the stable-diffusion directory
- Cerate another directory on the same level: stable-diffusioncd
Download the latest Stable Diffusion checkpoint
- With a web browser navigate to https://huggingface.co/CompVis/stable-diffusion#model-access
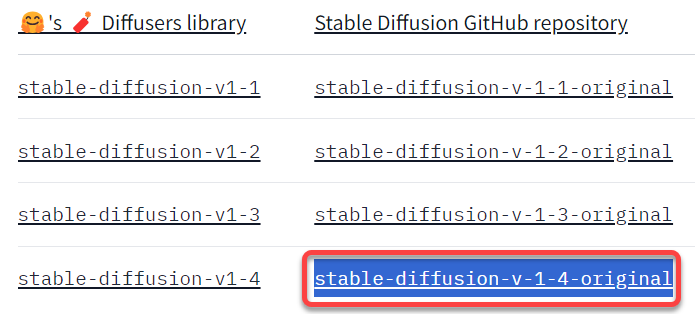
- Click the latest stable-diffusion-v-…-original version link
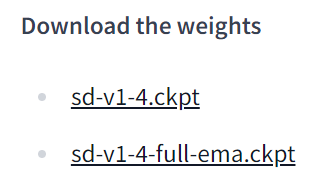
- Download the weight. Any of these two files work, but the full-ema produces better quality images, but almost twice as big (7.2 GB vs. 4 GB).
Configure the Python environment with Miniconda
- Start Miniconda from the Start Menu
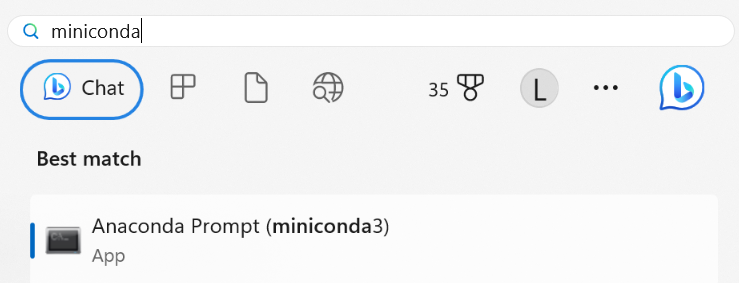
- In the Miniconda terminal execute the following lines
- Create the ldm Python environment
conda env create -f environment.yaml- this will cerate the Conda environment files at C:\Users\MY_USER_NAME\.conda\envs
If anything goes wrong during the environment creation, delete the ldm folder and run this command again.
- this will cerate the Conda environment files at C:\Users\MY_USER_NAME\.conda\envs
- Activate the just created environment
conda activate ldm
- Create the ldm Python environment
Copy the checkpoint file into the models directory
- Open a terminal in the stable-diffusion directory
- Create a directory for the model
mkdir models\ldm\stable-diffusion-v1 - Step into the new directory
cd models\ldm\stable-diffusion-v1 - Copy the downloaded .ckpt file into the models\ldm\stable-diffusion-v1 directory and rename it to model.ckpt
copy C:\Users\MY_USER_NAME\Downloads\sd-v1-4-full-ema.ckpt model.ckpt
To use Stable Diffusion
Activate the Python environment
- Start Miniconda 3 from the start menu
- In the terminal navigate to the stable-diffusion directory
- Activate the ldm Anaconda environment
conda activate ldm
Generate the image
We will call a Python script with the –prompt argument and type the English description of the image
python scripts/txt2img.py --prompt "a close-up portrait of a cat by pablo picasso, vivid, abstract art, colorful, vibrant" --plms --n_iter 5 --n_samples 1The image will be created in the stable-diffusion\outputs\txt2img-samples\samples directory
Arguments
To get help on using Stable Diffusion executepython scripts/txt2img.py --help
- –plms specifies how images are sampled
- –n_iter 5 sets the number of iterations
- –n_samples 1 – the nmber of samples generated
For more information see https://www.howtogeek.com/830179/how-to-run-stable-diffusion-on-your-pc-to-generate-ai-images/
