Skip to content
Pinter Computing

Knowledge Base for IT Professionals, Teachers, and Astronauts

Pinter Computing

Knowledge Base for IT Professionals, Teachers, and Astronauts

  • Home
  • Programming
  • DevOps
  • Project Management
  • Software and Hardware
  • Miscellaneous
  • Egyebek
  • About
  • Experience
  • Education
  • Contact
  • Home
  • Programming
  • DevOps
  • Project Management
  • Software and Hardware
  • Miscellaneous
  • Egyebek
  • About
  • Experience
  • Education
  • Contact
Close

Search

Home/3D Printing/Pause 3D Printing
3D Printing

Pause 3D Printing

By Laszlo Pinter
June 3, 2017 2 Min Read
0

There are some designs where you want to change the filament or insert a nut into the product. To pause the 3D printing process

  1. Export the design into a .gcode file,
  2. Open the. gcode file with a text editor,
  3. Insert the following lines into the file at the point you want to pause.
    ; Display a message
    M117 Change the filament and continue
    ; Pause the printing
    M600

If you want to print text, it is possible to pause the printing, change the filament to a different color, and continue.

To find the layer where you need to change the color in Cura, the free 3D print utility

  1. Load the STL file of the design into Cura,
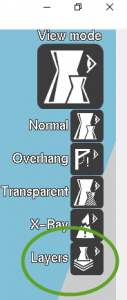
  2. Click the View Mode icon in the upper right corner of the screen, and select Layers,
  3. Use the slier to navigate between the layers,
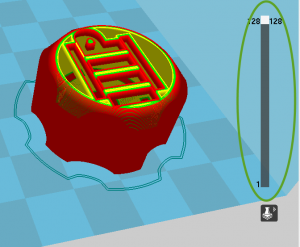
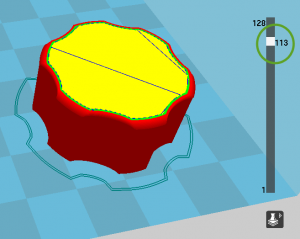
  4. Find the layer that prints the bottom of the groove, and write down the layer number. Note that the slider starts to number the layers with 1.
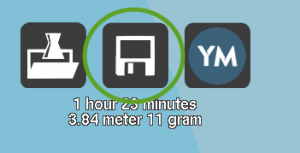
  5. Save the .gcode file to the disk with the Floppy icon on the left side. If the icon is gray, the design is larger than the printable size of the printer. You may scale the design down with the Scale icon.
  6. Open the .gcode file with a text editor,
  7. Note that the .gcode file starts to number the layers with 0. To stop at the correct layer, we need to subtract 1 from the number we have seen on the slider.
  8. We will change filament colors to print the bottom layer of the groove. In our example, layer 113-1 = 112 printed the bottom of the groove, search for the text Layer:112 in the file,
  9. Place a pause instruction before that line in the file
    ; Display a message
    M117 Change the filament and continue
    ; Pause the printing
    M600
    ;LAYER:112
  10. Find the next layer in the file, in our example, search for the text Layer:113 in the file,
  11. Place another pause instruction before that line in the file to change the color again.
    ; Display a message
    M117 Change the filament and continue
    ; Pause the printing
    M600
    ;LAYER:113
  12. Save the file and start the printing process.

Tags:

3Dprinting
Author

Laszlo Pinter

Follow Me
Other Articles
Previous

Chef Attributes

Next

Modify STL 3D printing files with FreeCAD

No Comment! Be the first one.

Leave a Reply Cancel reply

Your email address will not be published. Required fields are marked *

Search

Last Changes

  • DevOps Engineering part 1. (Mac) - Make your Macintosh easier to use June 25, 2026
  • Japan travel tips June 22, 2026
  • How to stop the rain and snow in Cities: Skylines II June 20, 2026
  • Cities: Skylines II Developer Mode June 20, 2026
  • 'CSII_MANAGEDPATH' has incorrect path(s) when building Cities: Skylines II mod June 20, 2026

Tags

.NET .NETcore 3Dprinting ASP.NET Core AutodeskInventor AWS C# Chef cloud DevOps Docker EntityFramework Games Git Go iOS iPad iPhone iPod Java Kubernetes Linux MacOSX MSSQL MVC Node.js Packer PowerShell Python RDS RightScale Ruby security Splunk TeamCity Terraform TestKitchen Tomcat Ubuntu Vagrant VirtualBox VisualStudio Windows WordPress Xcode

Recent Comments

  • Zengei László on MyHeritage családfa exportálása és küldése emailben
  • Raúl Castillo on DynDns update error
  • MICHAEL on Windows Media Player 12 cannot find the album information
  • Nargis on Configure Epson ET-3850 scanning on Windows 11
  • Venczelné Zemen Erika on Delta S2302 termosztát programozása

–

  • Log in
  • Entries feed
  • Comments feed
  • WordPress.org
Copyright 2026 — Pinter Computing. All rights reserved.