There are some designs where you want to change the filament or insert a nut into the product. To pause the 3D printing process
- Export the design into a .gcode file,
- Open the. gcode file with a text editor,
- Insert the following lines into the file at the point you want to pause.
; Display a message
M117 Change the filament and continue
; Pause the printing
M600
If you want to print text, it is possible to pause the printing, change the filament to a different color, and continue.
To find the layer where you need to change the color in Cura, the free 3D print utility
- Load the STL file of the design into Cura,
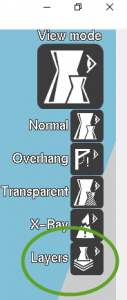
- Click the View Mode icon in the upper right corner of the screen, and select Layers,
- Use the slier to navigate between the layers,
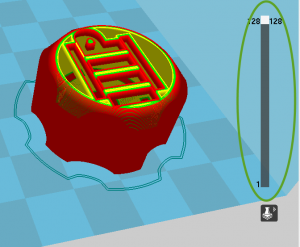
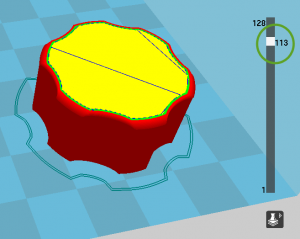
- Find the layer that prints the bottom of the groove, and write down the layer number. Note that the slider starts to number the layers with 1.
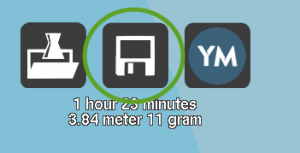
- Save the .gcode file to the disk with the Floppy icon on the left side. If the icon is gray, the design is larger than the printable size of the printer. You may scale the design down with the Scale icon.
- Open the .gcode file with a text editor,
- Note that the .gcode file starts to number the layers with 0. To stop at the correct layer, we need to subtract 1 from the number we have seen on the slider.
- We will change filament colors to print the bottom layer of the groove. In our example, layer 113-1 = 112 printed the bottom of the groove, search for the text Layer:112 in the file,
- Place a pause instruction before that line in the file
; Display a message
M117 Change the filament and continue
; Pause the printing
M600
;LAYER:112
- Find the next layer in the file, in our example, search for the text Layer:113 in the file,
- Place another pause instruction before that line in the file to change the color again.
; Display a message
M117 Change the filament and continue
; Pause the printing
M600
;LAYER:113
- Save the file and start the printing process.