Add user interface elements to the view
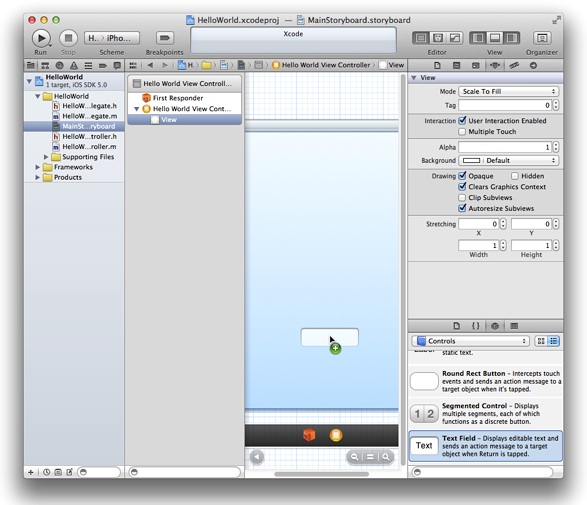
- Open the MainStoryboard.storyboard file in the project navigator
- Open the Utilities area by clicking the right most view button in the upper right corner of the screen
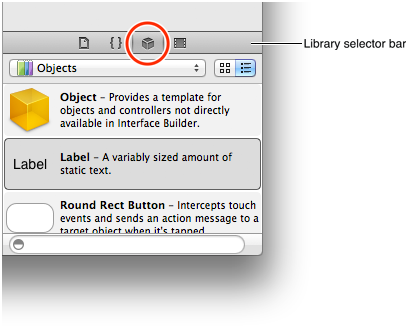
- In the Library selector bar of the Utilities area select the object library
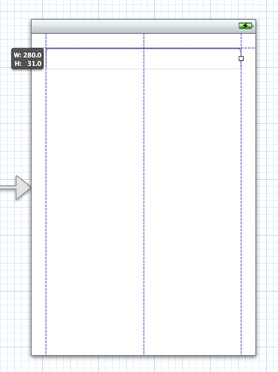
- From the list drag a Text Field, a Label, and a Button to the view
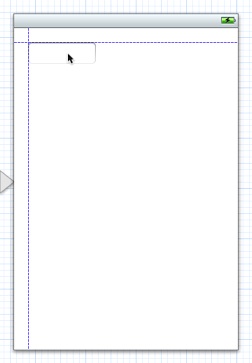
- When you drag the UI elements on the canvas blue alignment guides appear to help you to align the elements on the view
- To resize the UI elements drag the white squares at the middle of the sides or in the corners
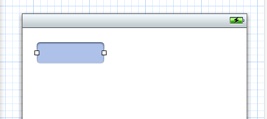
- The blue alignment guides also help you to set the proper size
Set the attributes of the User Interface elements
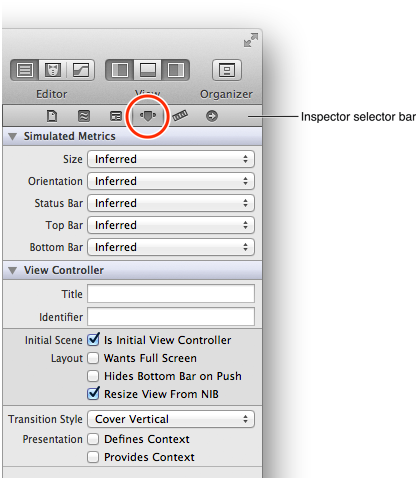
- If necessary open the Attributes inspector by clicking the Attributes icon in the Inspector selector bar
- Select the text field and enter the description of the text field in the Placeholder field of the Attributes inspector
- With the Alignment attribute you can align the text to left, center or right
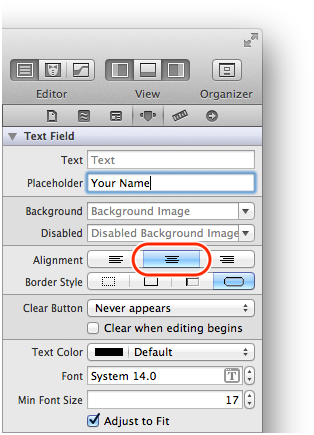
- To specify how the text field will be used, specify scroll down to the bottom of the Text Field area and set
- Capitalization to Words
- Correction to No
- Keyboard to Default
- Appearance to Default
- Return key to Done
To add an action to a button
- Hide the Utilities area by clicking the right most View button in the upper right corner of the screen
- Open the Assistant area by clicking the
 Assistant Editor button in the upper right corner of the screen
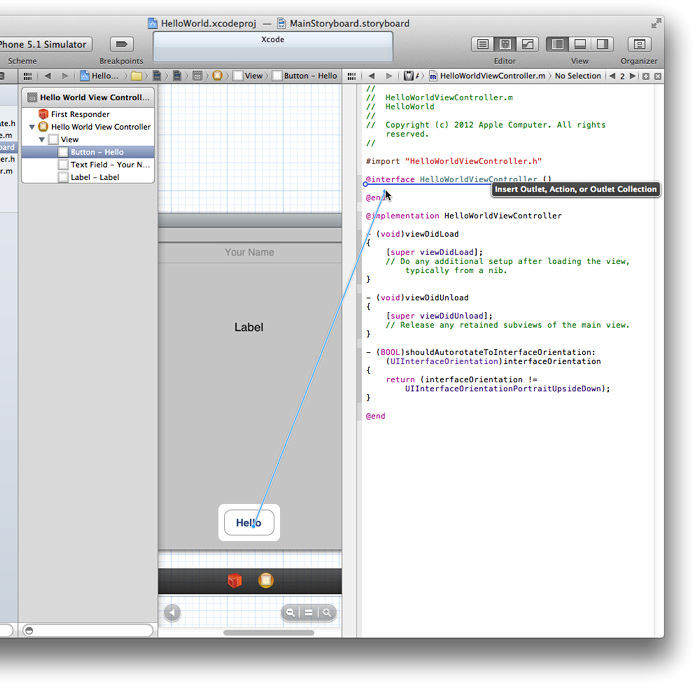
 - Make sure that the Assistant displays the view controller’s implementation file (that is,
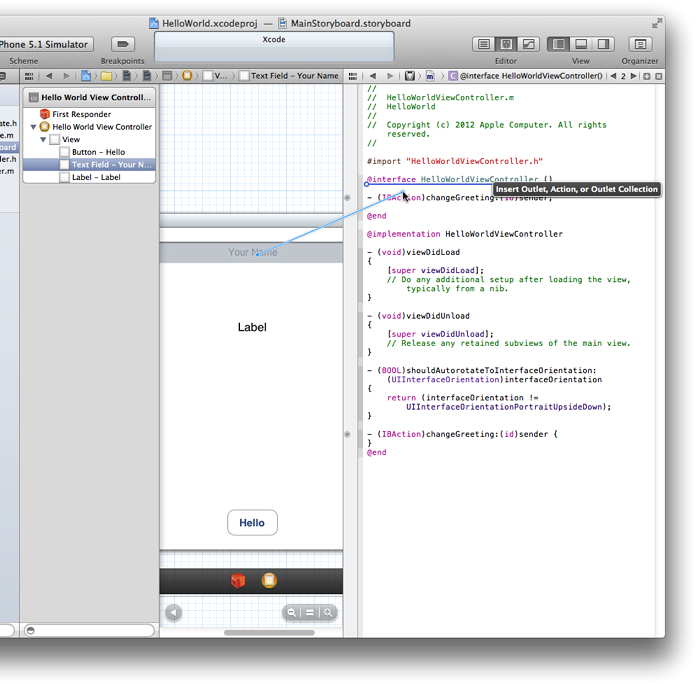
...ViewController.m). If it shows...ViewController.hinstead, click the...ViewController.htext above the editor area and select...ViewController.m - Press the Control key on the keyboard and drag the button to the @interface section of the …ViewController.m editor
- When you release the Control key a pop-over appears
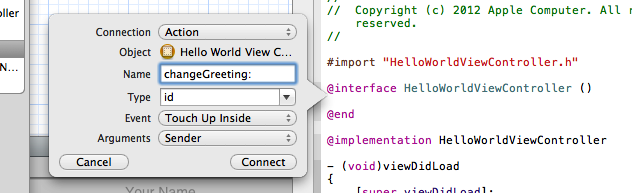
- In the Connection pop-up menu select Actionhe
- In the Name field enter changeGreeting: and finish the word with a colon(:)
- Leave the Type field as id
- Leave the Event pop-up menu as Touch Up Inside
- Make sure the Arguments pop-up menu displays Sender
- Click the Connect button to close the dialog
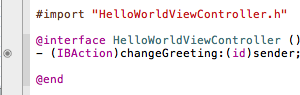
A few new lines of code appears in the …ViewController.m file with a gray filled circle on the left to indicate that a connection has been made between the button and the Controller
To get the user input from a text field create an Outlet
Control drag the text field to the @interface area of the …ViewController.m file
In the pop-over set the following values
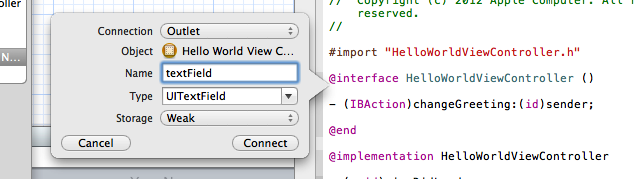
- Make sure the Connection contains Outlet
- In the Name field type textField
- Make sure the Type contains UITextField
- Make sure the Storage is set to Weak
- Click the Connect button to close the pop-over
To display the result in a label create an Outlet for the label
- Control drag the label to the @interface section of the @…ViewController.m file
- Make sure that the Connection pop-up menu contains Outlet.
- In the Name field, type label
- Make sure that the Type field contains UILabel
- Make sure that the Storage pop-up menu contains Weak
- In the popover, click Connect.
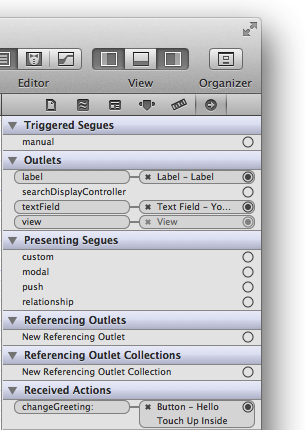
To view the connections you just created
- Click the Standard editor button to close the assistant editor and switch to the standard editor view. The Standard editor button is the leftmost Editor button and it looks like this:

- Click the Utilities view button to open the utilities area.
- Select the View Controller in the outline view.
- Show the Connections inspector in the utilities area. The Connections inspector button is the rightmost button in the inspector selector bar, and it looks like this:

Specify the View Controller as the delegate object for the text field to close the keyboard when the user clicks the Done button
- Make sure the MainStoryboard.storyboard is selected in the project navigator on the left side of the screen
- Control drag the text field to the bottom of the canvas onto the yellow sphere that represents the View Controller
- When you release the Control key you will see this
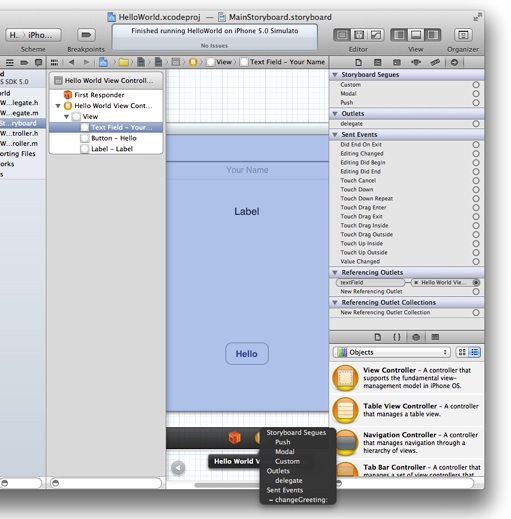
- Select delegate in the Outlets section of the pop-over
To add accessibility hint to the text field, so the Apple VoiceOver screen reader can help people with visual disability
- Select the storyboard file in the project navigator on the left side of the screen
- Select the text field
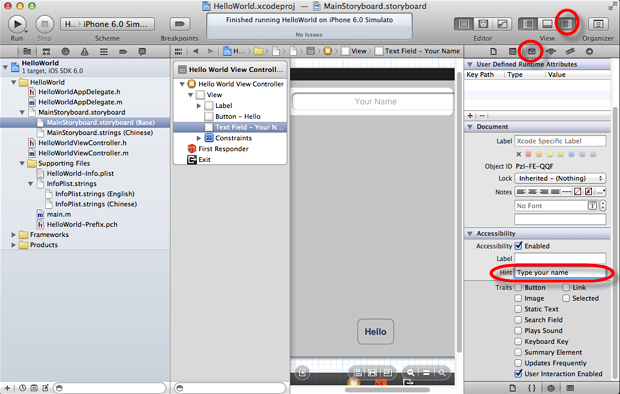
- In the upper right corner select the Utilities view button
- In the Inspector bar select the Identity inspector button
- Enter the hint in the Accessibility section