Segue types
Segues are connections between views, so one view can call the other when the user pushes a button, or any specific object.
The Modal Segue
When the two views do not need to share information, like a login screen
The Push Segue
The push segue can pass data between the views and handle memory. This type of segue is needed for the navigation controller and tab bar controller.
Creating a Modal Segue
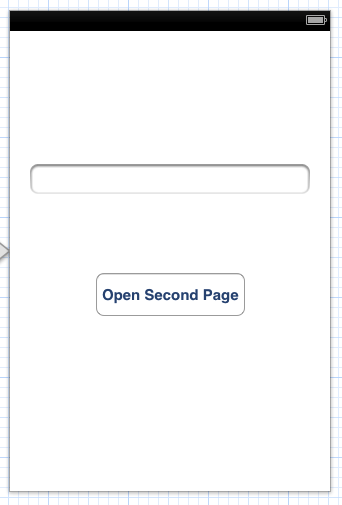
Add a button to the first view that will open the second view
- In Xcode open the Storyboard of your application
- Open the Utilities View in the upper right corner of the screen and select the Object library

- Drag a Text Field to the first view
- Drag a Round Rect Button to the first view and enter Open Second Page as the title
Add a new view to the Storyboard
- From the Object library drag a View Controller to the storyboard
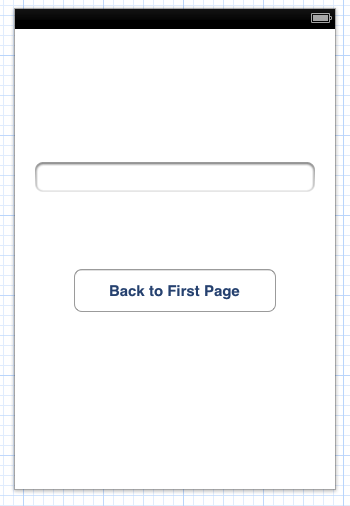
- Drag a Text Field from the Object library to the second view
- Drag a Round Rect Button from the Object library to the second view and enter Back to First Page to the title
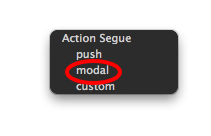
Create the segue between the views
- Press the Control button on the keyboard and drag from the button on first view to the new view controller and release the control key and the mouse button
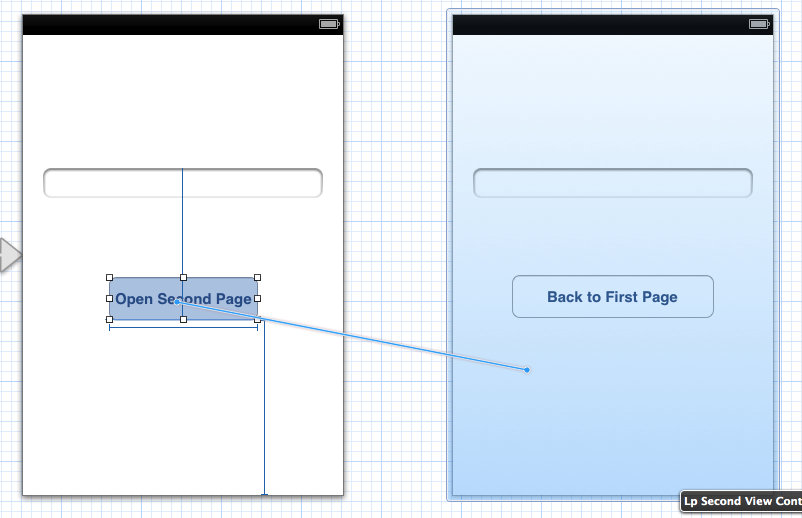
- In the popup select modal
Add the Text field to the interface of the first view
- Open the ViewController.h of the new view in the Assistant Editor
- Press the Control button and drag from the text field to the @interface section of the ViewController.h file
- In the popup type firstTextField to the Name field and click the Connect button

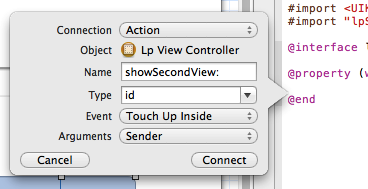
Add the button to the interface of the first view
- Press the Control key on the keyboard and drag the button from the first view to the @interface section of the ViewController.h file. Set the
- Connection to Action
- Name to showSecondView: (including the colon)
- Click the Connect button
Create a a UIViewController class for the new View Controller
- In the lower left corner of the project navigator click the plus sign (+)
- Select New File... from the popup menu
- On the popup window select Objective-C Class under IOS Cocoa Touch
- Click the Next button
- Set the name of the class to SecondViewController
- Set the “Subclass of” to UIViewController
- Click the Create button to place the new class into the project folder
Connect the new class to the View
- Open the Storyboard and select the new view
- In the Identity Inspector elect SecondViewController in the Class list
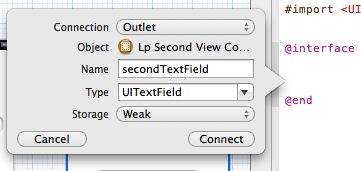
Add the Text field to the interface of the second view
- Open the SecondViewController.h of the new view in the Assistant Editor
- Press the Control button and drag from the text field to the @interface section of the SecondViewController.h file
- In the popup type secondTextField to the Name field and click the Connect button
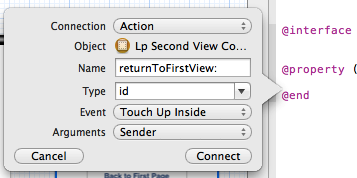
Add the button to the interface of the second view
- Press the Control key on the keyboard and drag the button from the second view to the @interface section of the SecondViewController.h file. Set the
- Connection to Action
- Name to returnToFirstView: (including the colon)
- Click the Connect button