Upgrade TeamCity to version 10
Create a backup of the database and the server before the upgrade
- Disable the Chef-Client scheduled task and Chef-Client service to make sure Chef does not alter the server during the upgrade.
- Disable the authorized agents to stop them picking new jobs.
- Stop the TeamCity process on the server,
- If TeamCity is started by a scheduled task at startup
- Disable the “teamcityserver” scheduled task in the Task Scheduler,
- Stop the “Java(TM) Platform SE binary” process in Task Manager.
- If TeamCity is running as a Windows Service
- Stop and disable the “TeamCity” service.
- If TeamCity is started by a scheduled task at startup
- Save a copy of the TeamCity configuration directories to the data drive and an outside location
- D:\TeamCity\conf
- D:\ProgramData\JetBrains\TeamCity\config
Some file names in the D:\ProgramData\JetBrains\TeamCity\config\projects directory can be very long, so save the backup first in the root of the data drive
- Create a backup image of your server,
- Create a backup snapshot of your database,
- If the image creation did not restart the server, restart the box to make sure no processes hold files in the TeamCity install folder.
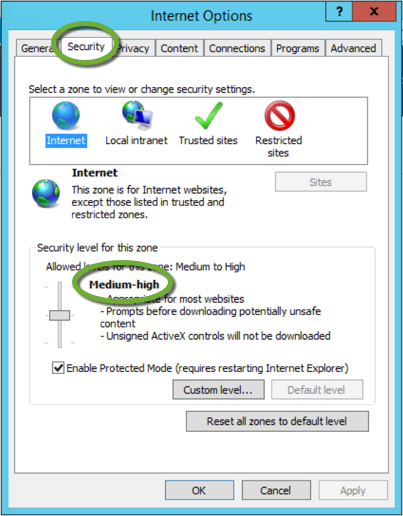
Download the TeamCity installer
- Enable file download on your server. Set the Internet Explorer security level to Medium-high
- Download the TeamCity server installer
- To download the latest TeamCity version navigate to
http://www.jetbrains.com/teamcity/download/ - For earlier versions go to https://confluence.jetbrains.com/display/TW/Previous+Releases+Downloads
- To download the latest TeamCity version navigate to
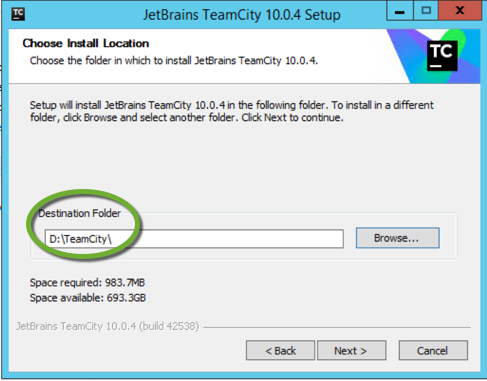
Install the new version of TeamCity server
- Execute the downloaded installer from the Downloads folder,
- If the current version of TeamCity is not on the C drive, make sure you select the correct drive,
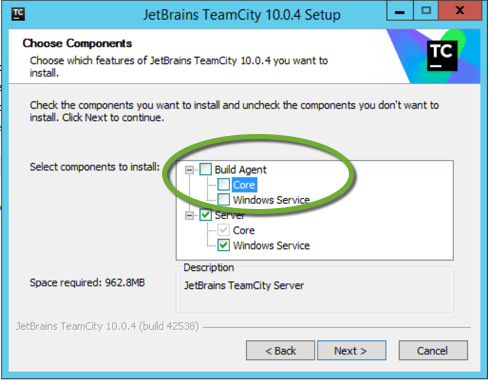
- It is not recommended to run agents on the server box. Uncheck the Windows Services and Core for the Build Agent,
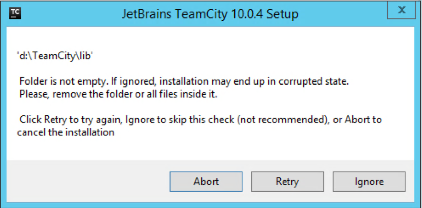
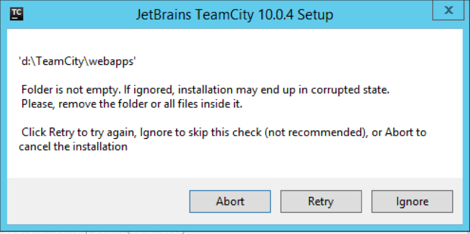
- If you get Folder is not empty… messages, delete the files from the indicated locations and click the Retry button,
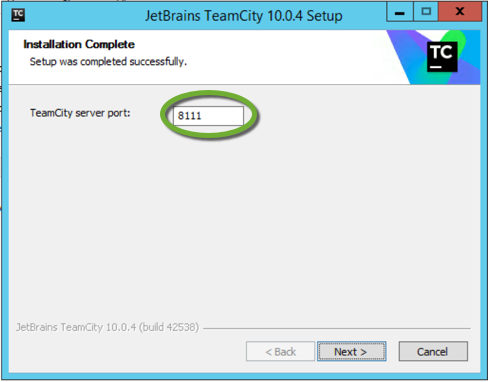
- Set the correct port TeamCity should to use
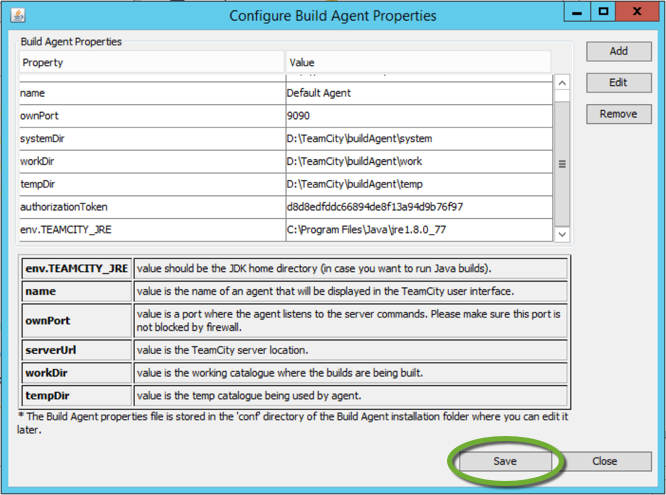
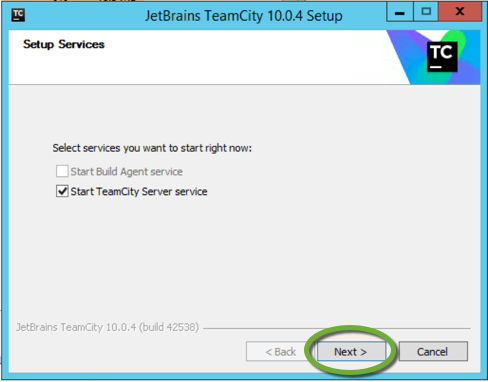
- Even if you haven’t enabled the agent functionality on the TeamCity server, you will see the Configure Build Agent Properties page. Click the Save button to continue.
- Select the SYSTEM account to run the TeamCity service
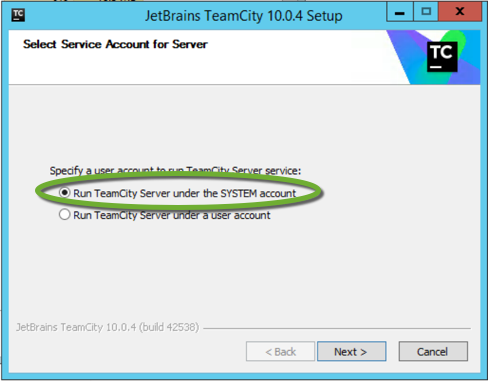
- Click the Next button to start the TeamCity service
Warning:
If you have specified larger memory setting than 32 bit Java is capable of handling, the TeamCity service will not start. You will get the following error message in D:\TeamCity\logs\teamcity-winservice.log
ProcessCommand [Info] Process exited with code: 1
console [Info] Error occurred during initialization of VM
console [Info] Could not reserve enough space for 2097152KB object heap
ServiceExecuteProcessTask [Error] Service process exited without service stop request
To switch to 64 bit Java, follow the steps below.
TeamCity on 64-bit Java
The TeamCity installer also installs the 32-bit version of the Java Runtime Environment (JRE) in the “D:\TeamCity\jre” folder. To use the 64 bit Java, test if your server has 64-bit Java installed:
- Open a command window and execute,
java.exe -d64 -version
- The installed Java is 32 bit if you get the error message:
Error: This Java instance does not support a 64-bit JVM.
Please install the desired version.
Switch to 64-bit Java
- Stop the TeamCity Windows Service,
- Rename the D:\TeamCity\jre to OLD_jre, so TeamCity will not find it anymore,
- If you have not specified the memory settings in the Set the TEAMCITY_SERVER_MEM_OPTS environment variable based on the physical memory size of your server and the estimated usage
- Start Windows Explorer
- Right-click This PC and select Properties
- Select Advanced system settings
- Click the Envirnment Variables… button
- In the System Variables section select TEAMCITY_SERVER_MEM_OPTS
- Set the value based on the expected server load:
- minimum setting for 32-bit and 64-bit java:
-Xmx750m - recommended setting for medium 64-bit server and maximum for 32-bit server:
-Xmx1024m - recommended setting for large server (64-bit java only):
-Xmx4g -XX:ReservedCodeCacheSize=350m - maximum settings for large-scale server use (64-bit java only):
-Xmx10g -XX:ReservedCodeCacheSize=512m
- minimum setting for 32-bit and 64-bit java:
Remove unsupported memory settings
TeamCity version 10 does not use -XX:MaxPermSize anymore. If you get
[Info] Java HotSpot(TM) Server VM warning: ignoring option MaxPermSize=2048m; support was removed in 8.0
remove “MaxPermSize” from theTEAMCITY_SERVER_MEM_OPTS environment variable.
Start the server
- Open Services and start the TeamCity Server Windows service
- Open a web browser and navigate to http://localhost:8111
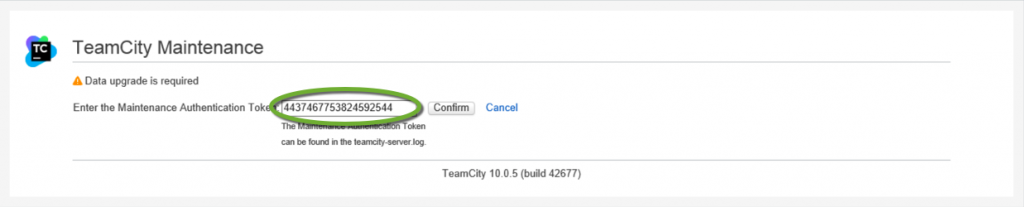
- On the TeamCity Maintenance page select the I’m a server administrator, show me the details link

- Open the D:\TeamCity\logs\teamcity-server.log file and find the Administrator can login from web UI using authentication token line and copy the token number to the clipboard

- Paste the token to the textbox and click the Confirm button
- On the TeamCity Upgrade page click the Upgrade button
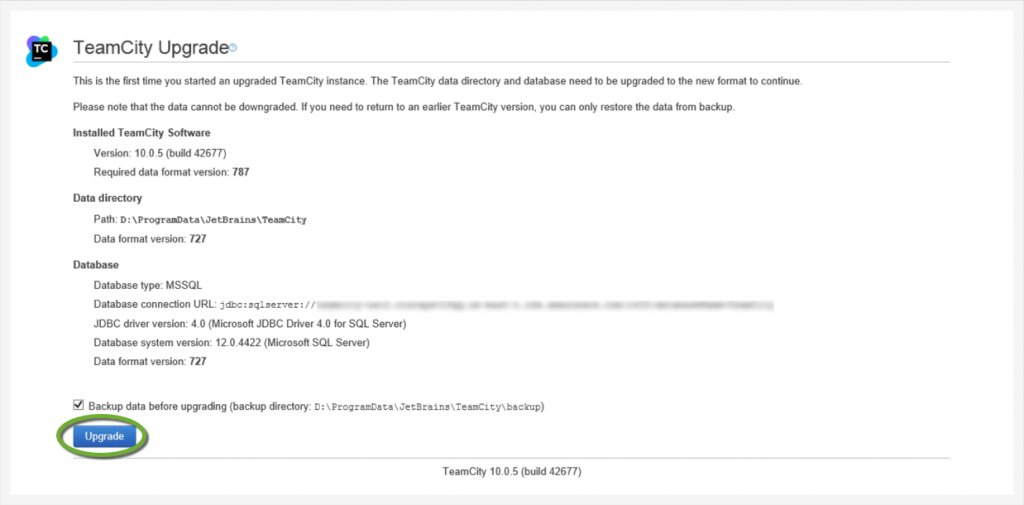
- TeamCity will make a backup of the current projects to D:\ProgramData\JetBrains\TeamCity\backup

Disaster recovery
If for some reason the server does not work after the upgrade, you can restore the database and the server from the backups you made before the upgrade.
Rebuild the environment
- Terminate the failed TeamCity server
- Restore the database from the backup snapshot
- Launch a new server instance from the backup server image
Make sure that the TeamCity process is not running on the restored server
When the server has started, remote into it.
- Check if the TeamCity process has ben stopped:
- If TeamCity is started by a scheduled task at startup
- Disable the “teamcityserver” scheduled task in the Task Scheduler,
- Stop the “Java(TM) Platform SE binary” process in Task Manager.
- If TeamCity is running as a Windows Service
- Stop and disable the “TeamCity” service.
- If TeamCity is started by a scheduled task at startup
Update the server configuration
TeamCity stores the address of the database and the IP address of the server in config files. To be able to use the restored server, make the following changes:
Update the database address
- Update the database address in the connectionUrl line of D:\ProgramData\JetBrains\TeamCity\config\database.properties
Update the IP address of the server
- Update the server IP address in the server rootURL element of D:\ProgramData\JetBrains\TeamCity\config\main-config.xml
Restart
- Restart the box for the changes to take effect.