Lookups provide readable information to users, so they don’t have to understand the returned codes in the reports.
Lookups are defined for a specific app, and not accessible from other apps.
Lookup options
Lookup code, description (input, output) values can be defined in multiple ways
- Comma delimited text file (csv),
- Search results saved as lookup table,
- External script or command,
- Splunk DB Connect application,
- Geospatial lookups,
- KV Store collection.
Create a lookup data .csv file
Save the lookup values in a “.csv” file on your workstation, with comma separated input and output values:
code,description
1,Success
2,Failure
3,Error …
To import a lookup table
Upload the data to the Splunk server
- In the Settings menu select Lookups,

- In the Lookup table files row click Add new,
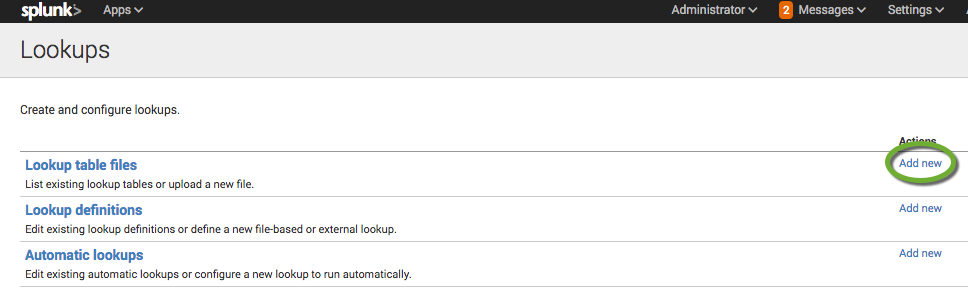
- Select the Destination app where the lookup table will be available,
- Browse to the data file on your workstation,
- Enter the Destination filename for the uploaded file on the Splunk server,
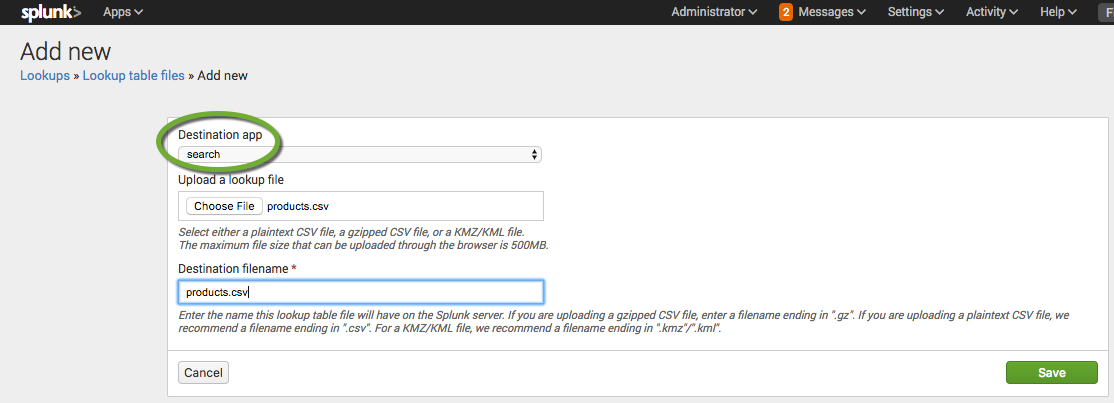
- Click Save to upload the file to the Splunk server.
Import the data to the Splunk server
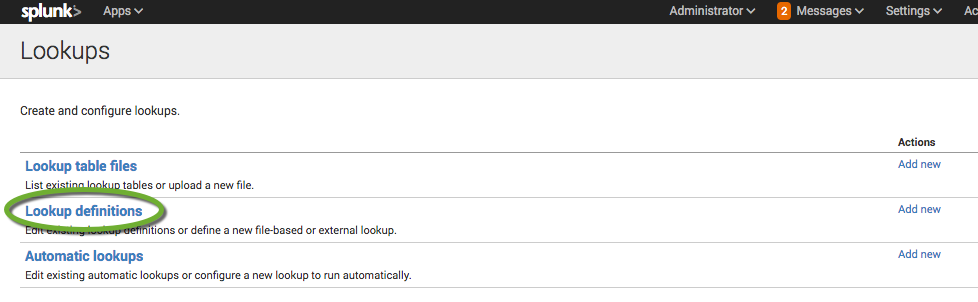
- In the Settings menu select Lookups again,

- Click Lookup definitions,
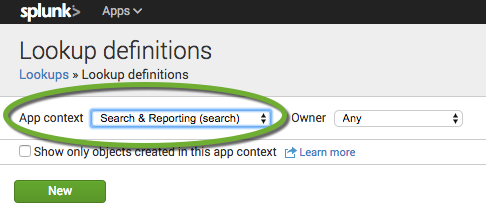
- Make sure the correct App context is selected in the drop-down, and click New,
- Make sure the correct Destination app and Lookup file are selected. Enter a name for the lookup definition, and keep File-based selected,
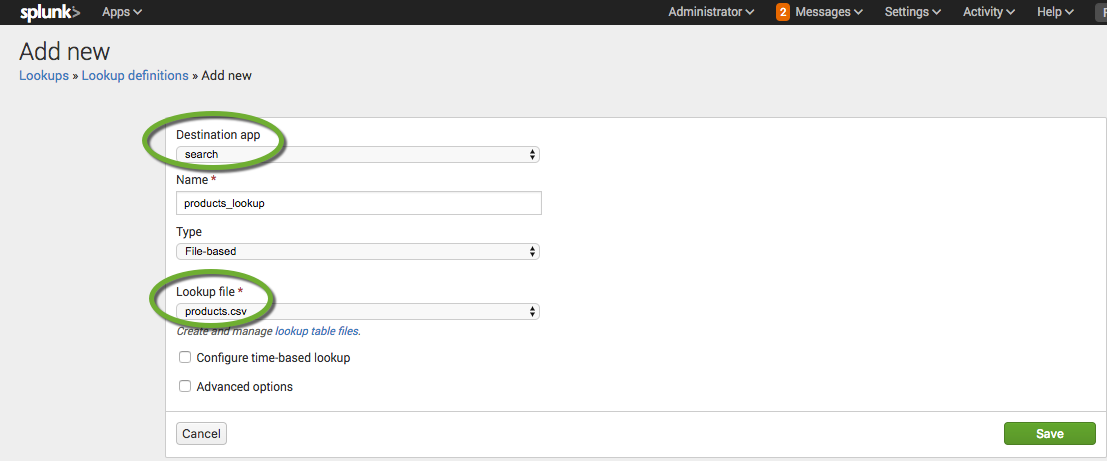
- Click Save.
Verify the imported lookup table
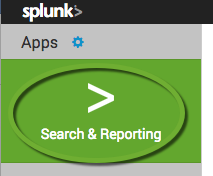
- Click the Splunk icon in the upper left corner to return to the home page,

- Click Search & Reporting,
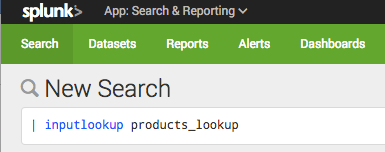
- In the New Search field enter the following command with the “Name” you have entered on the Lookup definitions page to see the table of lookup values.
| inputlookup MY_LOOKUP_NAME
Using lookup
Pipe the data into the lookup command to convert code to description
sourcetype=... | lookup products_lookup productId as productId OUTPUT product_name as ProductName
Pipe the result forward to the stats command for further processing
sourcetype=... | lookup products_lookup productId as productId OUTPUT product_name as ProductName | stats count by ProductName
Automatic lookup definition
If you want the lookup automatically appear in reports, create an automatic lookup definition.
- In the Settings menu select Lookups,
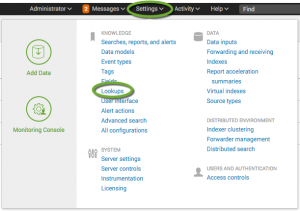
- Click Automatic lookups,
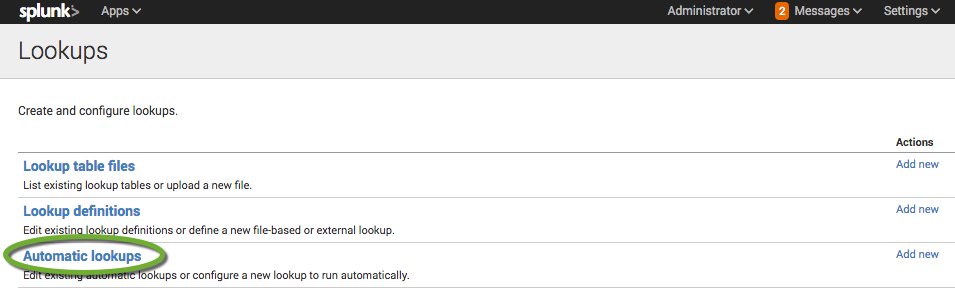
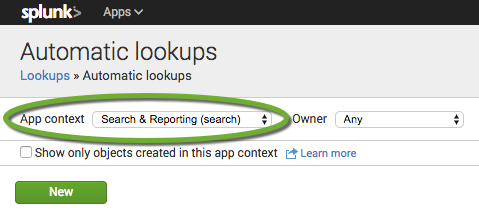
- Select the App context, and click New,
- Make sure the correct Destination app is selected where the lookup will be accessible,
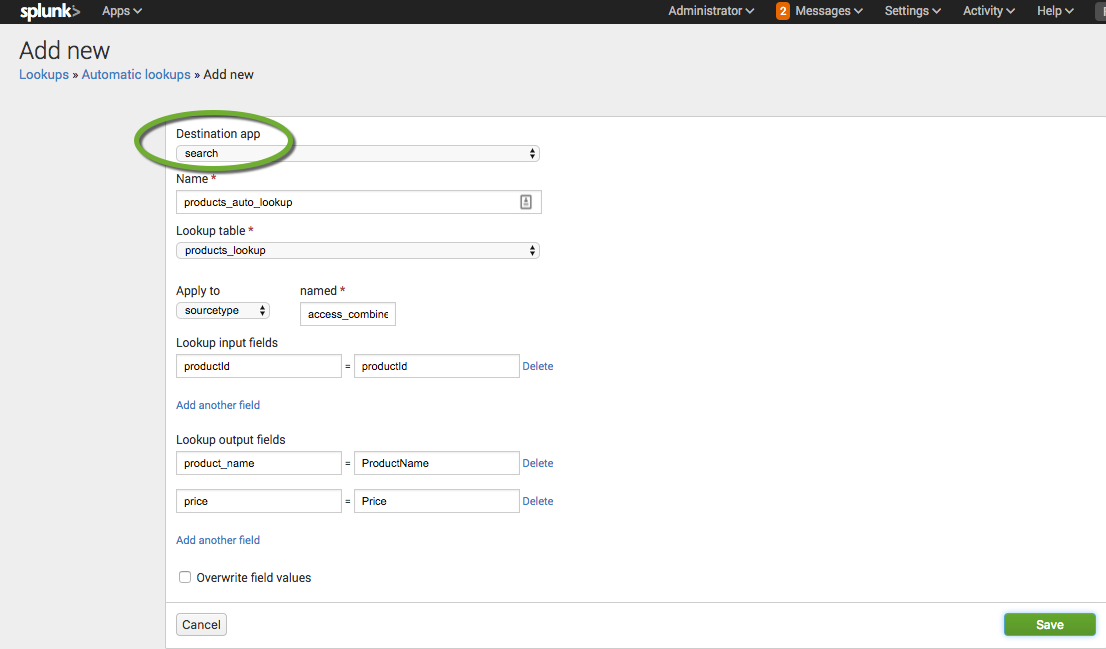
- Create a name,
- Select the lookup table from the dropdown,
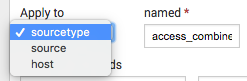
- In the Apply to section select the data type to use the lookup table for,
- In the Lookup input fields section enter the name of the code column in the lookup table and the code field name in the report.
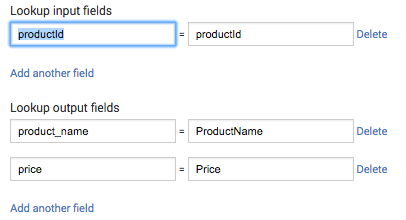
- In the Lookup output fields section specify the display values.You can specify multiple fields using the Add another field link.
- If you want to overwrite existing field values, check the Overwrite field values checkbox.
- Click Save to save the lookup.
- Select the App context, and click New,