The RightScale server templates publish server images to launch. It is advisable to create your own server image because the cloud providers can remove their published images anytime. If you generate your own image, you control the lifecycle of those.
Create your own server image
- Use Packer to create a new server image.
- Install RightLink.
- On Windows
-
-
- Create a PowerShell script and save it as install-rightlink.ps1
$wc = New-Object System.Net.Webclient $wc.DownloadFile("https://rightlink.rightscale.com/rll/10/rightlink.install.ps1", "$pwd\rightlink.install.ps1") Powershell -ExecutionPolicy Unrestricted -File rightlink.install.ps1 - Execute it from the Packer template
"provisioners": [
  {
    "type": "powershell",
    "pause_before":"10s",
    "scripts": [
    "install-rightlink.ps1"
    ]
  }
]
- Create a PowerShell script and save it as install-rightlink.ps1
-
-
- On Windows
- For more information see “Create Custom Images with RightLink” at http://docs.rightscale.com/rl10/getting_started.html
- Install RightLink.
- Make the image public, so RightScale can see it
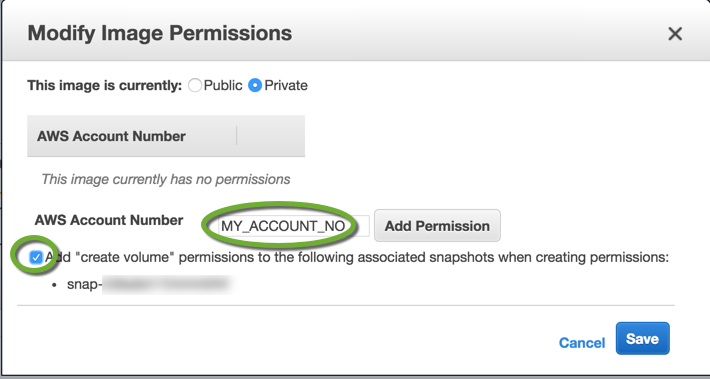
- Open the AWS console
- On the EC2 Dashboard select AMIs

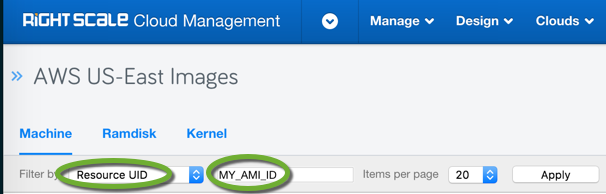
- Find the image by AMI resource ID
- On the Permission tab click the Edit button
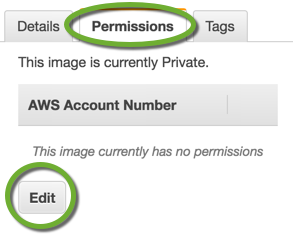
- Keep the image private, but share it with the AWs account you create the server template in.
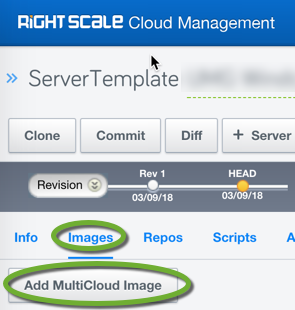
Attach the image to your RightScale server template
Make sure the image is visible in RightScale.
It can take 30 minutes for the new image to appear in the list.
- Open the RightScale Cloud Management console
- In the upper right corner select the account you want to work in,
- In the Clouds menu find the region where you created the image and click the Images link
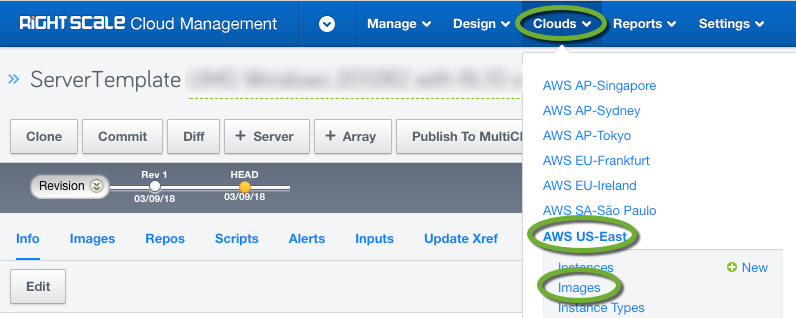
- Search for the image
If you have an existing MultiCloud image and want to update the server image in it
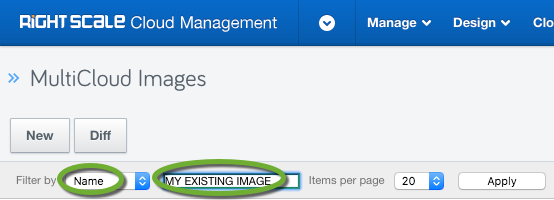
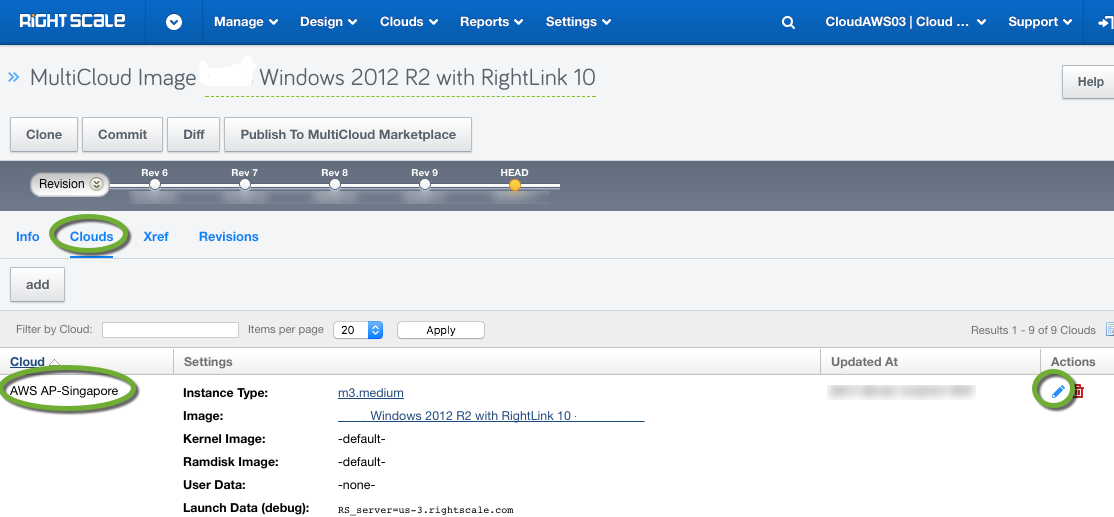
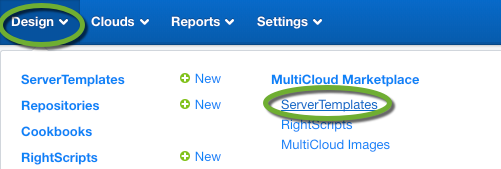
- In the Design menu select the MultiCloud Images link

- Find the existing image by name
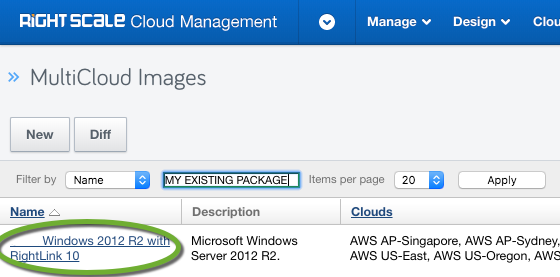
- Click the name of the image to open it
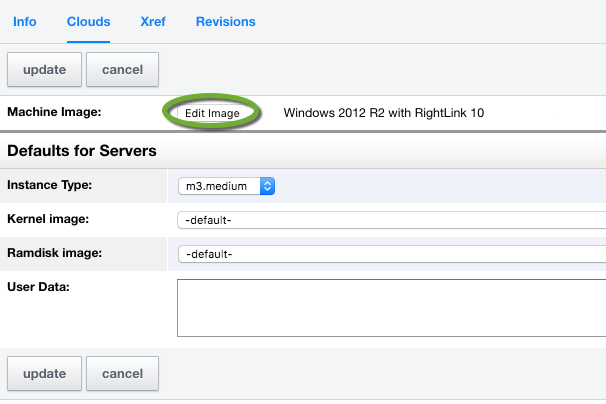
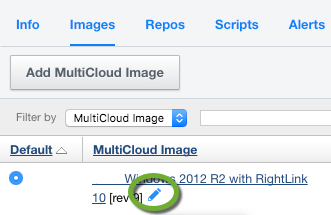
- On the Clouds tab select region, you are working in and click the pencil icon
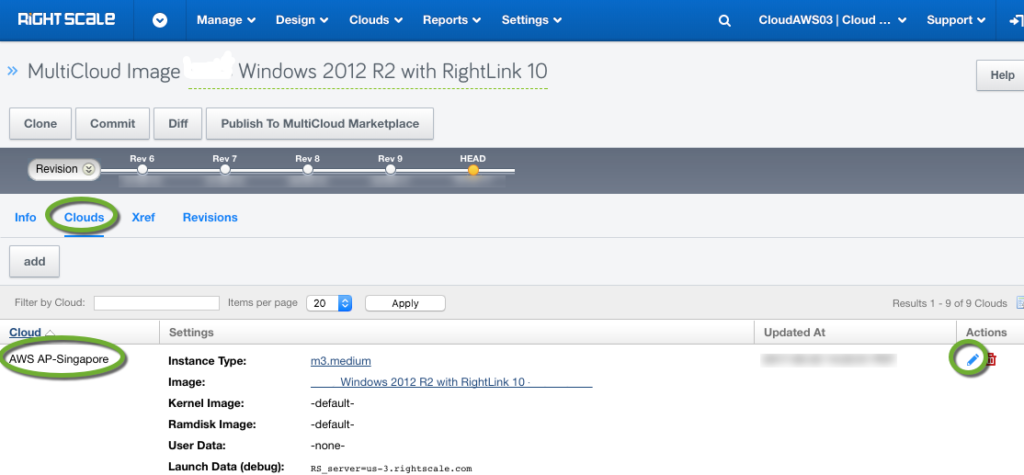
- Click the Edit Image button
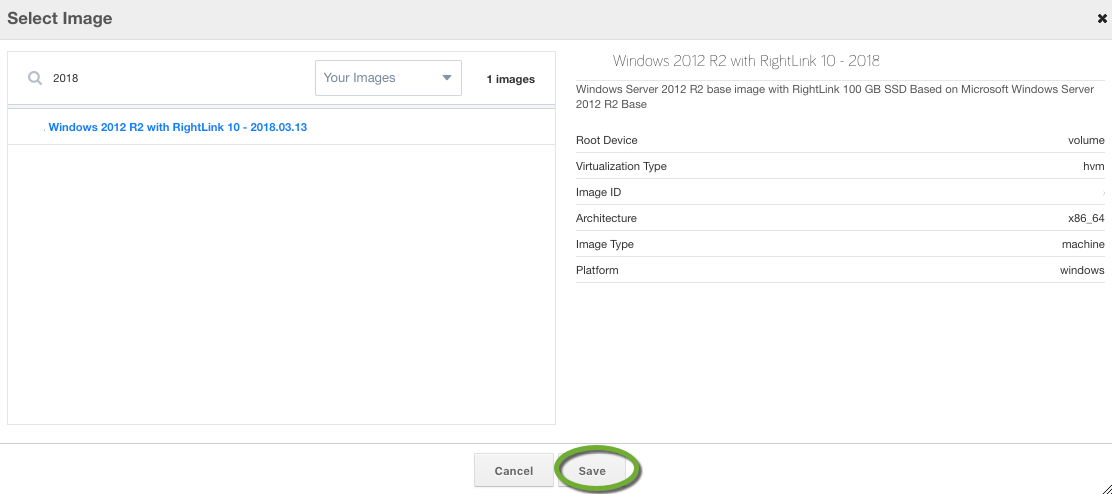
- Type a part of the name of the new server image you have just created to find it
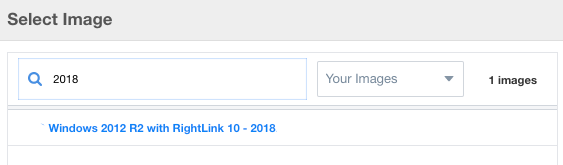
- Click the name of the image to select it
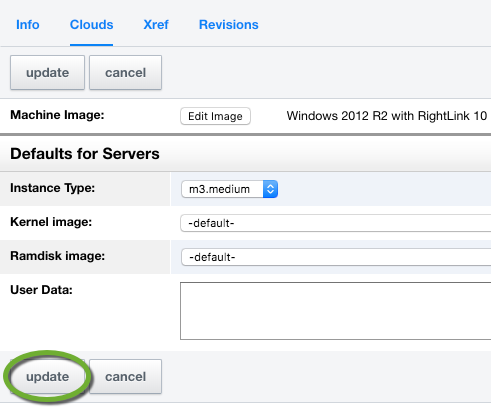
- Click the Save button to add it to the MultiCloud image

- Click the Update button to save the MultiCloud image
Test the new MultiColud Image
Set the MultiCloud image version in the Server Template
Test the new MultiCloud image by TEMPORARILY using the HEAD revision of the Server Template and the MultiCloud image
To test the new image TEMPORARILY select the HEAD revision of the MultiCloud image to be used by the Server Template
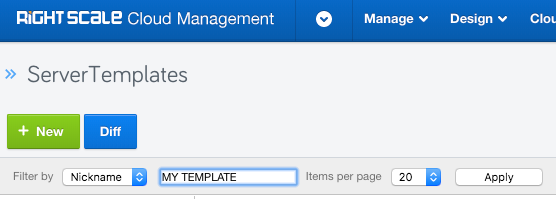
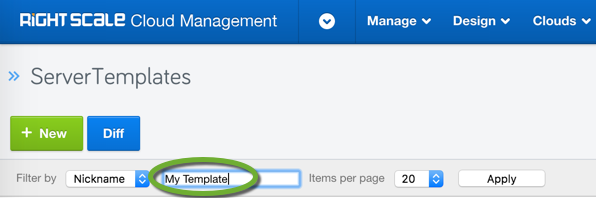
- In the Design menu select the ServerTemplates link

- Find your Server Template
- Click the name of the template to open the info page
- Select the HEAD revision of the Server Template

- On the Images tab click the pencil to set the revision of the MultiCloud image to use
- TEMPORARILY select the HEAD revision for the MultiCloud Image and click the green check mark to save the selection.

In your CAT file set revision 0 to use the HEAD revision of the Server Template
Launch a new server using Self Service with the HEAD revision of the Server Template
Create the new version of the MultiCloud Image
When you have successfully tested the new MultiCloud Image create a new version of it.
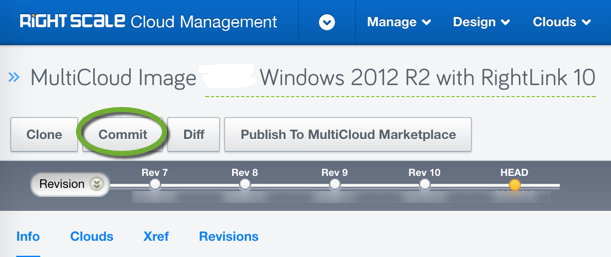
- Find your MultiCloud Image in Desing, MultiCloud Images
- Click the Commit button and enter a description for the change
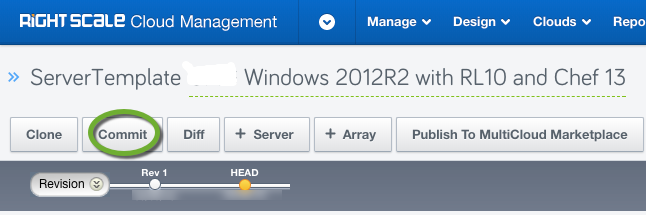
Create the new version of the Server Template
Save a new version of the Server Template
- Find your Server Template in Design, ServerTemplates
- Click the Commit button
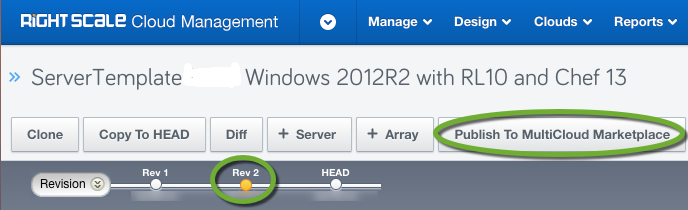
Publish the Server Template
- Select the last revision and click the Publish to MultiCloud Marketplace button
- Keep it private

- Select the account group to share with and click the DESCRIPTIONS button
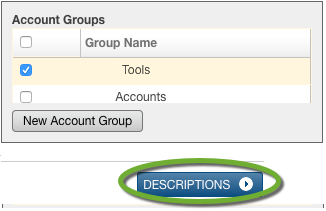
- Click the PREVIEW button
- Click the PUBLISH button
Import the Server Image to the other accounts you use
To be able to use the new version of the Server Image switch to the other accounts and import the template
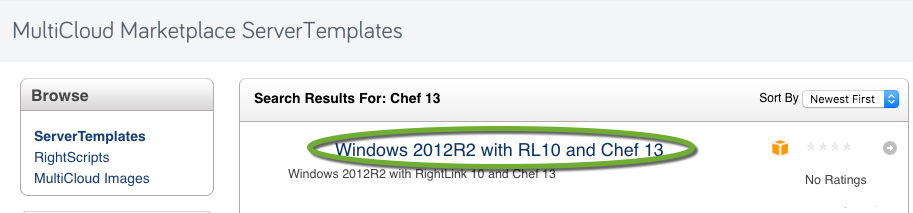
- In the Design menu under MultiCloud Marketplace select the ServerTemplates link
- Enter a portion of the Server Template name in the Keyword box and click the GO button

- Click the name of the template
- Click the Import button

If you want to use a new MultiCloud image in the Server Template
To create a new MultiCloud image
Add the new MultiCloud image to the server template
- Open the RightScale Cloud Management console
- In the Design menu select ServerTemplates

- Find your server template
- On the Images tab click the Add MultiCloud Image button