In this article we will make our application work. We already created a simple application and added a Text field, a Label and a Button to the view. We created connections between the user interface elements and the View Controller.
To make more room to work, close the Utilities area by clicking the Utilities button in the View group in the upper right corner of the screen or in the View -> Utilities menu click Hide Utilities
Create a Property to store your name
To be able to work with the data entered into the text field we have to create a property to store it and make it available for other processes. The property is a placeholder where we store values.
- In the project navigator on the left side of the screen select the …
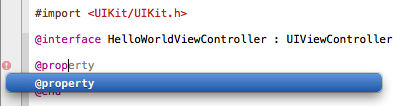
ViewController.h - Before the @end statement write the following:
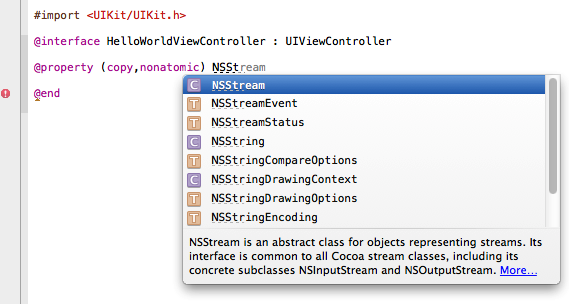
@property (copy, nonatomic) NSString *userName;
You can copy the text into the editor, but if you choose to type it, Xcode will help you to complete the words. Just hit Return to accept the suggestions.
As you continue to type Xcode will show selection lists to help you. Use the arrow keys to select the appropriate item and press Return.
Make the button work
In the previous article, Part 2,we already connected the button to the controller, now we will tell the controller what to do when the user clicks the button.
- In the project navigator on the left side of the screen select the …ViewController.m item
- Scroll down to the bottom to see the implementation of the changeGreeting: method at the end of the @implementation section
- Add lines to the method, it should look like the text below. The first and last lines (the method definition and the closing bracket) are already there, to overwrite them copy the text below, select the first and last line in the editor and replace them with the full text.
- (IBAction)changeGreeting:(id)sender {

    self.userName = self.textField.text;

    NSString *nameString = self.userName;
    if ([nameString length] == 0) {
        nameString = @"World";
    }
    NSString *greeting = [[NSString alloc] initWithFormat:@"Hello, %@!", nameString];
    self.label.text = greeting;
}
You can run your app now to make sure all parts are correct, but it is not done yet.
- Click the button on the simulated screen and “Hello, World!” should appear in the the label.
- If you click the text field you can enter letters there, but there is no way yet to close the automatically appearing keyboard
Make the keyboard disappear
The text field cannot close the keyboard, but it can ask the View Controller to act in behalf of it, so we will delegate the work to the View Controller
- Stop the simulator by clicking the Stop button in the upper right corner of the screen
Teach the View Controller what to do
- Select the …ViewController.m in the project navigator on the left side of the screen
- At the bottom of the file before the @end statement enter the following. The easiest way to to this is to copy and paste the code.
- (BOOL)textFieldShouldReturn:(UITextField *)theTextField {
    if (theTextField == self.textField) {
        [theTextField resignFirstResponder];
    }
    return YES;
}
In the method the resignFirstResponder instruction will close the keyboard.
Set up the View Controller to work on behalf of the text field
- In the project navigator select the …ViewController.h item
- To the end of the @interface line add the following:
<UITextFieldDelegate>@interface HelloWorldViewController : UIViewController <UITextFieldDelegate>
If there is already something between the < and > signs, just add ,
UITextFieldDelegatestarting with a comma (,) between the < and > signs.
Test your application
- Click the Run button in the upper right corner of the screen
The application should behave as you expect it:
- When you click the text field the keyboard appears
- When you enter your name the letters show up in the text field
- When you click the Done button on the keyboard the keyboard disappears
- When you click the button on the screen “Hello, your name” appears in the label
Congratulations, you just created your first working iPhone, iPod, iPad app!