DevOps engineering (Release engineering) is a relatively new profession. There is a very high demand for experienced DevOps engineers, because more and more large corporations want to migrate their data centers into the Cloud. In this series I will introduce you to the tools of the trade through the development of a Chef cookbook.
The tools of the DevOps engineers are new and most of them are in the active development phase with frequent releases. Some of the new versions have show stopping bugs in them, so it is a good idea to test all new versions of the tools before you uninstall the old one.
To work as a DevOps engineer you need a development environment with multiple tools. Luckily all of them are available for free and easy to set up.
- The Chef Development Kit to write and test your Chef cookbooks and recipes,
- Vagrant, the orchestrator, to contain the virtual machines to test the scripts,
- Virtual Box to launch the virtual machines,
- Chef needs Ruby to run,
- Git, the version control system.
You can do all development and testing on your workstation for free, but to see your scripts running in a real cloud, you can set up an account at a cloud provider. Amazon Web Services (AWS) offers a free tier where you can launch small server instances for free.
In this guide I will use a Windows computer as a workstation, but all tools work on Mac and Linux computers.
Install the DevOps development tools on Windows
Set up your computer
Windows
Display the file extensions
In Windows 10
- Open Windows explorer
- On the View tab select
- File name extensions
- Hidden items

In Windows 7
- Open Windows Explorer and select Organize
- Select Folder and search options
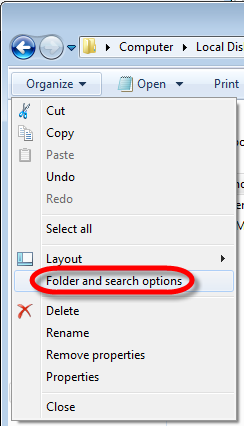
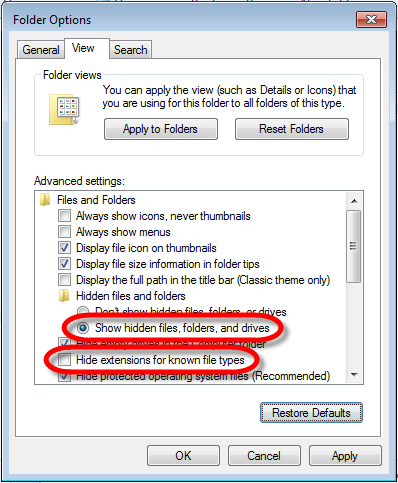
- On the View tab
- Select Show hidden files, folders, and drives
- Uncheck Hide extensions for known file types
Macintosh
Apple Id
If you don’t have an Apple ID create one. You can obtain one without a credit card:
- Start iTunes on your Macintosh,
- Click the drop down menu in the upper right corner,
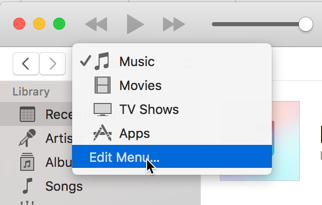
- If Apps is visible, select it, otherwise click Edit Menu…
- Select Apps to display it in the drop down.
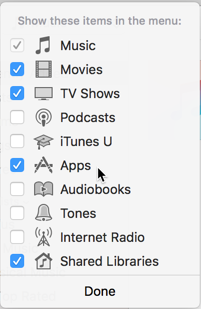
- Select Apps to display it in the drop down.
- Search for a free app in the App Store and start to download it,
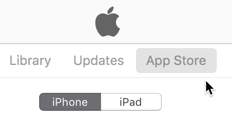
- Create a new Apple Id and select None for credit card type.
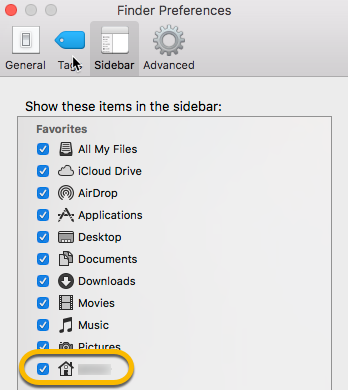
Show the user home directory
- Open Finder
- In the Finder menu select Preferences
- In the Favorites section select the checkbox next to your user name
Create a directory for optional applications
Create the opt folder in the root of the harddisk.
Remote Desktop Client
Windows
The Windows operating system already has a Remote Desktop Client
Macintosh
Download the Microsoft Remote Desktop app from the App Store
- Open the App Store
- Search for “microsoft remote desktop”
- Click the Microsoft Remote Desktop icon
- Click the blue Get button
- Click the green Install App button
Text Editor
Windows
Notepad ++
Install a good text editor. If you do not have a favorite, I recommend Notepad ++
- Download it from https://notepad-plus-plus.org/
Configure Notepad ++
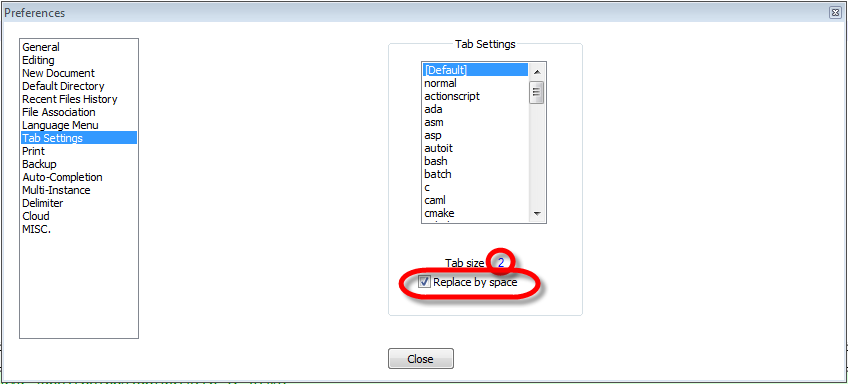
Tab settings
- In the Settings menu select Preferences
- In the Tab Settings section set the Tab size to 2 and select Replace by space
Macintosh
Atom
- Download it from https://atom.io/
- Double click the downloaded ZIP file to extract the application,
- Drag the Atom application into Applications
Terminal Window
Macintosh
Install iTerm2, a smart terminal emulator to issue Bash commands and log into Linux servers.
- Download iTerm2 from https://www.iterm2.com/downloads.html
- Double click the downloaded ZIP file to extract the application,
- Move the iTerm application to Applications.
Configuration suggestions are at
https://ruigomes.me/blog/perfect-iterm-osx-terminal-installation/
https://gist.github.com/kevin-smets/8568070
Enable unlimited scroll back
- Start iTerm2 and open the preferences window by pressing ⌘, (command-comma)
- On the Terminal tab click the Unlimited scrollback check box.
Git
Windows
- Navigate to https://git-scm.com/download/win to download Git for Windows. The page automatically downloads the installer for the operating system you use.
- Install the application
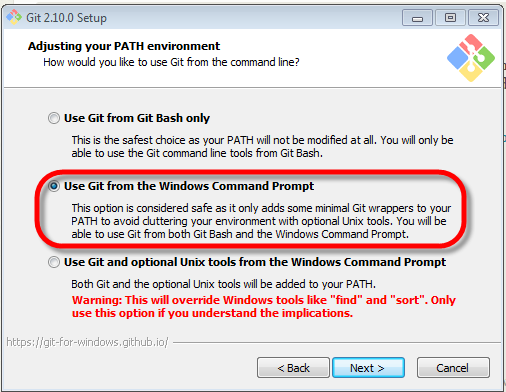
- Accept the default values, including these:
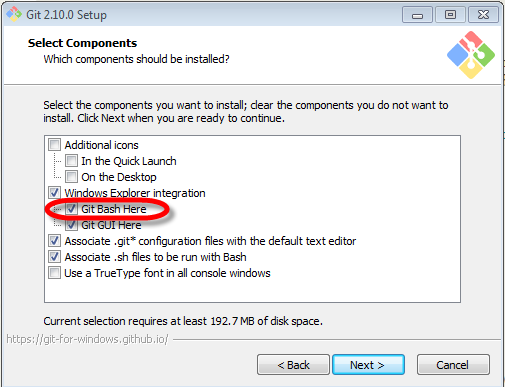
- Make sure the Windows Explorer integration for Git Bash is checked.
- Enable the Git tools in the command prompt too
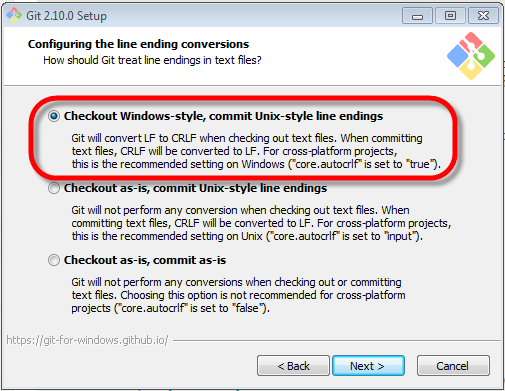
- Line endings for Windows computers
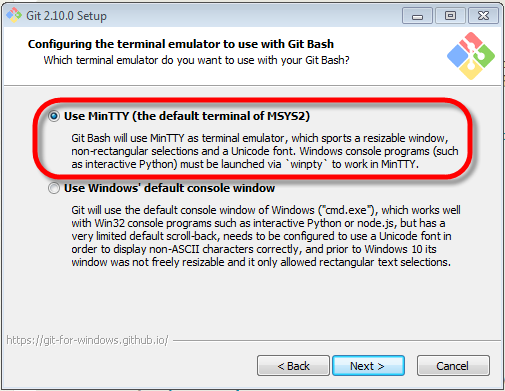
- Terminal emulator
- Caching
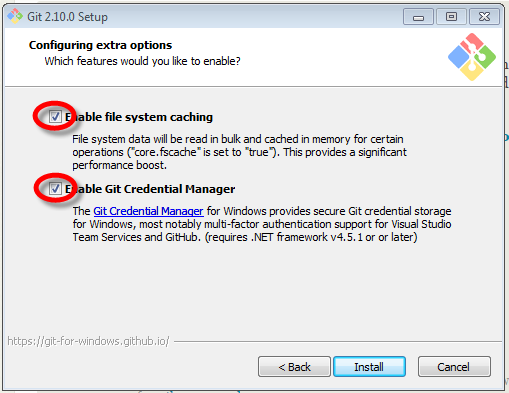
- Finish the installation
- Make sure the Windows Explorer integration for Git Bash is checked.
Configure Git for Windows
Enable Page Up and Page Down
- In Windows Explorer right click in the white area and select Git Bash Here,
- Stretch the Bash window to the full width of the page to have more room to work later,
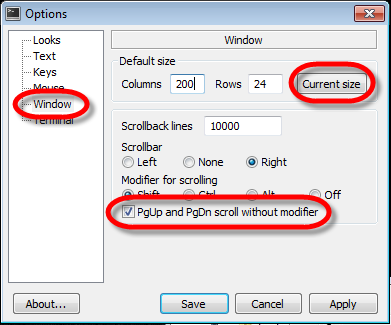
- Right click the Bash window and select Options…,
- On the Window tab,
- Click the Current size button to save the size,
- Select PgUp and PgDn scroll without modifier to be able to scroll quickly up and down in the window with the Page up and Page down buttons.
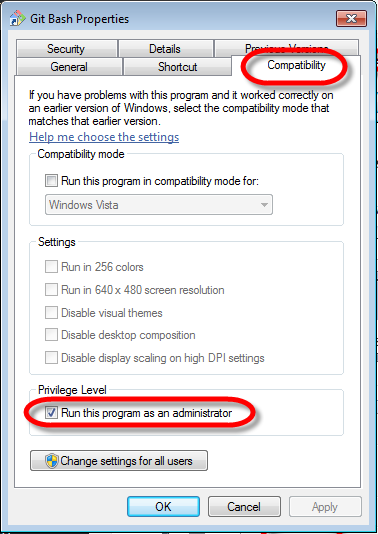
Set up Git Bash to always run as Administratort
Certain commands need elevated rights to run, so we will set up the Bash window to run as administrator.
- In Windows 7 click the Windows Start button and type bash
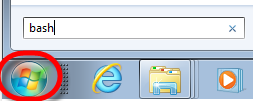
- Right click the found link and select Properties
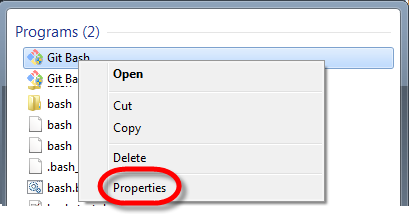
- On the Compatibility tab select Run this program as administrator
Macintosh
- Navigate to https://git-scm.com/download/mac to download Git for Windows. The page automatically downloads the installer for the operating system you use.
- This app is not trusted by Apple, so to install it
- Control-click the downloaded file and select Open
- Click the Open button to confirm the action
Virtual Box
Download Virtual Box from https://www.virtualbox.org/wiki/Downloads and follow the instructions to install it.
At the time of writing this was the section where the installer files were referenced
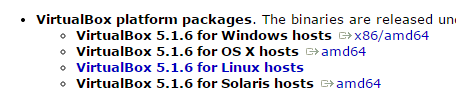
Run the downloaded installer file and accept all default values.
The installer starts the application. You can close it, we will use other tools to start it in the future.
Vagrant
Windows and Macintosh
- Download Vagrant from https://www.vagrantup.com/ and follow the instructions to install it.
Important
The default credentials of a Vagrant server are:
- UserName: vagrant
- Password: vagrant
Ruby
Windows
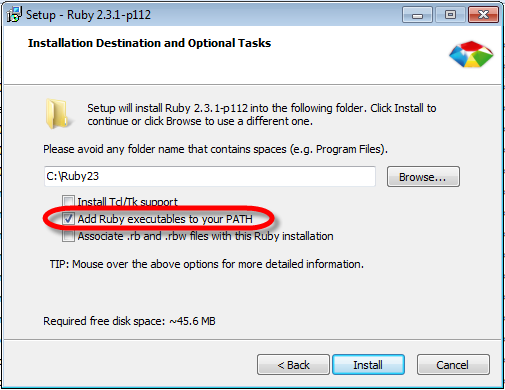
- Download Ruby from http://rubyinstaller.org/downloads
- Install the 32 bit version, as the 64 bit version is fairly new and has compatibility issues. Download the latest Ruby installer. Pick the file that does not have the (x64) at the end.
- Accept the default values but check Add Ruby executables to your PATH
Ruby Development Kit
The Ruby Development Kit is need for certain Ruby gems, so install it.
- Download the Ruby Development Kit from the DEVELOPMENT KIT section of http://rubyinstaller.org/downloads
- If you have installed the 32 bit version of Ruby make sure you install the 32 bit version of the DevKit. Select the Development kit that matches the Ruby version you installed. At the time of writing the latest development kit is under “For use with Ruby 2.0 and above (32bits version only)”
- Run the installer to extract it to a permanent location (C:\RubyDevKit)
- Open a command window in the C:\RubyDevKit folder
- Run these commands in the command prompt to install it.
ruby dk.rb initruby dk.rb install
- For more information see http://github.com/oneclick/rubyinstaller/wiki/Development-Kit
Macintosh
Ruby is already a part of the operating system.
Chef Development Kit
Windows and Macintosh
- Download the Chef Development Kit from https://downloads.chef.io/chef-dk/
Follow the instructions to install it.
Terraform by Hashicorp
- Download Terraform from https://www.terraform.io/downloads.html
Windows installation
- Unzip the downloaded package to C:\HashiCorp\Terraform
- Add the Terraform directory to the path of the computer. It is not added automatically on 64 bit Windows.
- In Windows Explorer right click Computer and select Properties,
- On the left side select Advanced System Settings,
- At the bottom click the Environment Variables… button,
- In the System Variables box select Path and click the Edit… button,
- Add the following to the end of the Variable value. (Don’t forget to start with the semicolon as the separator).
;C:\HashiCorp\Terraform
- To create RDS (Relational Database Service) instances in AWS, install the Amazon Web Services Command Line Interface (See instructions below)
- Configure the GitBash window to run as administrator to be able to execute the “terraform get” command to get local modules during development
- Right click the shortcut of the Bash window you use and select Properties
- On the Compatibility tab check Run this program as an administrator
For more details see https://www.terraform.io/intro/getting-started/install.html
Macintosh installation
- Download Terraform from https://www.terraform.io/downloads.html
- Double click the downloaded ZIP file to extract the application
- Create a directory, terraform for the Terraform application in the /opt folder
- Move the Terraform application into the terraform directoryin the /opt folder
- Add the location to the path
- Open the terminal iTerm2 window
- Navigate to the home directory
cd ~
- Find out if the Bash Profile file exists
ls .bash_profile
- If the result is ls: .bash_profile: No such file or directory
- Create the Bash Profile file.
- Add the following lines
# PATH Export
PATH=/opt/terraform:$PATH
export PATH
unset DYLD_LIBRARY_PATH
Graphviz – Dependency Graph Visualization Software
We will use this utility to display the Terraform graphs.
- Download from http://www.graphviz.org/Download..php
There are really two dots in the address :-) - Execute the installer
- You may need to add the location to the Path environment variable. Make sure you use the actual folder name, as it contains the version of the application.
;C:\Program Files (x86)\GraphvizX.XX\bin
Next:
Set up the DevOps development environment in Beginner’s Guide to DevOps Engineering part 2.
Back:
to the Tutorials page