If you work on a Mac or Linux workstation and need to script and administer Windows servers, you need a few Windows tools. You can create a Windows Virtual Machine hosted in the free Virtual Box from Oracle or in VMware Fusion. For installation instructions see Install the DevOps development tools on Windows
- Notepad++
- Chocolatey
- Git
- AWS CLI (Amazon Web Services Command Line Interface)
Disable the left Windows Key
When you work on a Mac, you use the Command key for cut, copy, paste and other functions. If you press the same key in the Windows virtual machine, it acts as the Windows key. If you press it with an arrow key, it will move or resize your current window.
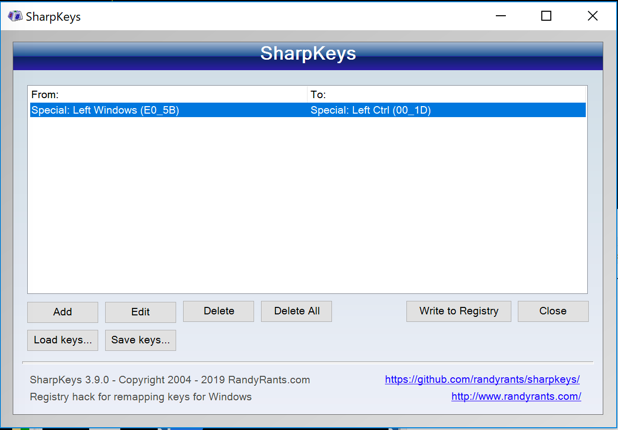
To disable the left Windows Key in your Windows virtual machine download SharpKeys from https://www.randyrants.com/category/sharpkeys/.
The application does not run in the background, it only updates the registry to remap the specified keys. Configure it to disable the left Windows Key:
Windows tools on the Mac
There are DevOps tools that you can install on your Mac to work with Windows servers and applications
Microsoft SQL Server tools
To connect to Microsoft SQL servers you can install Visual Studio Code and the MSSQL extension on your Mac.
Visual Studio Code
Install Visual Studio Code
- Install OpenSSL from the terminal window with
brew update brew install openssl ln -s /usr/local/opt/openssl/lib/libcrypto.1.0.0.dylib /usr/local/lib/ ln -s /usr/local/opt/openssl/lib/libssl.1.0.0.dylib /usr/local/lib/ - Download and install Visual Studio Code from https://code.visualstudio.com/Download
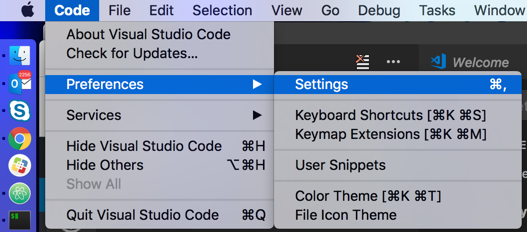
- In Visual Studio Code open the Code menu and select Preferences, Settings
- On the left side select the Extensions icon, and type mssql into the search field
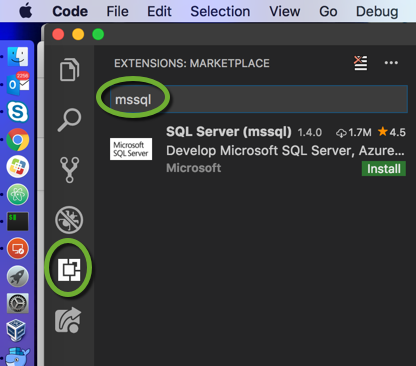
- Click the Install button.
To connect to an MSSQL server from Visual Studio Code
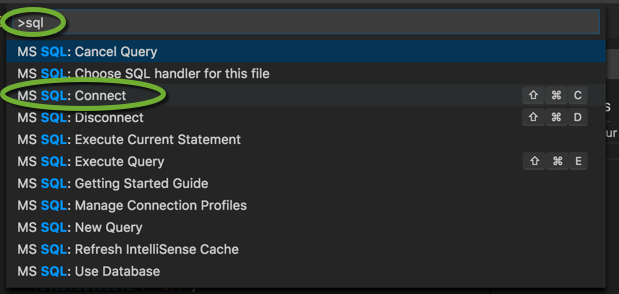
- In Visual Studio Code press F1 ( or SHIFT+COMMAND+P ) to open the Command Palette
- Type sql into the search field to display the MSSQL commands and select MS SQL: Connect
- Select Yes, to switch to the SQL language

- Type sql into the search field and select SQL

- Click Create Connection Profile

- Enter the IP address or the name of the server, and press enter

- You may enter the database name

- Select the authentication type. If you want to connect to the database server with SQL credentials, select SQL Login, to connect with Windows credentials, select Integrated.

- Enter the username

- Enter the password

- To save the password in the connection profile select Yes

- Enter a name for the profile

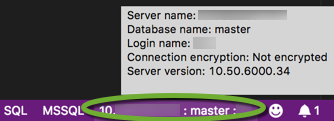
- Visual Studio Code connects to the database server. the status bar at the bottom of the page shows the connected server information,

- Hover above the server name with the mouse to display the detailed server info.
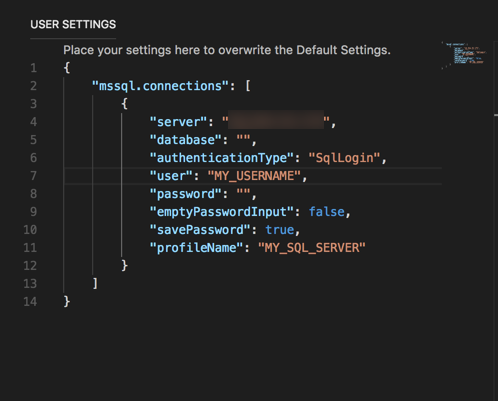
To edit the SQL Server profile in Visual Studio Code
- In the Code menu select Preferences, Settings
- Edit the JSON file in the USER SETTINGS window
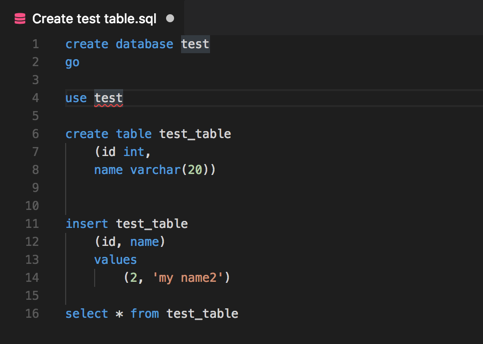
Execute an SQL script
- Enter the script into a Visual Studio Code tab
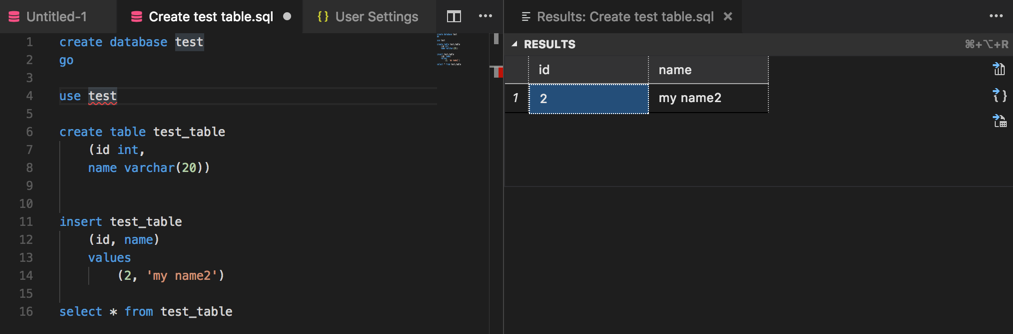
- Press COMMAND+SHIFT+E to execute the script
- Choose the profile to connect to the server

- The result is displayed on the Results tab
For more info on MSSQL in Visual Studio Code see https://docs.microsoft.com/en-us/sql/linux/sql-server-linux-develop-use-vscode?view=sql-server-2017