java.lang.NoClassDefFoundError, java.lang.ClassNotFoundException

When you add a dependency reference to a Java project, it may compile without any errors, but runtime you may get an error message similar to this:

HTTP Status 500 – Internal Server Error

Type Exception Report

Message An exception occurred processing JSP page [/index.jsp] at line [1]

Description The server encountered an unexpected condition that prevented it from fulfilling the request.

Exception

org.apache.jasper.JasperException: An exception occurred processing JSP page [/index.jsp] at line [1]

1: <jsp:forward page=”….html” />

Root Cause

javax.servlet.ServletException: Servlet.init() for servlet [spring] threw exception…

Root Cause

java.lang.NoClassDefFoundError: org/springframework/core/env/PropertySource…

Root Cause

java.lang.ClassNotFoundException: org.springframework.core.env.PropertySource…

If the newly added dependency also depends on another package, and that package is already in the pom.xml file, NetBeans will not show an error during build.

If the newly added dependency was recently introduced, and the version of the package already included in the pom.xml file,  references an earlier version, the runtime error will occur.

For example org.springframework.web.bind.annotation.GetMapping was introduced in Spring Web 4.0

If your pom.xml file already contains the reference to spring-web or spring-webmvc version 3, your application will fail runtime.

<dependency>
<groupId>org.springframework</groupId>
<artifactId>spring-webmvc</artifactId>
<version>3.0.5.RELEASE</version>
</dependency>

In your web browser navigate to the Maven repository at https://mvnrepository.com/artifact/org.springframework and search for the spring-web and spring-webmvc packages. Get the latest stable version numbers and update your pom.xml file.

 <dependency>
   <groupId>org.springframework</groupId>
   <artifactId>spring-webmvc</artifactId>
   <version>5.0.2.RELEASE</version>
 </dependency>


Java Spring MVC web application configuration in NetBeans 8

When you create a Java Spring MVC web application or make changes to an existing one, it is important to know the location of configuration values.

Java package name

The Java package name is stored in

  • Every .java file
    • package MY_PACKAGE_NAME
  • pom.xml file
    • <configuration>
        <mainClass>com.objectdb.Enhancer</mainClass>
          <arguments>
            <argument>MY_PACKAGE_NAME.MY_MAIN_CLASS_NAME</argument>
          </arguments>
      </configuration>
  • .jsp file
    • <%@page import=”MY_PACKAGE_NAME.*”%>
    • <jsp:useBean id=”MY_BEAN_ID” type=”MY_PACKAGE_NAME.MY_DAO_CLASS_NAME” scope=”request” />

WAR file name

The name of the WAR fle is set in the

  • pom.xml file
    • <finalName>MY_WAR_FILE_NAME</finalName>

Add references to external classes

When you copy a class from another project, you need to add references to the imported external classes. When you build your project, the missing references will be in the output window.

————————————————————-
COMPILATION ERROR :
————————————————————-
webapp/twitter_keywordsRepository.java:[3,42] error: package org.springframework.data.repository does not exist

To add the reference to the project

  1. Click the error message link in the output window,
  2. Click the light bulb in the line of the error,
  3. In the context menu select Search Dependency at Maven Repositories for
  4. Select the recommended Maven repository, and click the Add button.

The references are stored in the

  • pom.xml file under
    • <dependencies>


org.apache.jasper.JasperException: java.lang.IllegalStateException: No output folder

This error can happen on Linux and Windows, and the cause could be the same.

On Windows Server 2012R2 I opened a command prompt. To be able to delete a directory from the Tomcat webapps folder, I have issued the shutdown command.

When I started the server with the startup command, and navigated to my local website, my Java Spring MVC web application displayed the error message

org.apache.jasper.JasperException: java.lang.IllegalStateException: No output folder

The problem was, that the Tomcat service runs under root on Linux, and SYSTEM on Windows.

When you issue the startup command, Tomcat will run under the user account you logged in with.

Solution:

Stop and start the TomCat Linux or Windows service instead of issuing the shutdown and startup commands from the terminal or command prompt.


Only persistence units with transaction type JTA can be used as a container managed entity manager

NetBeans can use multiple deployment servers. When your web application uses the Entity Framework and you select the Glassfish server as the deployment server, you can get the error message when you try to run your application in the IDEÉ

Severe: Exception while preparing the app : The persistence-context-ref-name […] in module […] resolves to a persistence unit called […] which is of type RESOURCE_LOCAL. Only persistence units with transaction type JTA can be used as a container managed entity manager. Please verify your application.

When you first run the application NetBeans asks you to select the deployment server you want to use.

If only the Glassfish server is available, and Tomcat is installed on your workstation, add Tomcat to the available deployment servers.

Install Tomcat

For the Tomcat installation see Tomcat web server installation

Add Tomcat to the NetBeans server list

  1. In the Tools menu select Servers
  2. Click the Add Server button
  3. In the list select the Apache Tomcat or TomEEE server
  4. Click the Browse… button
  5. Select the Tomcat directory on your workstation
  6. Enter a Tomcat username and password for NetBeans, and click the Finish button.
  7. The user will be created in the tomcat-users.xml file in the Tomcat conf directory
  8. Click the Close button.

Select the Deployment Server

  1. Right-click the NetBeans project and select Run
  2. In the Select deployment server window select Apache Tomcat or TomEE

If the Select deployment server window does not pop up

  1. Right-click the NetBeans project and select Set Configuration -> Customize
  2. On the Run tab select the Apache server.

Starting of Tomcat failed, the server port 8080 is already in use

  1. If the Glassfish server already started, Tomcat cannot use the same ports and an error message will appear in the NetBeans RunOutput tab
  2. To stop the Glassfish server, restart your workstation.

Git Bash and Command Prompt cannot see the VirtualBox shared folder on Windows 10 guest

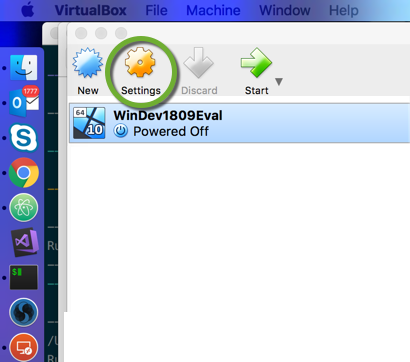
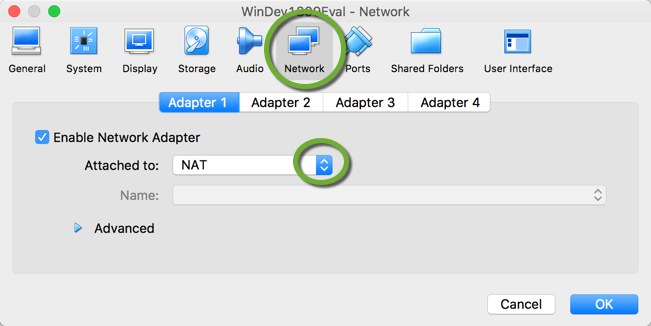
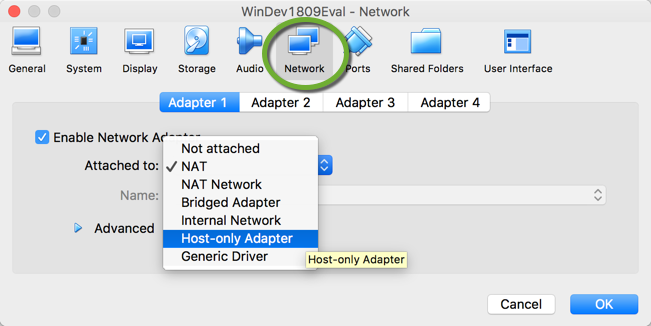
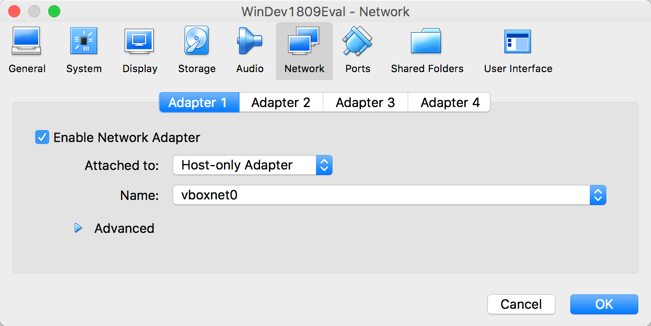
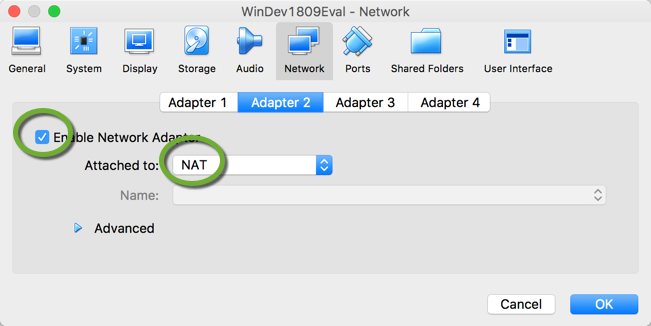
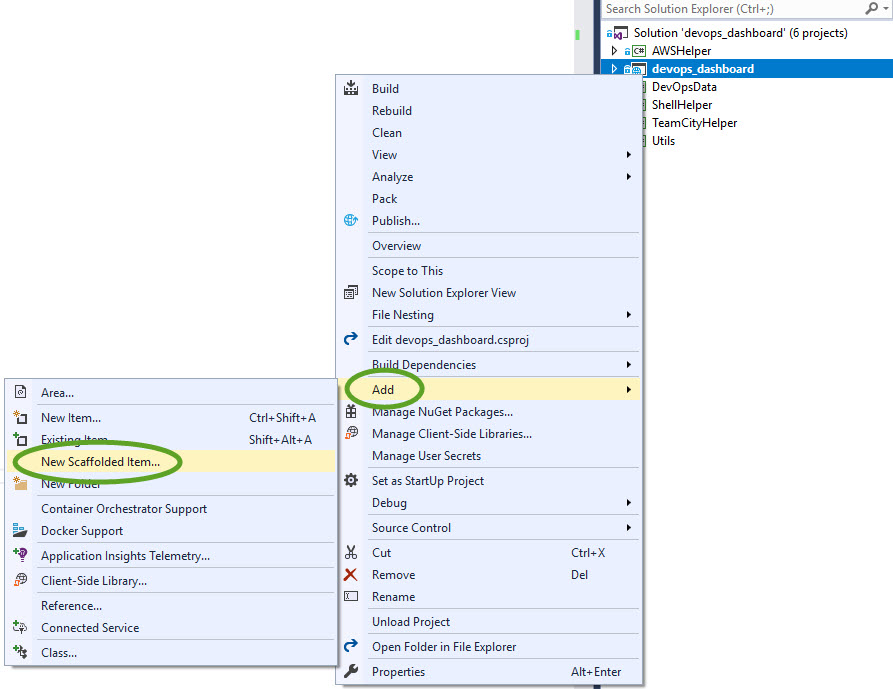
When you start a Windows 10 guest machine in VirtualBox on your workstation, you can set up shared folders to seamlessly copy files between your workstation and the Windows 10 guest machine.

The shared folder appears in Windows Explorer as a mapped network location.

For more on this see Configure the Windows virtual machine in VirtualBox

On a Windows 7 guest machine the Git Bash, Command Prompt, and PowerShell windows all can see the mapped E: network drive, so you can change the working directory with

cd E:

and execute commands in the shared folders.

On a Windows 10 guest machine, only the PowerShell window can see the shared folder as a mapped network drive, E:


Command prompt will display the error message

The system cannot find the drive specified

When you try to start the Git Bash window with Git Bash Here, nothing happens.

If you start Git Bash from the menu and try to change the working directory to the E: drive, you get the error message

bash: cd: /e: No such file or directory


Map the shared drive

If you need to use the Command prompt or the Bash terminal, you can temporarily map the shared folder

  1. Open the Command Prompt on the Windows 10 guest machine
  2. Execute the command
net use x: \\vboxsvr\Users

Automate the drive mapping

Mapped drives are user-specific so if you want to use a mapped drive as an Administrator, you have to map is as Administrator.

Enable the visibility of the mapped drives

  1. Start Regedit
  2. Navigate to HKEY_LOCAL_MACHINE\SOFTWARE\Microsoft\Windows\CurrentVersion\Policies\System
  3. Create a DWORD value EnableLinkedConnections with the value 1
  4. Restart the computer

Create the automated process to map the drive of the host computer

  1. Create a new batch file in your Documents folder: map_drive.bat
    net use x: \\vboxsvr\Users
  2. Create a new scheduled task: Map the Mac file system to X
    1. Set the user account to SYSTEM
    2. Run with highest privileges
    3. Configure for Windows 10
    4. Set the trigger to startup
    5. Create a new action

To use the Bash terminal

  1. Open the Bash terminal in a directory on the C: drive
  2. Change to the shared directory with
    cd /x/...

To use the command prompt

  1. Open the command prompt
  2. Change to the shared directory with
    x:
    cd ...

Refresh the environment variables in the Windows Command Prompt and PowerShell window

When the Windows Command Prompt and PowerShell windows open, they read the environment variables from the registry. If another process changes the value of an environment variable or creates a new one, the already open windows don’t reflect those changes. To reload the environment variables into open Command Prompt and PowerShell windows execute

refreshenv

Install Git on Windows

If you use two-factor authentication see Create a Personal Access Token to use it as password in the command line tools at Switching to 2-factor authentication in GitHub

  1. Navigate to https://git-scm.com/download/win to download Git for Windows. The page automatically downloads the installer for the operating system you use.
  2. Install the application
  3. Accept the default values, including these:
    1. Make sure the File Explorer integration for Git Bash is checked.
    2. Enable the Git tools in the command prompt too
    3. HTTPS transport backend. For large corporations with internal root certificates and  Windows Active Directory, the second option may be a better choice,
    4. Line endings for Windows computers
    5. Terminal emulator
    6. Caching
    7. Finish the installation.

Configure Git for Windows

Enable Page Up and Page Down

  1. In File Explorer right-click any folder and select Git Bash Here,

  2. Stretch the Bash window to the full width of the page to have more room to work later,
  3. Right-click the Bash window and select Options…,
  4. On the Window tab,
    1. Click the Current size button to save the size,
    2. Select PgUp and PgDn scroll without modifier to be able to scroll quickly up and down in the window with the Page up and Page down buttons.

Set up Git Bash to always run as Administrator

Certain commands need elevated rights to run, so we will set up the Bash window to run as administrator.

  1. Click the Windows Start button and type bash
  2. Right-click the found link and select Open file location

  3. Right-click the menu shortcut and select Properties
  4. On the Compatibility tab select Run this program as administrator

Using the Bash window

  • When you will start the Git Bash window you will always get the confirmation popup.

You can start the Git Bash window from the File Explorer

  1. Right-click a folder in File Explorer and select Git Bash Here. This does not work in the shared folders of Windows 10 virtual machines.

Configure the Git command line tool

To configure Git see Git configuration.

Install Chocolatey

The Chocolatey home page is at https://chocolatey.org/

Install Chocolatey

Navigate to the Chocolatey website at https://chocolatey.org/ and follow the latest instructions. At the time of writing the instructions were

Using the Command prompt

  1. Open a command prompt as Administrator,
  2. Install Chocolatey with the command
    @"%SystemRoot%\System32\WindowsPowerShell\v1.0\powershell.exe" -NoProfile -InputFormat None -ExecutionPolicy Bypass -Command "iex ((New-Object System.Net.WebClient).DownloadString('https://chocolatey.org/install.ps1'))" && SET "PATH=%PATH%;%ALLUSERSPROFILE%\chocolatey\bin"

Using PowerShell

  1. Open a PowerShell window as Administrator,
  2. Check the execution policy for your computer
    Get-ExecutionPolicy
    1. If the command returns Restricted, enable PowerScript execution with
      Set-ExecutionPolicy Bypass -Scope Process
    2. Answer Y to the question,
  3. Install Chocolatey with
    Set-ExecutionPolicy Bypass -Scope Process -Force; iex ((New-Object System.Net.WebClient).DownloadString('https://chocolatey.org/install.ps1'))

Apply the Chocolatey license

  1. If the C:\ProgramData\chocolatey\license directory does not exist, create it,
  2. To place the Chocolatey license file, chocolatey.license.xml into C:\ProgramData\chocolatey\license folder follow the recommendations at …refers to a location that is unavailable
  3. Install the Chocolatey extensions
    choco upgrade chocolatey.extension -y

Ignore the error:

Error when attempting to load chocolatey licensed assembly. Ensure
that chocolatey.licensed.dll exists at
‘C:\ProgramData\chocolatey\extensions\chocolatey\chocolatey.licensed.dll’.
Install with `choco install chocolatey.extension`.
The error message itself may be helpful as well:
The system cannot find the file specified. (Exception from HRESULT: 0x80070002)

The instance ID ‘…’ does not exist

When you launch an EC2 instance in AWS and the Chef script is trying to set tags on the instance you may get the error message:

The instance ID ‘…’ does not exist

It can happen when you launch the instance in one AWS account, and the tagging script tries to find the instance in another account.

Solution

When the tagging script runs make sure, the AWS credentials and the region point to the account and region where the instance was launched.

Determine the Windows PowerShell version

To reliably display the version of the Windows PowerShell engine

  1. Open a PowerShell command window,
  2. Execute the command,
    $PSVersionTable.PSVersion

    PS C:\WINDOWS\system32> $PSVersionTable.PSVersion

    Major Minor Build   Revision
    —–   —–   ——-  ——-
    5       1        16299  64

  3. If no value is displayed, the version is 1.0, as it does not have the referenced variable.