- Download iTerm2 from https://www.iterm2.com/downloads.html
- Double click the downloaded ZIP file to extract the application,
- Move the iTerm application to Applications.
iTerm2 configuration
Install Oh My Zsh
Oh My Zsh is an open source, community-driven framework for managing your zsh configuration.
- Install it with
sh -c "$(curl -fsSL https://raw.githubusercontent.com/ohmyzsh/ohmyzsh/master/tools/install.sh)"
More info at https://github.com/ohmyzsh/ohmyzsh
Use .bashrc for configuration
When you start iTerm, it reads its own config file, ~/.zshrc To keep using the standard ~/.bashrc config file
- Add this to the end of the ~/.zshrc file:
source ~/.bashrc
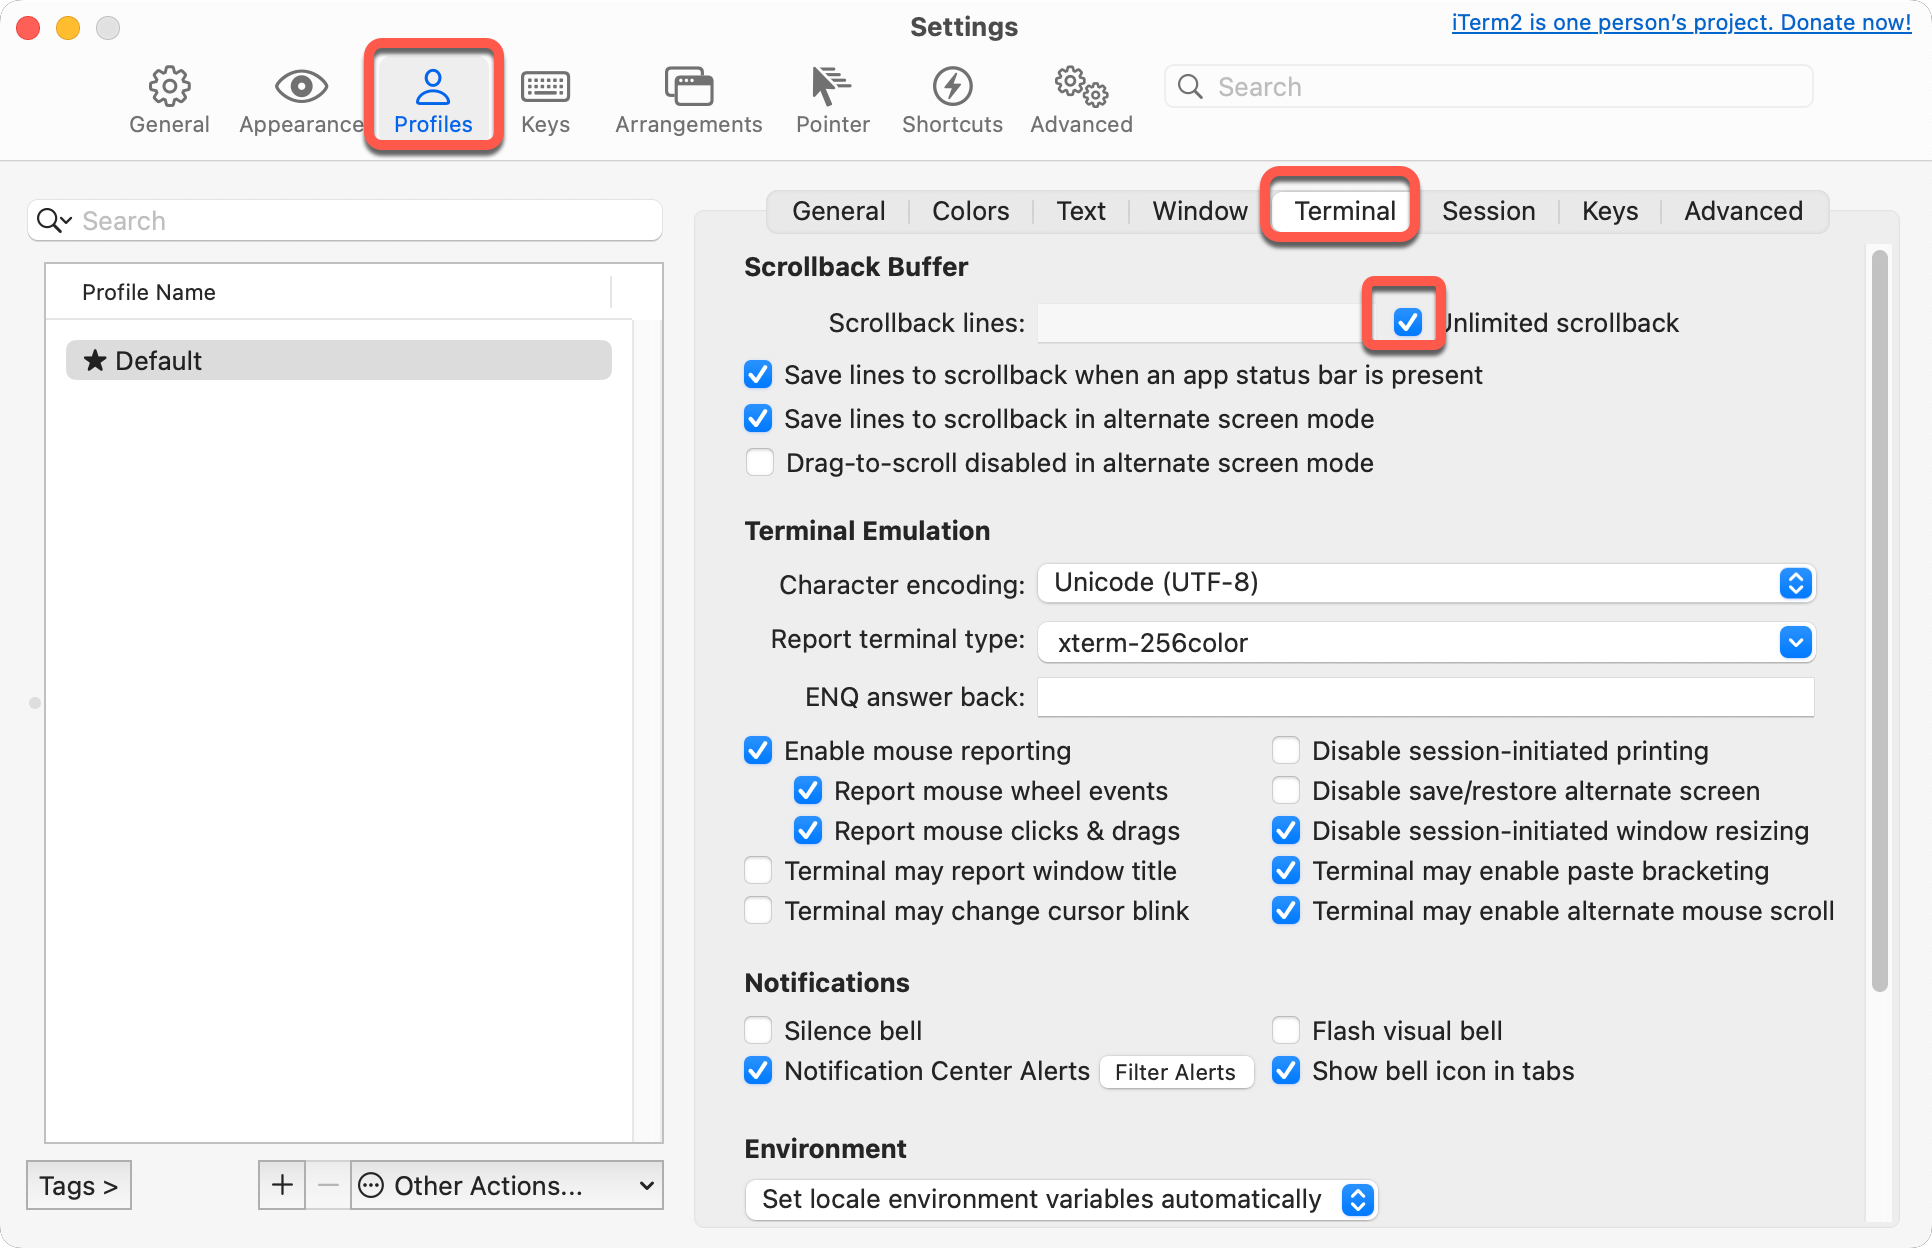
Enable unlimited scroll back
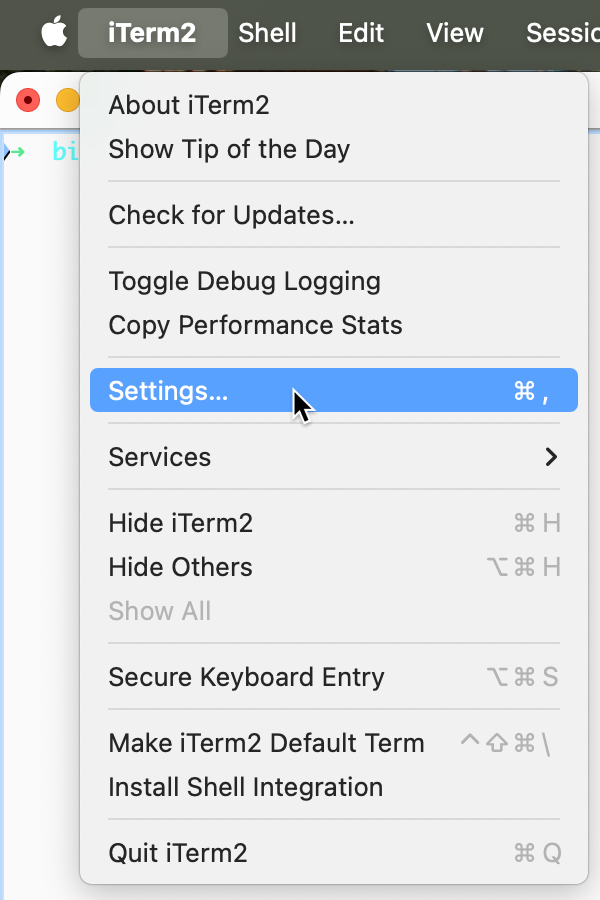
- Start iTerm2 and in the iTerm2 menu select Settings, or press ⌘, (command-comma)
- On the Profiles, Terminal tab click the Unlimited scrollback check box.
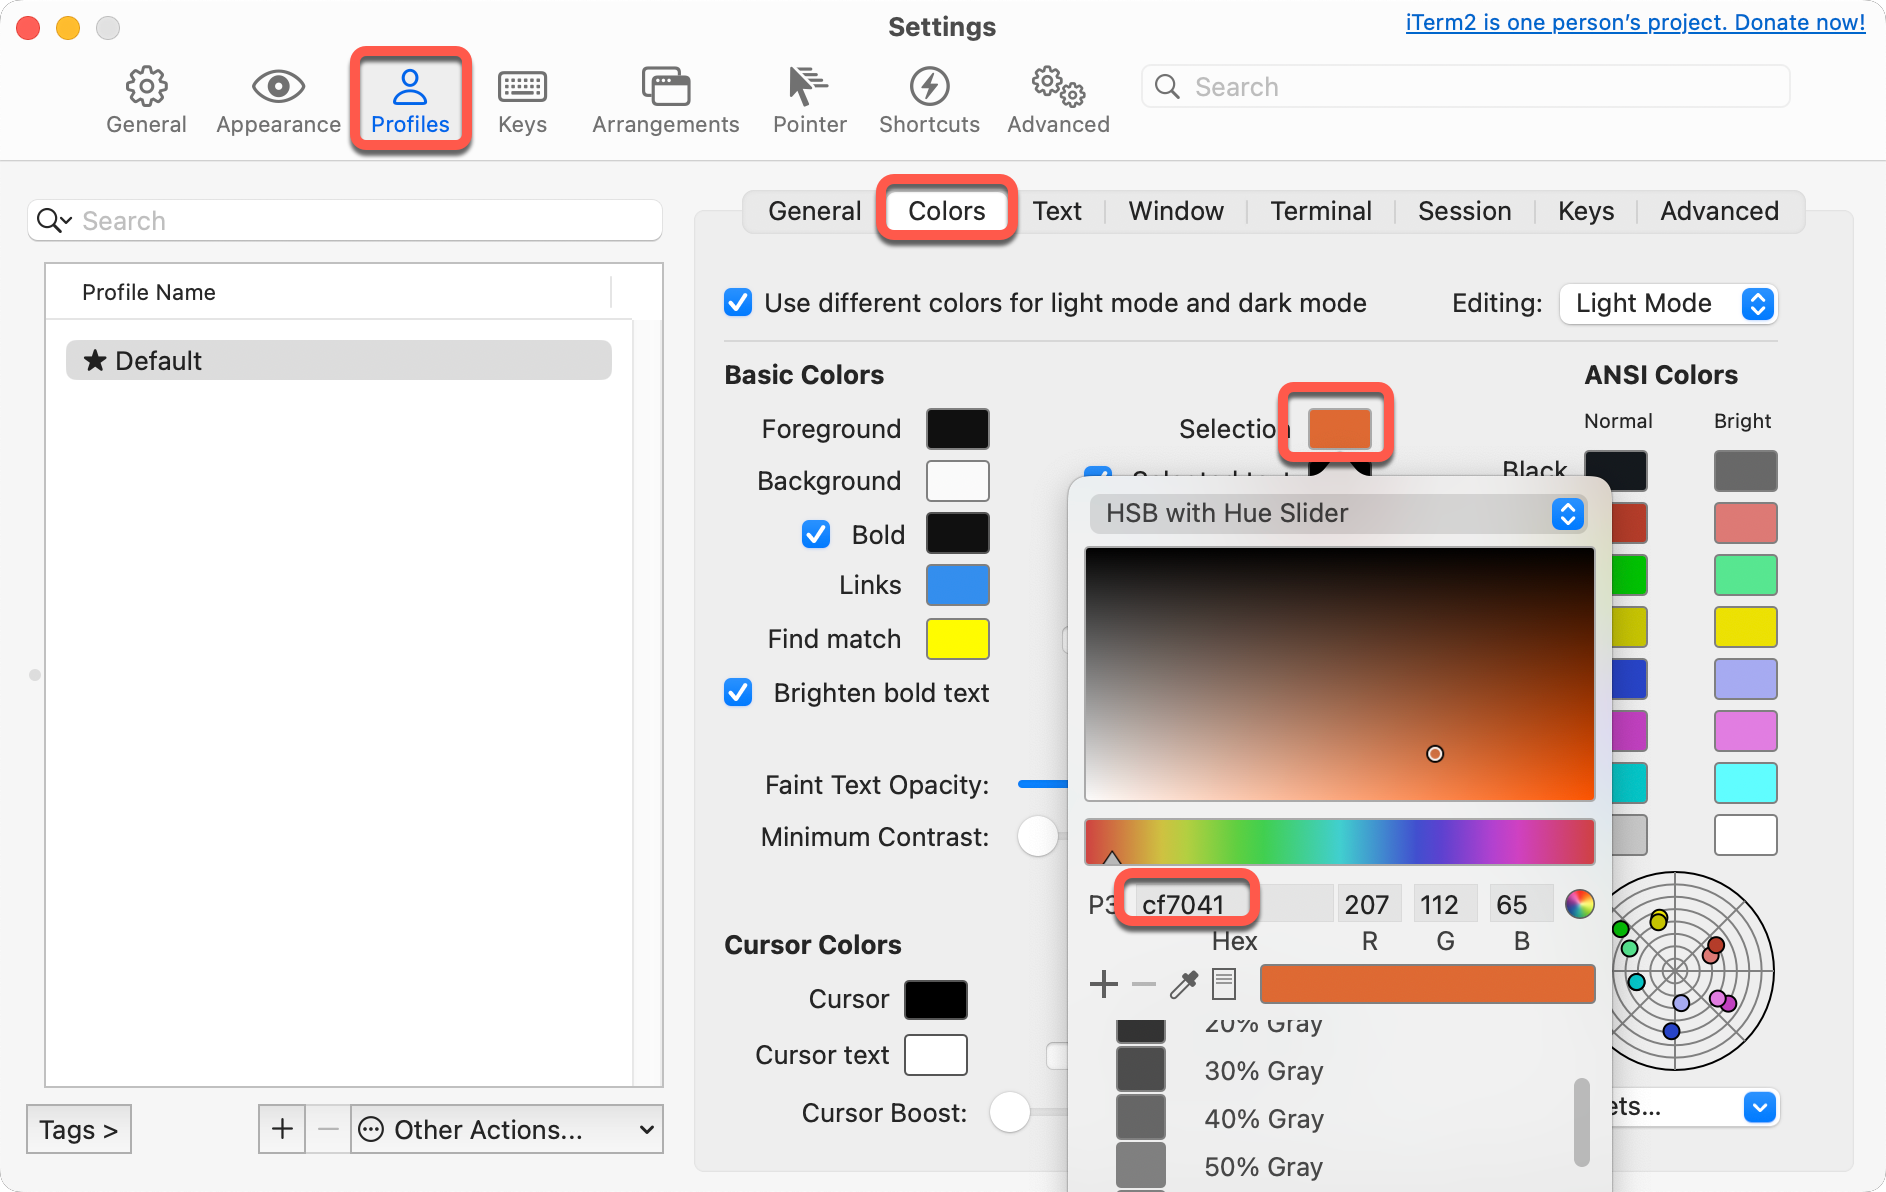
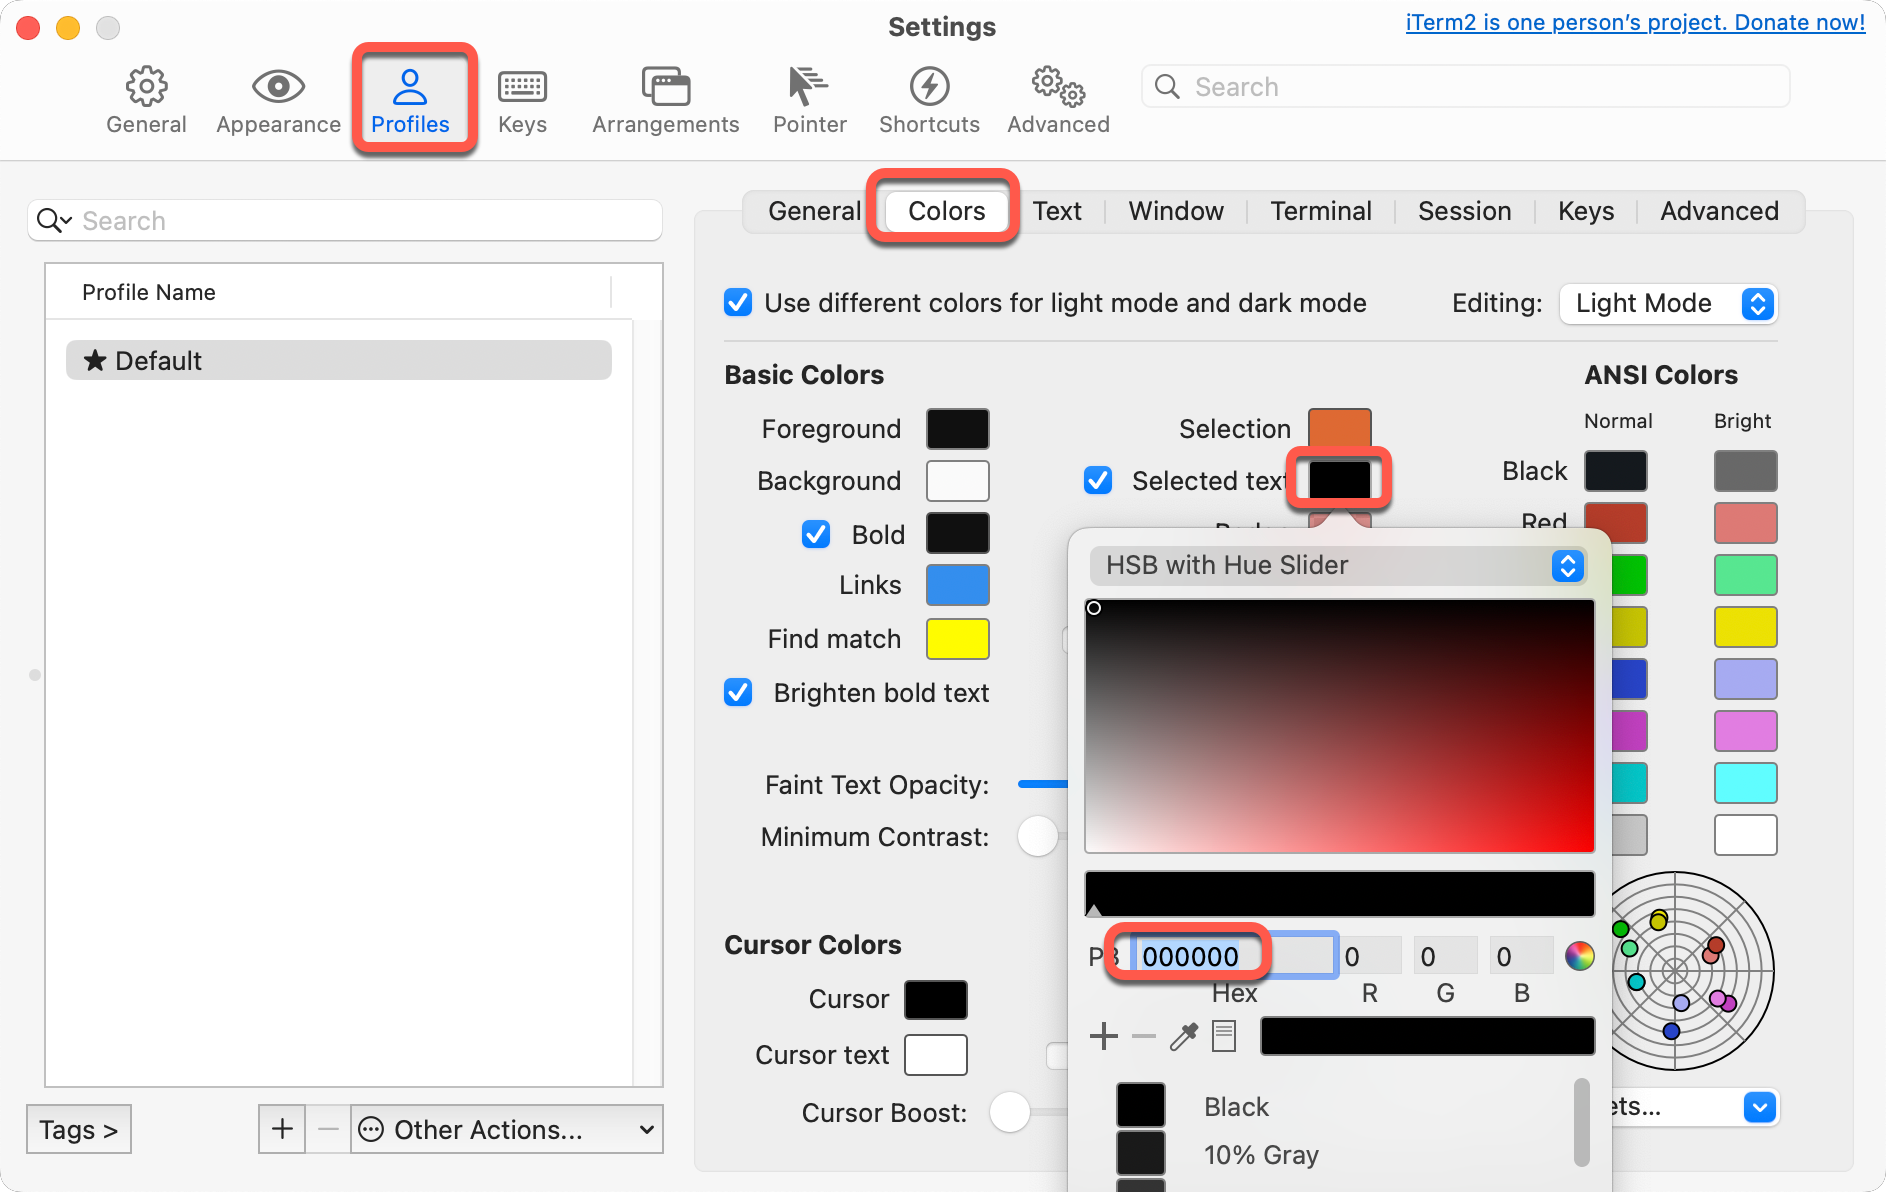
Set the highlight color
By default the highlighted text just a little different from the rest. When we search for something, it is hard to notice the found text.


To change the highlighted text color
- Start iTerm
- Start iTerm2 and in the iTerm2 menu select Settings, or press ⌘, (command-comma)
- On the Profiles, Colors tab set the color of the Selection to red (cf7041), and Selected Text to black (000000).

To start iTerm2 from Finder
This is configured automatically when you install iTerm:
- Open Finder and navigate to the location you want to work in,
- Right click a folder to work in that folder or a file to work in the current folder
- Select Services, iTerm2 in Finder

Meslo Powerline font
- Import the Meslo Powerline font with the following bash command:
git clone https://github.com/powerline/fonts.git && cd fonts && ./install.sh - Select the font in iTerm2
- Press ⌘, (command-comma) to open the Preferences window
- Select Profiles
- On the Font section of the Text tab click the Change Font button
- Select the “Meslo LG L for Powerline”, “Regular”, “12pt”
Make the prompt shorter
to remove your username@computername from the prompt
- Edit the ~/.bashrc file
- Add the following line
DEFAULT_USER="YOUR_USER_NAME"
Colored prompt
To color the prompt:
- Make sure Oh My Zsh is installed as described above
- Edit the ~/.bashrc file and set the ZSH_THEME to ZSH_THEME=”agnoster”
More configuration suggestions are at
https://ruigomes.me/blog/perfect-iterm-osx-terminal-installation/
https://gist.github.com/kevin-smets/8568070
Information on how terminals read settings at https://shreevatsa.wordpress.com/2008/03/30/zshbash-startup-files-loading-order-bashrc-zshrc-etc/
Not necessary anymore, for reference only
Set case-insensitive tab completion. This is the default, not necessary.
Add these lines to the ~/.zshrc file
# Set case insensitive comparison when lower case letters are typed.
# Upper case typed letters only match upper case file names
zstyle ':completion:*' matcher-list 'm:{a-z}={A-Za-z}'
autoload -Uz compinit && compinit
“Solarized” color scheme is already installed, these steps are not necessary anymore
- Download the color scheme to the Desktop with the following Bash command:
curl -o ~/Desktop/solarized.itermcolors https://raw.githubusercontent.com/altercation/solarized/master/iterm2-colors-solarized/Solarized%20Dark.itermcolors - Import the color scheme to iTerm2
- Press ⌘, (command-comma) to open the Preferences window
- Select Profiles
- In the lower right corner of the Colors tab click the Color Presets… drop down
- Select Import…
- On the Desktop select the downloaded solarized.itermcolors file
- In the Color Presets… drop down select Solarized Dark
Hi, i run c, c++ and java in vim(iTerm2) or emacs, the problem I have is that none of the codes wait for user input then necessery, it doesn’t happen in IDEs. I cannot find answer to this problem. Can you help…
Rob
Hi Rob,
I personally never experienced this, maybe someone has a suggestion…
Laszlo