Apple and battery experts recommend keeping lithium-ion batteries charged between 30% and 80% for a longer life span.
Most people charge their phones overnight, so it is hard to disconnect the charger when the charge level reached 80% even if we set up a notification based on battery condition.
Automatically Stop charging
This post explains how to fully automate the charging process and automatically turn off the charger when the battery charge goes above 80%. If Optimized Battery Charging is on, iOS pauses overnight charging at 80% and finishes charging to 100% by it is time to wake you up, but I noticed, it started to fully charge the phone at 1 am, so there is not much rest for the battery. This automation turns off the charger to keep the battery at an 80% charging level.
Charger reset
There are two ways to turn on the outlet for charging. You can turn it on manually by pushing a button or using the app which came with it, or you can set up another automation to turn the outlet on when the battery level falls below 80%. With this setting, you can keep other devices, like iPads charged to 80% always ready for use, while still protecting the battery.
If you have more than 2 devices
If you have more than 2 devices, you need to create additional IFTTT and My Leviton accounts, as the free IFTTT account only allows 5 applets to run, and most likely only one IFTTT account can be connected to a My Leviton account. For the free solution see “If you have more than 2 devices” below.
If you want to charge the same phone at multiple places
To charge the same phone at multiple places link two smart plugs in a My Leviton Activity to control them together. No matter where you plug in your phone, both smart plugs will turn on and off simultaneously based on the battery charge level. See “Charge the same phone at multiple places” below.
Project Cost
The cost of the project per device is around $30.00, the price of a Smart Plug. The applications and services are free to use.
For android phones see the Reddit post https://www.reddit.com/r/tasker/comments/s4u1u1/turn_smart_plug_tplink_tapo_p100_onoff_depending/
What we need
Hardware
The only hardware you need is a smart plug,
- 1 Smart plug
Some of the smart plug brands you can use are
- Leviton
- Hive Active Plug
- Meross
- VeSync
- WeMo
- WIFIPLUG
Check the IFTTT website at https://ifttt.com/ for more compatible brands.
I am using the Leviton D23LP-2RW Decora Smart Wi-Fi Mini Plug-In Dimmer (2nd Gen). It is a dimmer switch, so does not make a clicking noise when it turns on and off. You can purchase it at Amazon for $28.98 at https://www.amazon.com/dp/B08RSP3NKH?psc=1&ref=ppx_yo2ov_dt_b_product_details
Applications
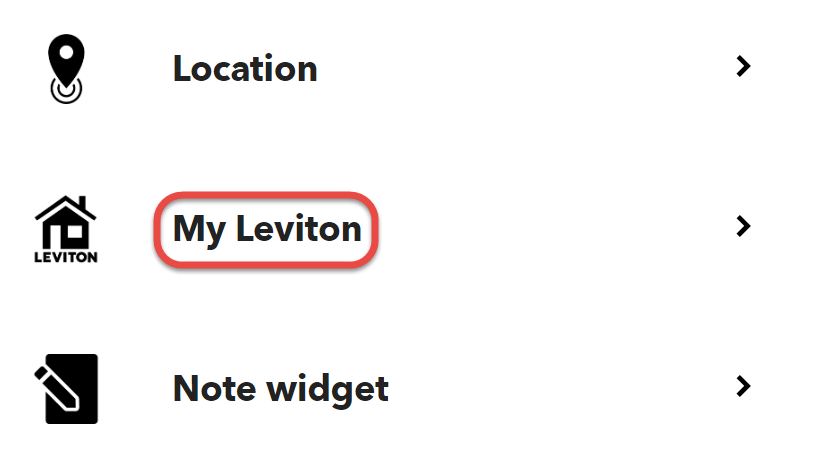
- An app to control the smart switch. I use the My Leviton app to control the Leviton smart switch.
- Shortcuts Apple app on iPhone and iPad to watch the battery level and trigger an action when it is over 80%. iOS 16 installs Shortcuts, for older versions download the free app from the Apple App Store.
Services
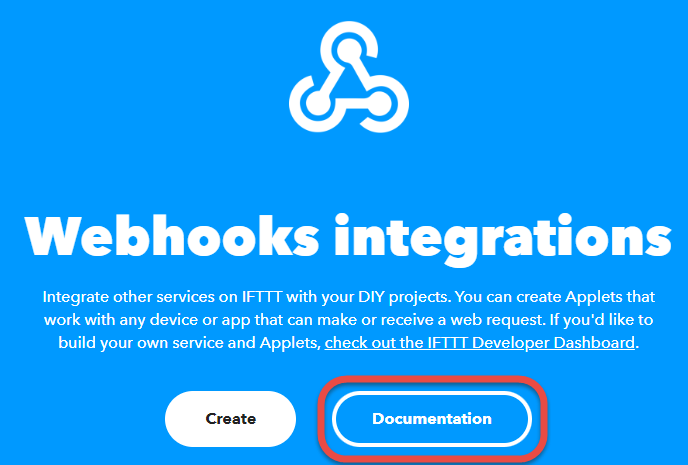
- IFTTT
Unfortunately, Apple Shortcuts cannot directly control smart switches without a home automation hub, like a 4th generation Apple TV or a HomePod. To avoid these costs we will use IFTTT, a free online service to control the smart switch over the internet.
Set up
Connect to the Smart Switch
- Plug the smart switch into a power outlet
- Download the app for your smart switch and connect the app to the smart switch
- Name the smart switch in the app as Phone charger
- Turn on the smart switch and temporarily plug a light into it to see when the power turns off.
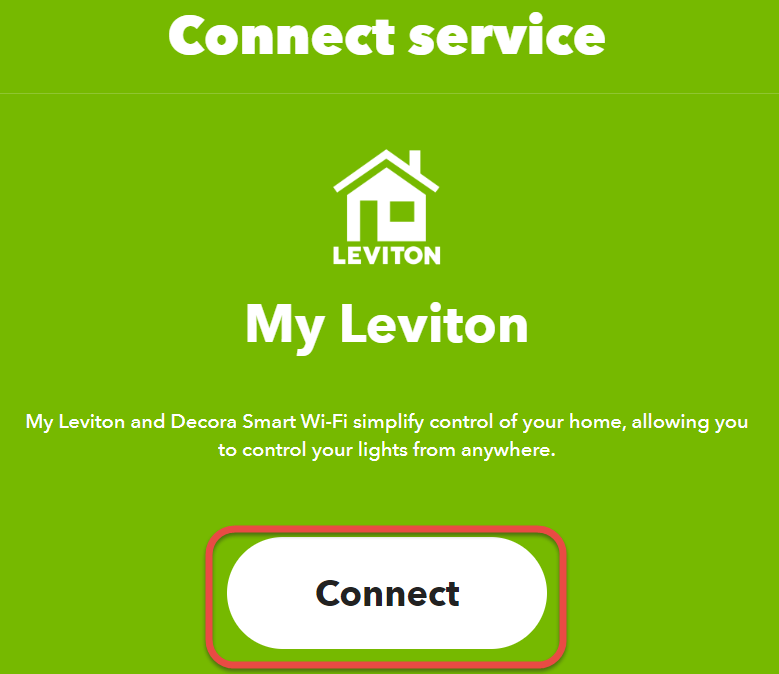
Create an IFTTT applet
- Using your web browser on your computer navigate to https://ifttt.com/
- Create a free IFTTT account by clicking the Get started button

- Click the sign up link
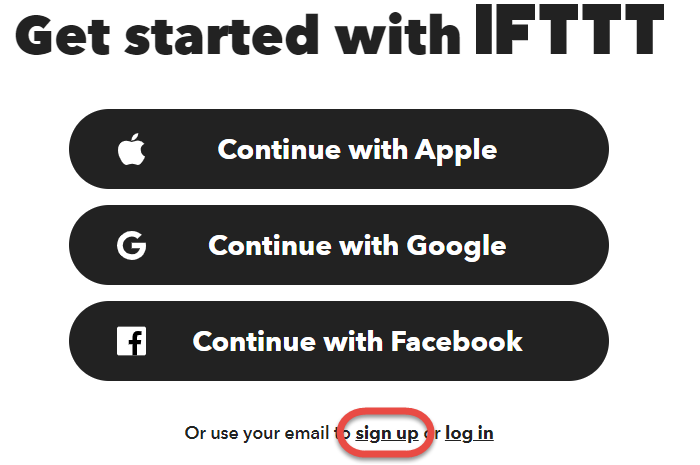
- Enter your email address and create a password, or sign up using your Apple, Google, or Facebook credentials

- Answer a few questions about the type of apps you want to create, your answers do not change anything in this process.
- On the top of the screen click My Applets

- In the upper right corner, click Create

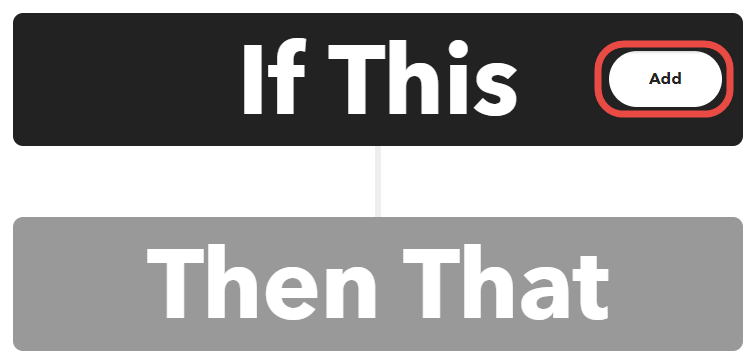
- In the If This box click Add
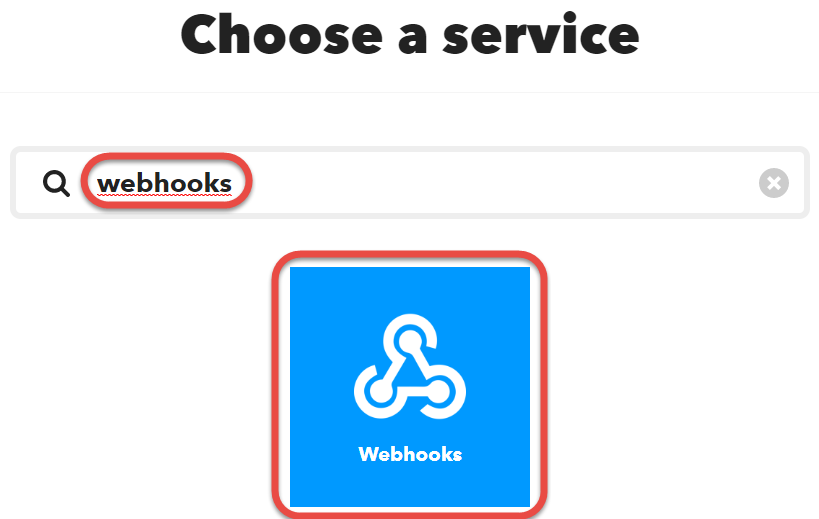
- On the Choose a service page type webhooks into the search box and click the Webhooks icon
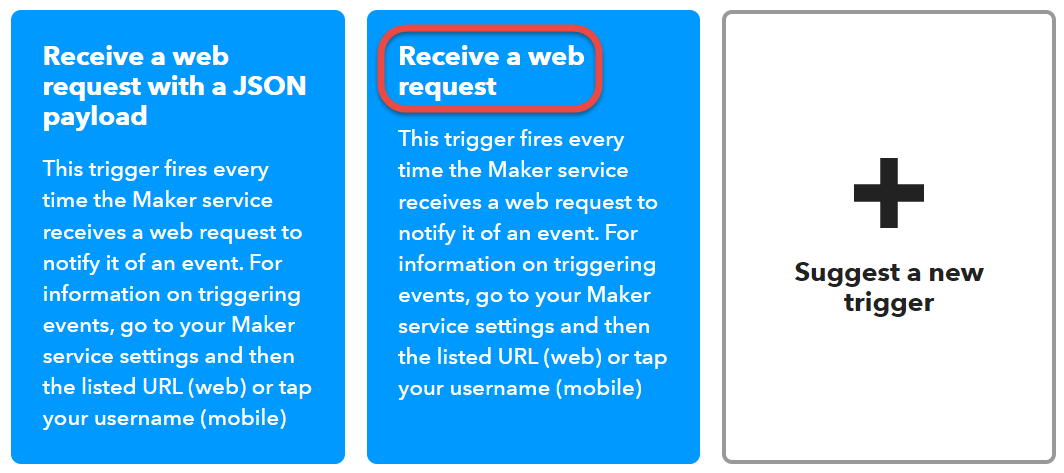
- Select Receive a web request
- Click the Connect button

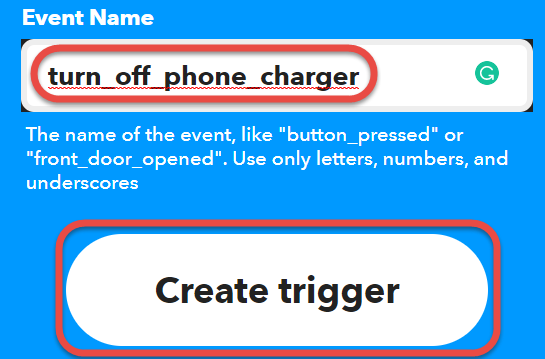
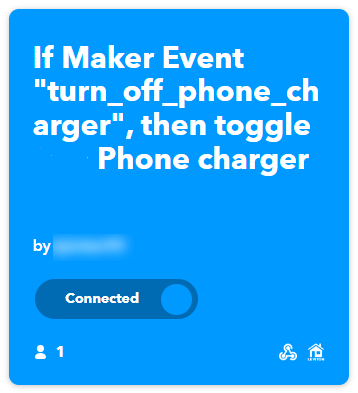
- Enter a name for the event and click the Create trigger button. Use letters, numbers, and underscores only for the event name.
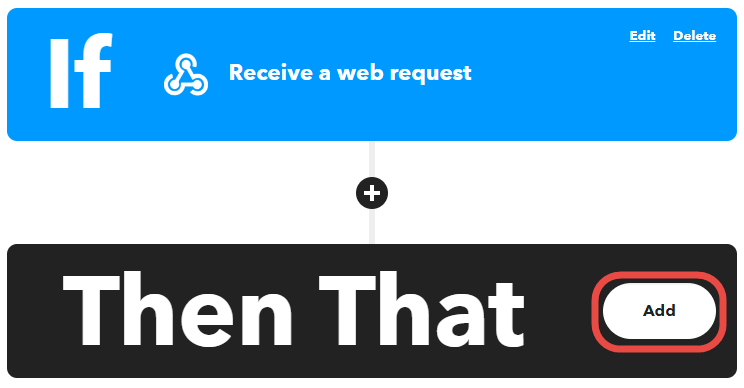
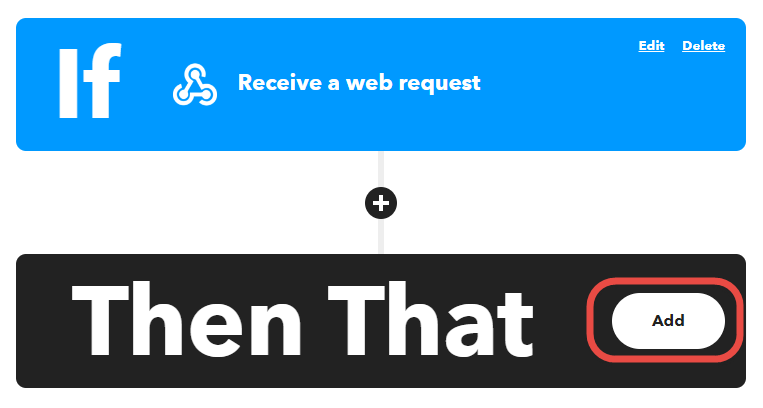
- In the Then That box click the Add button
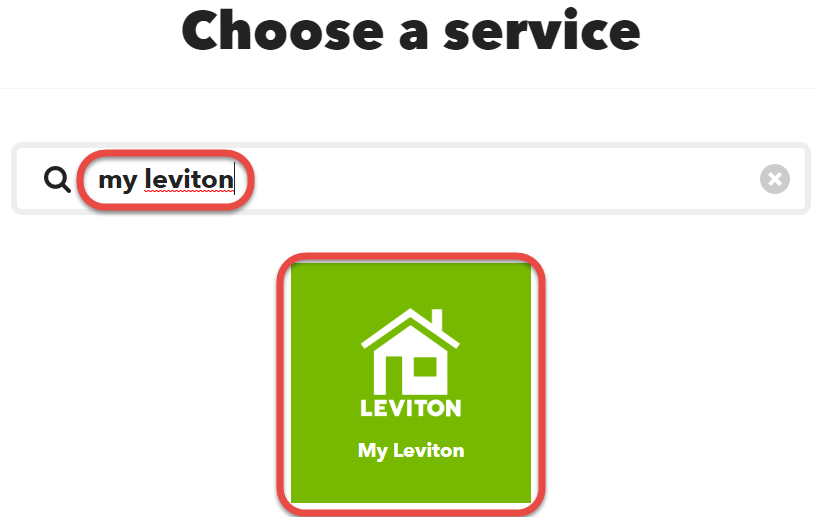
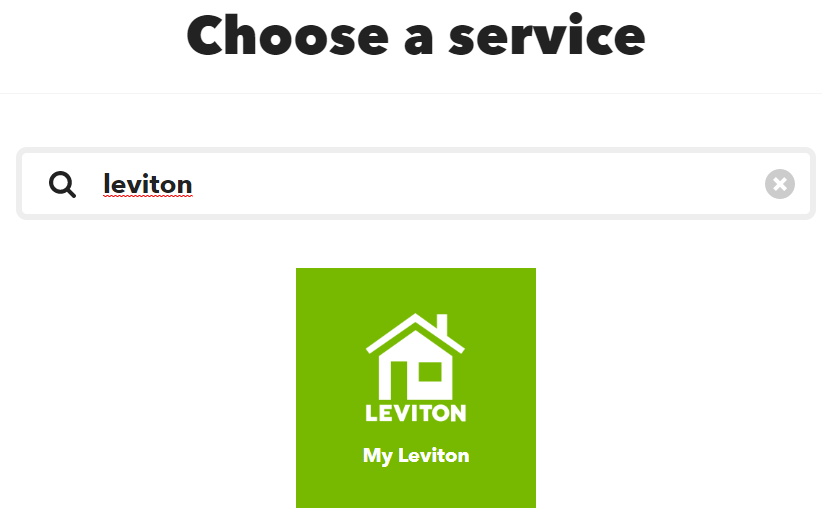
- On the Choose a service page search for the app of your smart switch. In this example, we will use the My Leviton app.
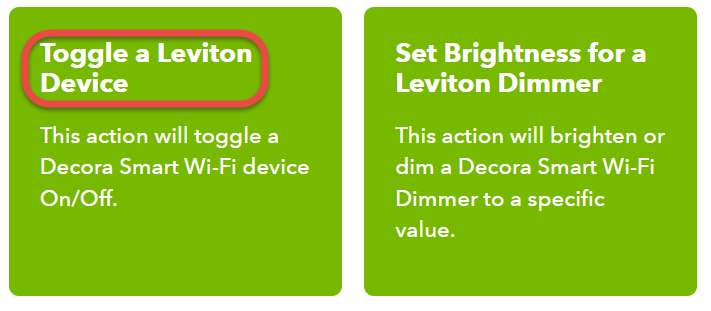
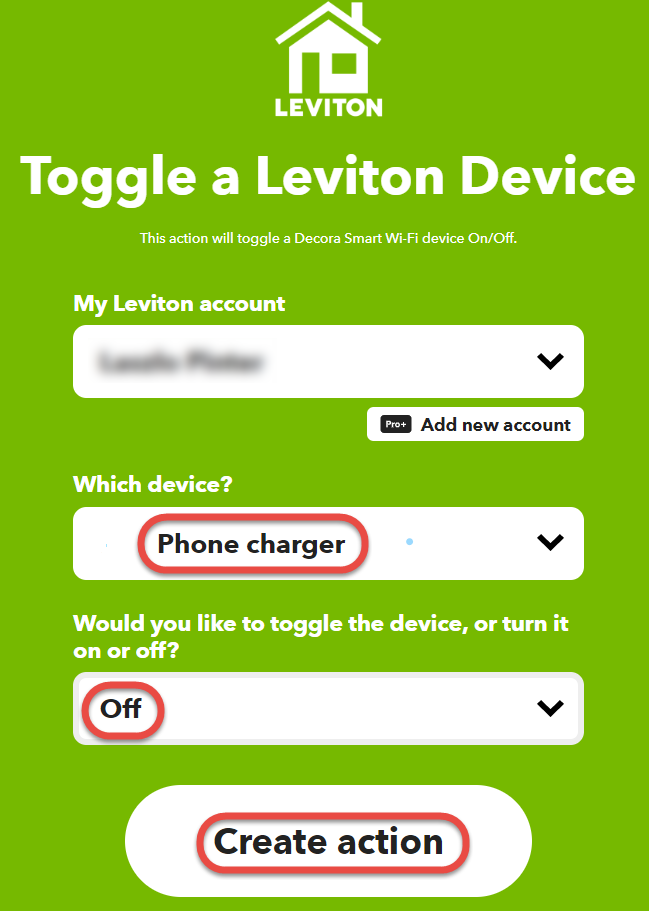
- Select Toggle a Leviton Device
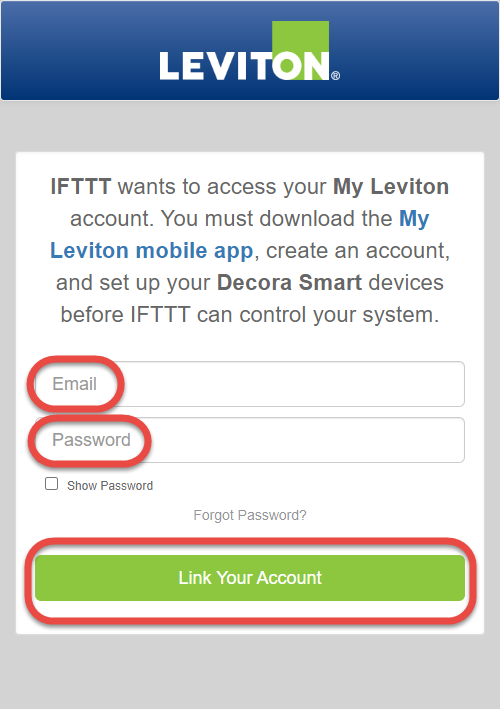
- Click the Connect button
- Enter the email address and the password of your Leviton or other smart plug automation account and click the Link Your Account button
- Select the smart switch, set the command to Off, and click the Create action button
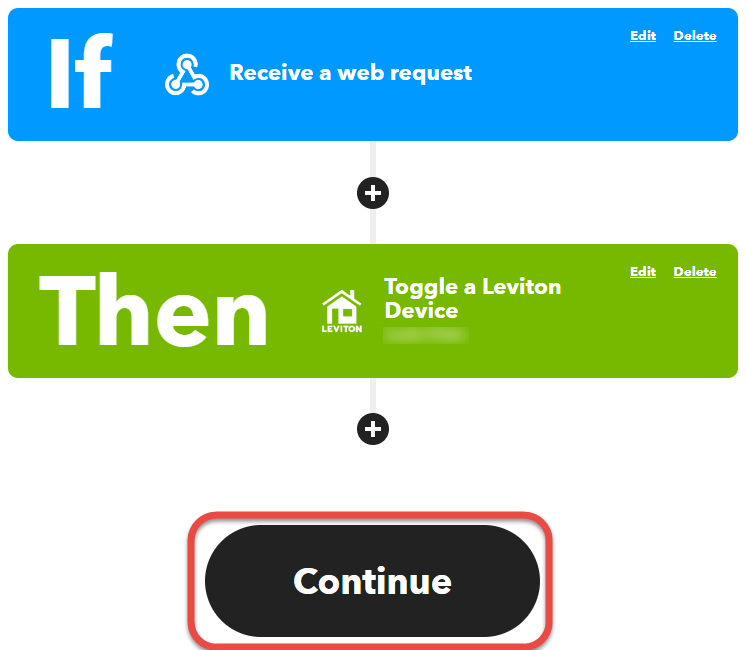
- Click the Continue button
- Enable the notifications and click the Finish button
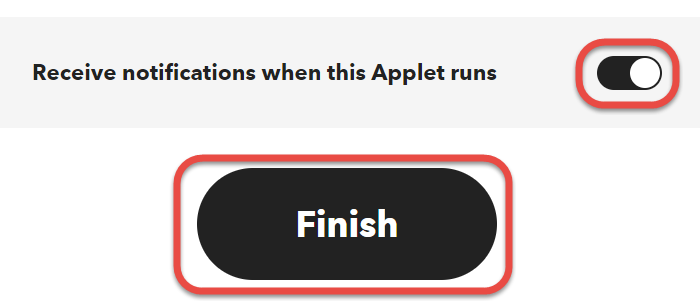
- Enable notifications again
Get your IFTTT key
The long key secures your applet, so others cannot trigger it without knowing it.
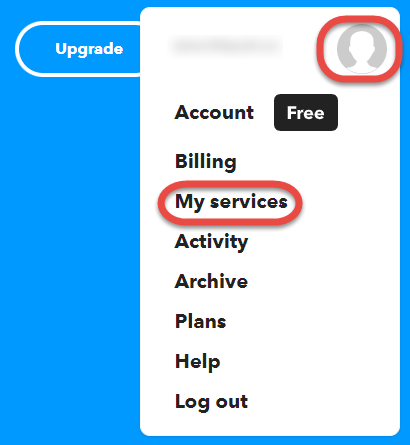
- In the upper right corner of the IFTTT website click the head icon and select My services
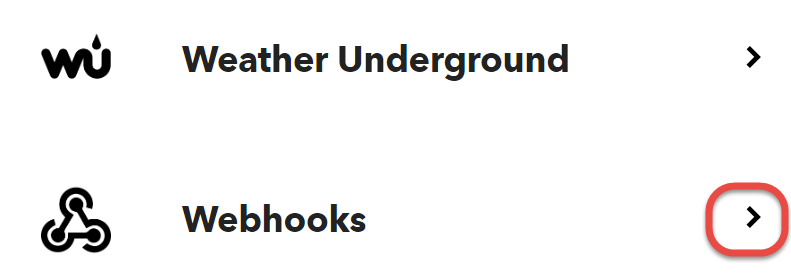
- Click the arrow of the Webhooks item
- Click the Documentation button
- Make sure the smart switch is on.
- Enter the name of the event into the URL and click the Test it button
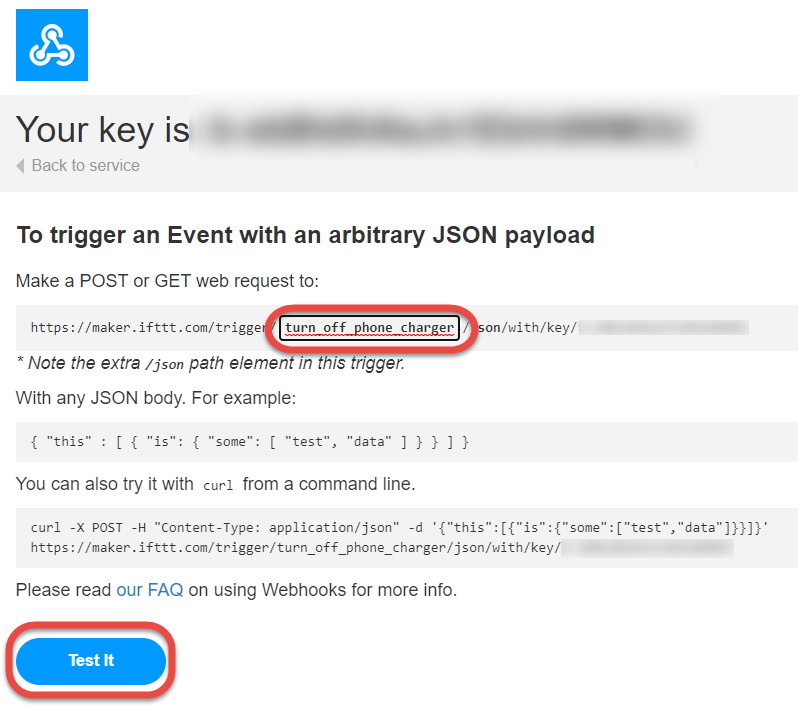
- A message should appear on the top of the screen and the smart switch should turn off.

- Copy the URL of the event including your key

- To transfer the URL to your phone, send the URL to yourself in an email.
- Open the email on your phone and copy the URL to the clipboard with the copy command.
Create the automation
On iPhone and iPad, we will create automation to call the URL of the IFTTT applet
- Open the Shortcuts built-in Apple app
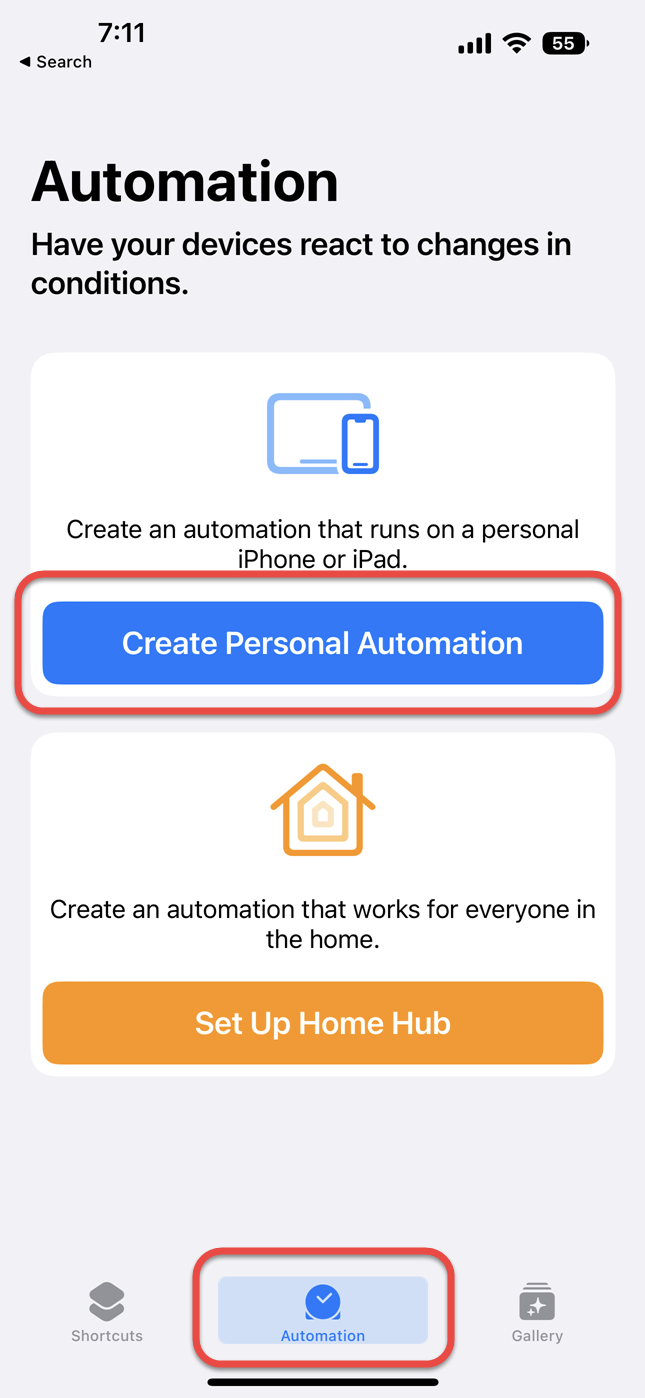
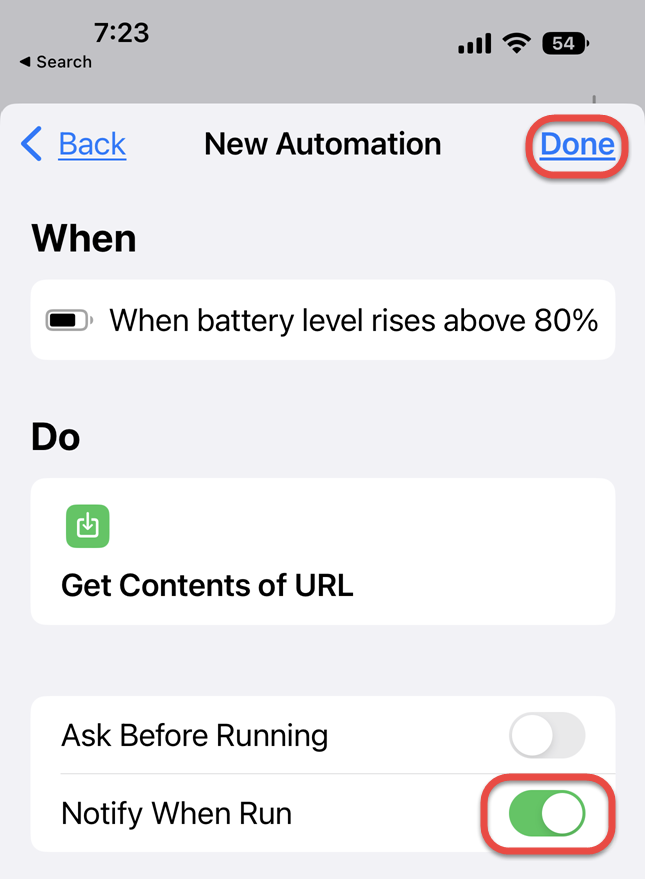
- At the bottom select Automation and select Create Personal Automation
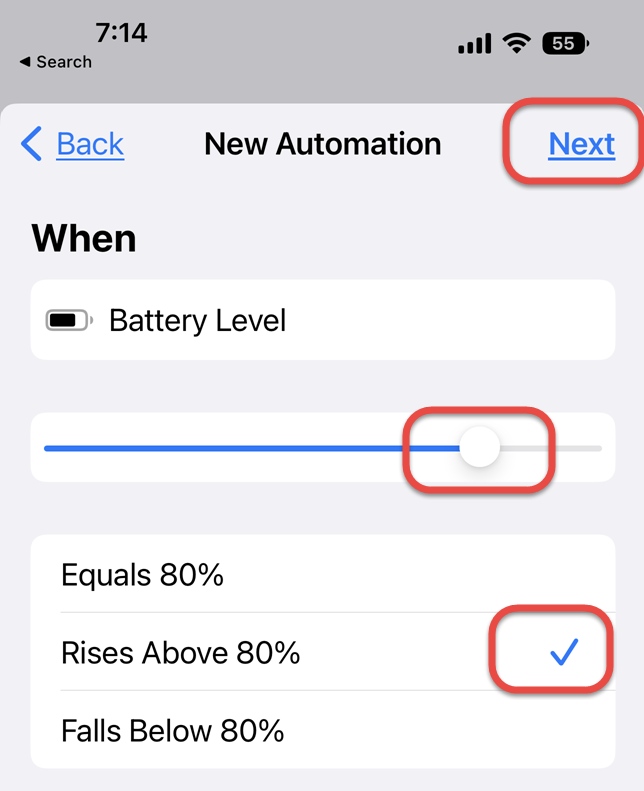
- Select Battery Level
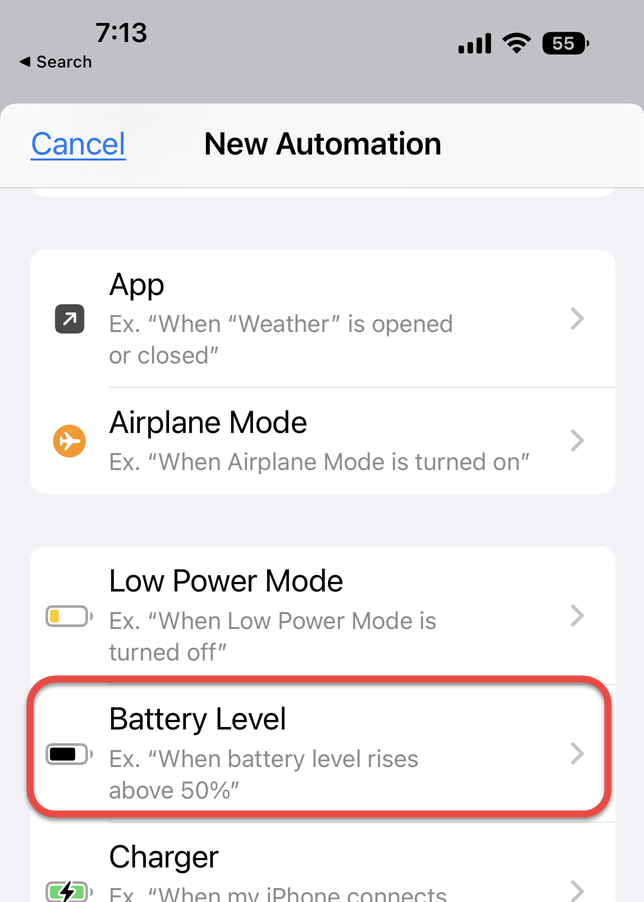
- Set the slider to 80% and select Rises Above 80%, and click Next
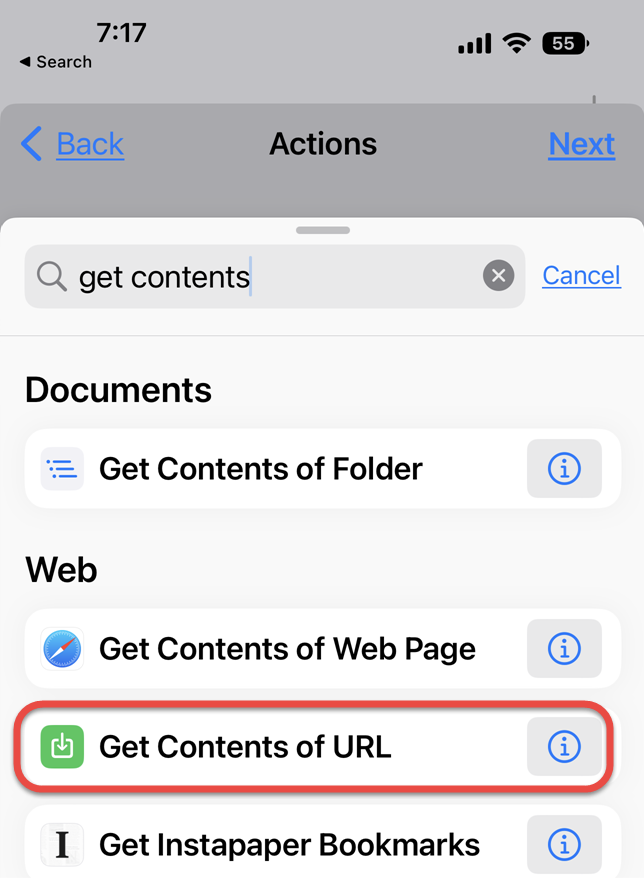
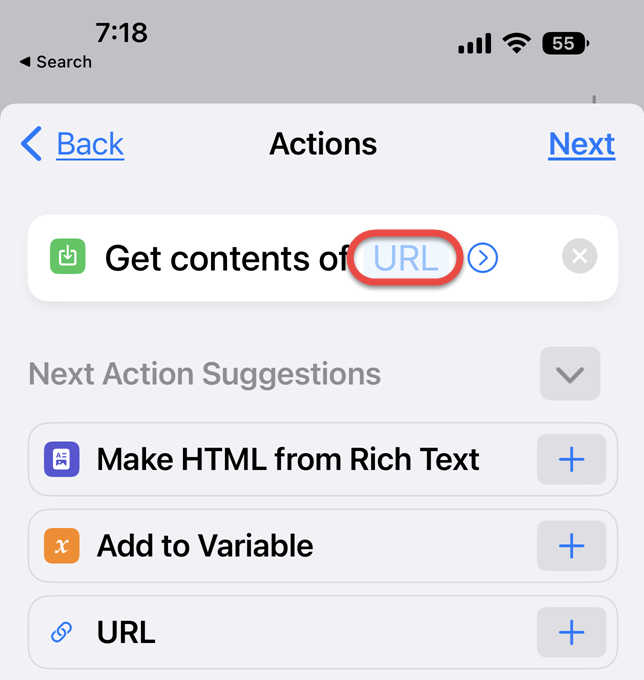
- In the Search for apps and actions field type get contents
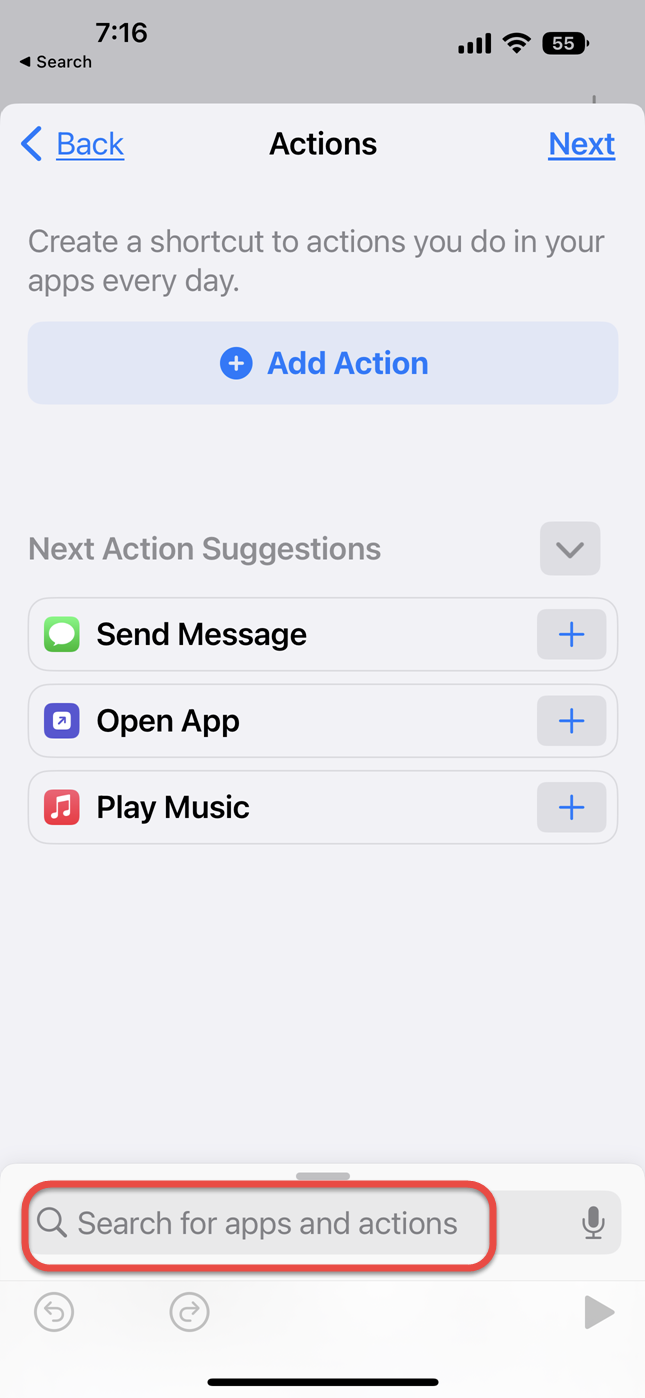
- Select Get Contents of URL
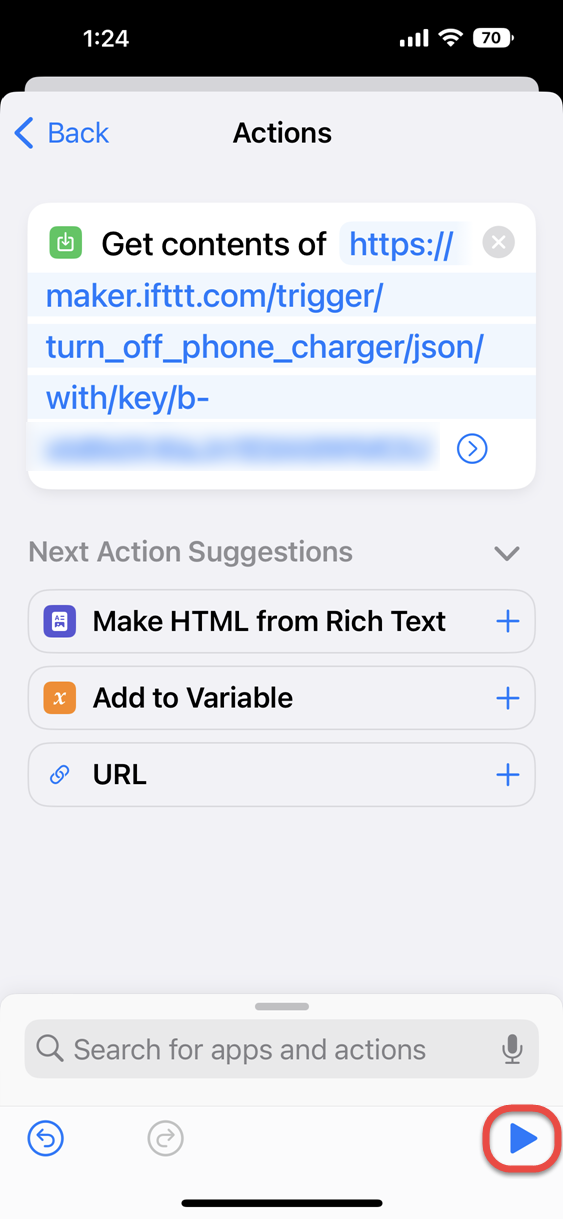
- Paste the URL into the URL field
- Tap the arrow in the lower right corner to test the action. The smart plug should turn off in a few seconds. Tap Next in the upper right corner to go to the next page.
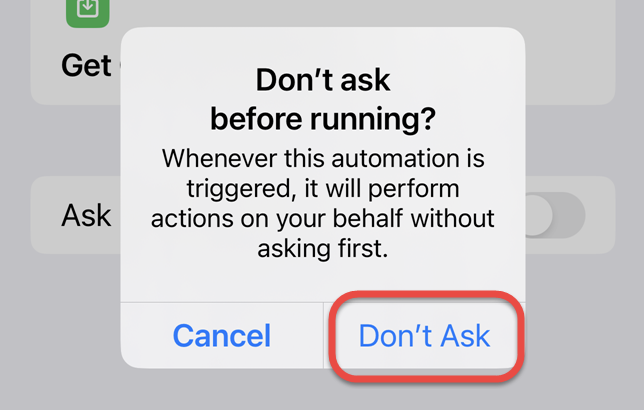
- Turn off Ask before Running to execute the shortcut automatically
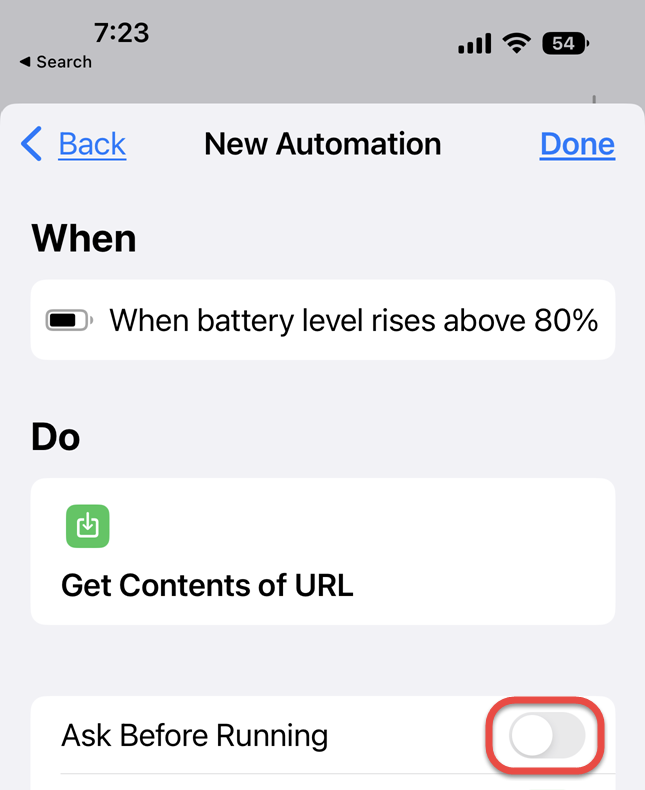
- Select Don’t Ask
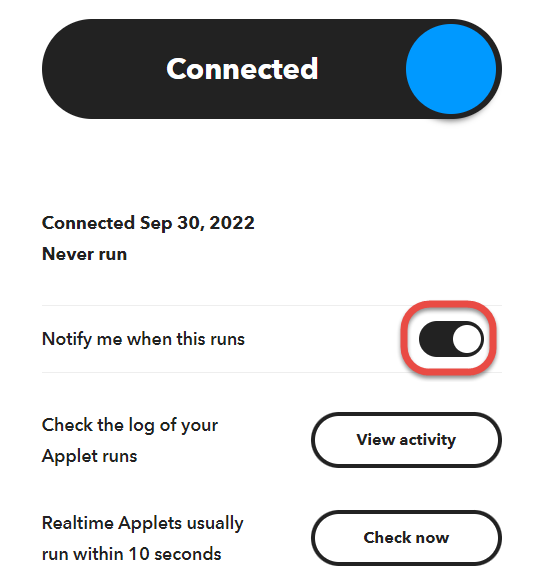
- Temporarily you can turn on Notify When Run during testing. Later the notification may wake you up, so when testing is completed you can turn the feature off. Click Done.
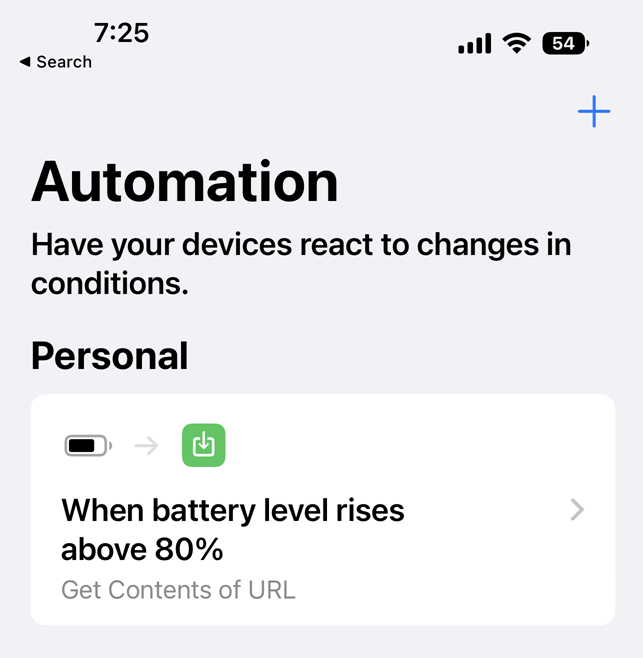
- Exit the Shortcuts app
Stop phone charging at 80%
- Plug the smart switch into a power outlet
- Plug the phone charger into the smart switch
- Plug the charging cable into your phone. Make sure the phone battery is charged less than 80%.
- Turn on the smart switch
Charging starts and will stop when the battery is changed to 81%.
IFTTT applet maintenance
To edit an IFTTT applet
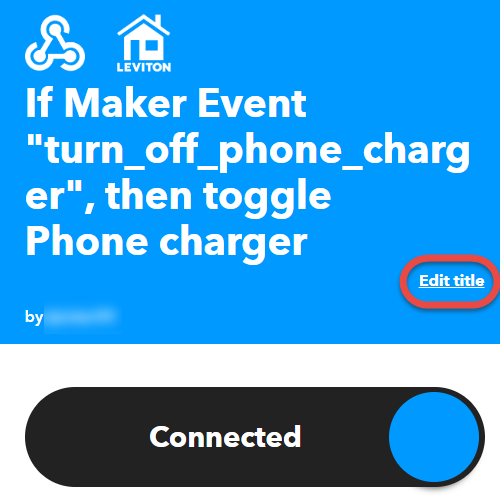
- On the top of the screen select My Applets
- Click the applet to edit
- To edit the title of the applet click the Edit title link
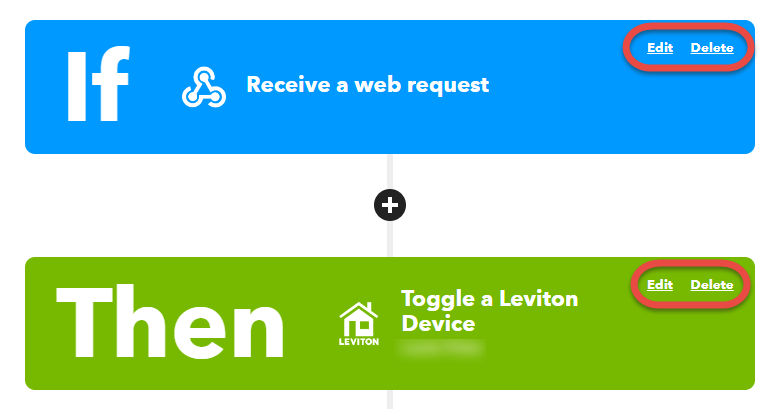
- To edit the applet actions click the Settings button in the upper right corner of the page
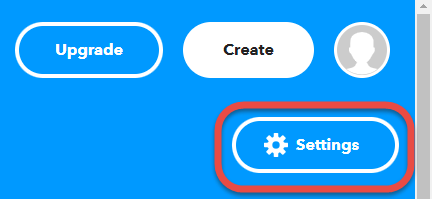
- Click the Edit or Delete links in the upper right corner of the panels
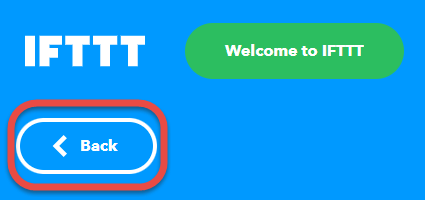
To disable an IFTTT applet
- On the top of the screen select My Applets
- Click the applet to disable
- Click the Connected button, it should change to Click to connect.


- In the upper left corner click the Back button
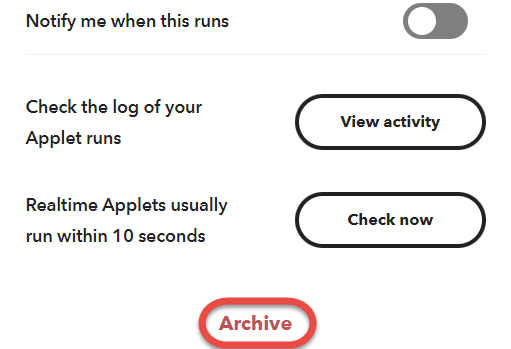
To delete an IFTTT applet
There is no delete function, but you can archive applets, so later you can restore them.
- In the upper right corner click the My Applets button
- Click the applet to archive (delete)
- Click the Archive link
IFTTT Service maintenance
If you lose connection to a service and want to reconnect to it, or want to delete a connection to a service visit the My Services page.
- In the upper right corner of the IFTTT web site click the head and select My Services
- Select the service
- In the upper right click the Settings button
- On the page, you can view the Activity log, Reconnect or Disconnect the service.

If you have more than 2 devices
Your free IFTTT account only allows 5 applets to run. One device requires two applets, one to turn the changer on when the battery level falls below 80%, and another one to turn it off when the battery level goes above 80%. If you have more than 2 devices, you need new IFTTT and My Leviton accounts. It looks like IFTTT does not allow multiple IFTTT accounts to connect to the same My Leviton account, but you can share the Leviton devices between multiple My Leviton accounts.
- Add all Leviton devices to the main My Leviton account.
- Create a new My Leviton account for the additional device and verify the email address.
- In the My Leviton app of the main account invite the new My Leviton account.
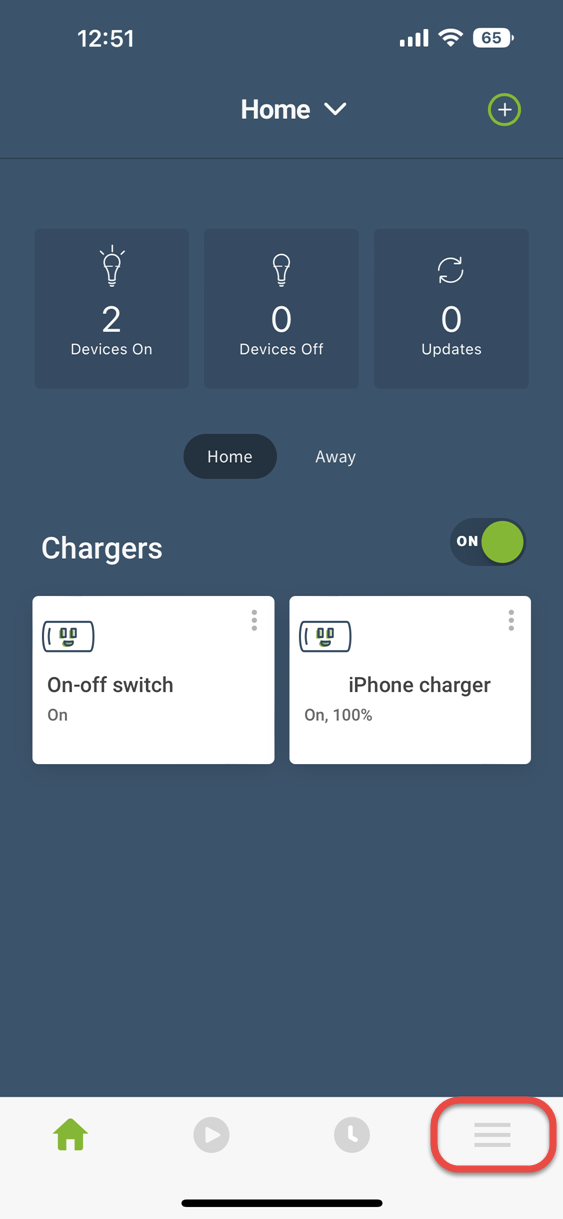
- At the bottom of the screen tap the “hamburger menu” icon
- In the menu select Users

- In the upper right corner tap the Plus sign
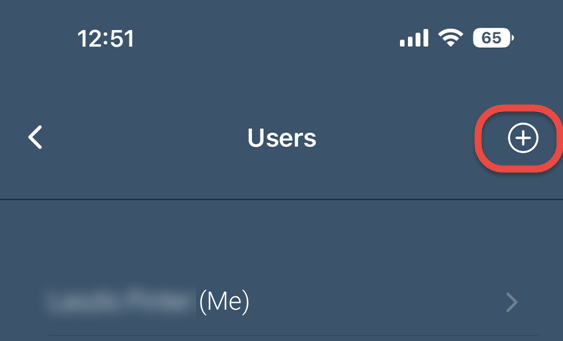
- Enter the email address of the new My Leviton account, select the residence you want to allow access to, and tap the Invite button
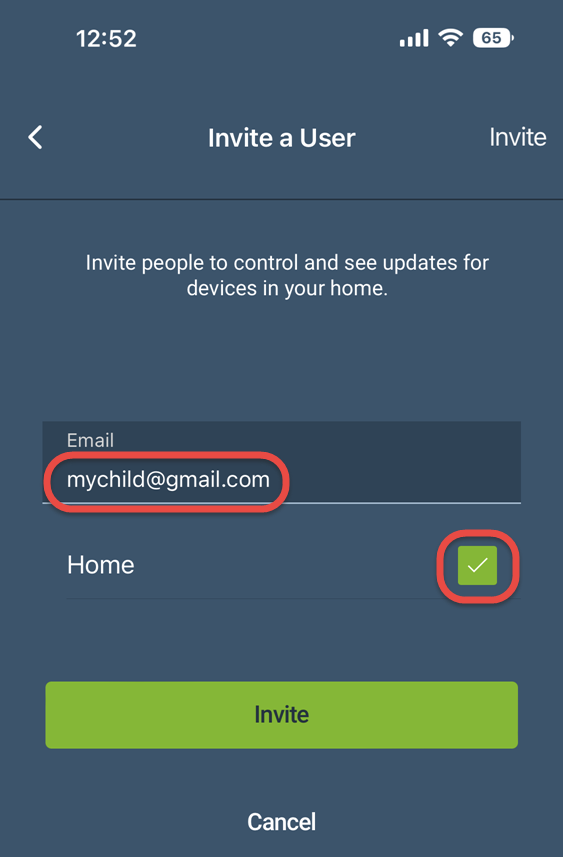
- Accept the invitation of the new My Leviton account sent to the new account’s email address.
- At the bottom of the screen tap the “hamburger menu” icon
- Create a new free IFTTT account with the new email address.
- Create the applets for the new device in the new IFTTT account and connect it to the new My Leviton account.
- Create the applets for the new device in the new IFTTT account and connect it to the new My Leviton account.
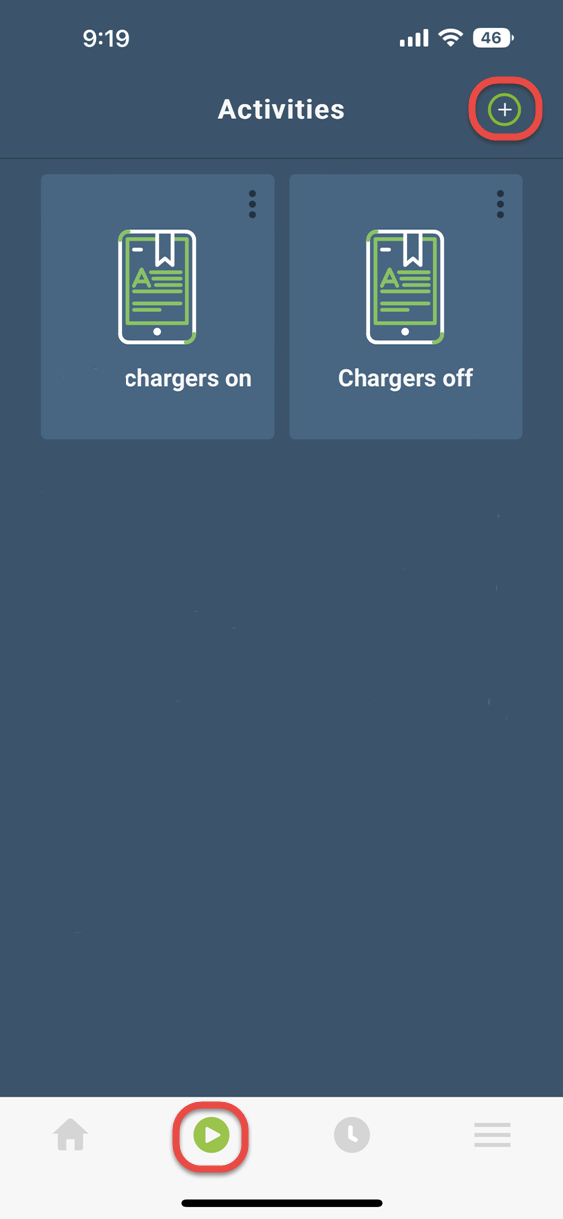
Charge the same phone at multiple places
If you want to charge the same phone at multiple places, link two smart plugs together in an Activity and control the activity from IFTTT.
Create a My Leviton activity
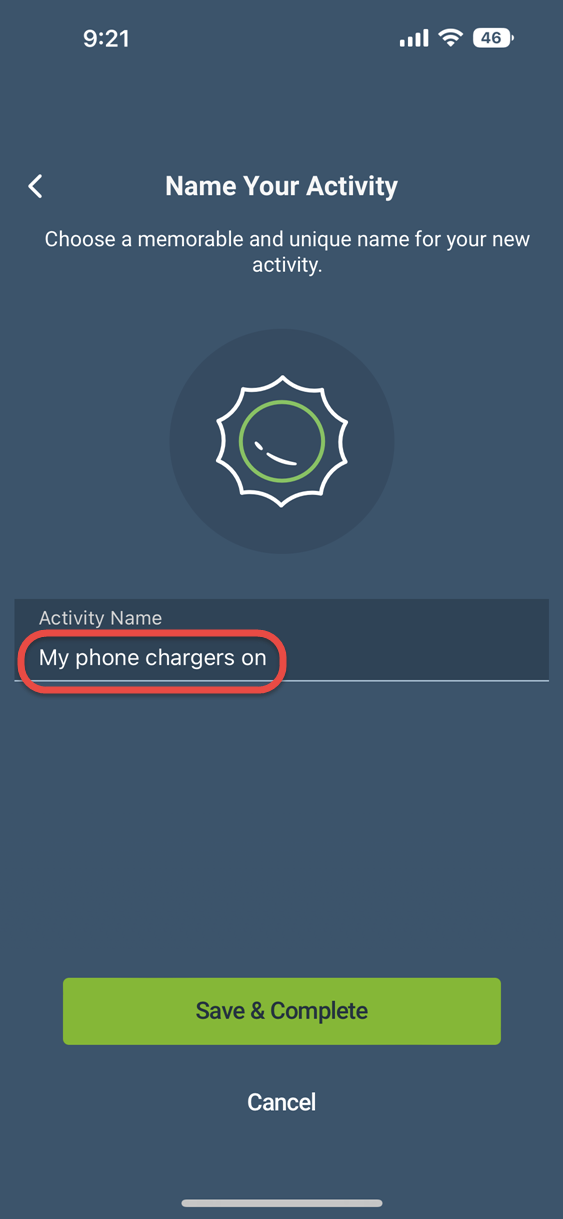
In the My Leviton app create two activities: My phone chargers on and My phone chargers off.
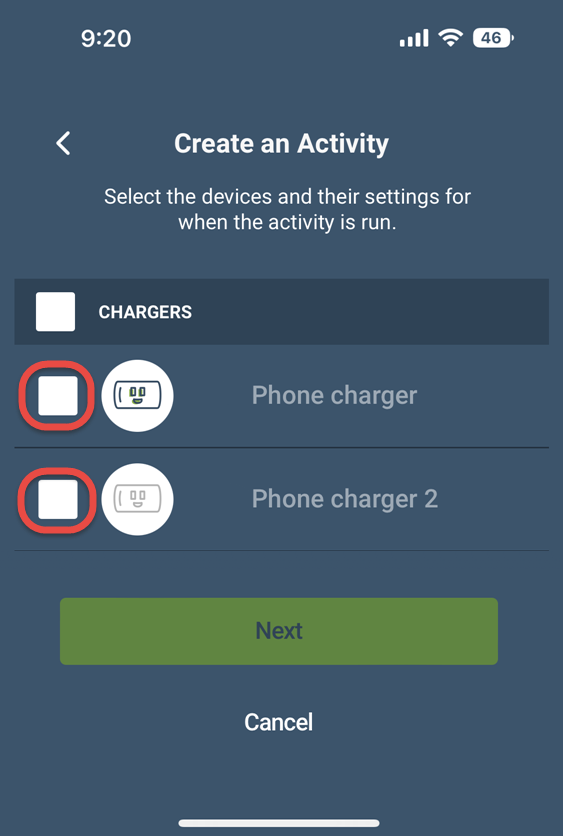
- In the My Leviton app tap the Activities button at the bottom of the screen and tap the plus sign
- Select the devices to group together
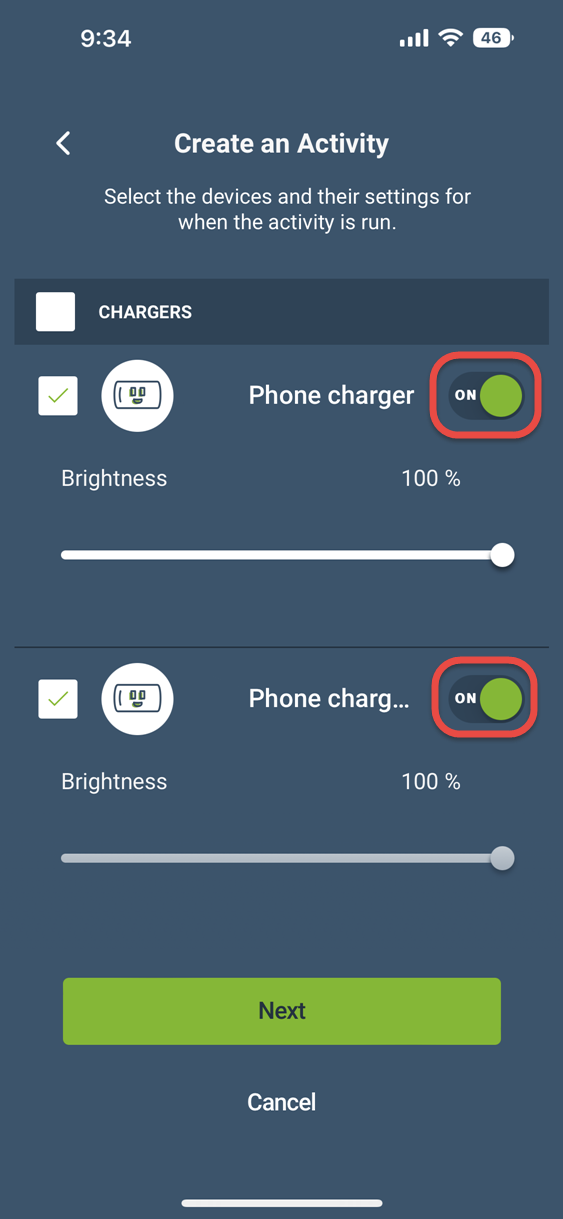
- Set on or off for the action and click Next
- Select an icon and click Next
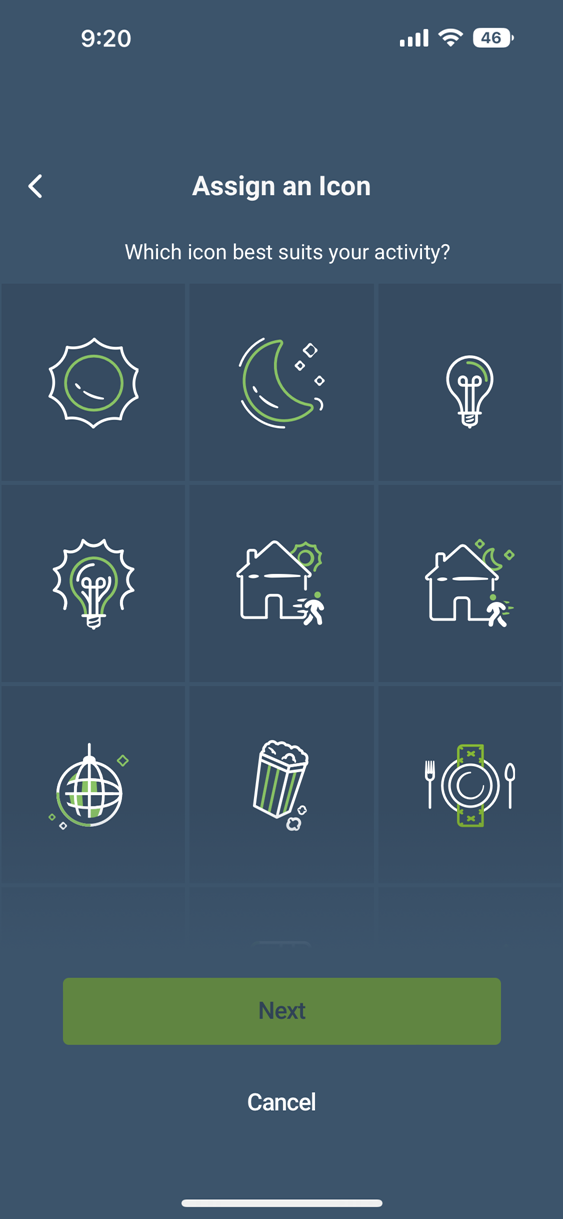
- Enter a name for the Activity
In IFTTT select the Activity to control
- When you create the action
- Select My Leviton
- Select Run a Leviton Activity
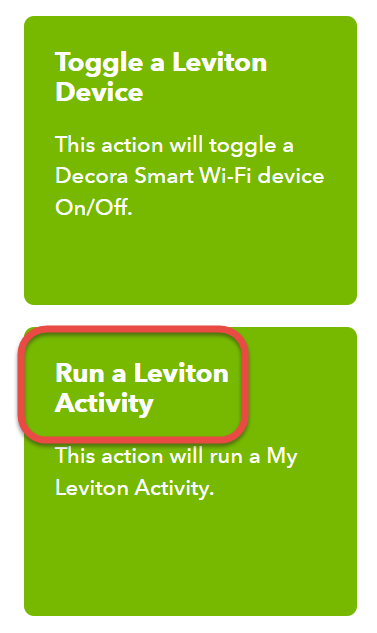
- Select the Activity

-
-
-
-
-
Show Commentsgreat content thank you
Very nice work, thank you
Been looking for this for a long time. THANK YOU
Thanks for the post. I’ve followed everything and successfully tested in IFTTT app but when I paste the URL into Shortcuts and test there it doesn’t work. Any way to diagnose what’s going wrong?
Hello!
Thanks for your precise article!
Reaching 100€ for glued-in battery change, I’m proud to report
>> 97%<< max. Capacity on my iPhone 11 pro.
But I all did it manually, and way from perfect.
I did bot use the new power plugs with max. Amps, but turned to old USB power supplies only delivering 1A max..
Switched on optimized battery charge, and often unplugged it late in evening, put back on the battery saving mode, and went to data-off (a shortcut doing it for bt, wifi and 5G in settings so no automatic “turn-on-wifi”, also works by hey siri data off. Of course, data on is also existing' but it wants data to execute it, the smart girl, so you have to bark mobile data on and then data on. I will include the power saving mode in the two commands as well now. Or play with ITTT.).
By this, so no airplane, but all data transmitters off, you are still available by phone and SMS, eg to taxi your kids late in the night from train station. :).
Now I want to propose using some USB or AC power meter one could program. As averaged “minimum power use over a minute” is likely the battery only if not watching a movie, you can assume the power climbs while cell voltage rises in constant current charging mode, which is just ending at 80% ca., to turn on constant voltage charging mode, where power demand drops.
So without data communication to a device, we can stop ALL lithiumdriven gadgets at 80% we are allowed to cut off from power, may it be your drill or lawn mower’s batt or a headphone : as long as the resolution of the power meter is enough to detect the maximum power and the decline afterwards, we can charge ANY device to any % charging state, by small algorithm in some 1€ microcontroller, or programming some custom firmware in commercially available USB power meters, we order with a cut off switch we can programm by the software.