Anaconda changed its Term of Use to require payment from companies larger than 200 employees. Many companies are not willing to pay the subscription fees for a software they can substitute.
conda-forge is the free, really open source alternative for the conda Python package manager.
To migrate your development environment from conda to conda-forge
Install conda-forge
To install conda-forge
- Navigate to https://conda-forge.org/download/,
- Download the installer for your operating system, and follow the instructions ate the bottom of the page.
On macOS
- Open a terminal
- Execte the command
bash ~/Downloads/Miniforge3-MacOSX-x86_64.sh- Answer yes when asked to accept the license terms
- Press ENTER to allow the installation into your user directory
- During the installation you can opt to activate the base environment when the terminal starts
That step will update your terminal startup script, in case of iTerm2 it is ~/.zshrc
On Windows
- Execute the Windows installer
Configuration
Check the version of conda on your workstation, and update Conda, it should be higher than 4.9
conda --version
conda update conda
To list the Conda config locations and channels
conda config --show-sourcesTo not to activate the conda base environment at startup execute the command
conda config --set auto_activate_base falseIf the listed channels do not contain “conda-forge” configure conda to install packages from conda-forge, the free for everyone open source package repository
conda config --add channels conda-forgeIf there are multiple channels are listed activate the strict channel priority to make sure the packages are first searched on the conda-forge channel
conda config --set channel_priority strictCheck the Conda configuration
To list the Conda config locations
conda config --show-sourcesThe usual Conda config location is ~/miniforge3/.condarc
To check the Conda configuration at the usual location
cat ~/miniforge3/.condarcchannels:
– conda-forge
channel_priority: strict
For more information see A brief introduction to conda-forge
This may only work with the not free Anaconda installation
Find conda-forge packages
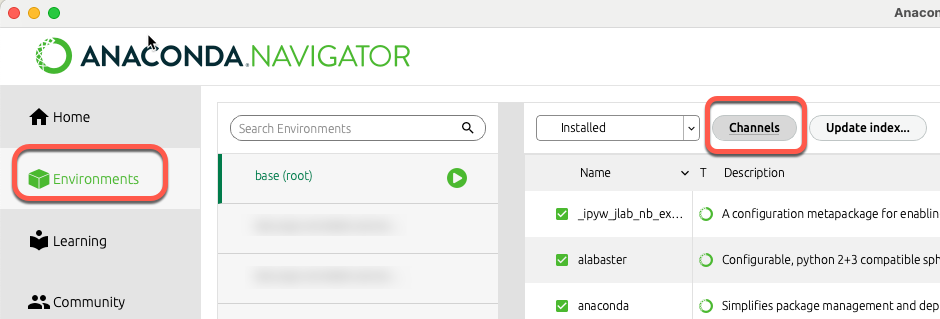
- Start the Anaconda Navigator by executing in the terminal
anaconda-navigator - On the Environments tab click Channels
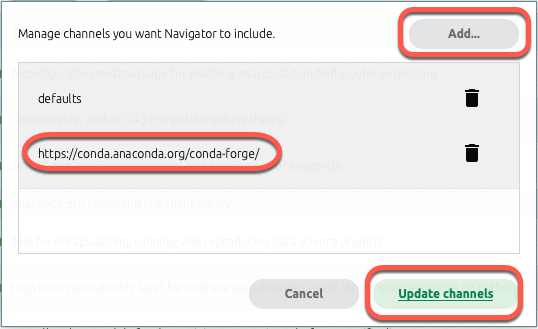
- Click the Add… button,
- Enter https://conda.anaconda.org/conda-forge/ into the text box,
- Press the Enter key, and
- Click the Update channels button
Usage
To activate the conda base environment in the terminal, execute
eval “$(~/miniforge3/bin/conda shell.YOUR_SHELL_NAME hook)”
For iTerm the command is
eval "$(~/miniforge3/bin/conda shell.bash hook)"To install conda’s shell functions for easier access, first activate the conda base environment as above, then:
conda initFor changes to take effect, close and re-open your current shell.