Import STL mesh files into Autodesk Inventor
Import and export STL mesh files
To enable Autodesk Inventor to open and save .stl files add the STL Import and STL Export add-ins to Adobe Inventor. .stl files are used to transfer 3D print designs between computers. You can download most of them for free from the Internet.
- In the Tools menu open the Add-in Manager
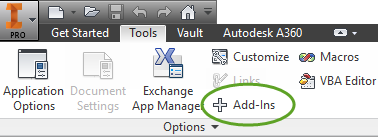
- On the Translators tab select the STL Import and STL Export translators.

To be able to edit the STL mesh files
install the Mesh Enabler add-in
Download the Autodesk Inventor Mesh Enabler
- Navigate to the Autodesk app store at https://apps.autodesk.com/en
- Sign in with your Autodesk account
- Search for Mesh Enabler
- Click the Download button
Install the Autodesk Inventor Mesh Enabler
- Double click the downloaded AutodeskMeshEnabler.msi file and complete the installation
- Start Autodesk Inventor
- In the Tools menu select the Add-in Manager
- On the Applications tab select Autodesk Mesh Enabler

- Select the Load Automatically checkbox
- Click OK
To convert an STL mesh file to a solid model
- Start Autodesk Inventor
- Open the STL mesh file
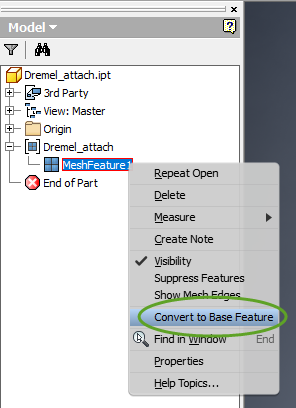
- In the browser right-click the MeshFeature1 element and select Convert to Base Feature
- In the dialog box select the output you need and click OK.
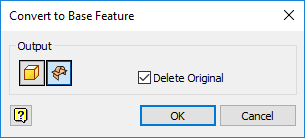
- Solid/Surfaces: Converts the selected mesh features to multi-solids or individual surfaces. To create solids, the mesh features must form closed meshes.
- Composite: Converts the selected mesh features to a single composite feature.
- Delete Original: Deletes the selected mesh features after conversion.
Set the default project location
Inventor saves the new projects in your document folder. To set a different default location
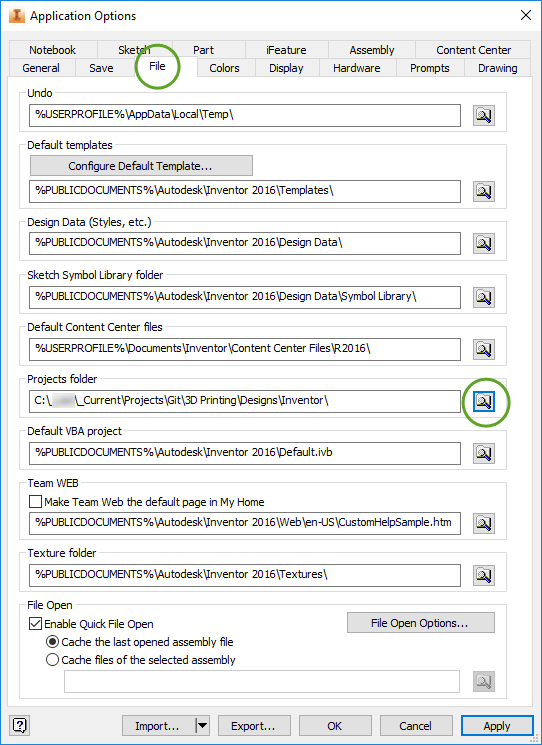
- In the Tools menu select Application Options
- On the File tab click the yellow folder icon next to Project folder and set the desired location.
To save the solid model as an STL 3D mesh
- Open the Inventor Parts (.ipt) or Inventor Assembly (.iam) file in Autodesk Inventor,
- Click the Inventor icon in the upper left corner,
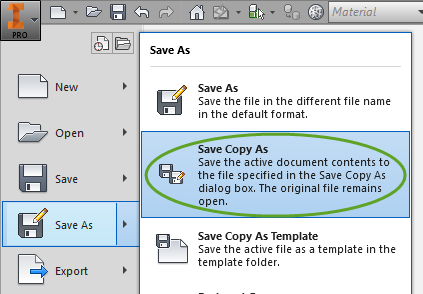
- Click the small arrow next to Save As,
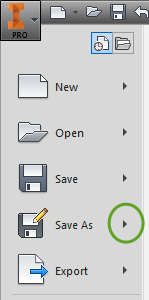
- In the submenu select Save Copy As,
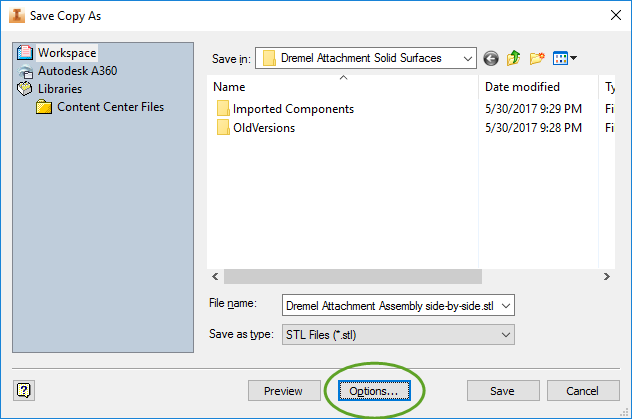
- In the Save as type dropdown select STL Files,

- Enter a name for the file and click Options…,
- Select Source Units to make sure the size of the mesh is identical to the objects in the Inventor document,
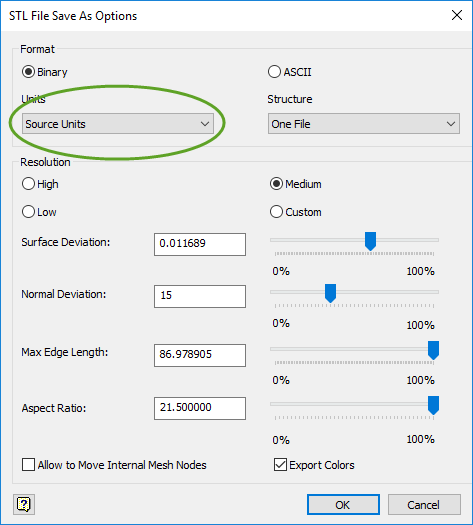
- Click OK to close the Options window,
- Click Save to write the file to the disk.