Project management
Create a new project in PyCharm
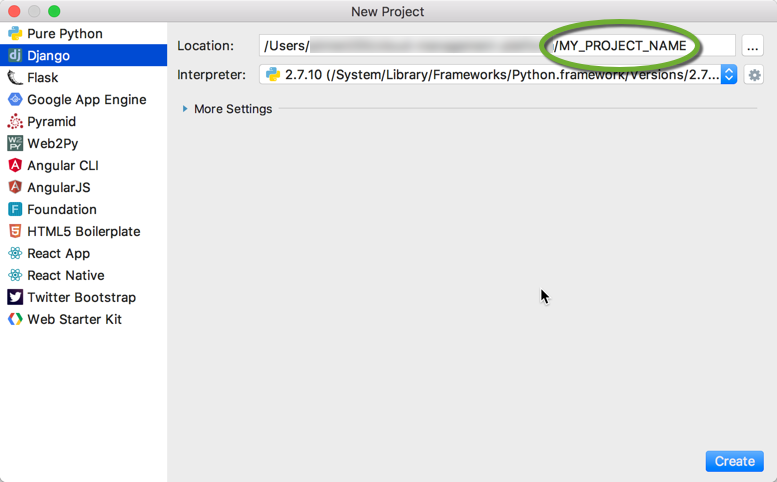
- In the File menu select New Project…,
- On the left side select the Python framework you want to use,
- Enter the name for your project to the end of the Location path,
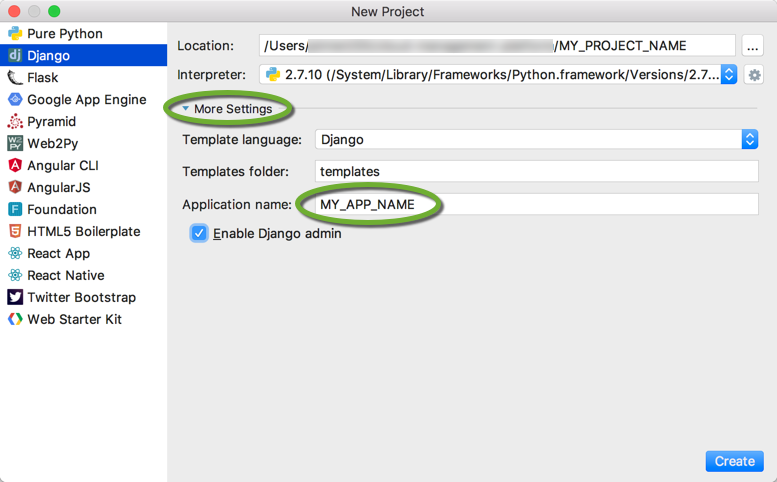
- If you have selected a framework that asks for more information
- Click the More Settings link and enter the additional values,
- Click the Create button,
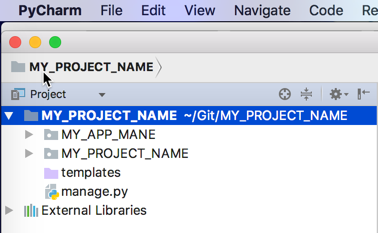
- PyCharm generates folders for your project and application,
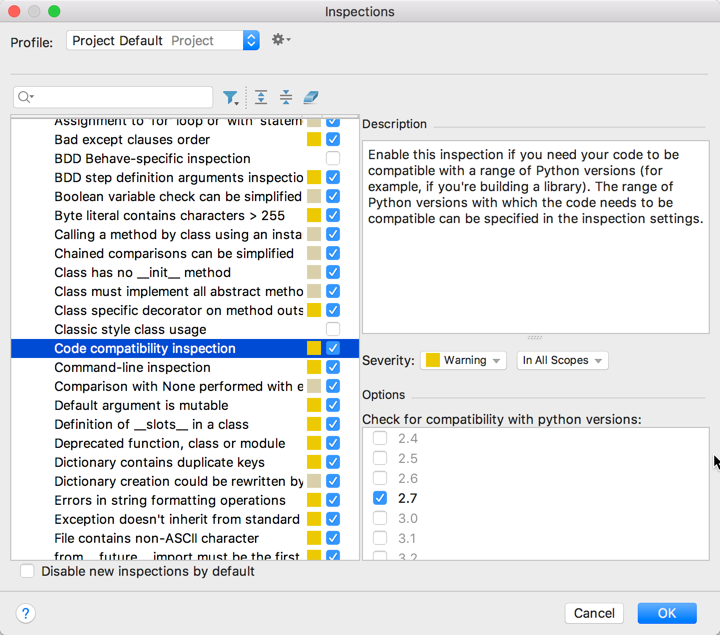
- When PyCharm asks you about compatibility inspection, enable it, to make sure your code is compatible with future versions of Python.
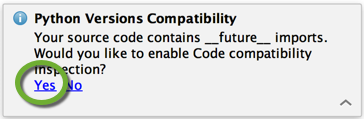
- PyCharm will enable Code compatibility inspection. Click OK to save the setting.
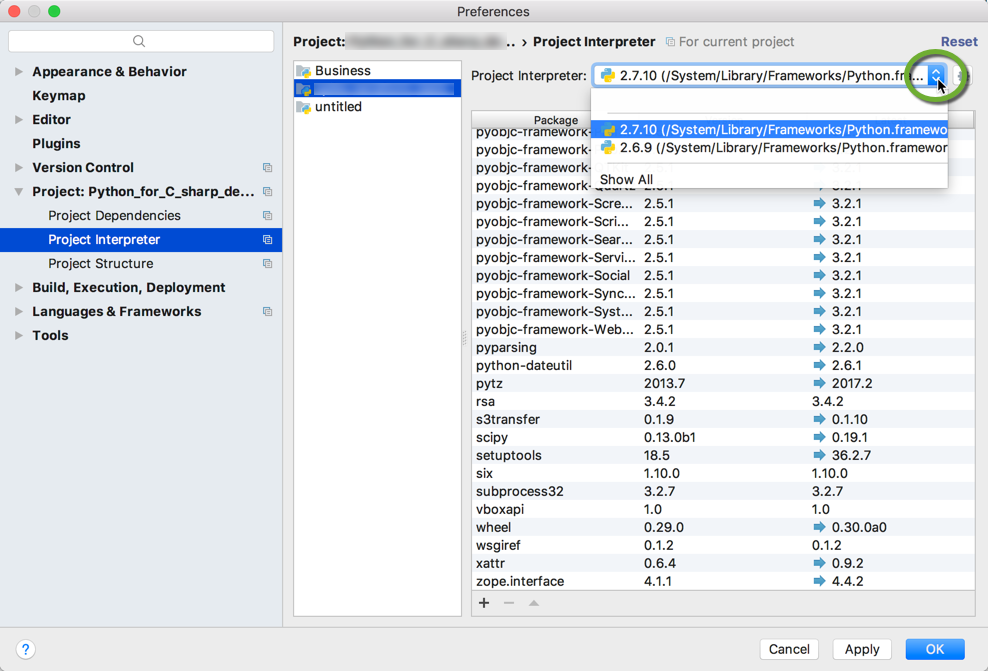
- PyCharm will still set your project interpreter to 2.6, so set it to 2.7. In the PyCharm menu select Preferences…,
- On the left side select Project:…, Project Interpreter,
- In the Project Interpreter drop-down select 2.7 and click the OK button.
- Click the More Settings link and enter the additional values,
Delete a project in PyCharm
The PyCharm project explorer does not have a delete option. To delete a PyCharm project
- Open the project location in Finder,
- Move the project folder to the Trash,
- The PyCharm project explorer window will reflect the change.
Shortcuts, tips, and tricks
Auto generate
Auto generate functions, classes, attributes
- Enter the name of the undefined element where you want to use it,
- Click the light bulb, or press ⌥⏎ (Alt-Enter) to pop up the Intention Action alert,
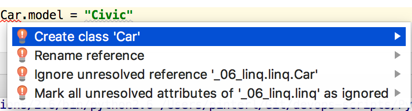
- Select the action to generate the definition.
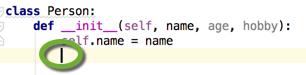
Auto generate fields for classes
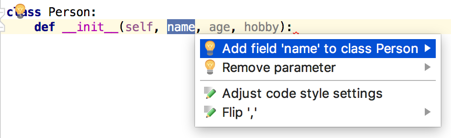
- Enter the __init__ function of the class with the field names,
- Place the cursor on the field you want to generate the definition for,
- Click the light bulb, or press ⌥⏎ (Alt-Enter) to pop up the Intention Action alert,
- Select Add field ‘…’ to class …,
- Press Enter to select the option,
- Press Enter at the end of the new line to move the cursor to the next line, otherwise, the Intention Action alert does not pop up when you press ⌥⏎ (Alt-Enter)
Code completion
- Press Ctrl-Space to complete the name of the element.
- Press Ctrl-Space twice to complete the name of any class, even if it is not yet imported. The import statement will be automatically added.
Quick documentation
To get a short documentation on an element under the cursor, press F1. (By default on a Macintosh you need to press fn-F1, because the F1 button is programmed to adjust the brightness.)
For more information
Auto completing code, see https://www.jetbrains.com/help/pycharm/auto-completing-code.html
Keyboard shortcuts
https://www.jetbrains.com/help/pycharm/keyboard-shortcuts-and-mouse-reference.html