As of the writing of this article to create iOS apps for iPhone, iPod and iPad you need a Macintosh computer with the Lion (Mac OS X 10.7), Mountain Lion (Mac OS X 10.8) or later operating system.
Check the hardware requirements of Lion and Mountain Lion if you need to upgrade you computer from Snow Leopard (Mac OS X 10.6) or earlier, because Mountain Lion only runs on newer models with aluminum housing. If you have an earlier model with black or white housing from 2008 upgrading to Lion can be your solution. My black MacBook with the serial number ending with UMoP2 can only be upgraded to Lion.
To see the serial number of your Mac
- Click the Apple icon in the upper right corner of the screen
- Select About This Mac
- On the popup window double click the word Version under the Mac OS X text
To deploy your app to any Apple device or submit it to the Apple App Store you need to register as a developer at developer.apple.com and pay $99 plus tax a year membership fee.
To test the app on your Macintosh in an iOS simulator you don’t need the developer account, just download Xcode, the Apple development environment for free. This way you can decide without paying anything if you are interested in the Apple iOS app development.
In this series of articles we will use Xcode, the Apple development platform to create, test and deploy our applications.
To get Xcode
- Start the Mac App Store application in your Mac
- Download Xcode, the Apple IDE for iOS and Mac software development
The first steps
- Start Xcode
- On the Welcome page click Create a new Xcode project
- To create an iOS application for iPhone, iPod or iPad click Application under iOS on the left side
- Select the application type you want to develop
- To create a simple one page application select Single View Application
- Enter the name and other parameters of the application
- Enter your initials for the class prefix to create a unique set of classes
- Create a folder for the application in the Documents folder of your computer and save the project in that folder
Set the initial view (the view that opens when the app starts)
In this example you can skip this if you selected the Single View Application, but later when you create apps with multiple views this will be the way to select the view that loads when the app starts.
- Open the storyboard file
- In the project navigator on the left side of the screen click the MainStoryBoard_iPhone.storyboard item
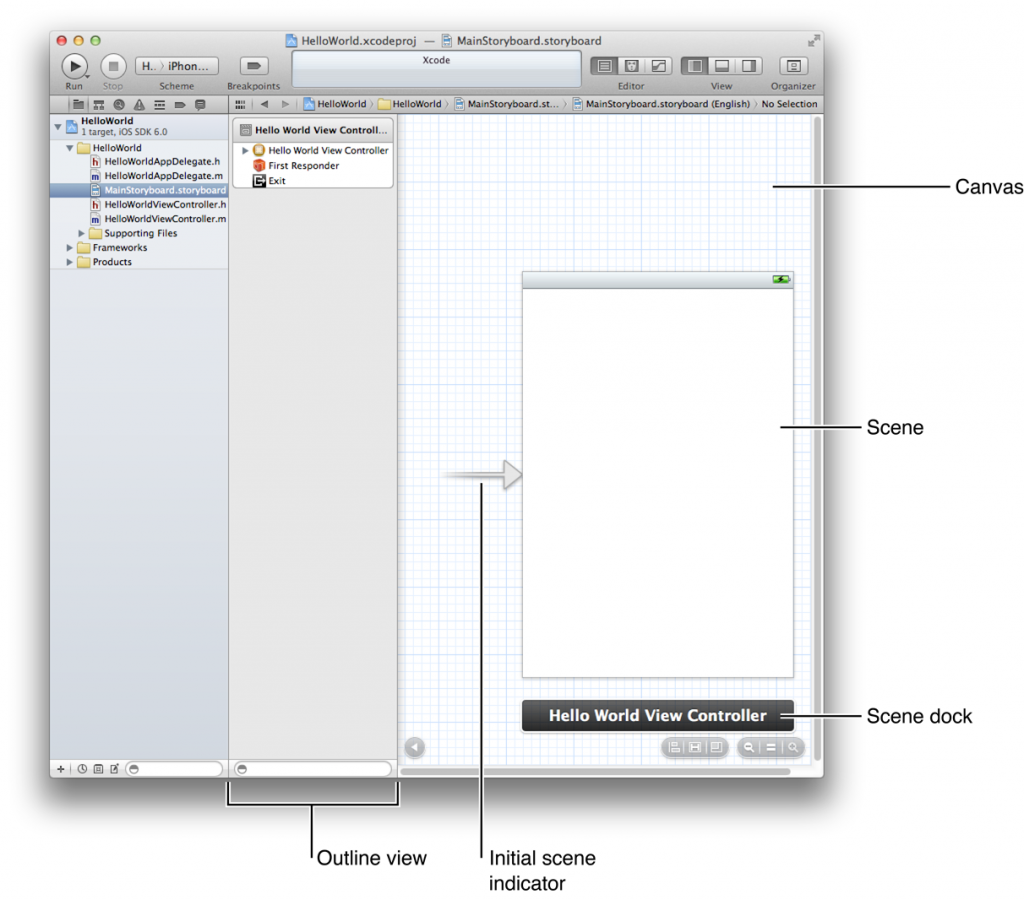
- In the middle pane select the Controller you want to handle the initial view
- To display the Utilities pane click the right View button in the upper right corner
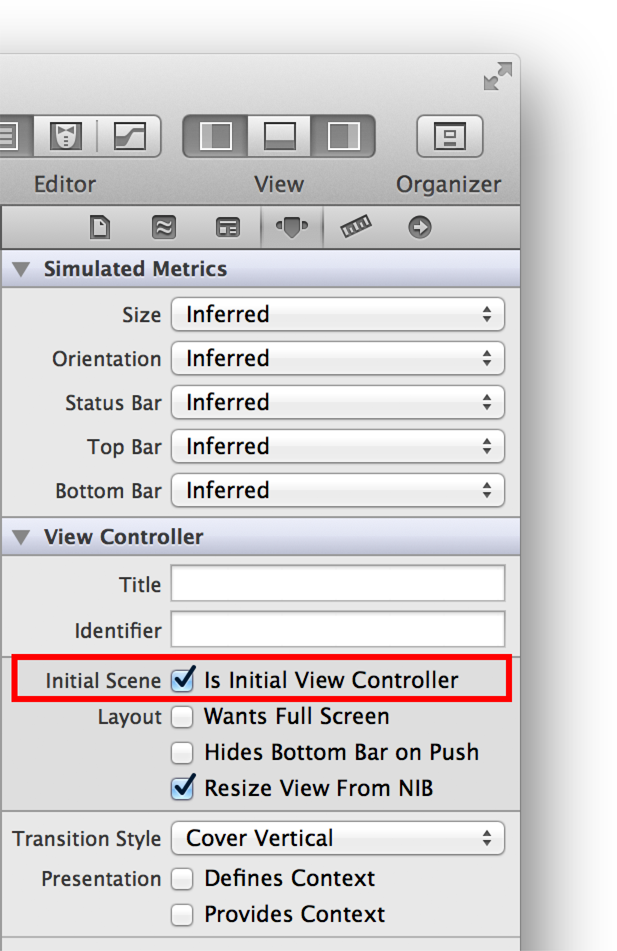
- To display the Attributes click the Attributes icon in the Inspector selector bar
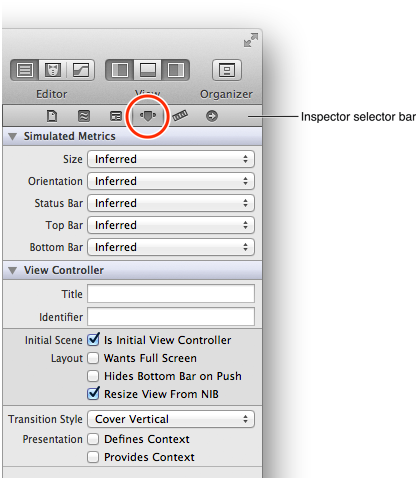
- In the View Controller section click the Initial Scene check box
Set the background color of the view
- In the middle of the screen select the view you want to modify
- Open the Attributes inspector as described above
- In the Attributes inspector set the background color
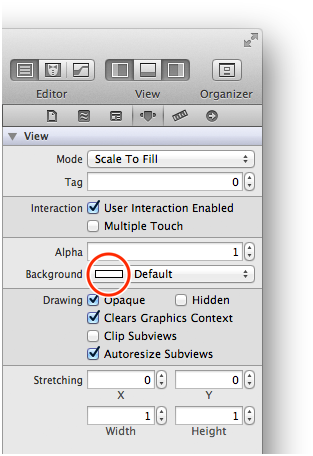
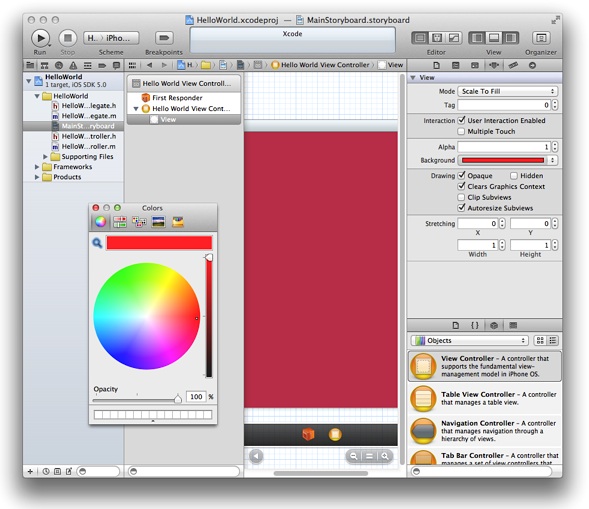
To open the color wheel to select from all possible colors select Other in the Background drop down list
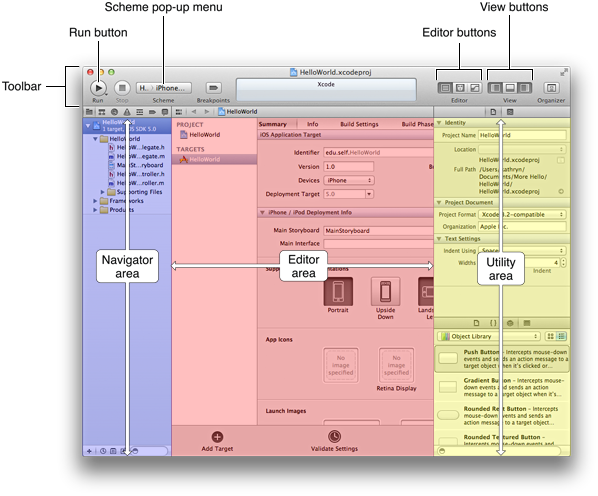
Run the application in the iOS Simulator
- Select the device you want to simulate in the Scheme pop-up menu on the top of the screen next to the Stop button
- Click the Run button to compile and run your app
- The simulator does not have a stop button, but you can close it in the iOS Simulator menu.