The motherboard BIOS update can cause problems, it is possible that after the update the computer does not boot anymore.
The ASUS motherboards come with the USB BIOS Flashback feature to load the BIOS even if the computer does not boot anymore.
The process below is for the ASUS P8Z77-V PRO/THUNDERBOLT motherboard, but all modern ASUS motherboards provide the same functionality.
Before BIOS update make sure you load the optimized BIOS configuration, otherwise after the BIOS update the computer may not boot anymore
Load the optimized BIOS configuration before the BIOS update
- Restart the computer,
- During the startup press the Del button to enter the BIOS setup,
- Press F5 to load the optimized configuration,
- Press F10 to save the changes and exit.
To reload the BIOS after a failed update
To fix a corrupted BIOS, you need access to a working computer that is connected to the Internet and a USB stick (pen drive) that is formatted with the FAT file system. Older motherboards cannot read the NTFS file system during the BIOS Flashback process.
Download the “Bios Renamer for USB BIOS Flashback” utility
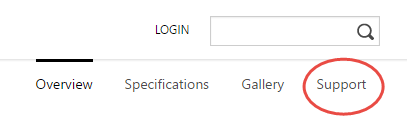
- On the asus.com web site select Support in the menu,
- Select Consumer,
- In the search box enter the model of your motherboard,
- In the sub-menu of the product page select Support,
- Click Driver & Tools,
- In the Please select OS drop down menu select Others,
- In the BIOS-Utilities section download the Bios Renamer for USB BIOS Flashback.
Download the BIOS for your motherboard
- In the Please select OS drop down menu select the operating system you use,
- In the BIOS section download the latest BIOS file.
Rename the downloaded BIOS file
The USB BIOS Flashback searches for a specific file on the USB device that you insert into the BIOS FlashBack USB port (marked with green border). The Bios Renamer for USB BIOS Flashback utility will rename the downloaded BIOS file to the correct name for your mother board
- Create a folder for the BIOS file,
- Extract the BIOS file from the downloaded BIOS zip file and place it in the folder,
- Extract the BRenamerl.exe utility from the zip file and place it in the same folder,
- Double click the BRenamerl.exe file to execute it. The program will rename the BIOS file, so the Flashback utility can find it.
- Copy the renamed file to the FAT formatted USB stick.
The BIOS file names
| Motherboard model | BIOS file name |
| P8Z77-V PRO/THUNDERBOLT | Z77VPTB.CAP |
Flash the BIOS of the unresponsive ASUS motherboard
- Turn off the computer,
- Open the computer case to get access to the component side of the motherboard,
- Insert the USB stick into the green framed USB Flashback port,
- Plug the computer into the wall outlet,
- If the power supply has a switch, turn it on, but do not start the computer,
- Keep the BIOS Flashback button pressed on the motherboard for 3 seconds,
- If the BIOS Flachback LED keeps blinking, the update starts. When the LED goes dark, the update has completed.
- If the BIOS Flachback LED blinks a few more times and stays lit, the USB drive is not inserted to the correct port, not readable, the BIOS file name is not correct, or the file is corrupted. Turn on the computer for a few seconds to clear the BIOS Flashback LED light.
- If the BIOS Flashback light goes out in a few minutes, the BIOS flashback has succeeded.
Load the optimized BIOS configuration as described at the top of this post.
What if the FLBK_LED stays on for..ever ?
@Amine, Make sure you rename the BIOS file, otherwise the installer cannot find it.