We have already created a Docker image for the server using Nginx. We will create an AWS ECS Fargate cluster in AWS and host the container there.
Create an ECR repository for the image
Select the Elastic Container Registry

Create a new repository

Enter a name, enable Tag immutability and Scan on push

Select the repository you just created and click the View push commands button

Follow the instructions on the next page to authenticate in the registry, build your Docker image and push it to the registry.
 # Authenticate in ECR
 aws ecr get-login-password --region us-east-1 | docker login --username AWS --password-stdin MY_ACCOUNT_NUMBER.dkr.ecr.us-east-1.amazonaws.com/MY_ECR_REPOSITORY_NAME
 # Build the image
 docker build -t MY_DOCKER_IMAGE_NAME .
 # Tag the image
 docker tag robbers-rummy-server:latest MY_ACCOUNT_NUMBER.dkr.ecr.us-east-1.amazonaws.com/MY_DOCKER_IMAGE_NAME:$1
 # Push the image
 docker push MY_ACCOUNT_NUMBER.dkr.ecr.us-east-1.amazonaws.com/MY_DOCKER_IMAGE_NAME:$1
If this is the first ECS cluster of the account the Getting Started button launches the ECS Wizard. See Using the ECS wizard to create the cluster, service, and task definition below.
Create the ECS cluster
Create a new ECS cluster in the new VPC
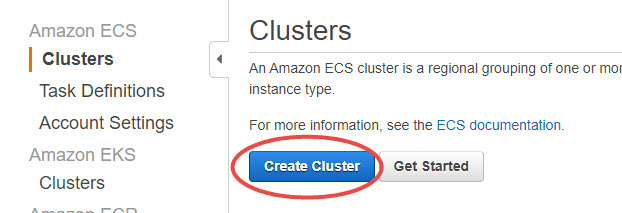
- Select the Fargate cluster template

For production clusters, add a third subnet for redundancy. This way of one of the availability zones develop issues, the cluster can use the third subnet for high availability.

For production clusters also enable Container Insights for advanced logging

Create a security group
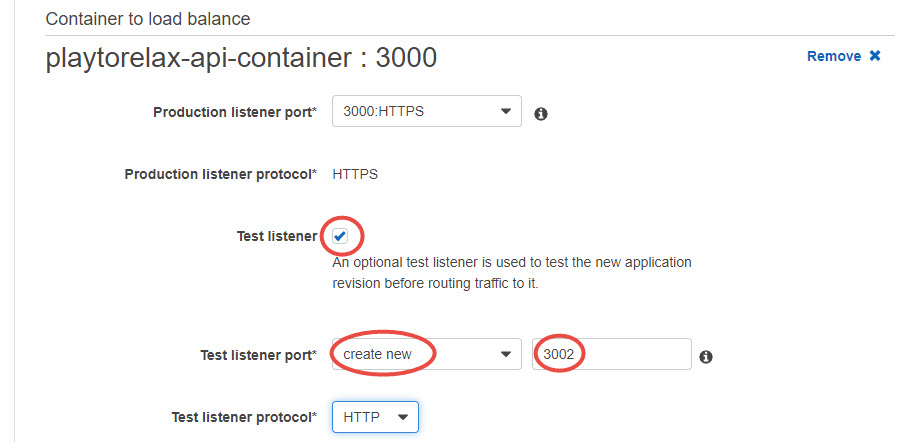
Create a security group in the new VPC with an ingress rule for the necessary port and protocol. Open port 3000-3001 for production and test for blue-green deployment.

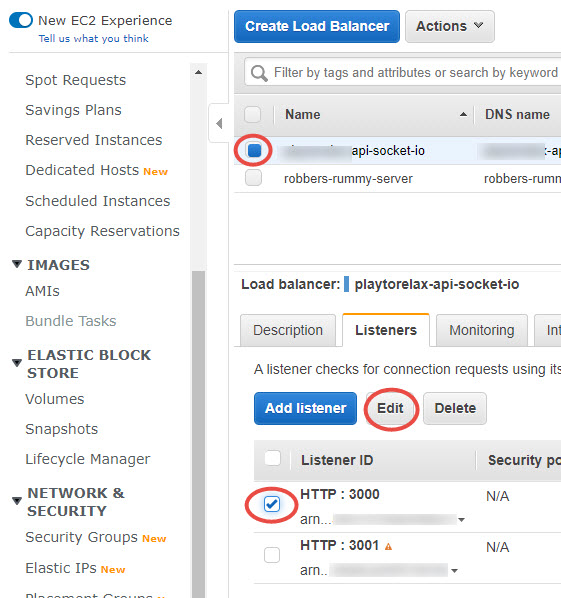
Create an Application Load Balancer
Create a new Application Load Balancer in the new VPC, but do not add any listeners and target groups. Those will be created by the ECS Fargate Service creation.

This is fine, we don;t need listeners now.

Add the security group to the Load Balancer.
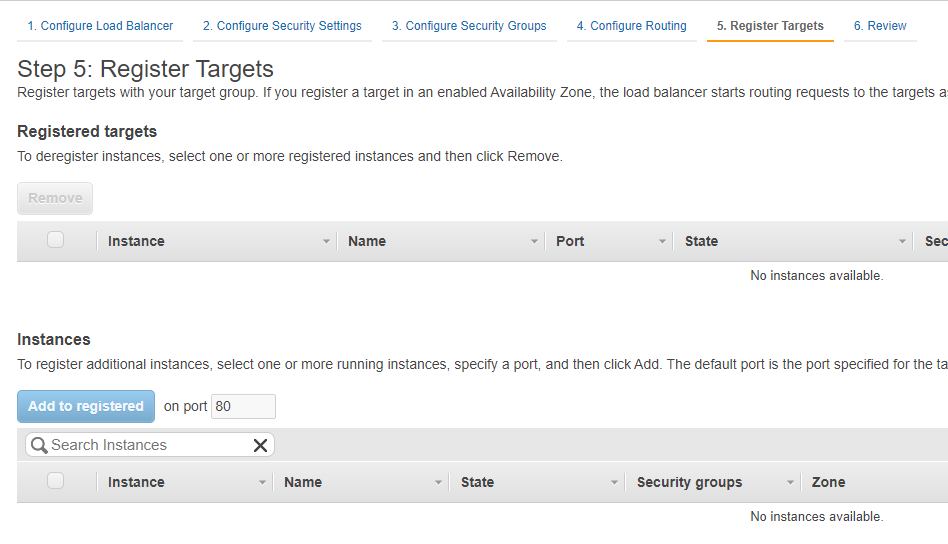
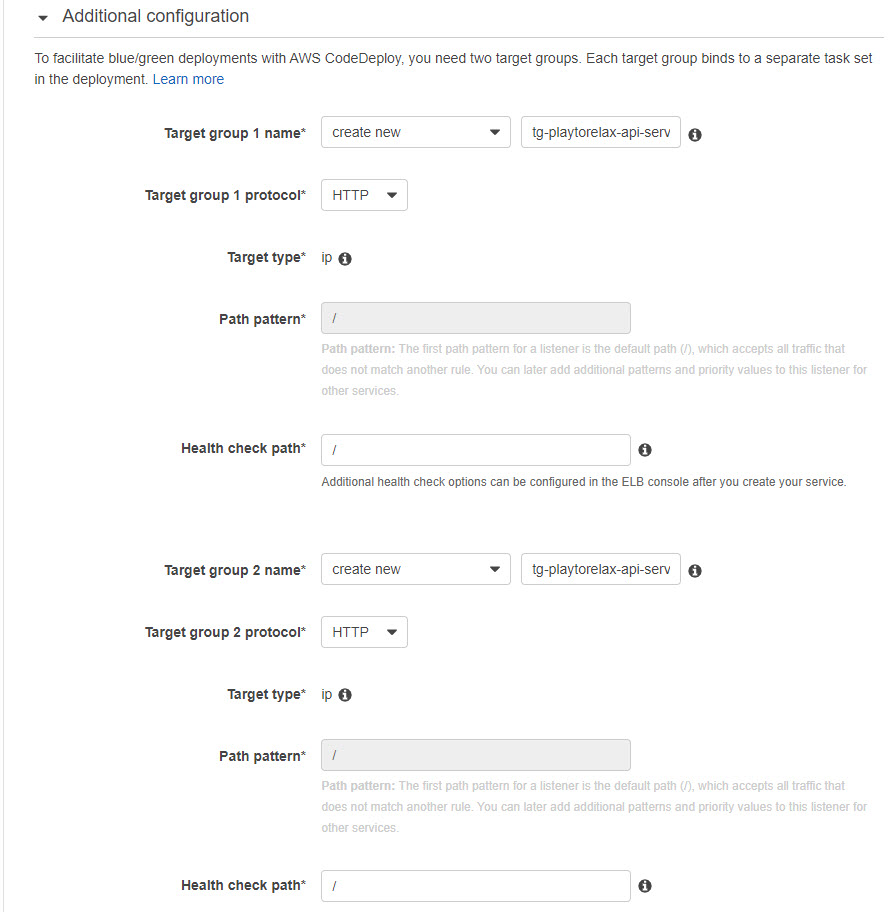
We have to create a temporary target group, we will delete it later.
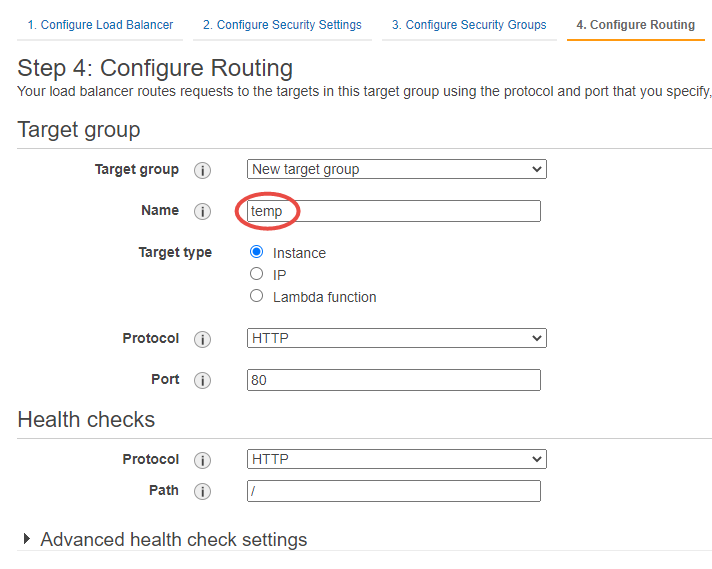
Do not register any targets, the ECS service creation process will create the target group and register the target.
Create an ECS Task Definition
We will use the task definition when we will create the Service
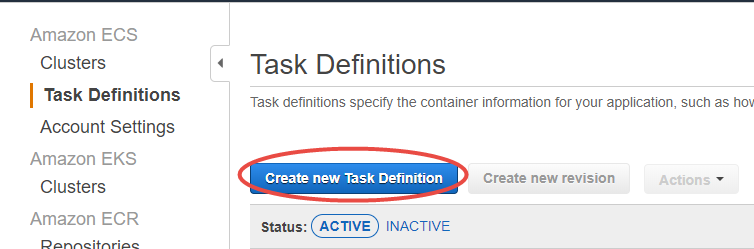
In this example, we will create a Fargate Task Definition


Select the memory, CPU sizes and click the Add container button
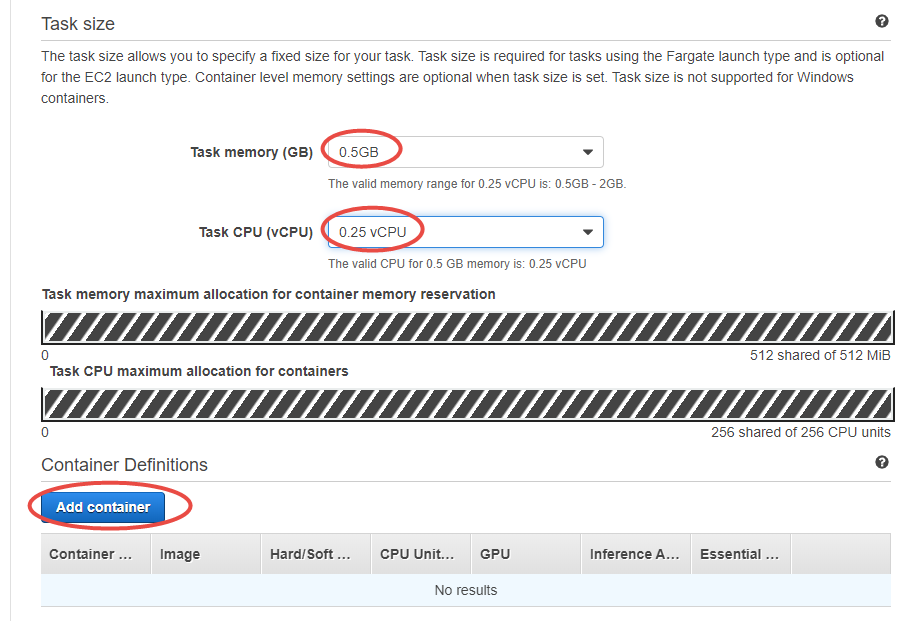
Configure the container

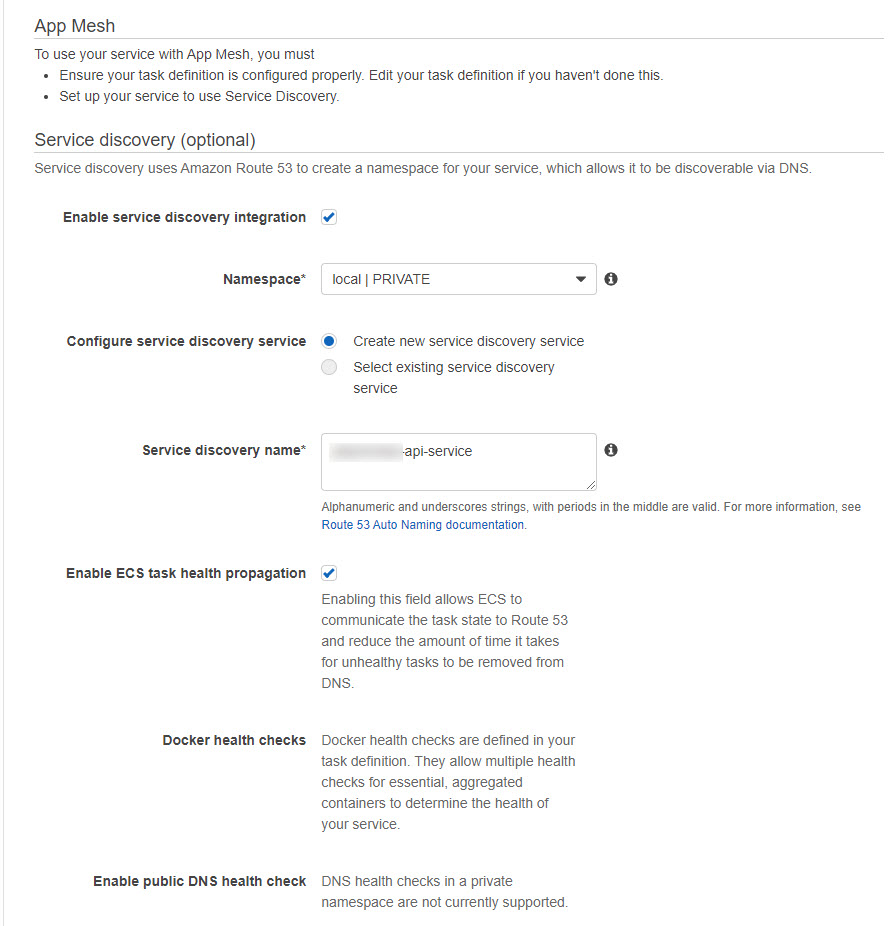
Set the environment variables

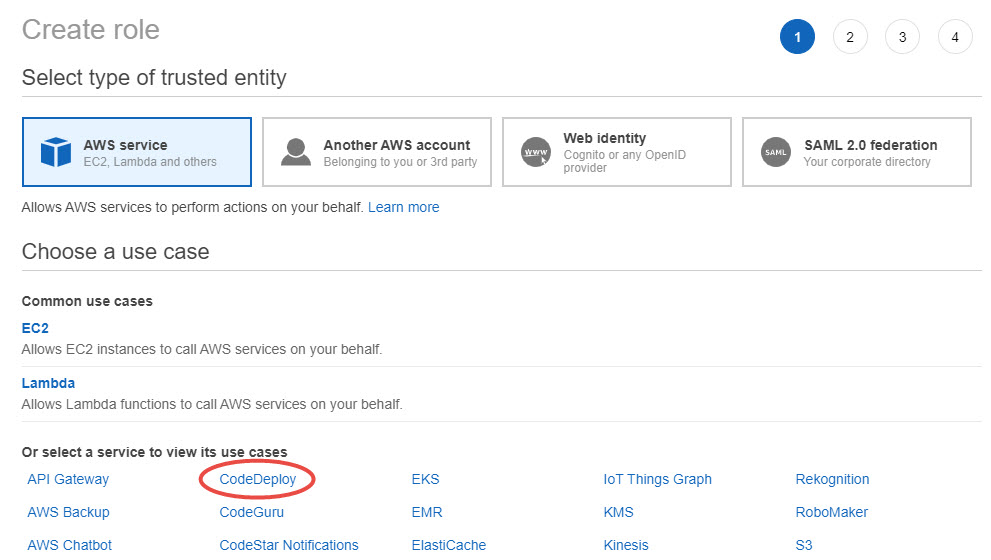
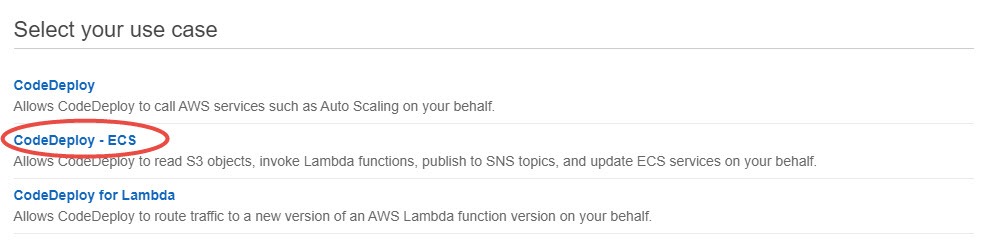
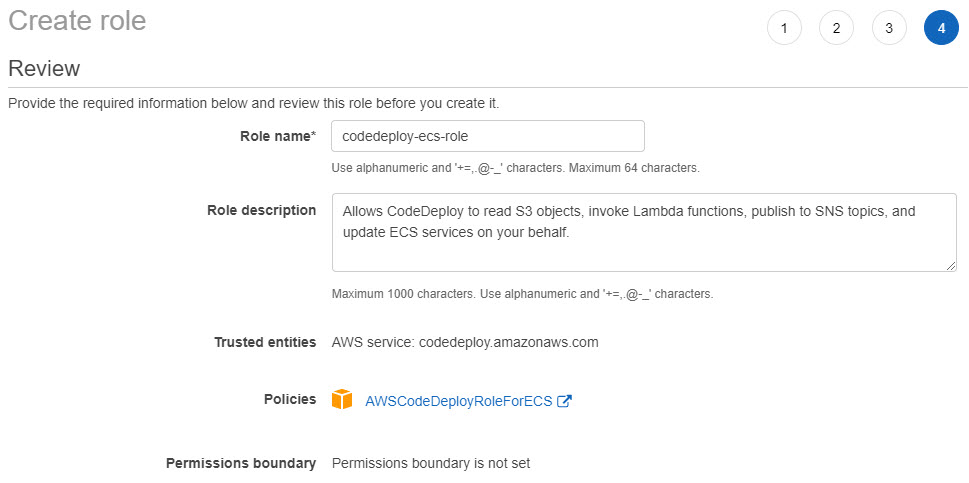
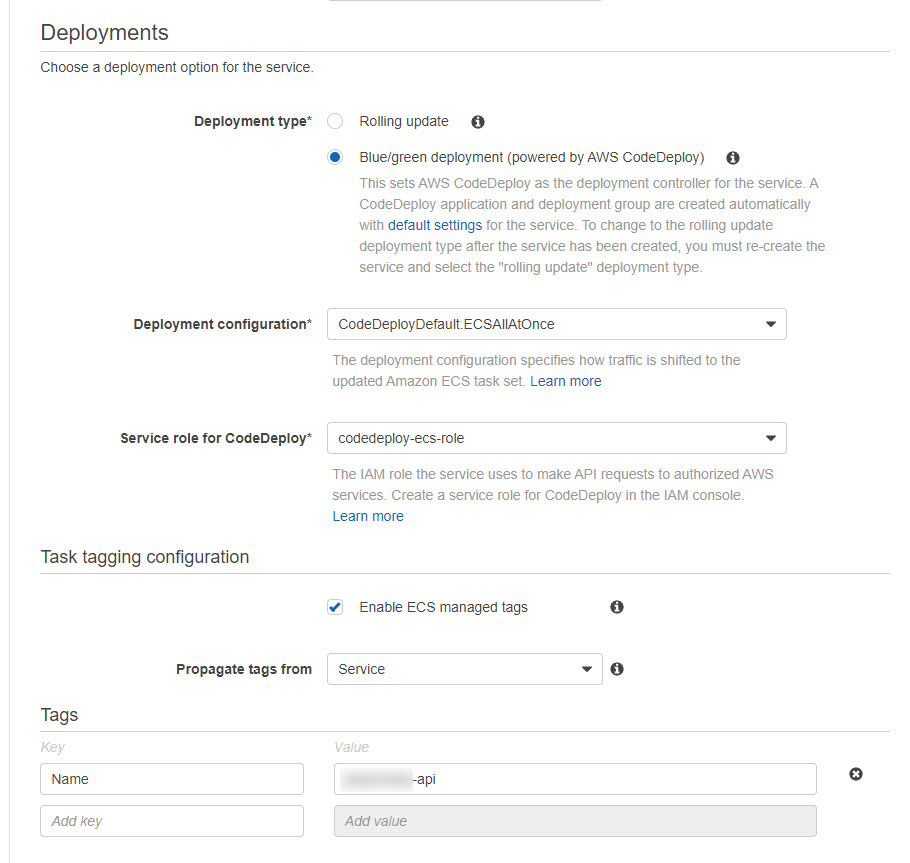
Create a service role for CodeDeploy
Create a service role for CodeDeploy in the IAM console.
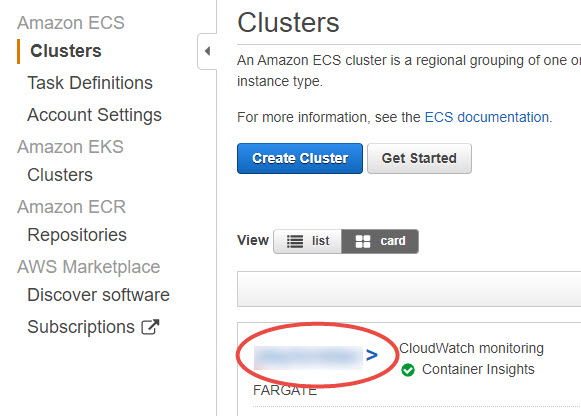
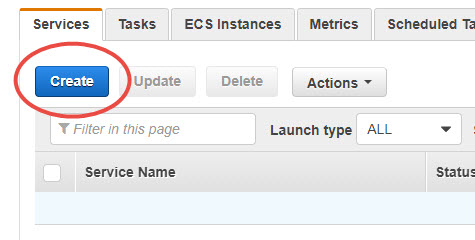
Create the service
Create a new Farate service in the new cluster. Click the name of the cluster.
On the Services tab click the Create button

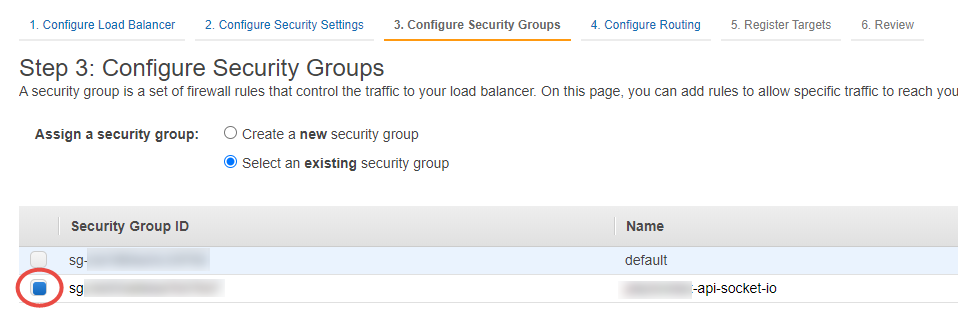
- Select the new VPC, the subnets, and click the Edit button to select the new security group

- Select the new security group

Click the Add to load balancer button to add the container to the load balancer. Select the Application Load Balancer type
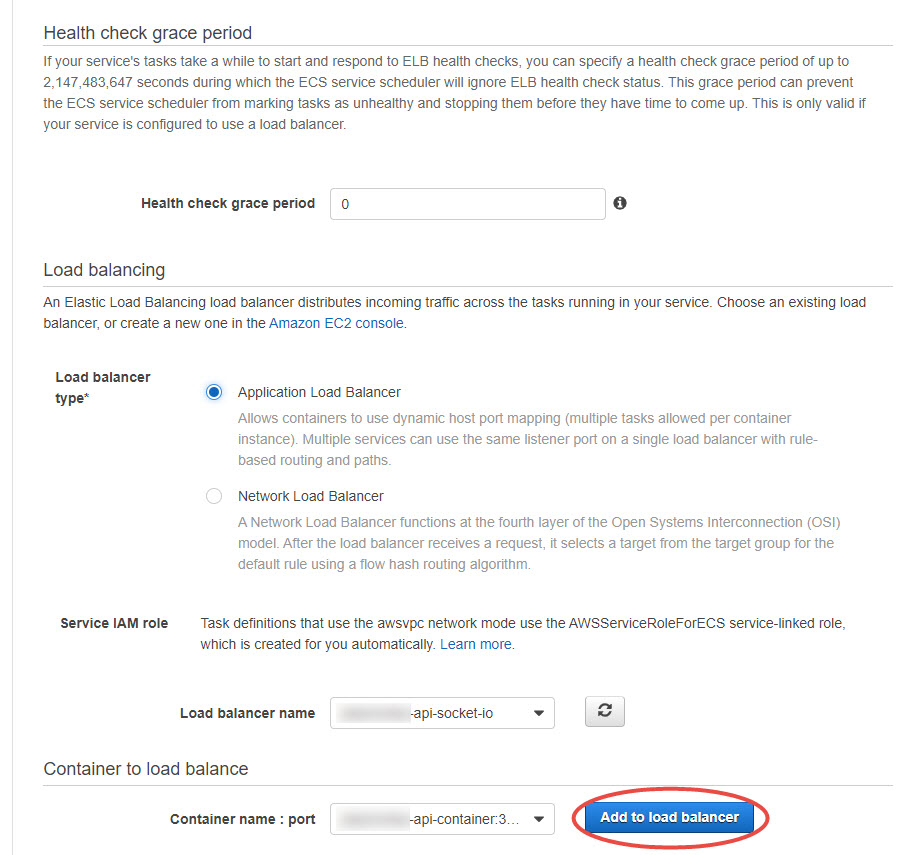
- Select HTTP for the listeners, for some reason at the time of writing we cannot select the SSL certificate on this page
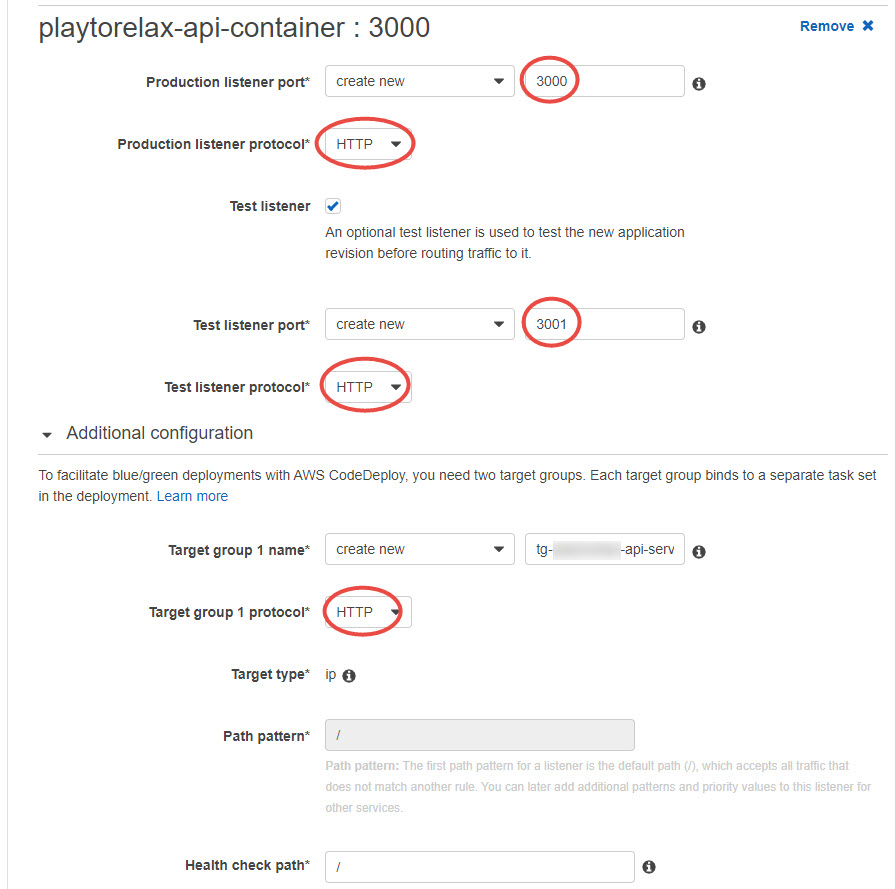
Create a new listener for testing during the blue-green deployment
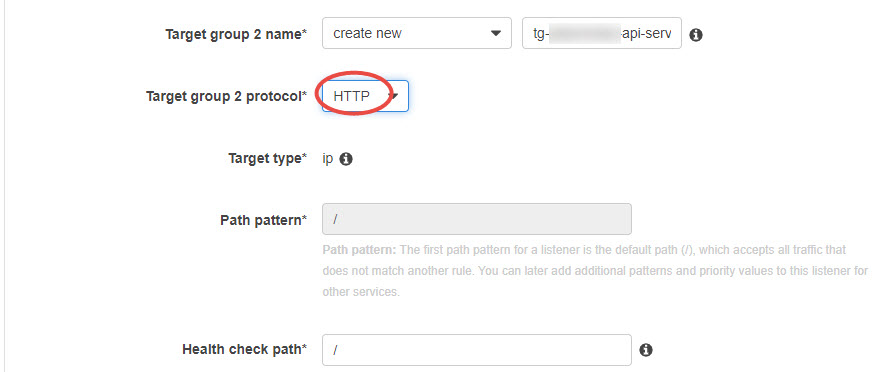
Edit the name of the target groups if needed
For now, we don’t set up autoscaling

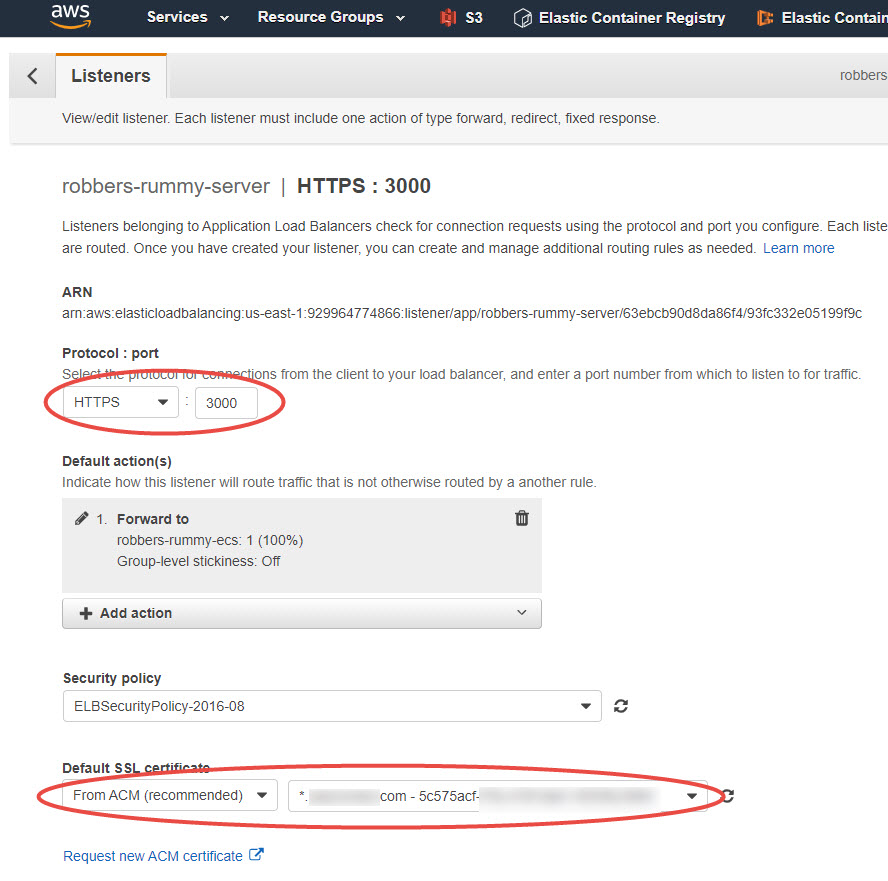
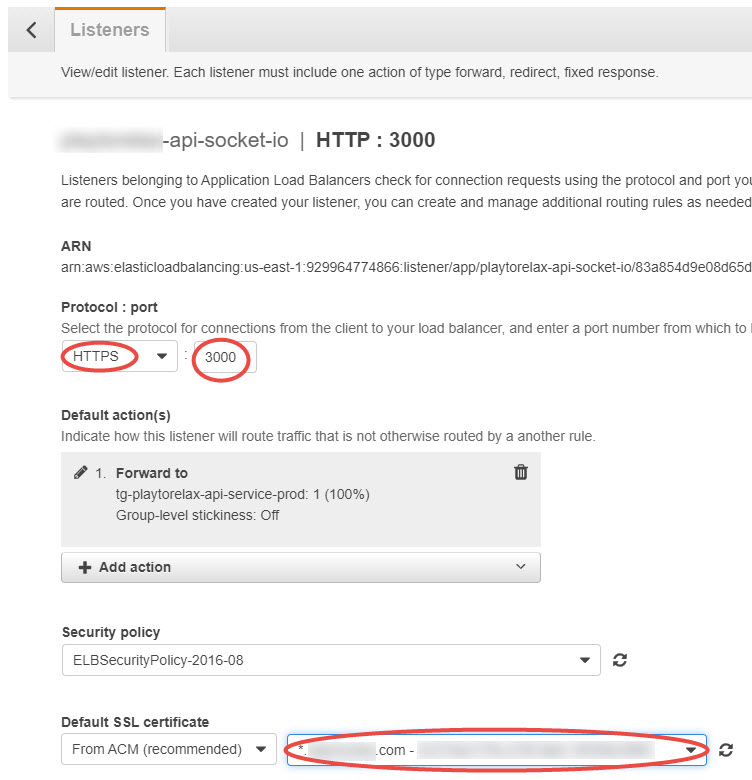
Enable HTTPS in the load balancer listeners
Select HTTPS, port 3000, and the certificate
Add 404 to the health check success codes
Socker.IO returns 404 when we call the root path, so add 404 to the target group health check success codes
- Select the target group name

- In the Health Check settings panel click the Edit button

- Click the Advanced Settings arrow
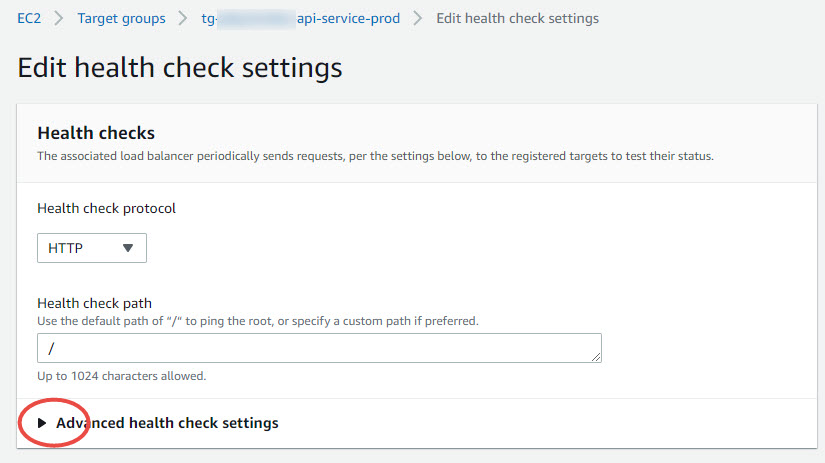
Add 404 to the success codes

If this is the first service of the cluster, the wizard will guide you through the Service creation process.
In the AWS console select Elastic Container Service

Click the Get started button

Click the Configure button in the custom configuration

Enter the
- Container name
- Image
- Memory limits (soft limit) = 512
- Container port = 3000

Click the Advanced container configuration arrow

Add the environment variable NODE_ENV=production

Under Storage and Logging enable Auto-configure CloudWatch Logs

Click the Save button
Keep the default task definition and click Next

Edit the Service definition


Create the load balancer


Add 404 to the health check success codes

When you return from the Load Balancer creation refresh the Load Balancer list


Keep the Cluster definition and click Next

Click the Create button to create the cluster
When enabled, click the View service button


Create a CI/CD pipeline and connect it to an ECR repository


Enable HTTPS in the listener
- Create an SSL certificate in the AWS Certificate Manager
- Update the load balancer listener to use HTTPS on port 3000