React Router, written by the Remix team, provides the missing routing services for React applications, used by 7 million websites. Remix propvides other features to make react application development more intuitive by providing
- Automatic code splitting
- Simplified data loading
- Form Actions, Server actions
- Simplified pending states
- Optimistic UI
- Server rendering
- Static pre-rendering
- React Server Components – RSC (coming soon)
The Remix team also added Vite, as it “has risen substantially in popularity, offering a fast dev experience, optimized builds, and a rich plugin ecosystem and authoring experience.”
As Upgrading from Remix to React Router states “React Router v7 is the next major version of Remix after v2”. React Router v7 now contains the functionality of @remix-run/node, @remix-run/cloudflare, etc.
The blog, Merging Remix and React Router explains the Remix team’s decisions, and give you the reason to make the change.
To upgrade from Remix to React Router 7
Upgrade Node to version 20
React Router v7 requires Node.js version 20 or higher, so at the time of writing most users have to upgrade Node.js.
If you used Homebrew to install Node.js, execute the commands
brew update       # Update Homebrew
brew tap --repair # If brew notifies you about broken references
brew upgrade      # If there are "Outdated Formulae"
brew upgrade node # Update Node.js to the latest stable version
Create a new Remix site using the React Router framework
Follow the instructions at React Router Installation.
At the time of writing these are the recommended steps:
Create the base application
npx create-react-router@latest MY_APP_NAMEIf you want to keep your application in a subdirectory of your repository, select No for “Initialize a new git repository?”. Select Yes for “Install dependencies with npm?”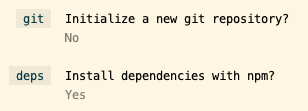
- The process will create a folder matching the name of the application you specify, and will add that name to the package.json file as the “name” element.
- The .gitignore file, and the .git directory will be placed in the application directory. As an application repository usually contains more than just the web application, like Terraform scripts, documentation, move the .gitignore file higher, remove the .git directory and recreate the repository with the
git initcommand in the top level directory of your application. We also need to update the .gitignore file, and remove the leading slashes from all lines, as the node_modules, .react-router, and build directories are not in the root directory anymore. - Make sure at least the “Secrets” section is in the the top level .gitignore file to avoid committing secrets into Git.
.DS_Store

# Secrets
.env
.env*.local
*.pem
terraform.tfstate
terraform.tfstate.backup

# Terraform
.terraform/
.terraform.lock.hcl

# Node.js modules
node_modules/

# React Router
.react-router/
build/
Run the application
cd MY_APP_NAME
npm run dev
Navigate to http://localhost:5173 to view it in the browser.
Copy and update the source code
- Copy the app/models, app/routes/, app/styles directories into the app folder of the new base application structure.
- Execute the codemod to update the package references
npx codemod remix/2/react-router/upgradeSee Upgrading from Remix for more information on this step. Pay attention to the table at Update your dependencies (manual) which shows the old module imports to be replaced by the new imports.
Make your application work
Remove unused imports
Unused imports will trigger unnecessary error messages during the migration. To remove unused imports
- In Visual Studio Code hover above an unused import
- Click Quick Fix
- Select Delete all unused imports

Remove imports
Remove these imports and if indicated import from a new module
| Import | From | To |
| LoaderArgs | react-router | |
| ActionArgs | react-router | |
| json | react-router | |
| Route | “./+types/home” | “./+types/root” |
Replace some lines
Use any instead of LoaderArgs and ActionArgs in the Loader and Action function signature. Use data instead of json to return values from the Loader to the client. Import data from react-router
- export async function loader({ request }: LoaderArgs) {
+ export async function loader({ request }: any) {

- export async function action({ request }: ActionArgs) {
+ export async function action({ request }: any) {

- return json({
+ return data({
    also add import { data } from "react-router";
Update your Make file
If you maintain a Makefile with the list of modules you need to install to make the application work, these modules are installed by React-Router during the application generation
install:
	npm i @react-router/node
	npm i @react-router/serve
	npm i isbot
	npm i react
	npm i react-dom
	npm i react-router

	npm -D @react-router/dev
	npm -D @tailwindcss/vite
	npm -D @types/node
	npm -D @types/react
	npm -D @types/react-dom
	npm -D react-router-devtools
	npm -D tailwindcss
	npm -D typescript
	npm -D vite
	npm -D vite-tsconfig-paths
Update the routing
Edit the app/routes.ts file and set the path for the index to point to your home page. Add all routing to this file.
import { type RouteConfig, index, route } from "@react-router/dev/routes";

export default [
  index("routes/_index.tsx"),
  route("data_editor", "routes/data_editor.tsx")
  route("us/user_editor", "routes/us.user_editor.tsx")
] satisfies RouteConfig;
Run the application
Start the server with the npm run dev command. See Troubleshooting below for the most common error messages.
Install the missing modules
As you refresh the page, the Cannot find module ‘…’ imported from ‘…’ message will let you know which modules need to be installed with the npm install … command. Update the install section of your Makefile to keep the list of necessary modules.
Separate files for server side and client side functions
To make the application work using the new framework and the Vite development tools, we have to make sure the client side files do not reference any modules that are not available in the browser. These include imports of our functions with database access.
The Remix compiler in the past could reference the server side and client side functions from common helper files. Vite needs separate files for the server side and client side.
If a client side file imports a function that contains references to functionality that is not available in the browser, like file system or database access the application compiles without error, the server starts without error, but we will find error messages in the console window of the browser.
Module “events” has been externalized for browser compatibility. Cannot access “events.EventEmitter” in client code. See https://vite.dev/guide/troubleshooting.html#module-externalized-for-browser-compatibility for more details.
Uncaught ReferenceError: process is not defined
at node_modules/pg/lib/defaults.js
In this example our client side helper file only imported, but not called a function that accessed the PostgreSQL database.
Another example, when a function (logInfo) is imported from the server side file, but not used.
Solution: Delete the unused references
To import only a URL
RollupError]: “default” is not exported by ‘./index.css’ imported by “app/index.tsx”.
Style sheets are not compiled into the code, only the browser needs access to them to render the page. To reference style sheets, we only need to import the URL, so the compiler can make sure those are available and include them in the build. To import only the URL, add ?url to the end of the style sheet path.
import { LinksFunction } from "@remix-run/node";

-import styles from "./index.css";
+import styles from "./index.css?url";
Render UI only in the browser
Element type is invalid: expected a string (for built-in components) or a class/function (for composite components) but got: object.
or
React.jsx: type is invalid — expected a string (for built-in components) or a class/function (for composite components) but got: object.
Vite tries to render client side elements in the server. In the client side code render client side code only in the browser.
  // Check if the code is running in a browser
  const [isClient, setIsClient] = React.useState(false);
  React.useEffect(() => {
    setIsClient(true);
  }, []);

  # Render the UI
  return (
    <>
      {isClient ? (
        <Header/>
      ):null}

      {isClient ? (
        <div>
        ... The rest of the UI
        </div>
      ):null}

      {/* Display the Footer component */}
      {isClient ? (
        <Footer/>
      ):null}
      </>

  );
Custom image in the expandIcon
During the migration the compiler did not accept the Material UI icon library. You can use a custom PGN image for the expandIcon of the AccordionSummary:
<AccordionSummary
  expandIcon={<img src="/expand-more-down.png" />}
...
Replace Material UI controls with standard HTML controls
When I ran my application in a Docker container I started to get error messages related to Material UI controls. I replaced those with standard HTML elements. See troubleshooting elow for the full error messages.
| Material UI control | HTML element |
| Box | div |
| AppBar | div |
| Button | custom dropdown menu function |
| Material UI icon library | expandIcon={<img src=”/MY_IMAGE.png” />} |
Troubleshooting
Internal server error: [vite] The requested module ‘…’ does not provide an export named ‘default’
Enclose the function name in curly braces in the import statement. See Module … has no default export
[vite] Named export ‘json’ not found. The requested module ‘react-router’ is a CommonJS module, which may not support all module.exports as named exports.
Remove the json reference from the react-router import
import { json, redirect } from "react-router";[vite] Named export 'GridColDef' not found. The requested module '@mui/x-data-grid' is a CommonJS module, which may not support all module.exports as named exports.
GridColDef is a type, import it with the type prefix. Quick actions can help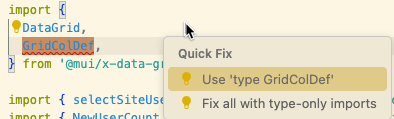
import {
  DataGrid,
  type GridColDef,
} from '@mui/x-data-grid';
(node:18) Warning: To load an ES module, set “type”: “module” in the package.json or use the .mjs extension.
(Usenode --trace-warnings ...to show where the warning was created)
/app/node_modules/@mui/material/Box/index.js:1
export { default } from “./Box.js”;
^^^^^^SyntaxError: Unexpected token ‘export’
When we run the application in a Docker container, we get the SyntaxError: Unexpected token ‘export’ error related to the Box.js. Remove references of <Box> from the application and replace those with <div>.
(node:18) Warning: To load an ES module, set “type”: “module” in the package.json or use the .mjs extension.
(Use `node –trace-warnings …` to show where the warning was created)
/app/node_modules/@mui/material/AppBar/index.js:1export { default } from “./AppBar.js”;
^^^^^^SyntaxError: Unexpected token ‘export’
When we run the application in a Docker container, we get the SyntaxError: Unexpected token ‘export’ error related to the AppBar.js. Remove references of <AppBar> from the application and replace those with <div>.
(node:18) Warning: To load an ES module, set “type”: “module” in the package.json or use the .mjs extension.
(Use `node –trace-warnings …` to show where the warning was created)
/app/node_modules/@mui/material/Button/index.js:1export { default } from “./Button.js”;
^^^^^^SyntaxError: Unexpected token ‘export’
When we run the application in a Docker container, we get the SyntaxError: Unexpected token ‘export’ error related to the Button.js. Remove references of <Button> from the application.