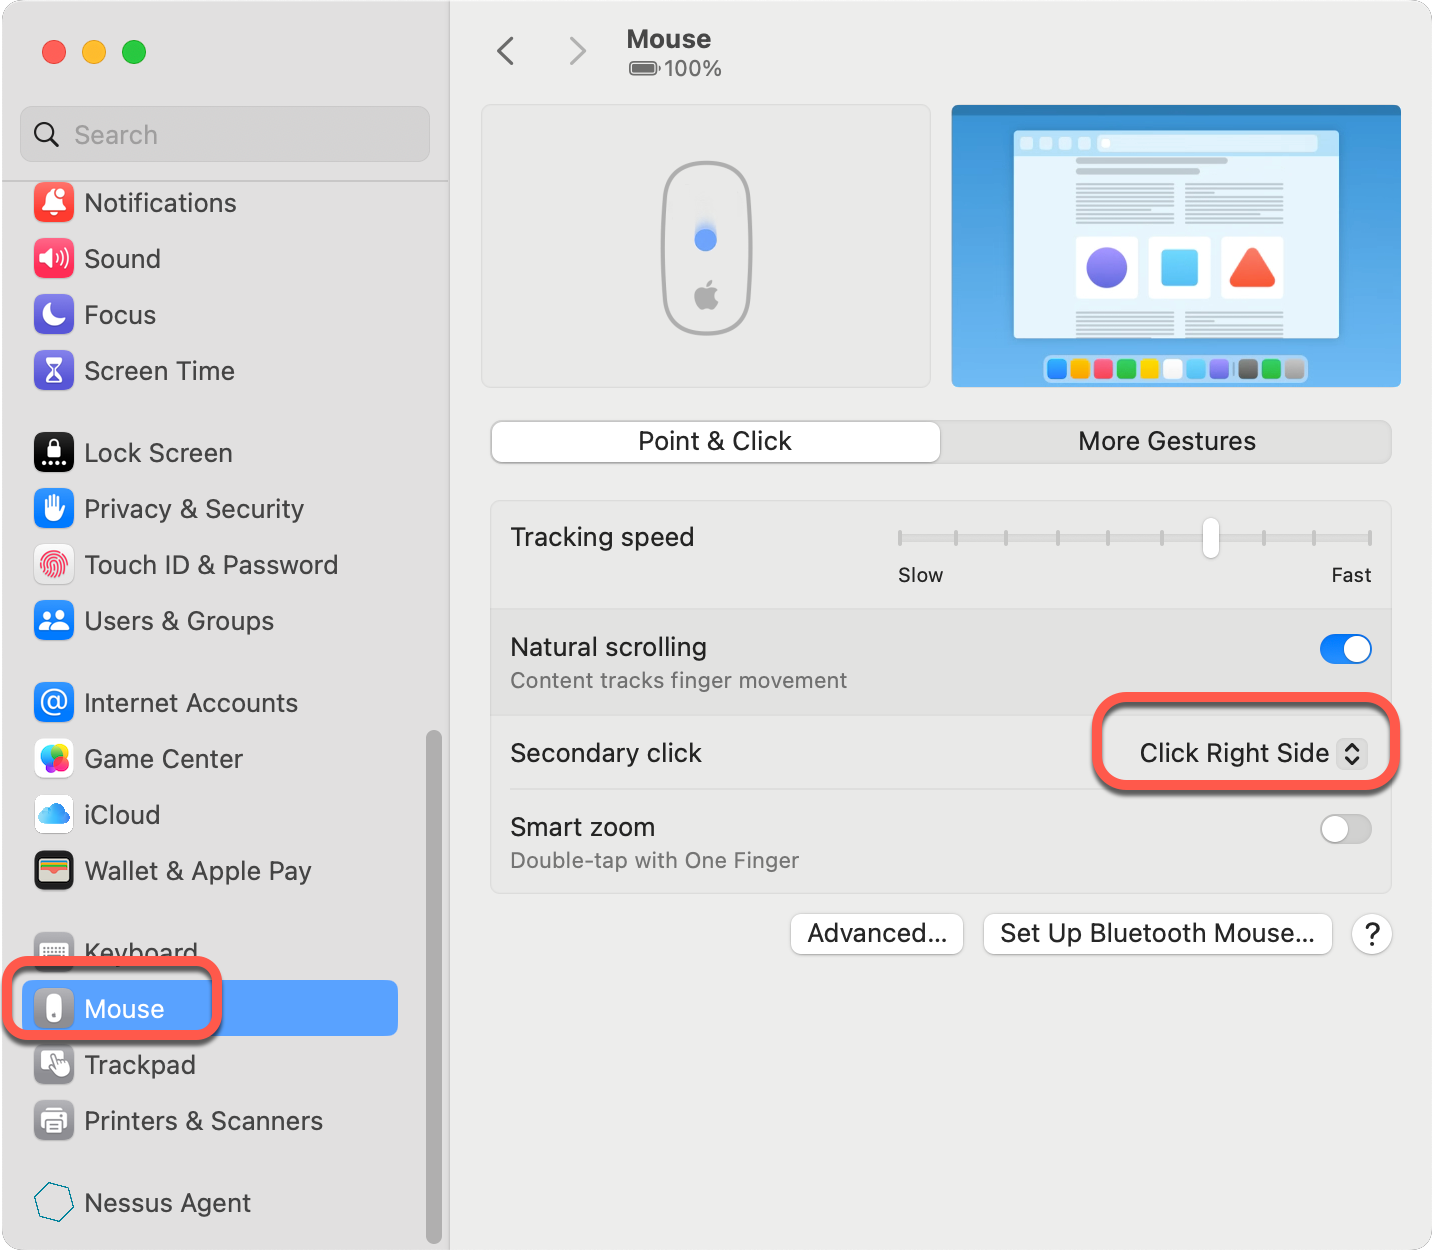
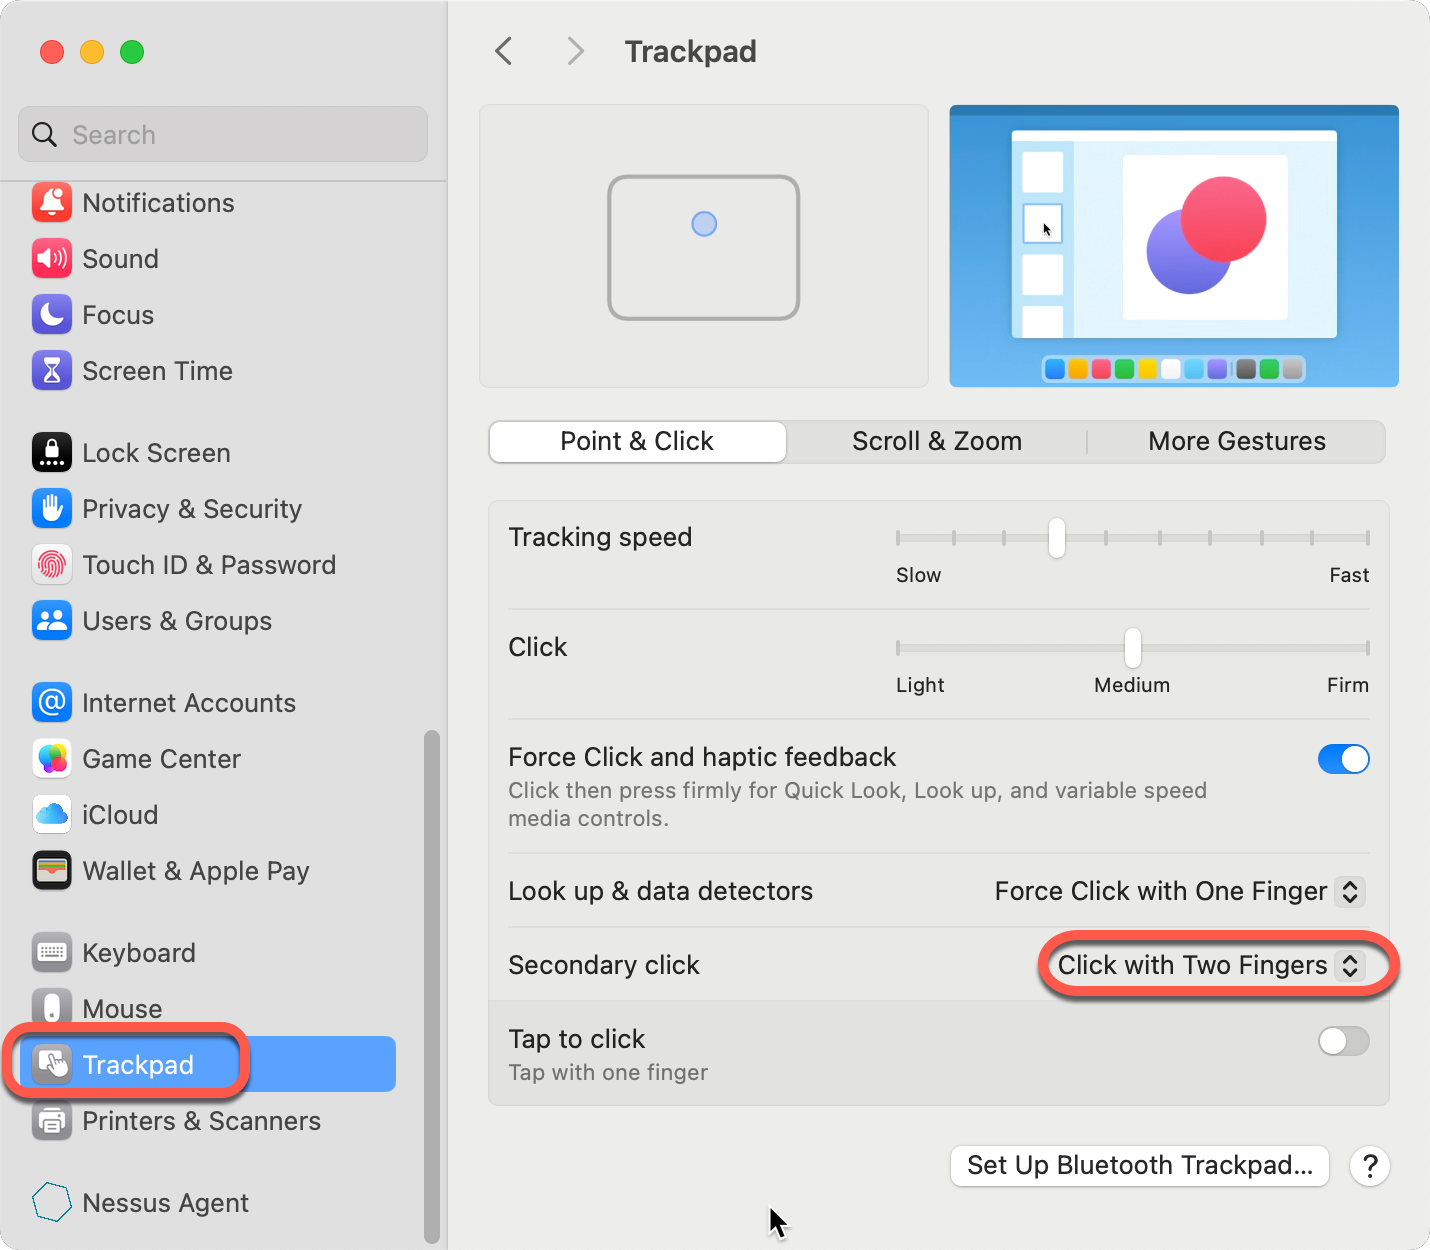
Enable the right-click
To be able the right-click on the mouse
- Open settings.

- Enable Secondary click for the mouse and the trackpad.
Sounds
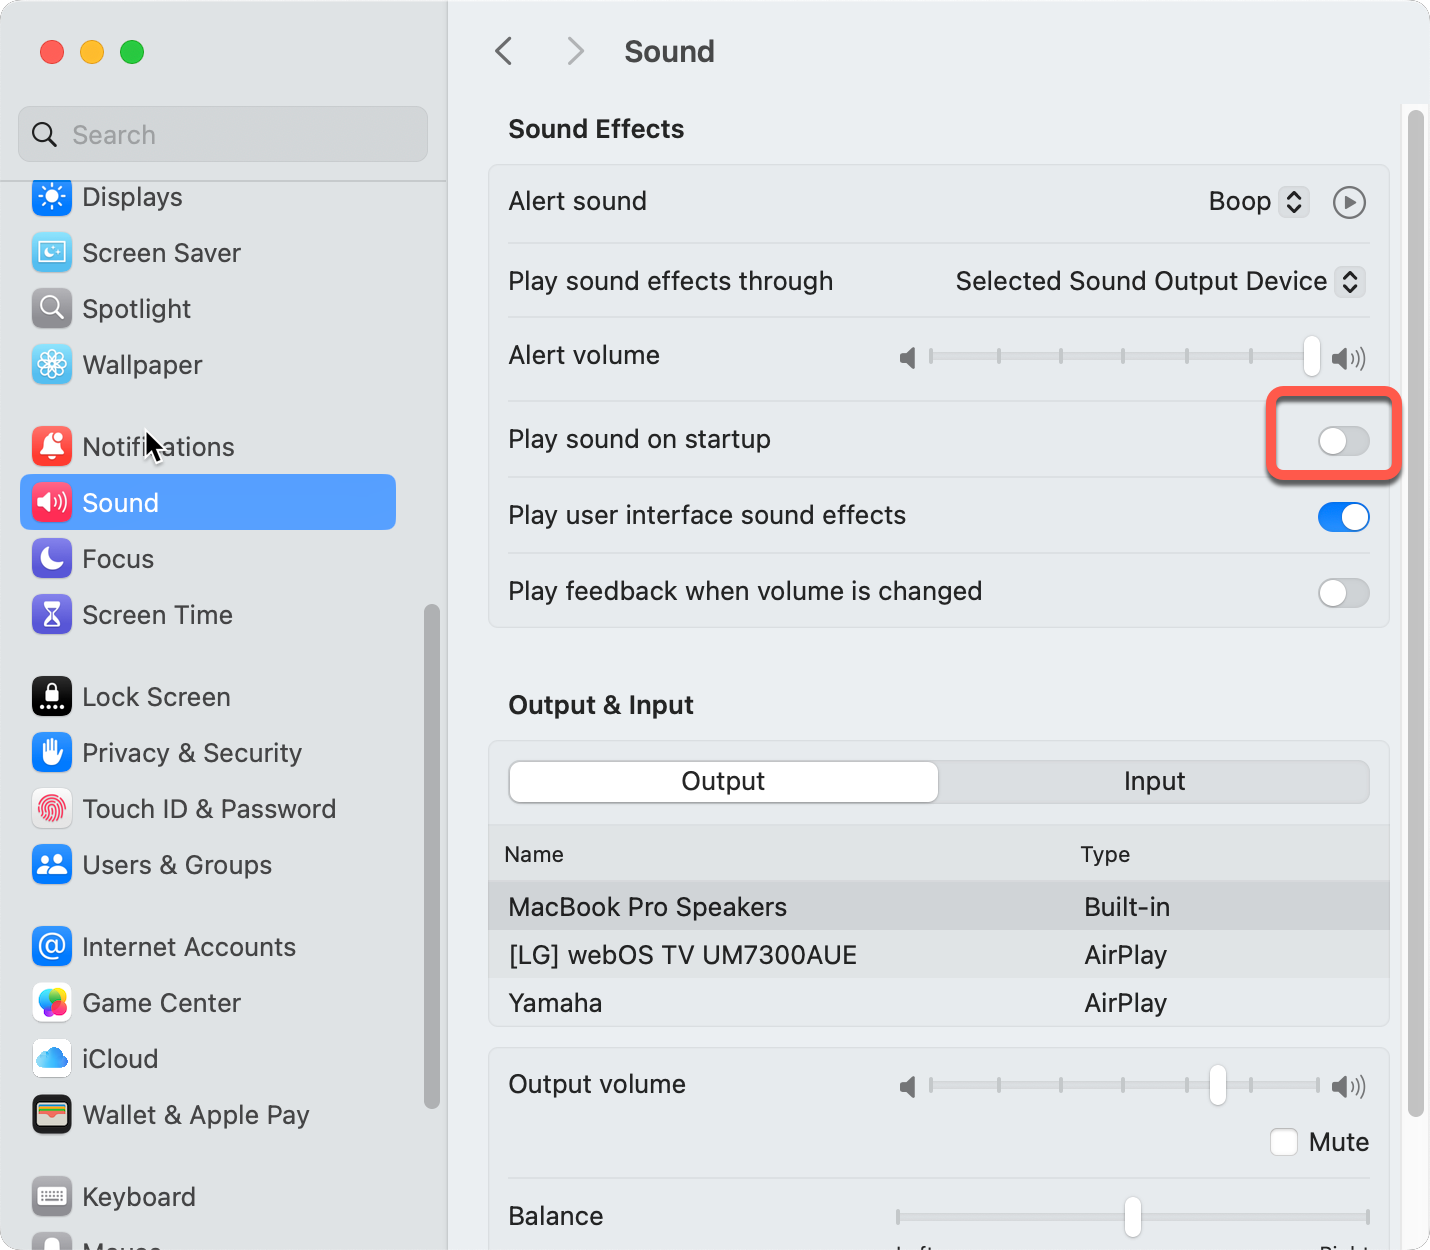
Disable the startup sound
To disable the sond during the computer start
- In System Settings, Sound tab turn off the Play sound on startup
Enable notifications when external monitors are connected
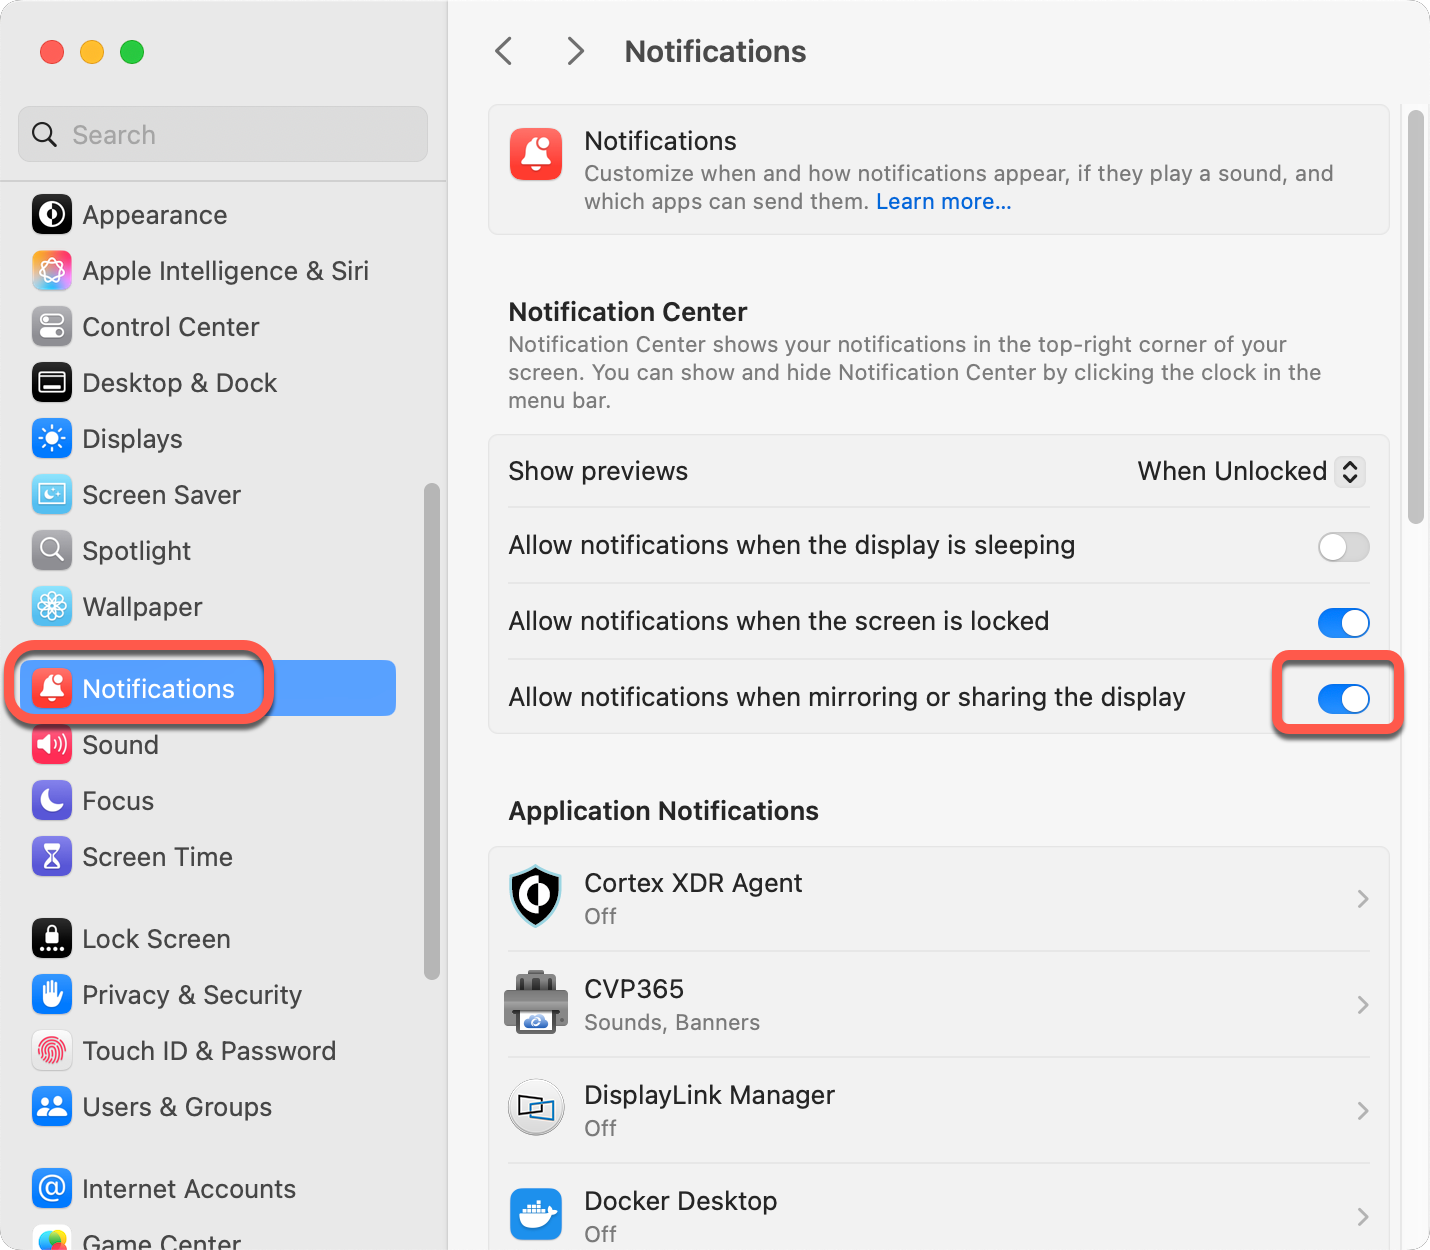
By default notifications are turned off during screen sharing and screen mirroring. This makes screen sharing quieter for the audience, but notifications of arriving emails and Zoom calls are also muted when we use external monitors (screen mirroring). To enable notifications when external monitors are connected:
- In System Settings, Notifications enable Allow notifications when mirroring or sharing the display.
Keyboard
Disable caps lock
If you never write emails with all capital letters, and many times a day accidentally press the caps lock key, you can disable it.
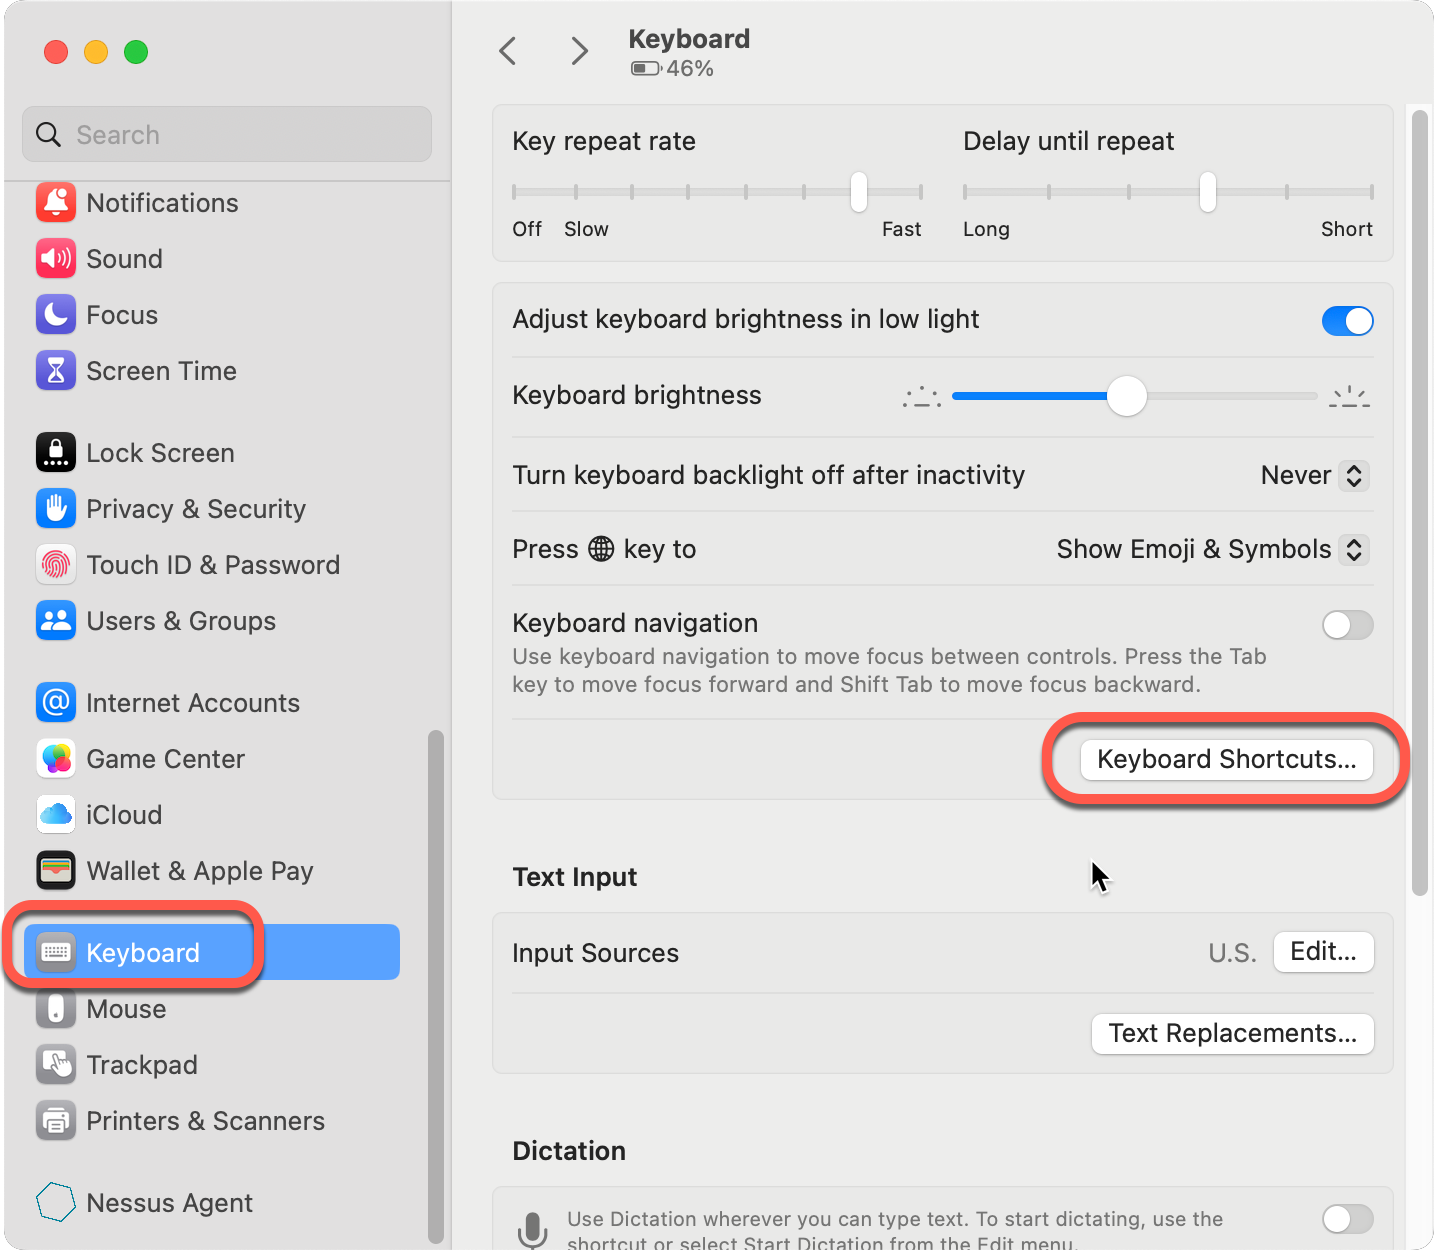
- Open settings.
- Open the Keyboard settings click Keyboard Shortcuts
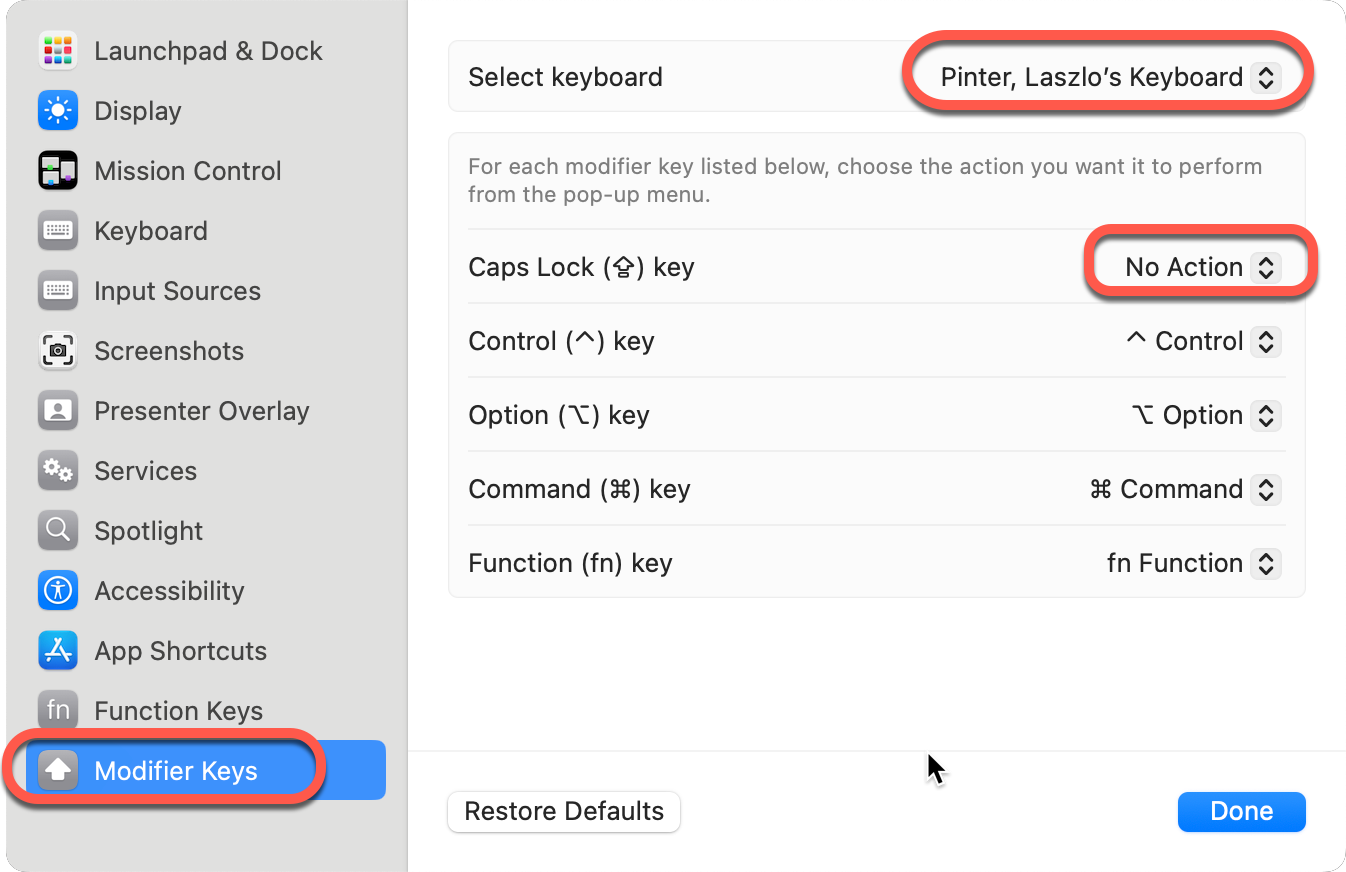
- On the Modifier Keys tab set Caps Lock to No Action for the inernal keyboard.
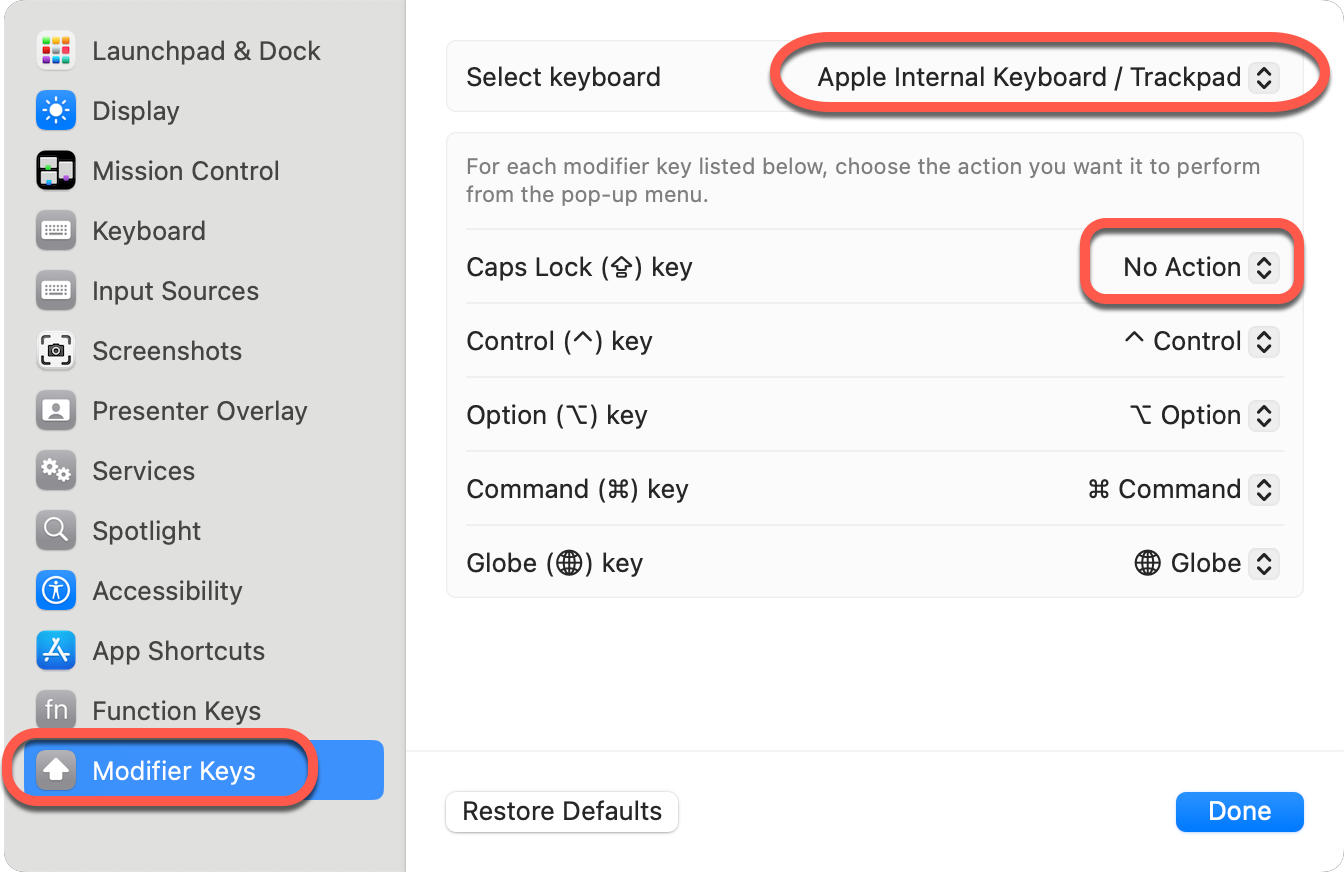
- Set the same for your external keyboard if you have one.
Disable the Globe key
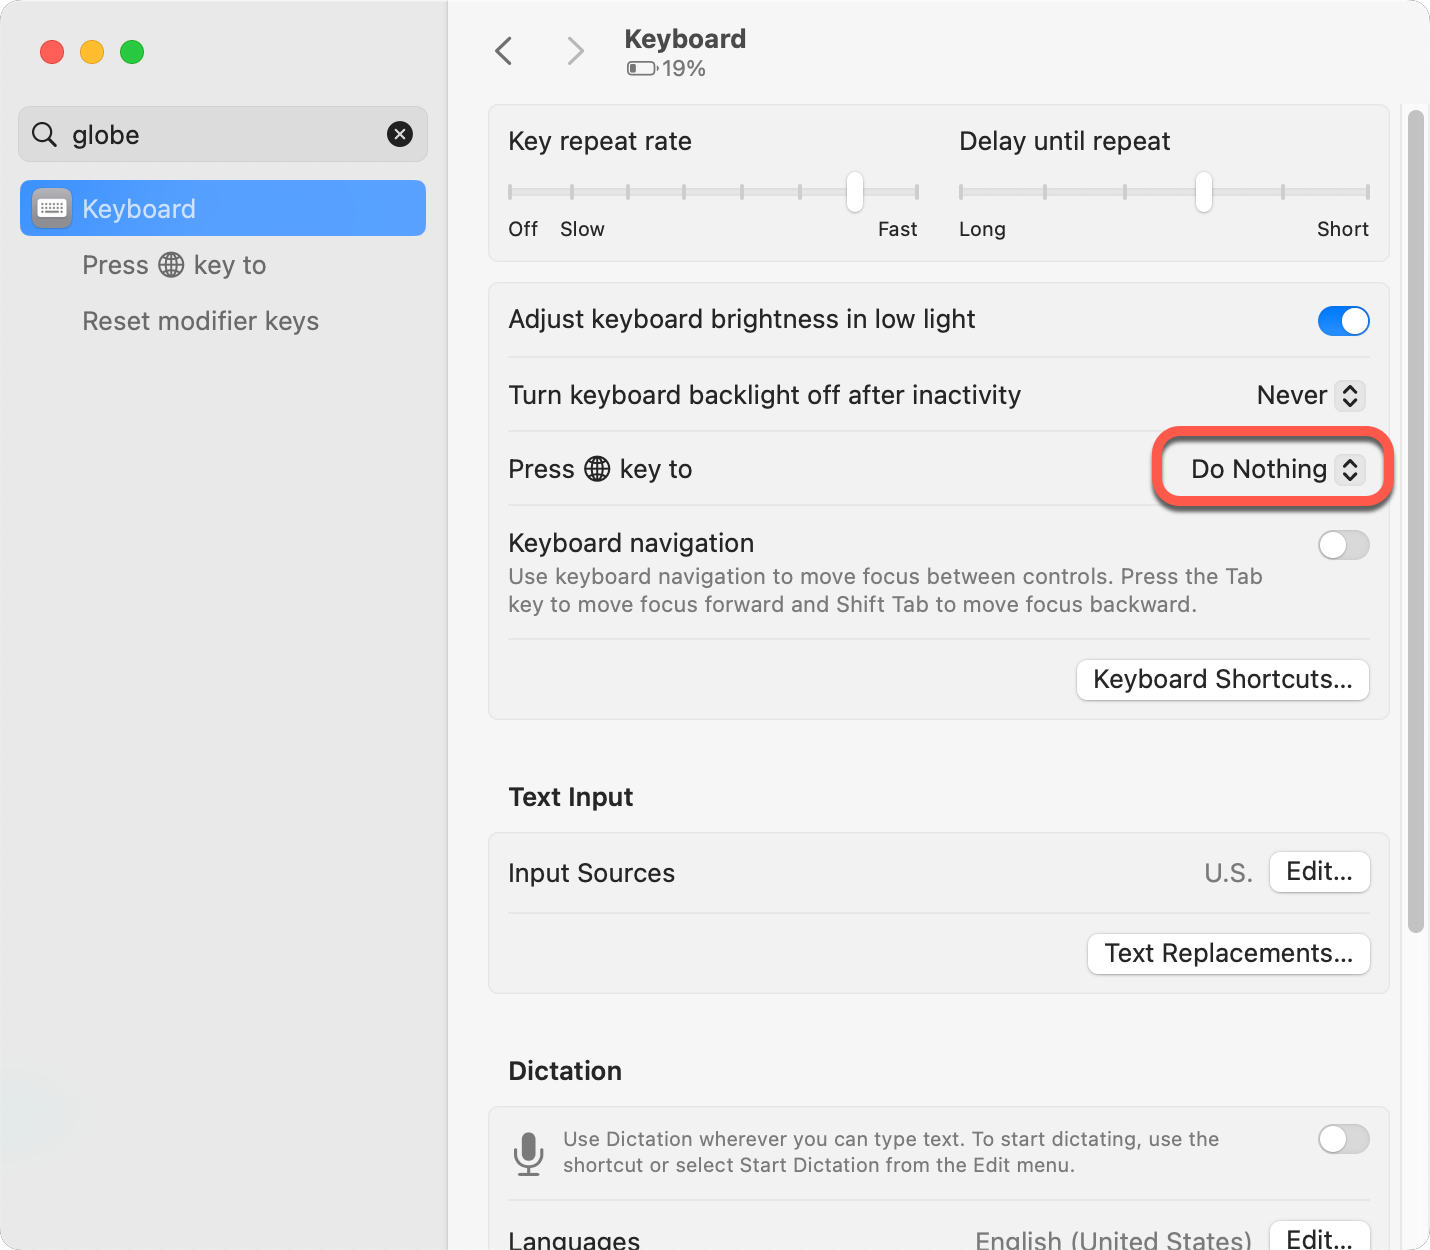
When you press the fn key on the MacBook the emoji selection pops up. It is very annoying during programming. To disable the Globe key
- In Systems Settings, Keyboard set Press globe key to Do Nothing
Free up the F11 key
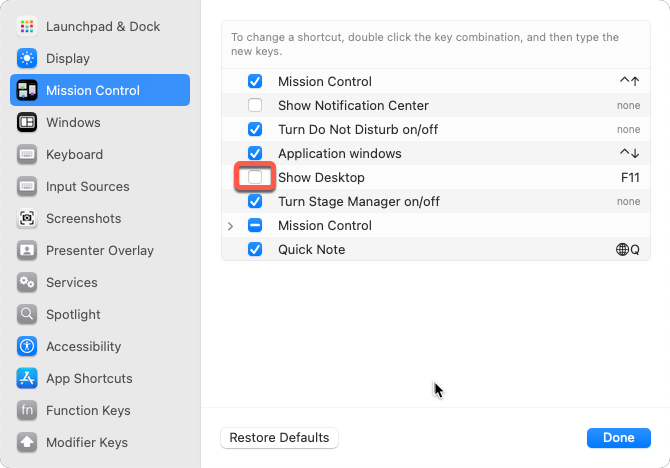
During software development the F11 key is used to step into a method execution during debugging. To be able to use it, disable the default function to display the desktop.
- In System Settings search for Keyboard and click the Keyboard Shortcuts button
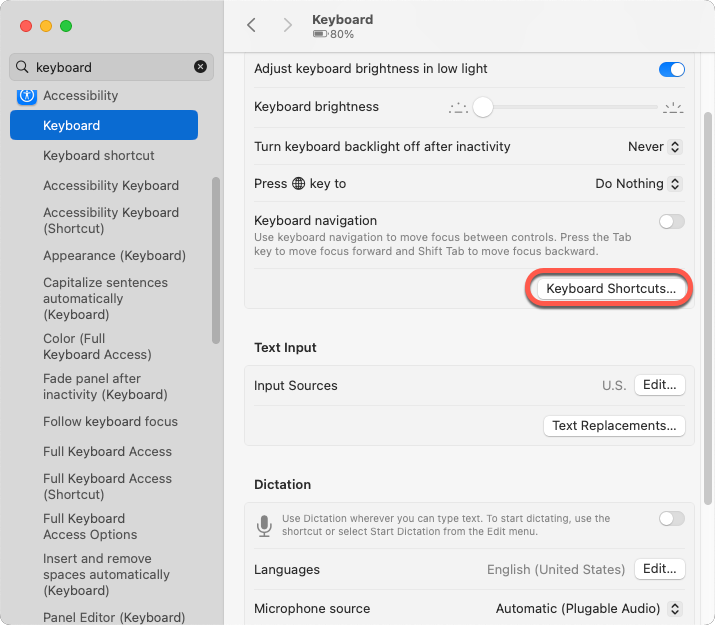
- On the Mission Control tab uncheck Show Desktop
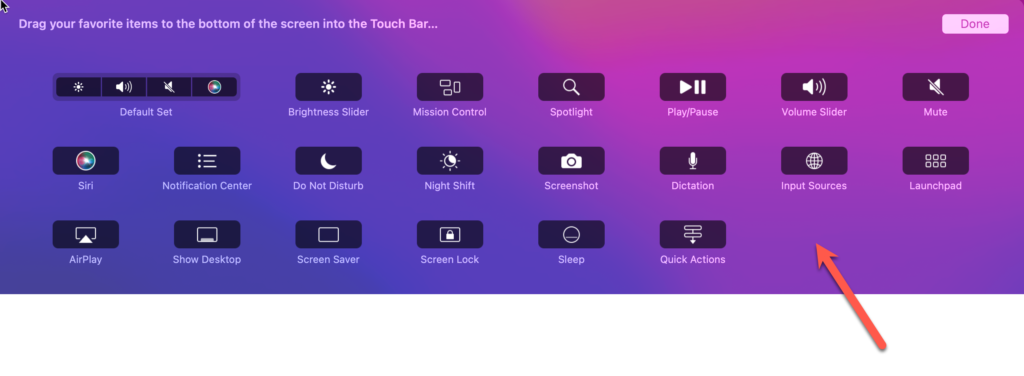
Remove Siri from the control strip
If you don’t use Siri on your Mac, there is no reason for Siri to occupy space on the control strip above the keyboard.
- Open the Keyboard settings
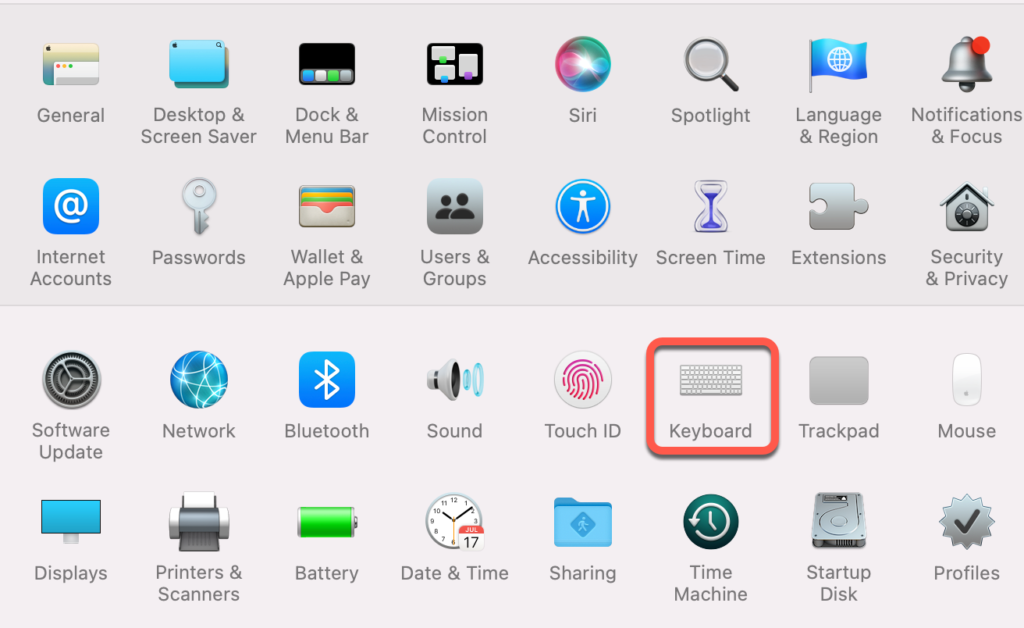
- On the Keyboard tab click the Customize Control Strip button
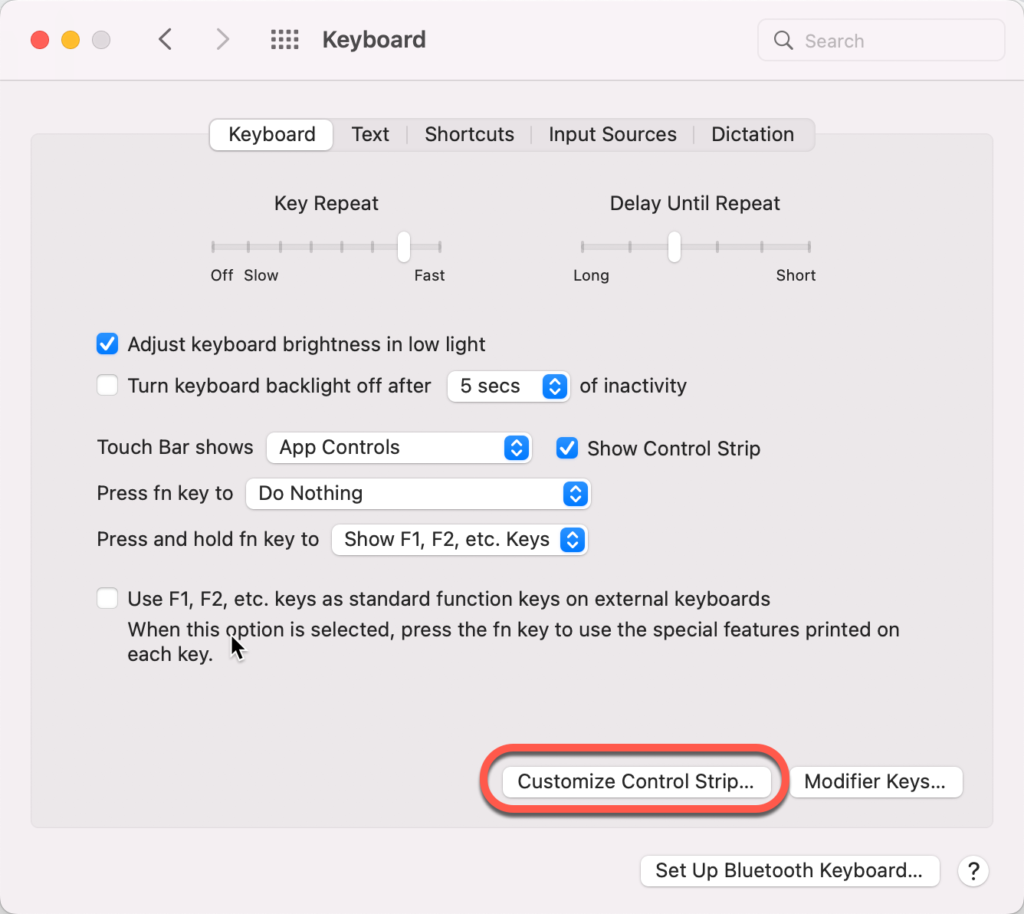
- Move the mouse below the bottom of the screen to highlight the Siri icon on the control strip, and drag it from the control strip up to the screen.
How to lock the screen
On High Sierra ( macOS 10.13 ) and later
- Press the Cmd-Ctrl-q key combination to lock the screen.
On earlier macOS versions

To be able to lock the screen from the menu bar:
- In Finder search for Keychain Access and start it,
- In the Keychain Access menu select Preferences,
- Check the Show keychain status in menu bar checkbox,
This will place a lock icon in the menu bar.
To lock your screen
- Click the lock icon in the menu bar
- Select Lock Screen
Finder
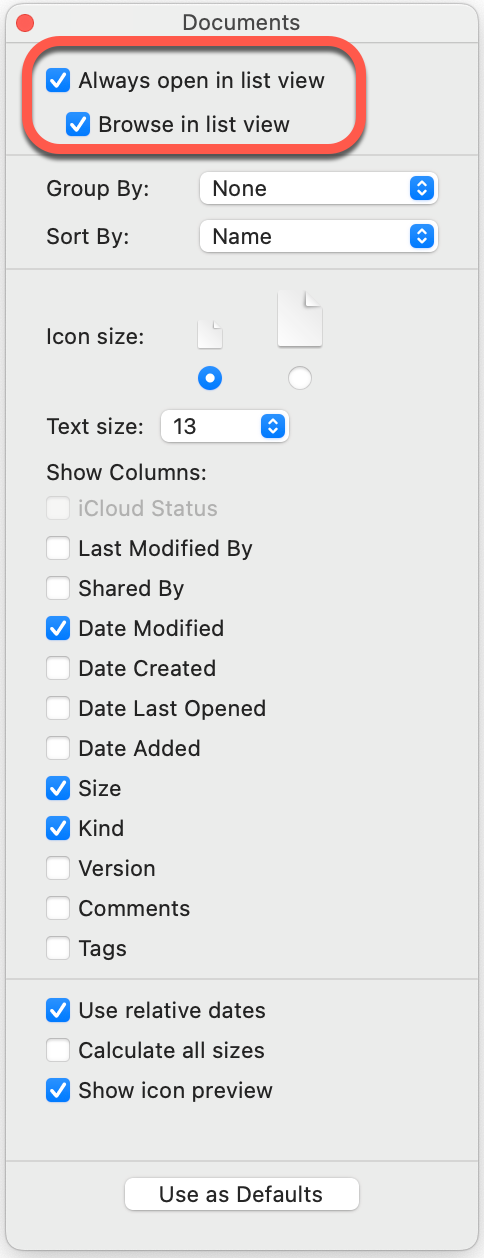
Always browse in list mode
- Open Finder
- In the View menu select Show View Options
- Select Always open in list view, and Browse in list view
Show the full path in Finder

- Open Finder
- In the View menu select Show Path Bar
Finder will show the full path of the current folder at the bottom of the window.
To jump to a folder shown in the path bar just double click it.
Show hidden files and folders
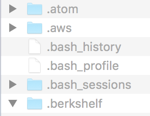
- Open the terminal and execute the following line
defaults write com.apple.finder AppleShowAllFiles YES
- For the change to take effect relaunch Finder.
- Press the ‘Option/Alt’ key, right click on the Finder icon in the dock and click Relaunch
Menu bar
Change the spacing betweeh the icons
The notch for the camera on the new MacBooks hides the left most icons. The apps are running, but their icons are hidden if those do not fit on the right side of the notch. To make room for more icons
Remove rarely used system icons from the Menu Bar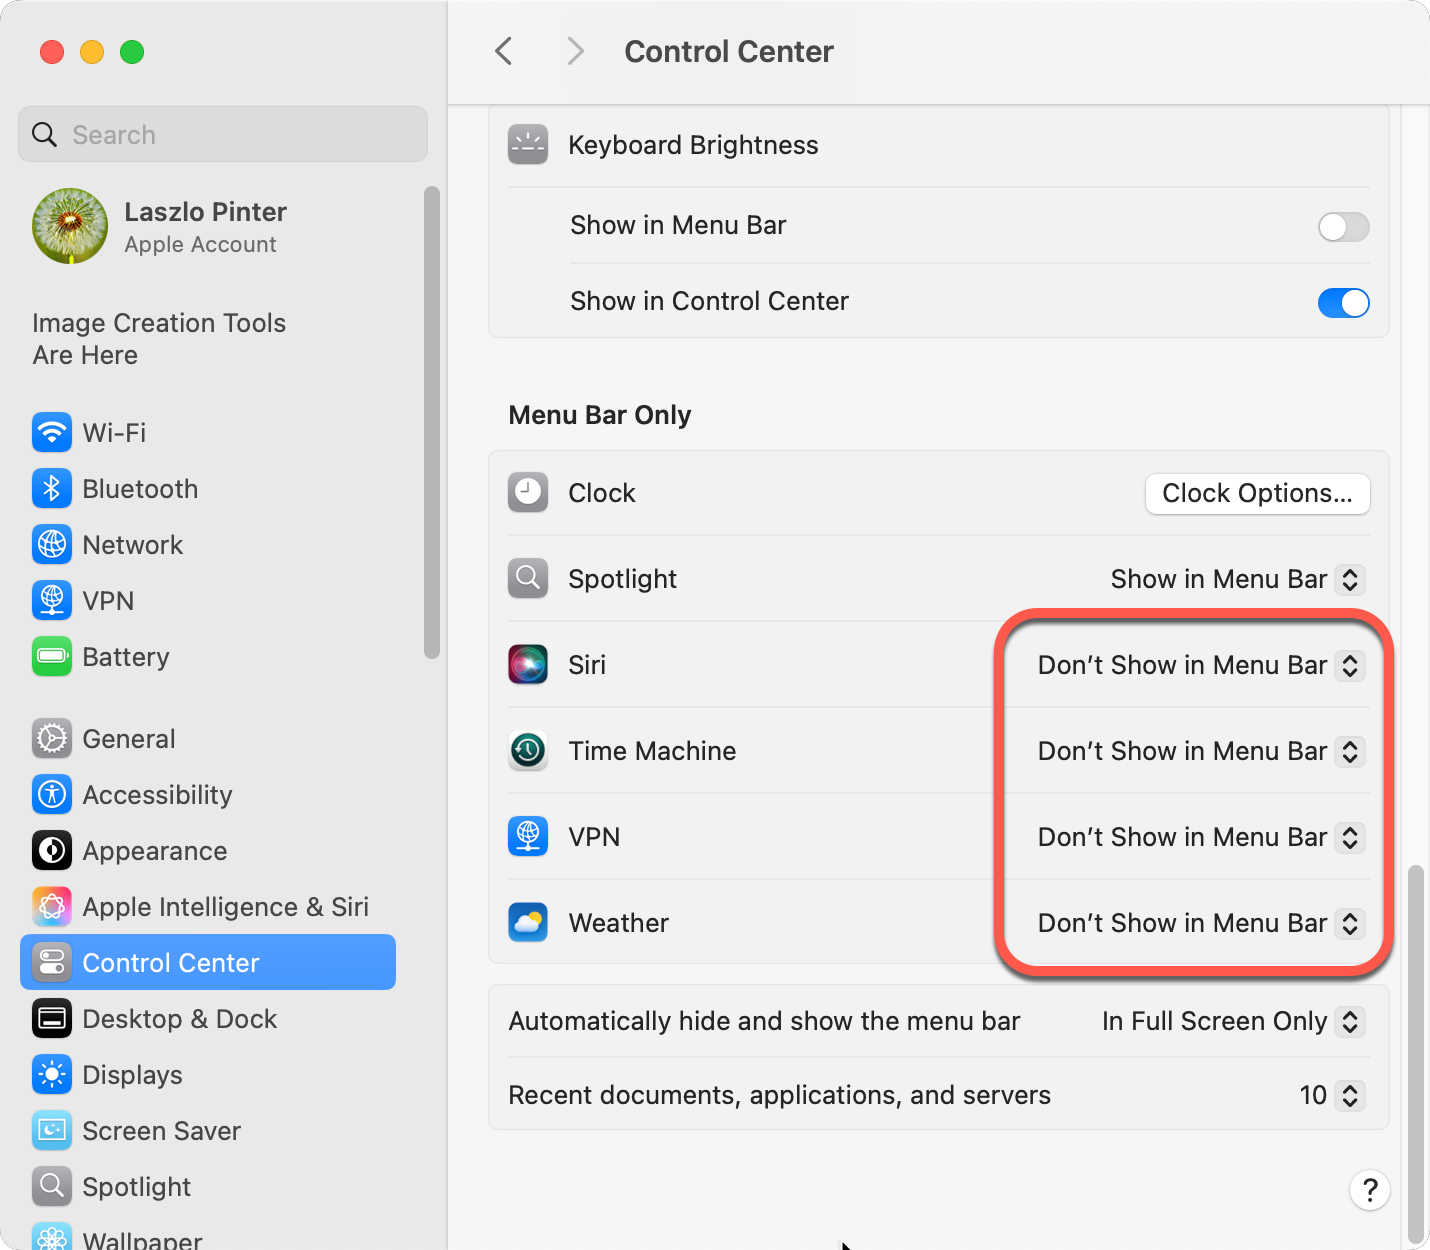
Set the clock to display less information. Click the Clock Options button to access the Clock panel
Set the spacing of the icons. Based on Hidden preference to alter the menubar spacing and How to fix Mac menu bar icons hidden by the MacBook notch by Jesse Squires.
- Open a terminal and execute the commands below. Log out and in again for the changes to take effect
defaults -currentHost write -globalDomain NSStatusItemSpacing -int 12
defaults -currentHost write -globalDomain NSStatusItemSelectionPadding -int 8- To check the values after those are set (there are no default values)
defaults -currentHost read -globalDomain NSStatusItemSpacing
defaults -currentHost read -globalDomain NSStatusItemSelectionPadding- To restore the original values execute the commands below. Log out and in again for the changes to take effect.
defaults -currentHost delete -globalDomain NSStatusItemSpacing
defaults -currentHost delete -globalDomain NSStatusItemSelectionPadding
Move the important icons to the right side
Press and hold the Command key and drag the important icons to the right side of the Menu Bar to keep those always displayed.
Show the battery charge percentage
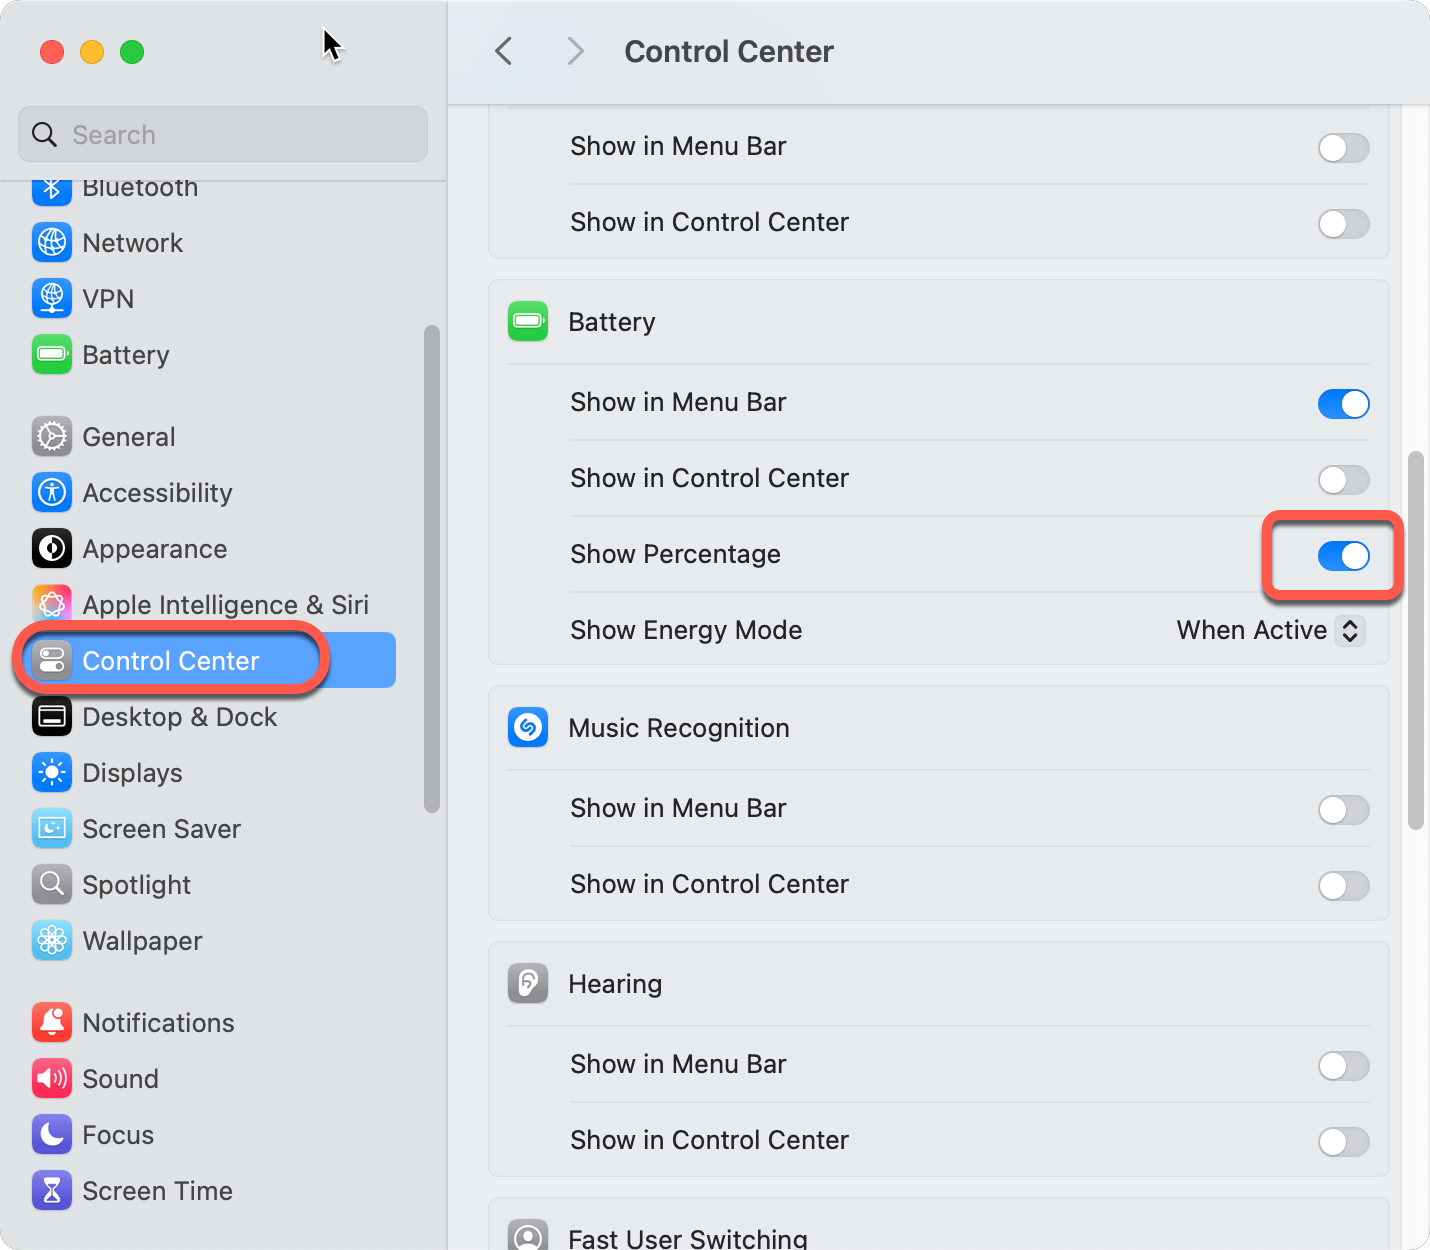
In Sequoia and later
- In System Settings on the Control Center tab under Battery enable Show Percentage
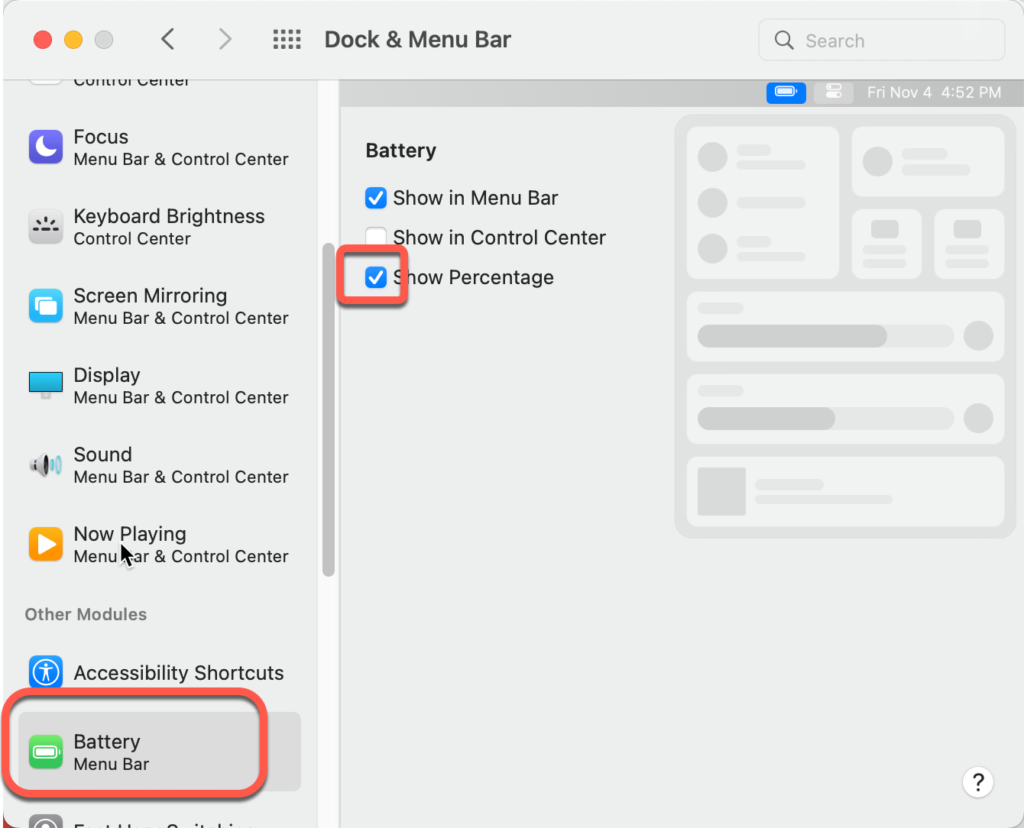
In Monterey or later
- In System Preferences select Dock & Menubar
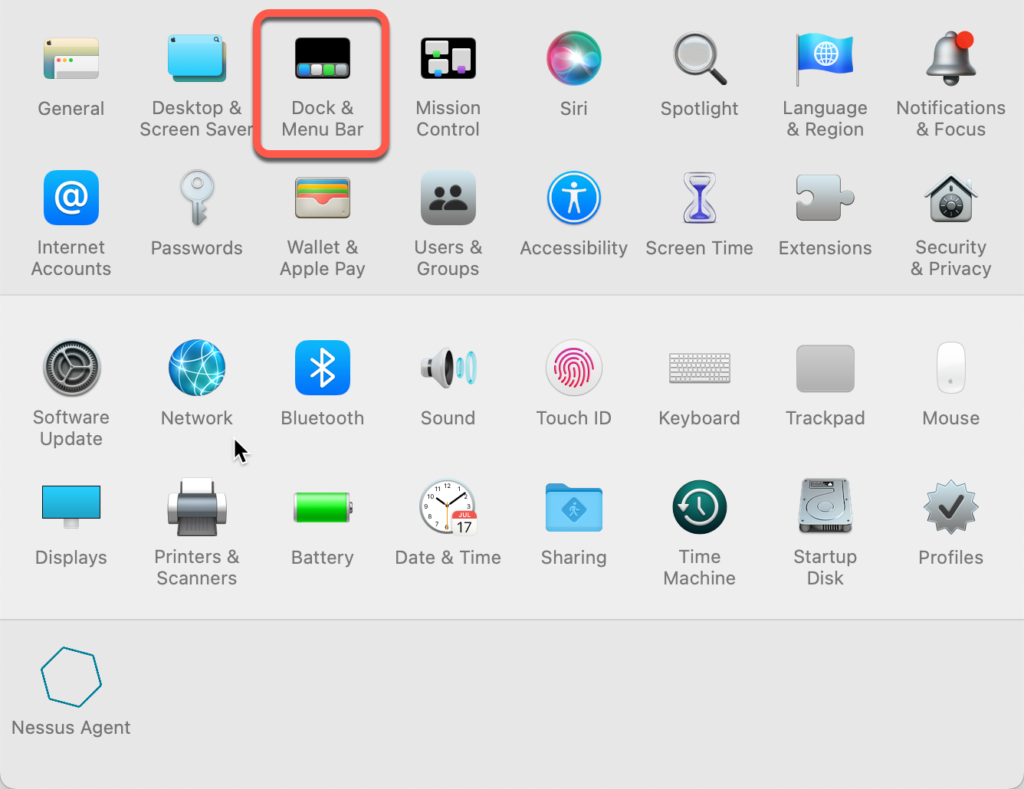
- On the left side scroll down to Battery Menu Bar and select Show Percentage
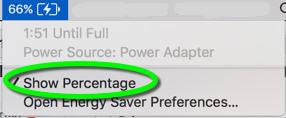
Before Monterey ( macOS 12 )
- Click the battery icon in the toolbar
- Select Show Percentage
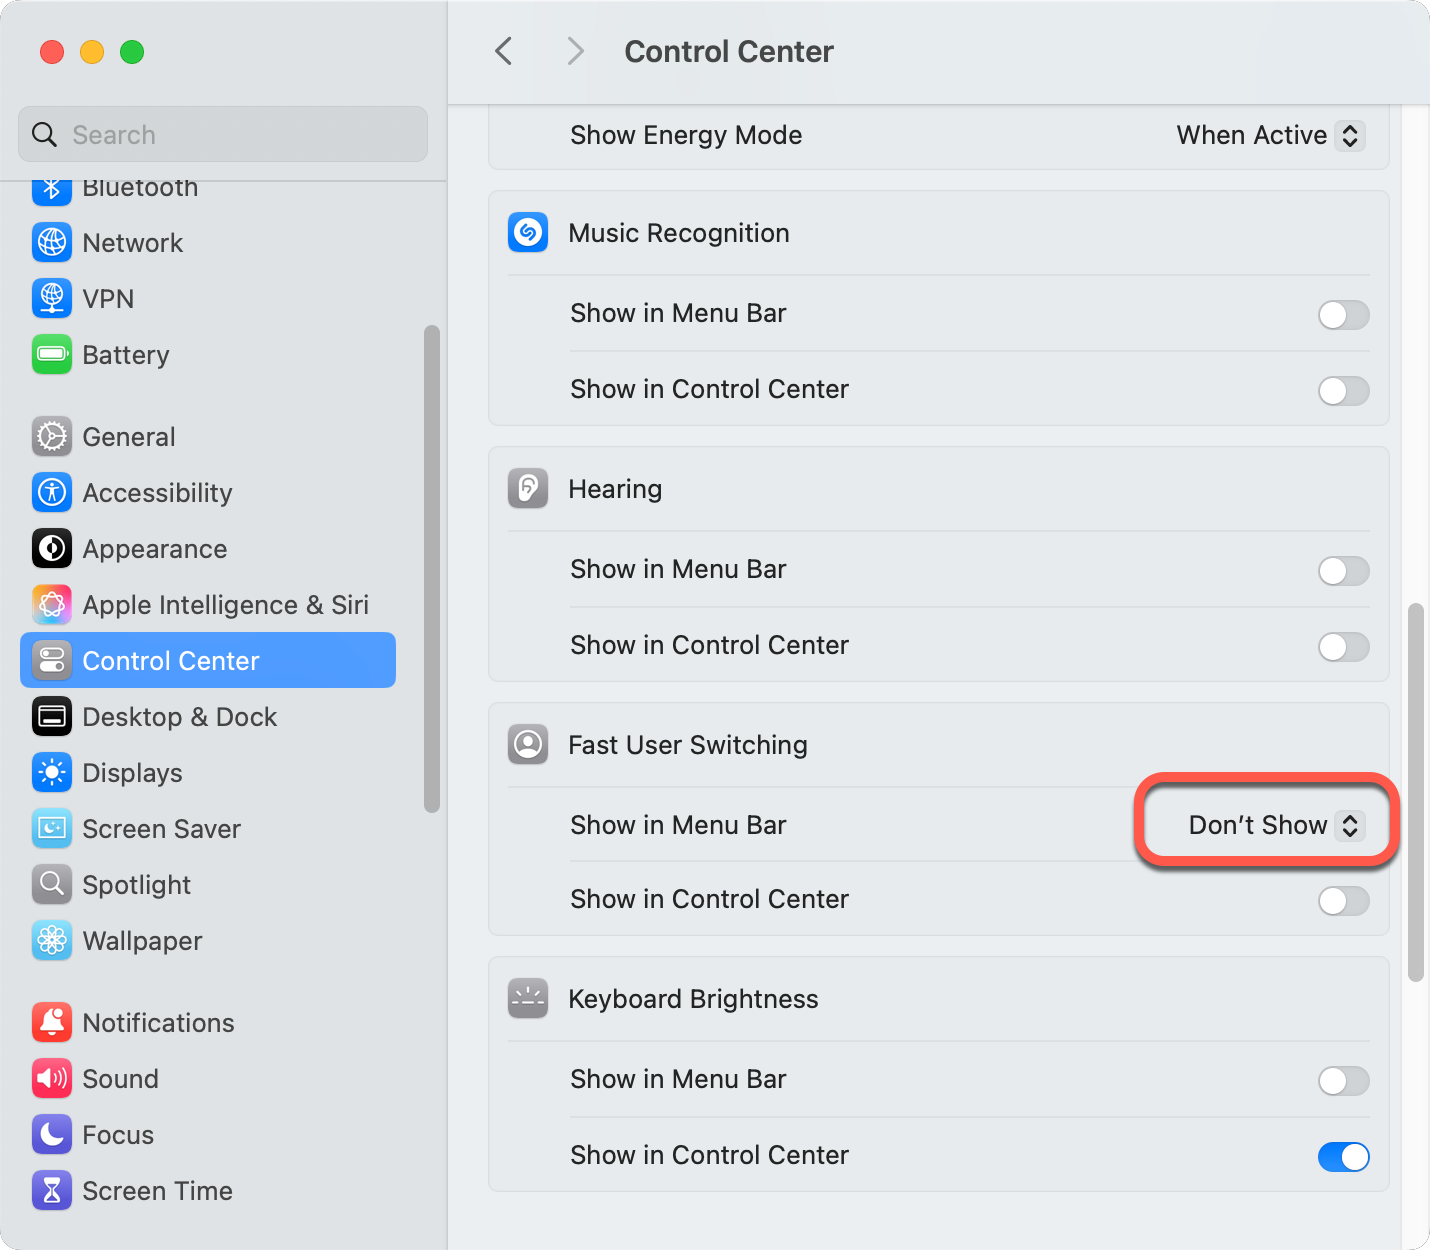
Remove Fast User Switching
If you are the only one who uses the computer, to save space in the Menu Bar, remove the Fast User Switching icon![]()
- In System Settings on the Control Center tab under Fast User Switching set Show in Menu Bar to Don’t Show
Apple Id without credit card
If you don’t have an Apple Id, create one. To obtain one without a credit card, you need to create the account in an older version of iTunes. In version 12.7 of iTunes Apple removed the access to the App Store.
- Downgrade iTunes on your Mac to version 12.6. Follow the instructions at http://osxdaily.com/2017/09/17/downgrade-itunes-12-7-to-itunes-12-6/
- Start iTunes 12.6 on your Macintosh,
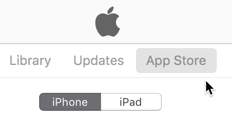
- Click the drop-down menu in the upper left corner,
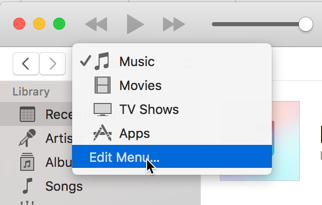
- If Apps is visible, select it, otherwise click Edit Menu…
- Select Apps, and click Done to display it in the drop down.
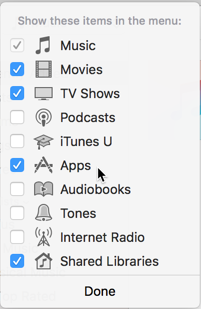
- Select Apps, and click Done to display it in the drop down.
- Search for a free app in the App Store and start to download it,
- Create a new Apple Id and select None for credit card type.
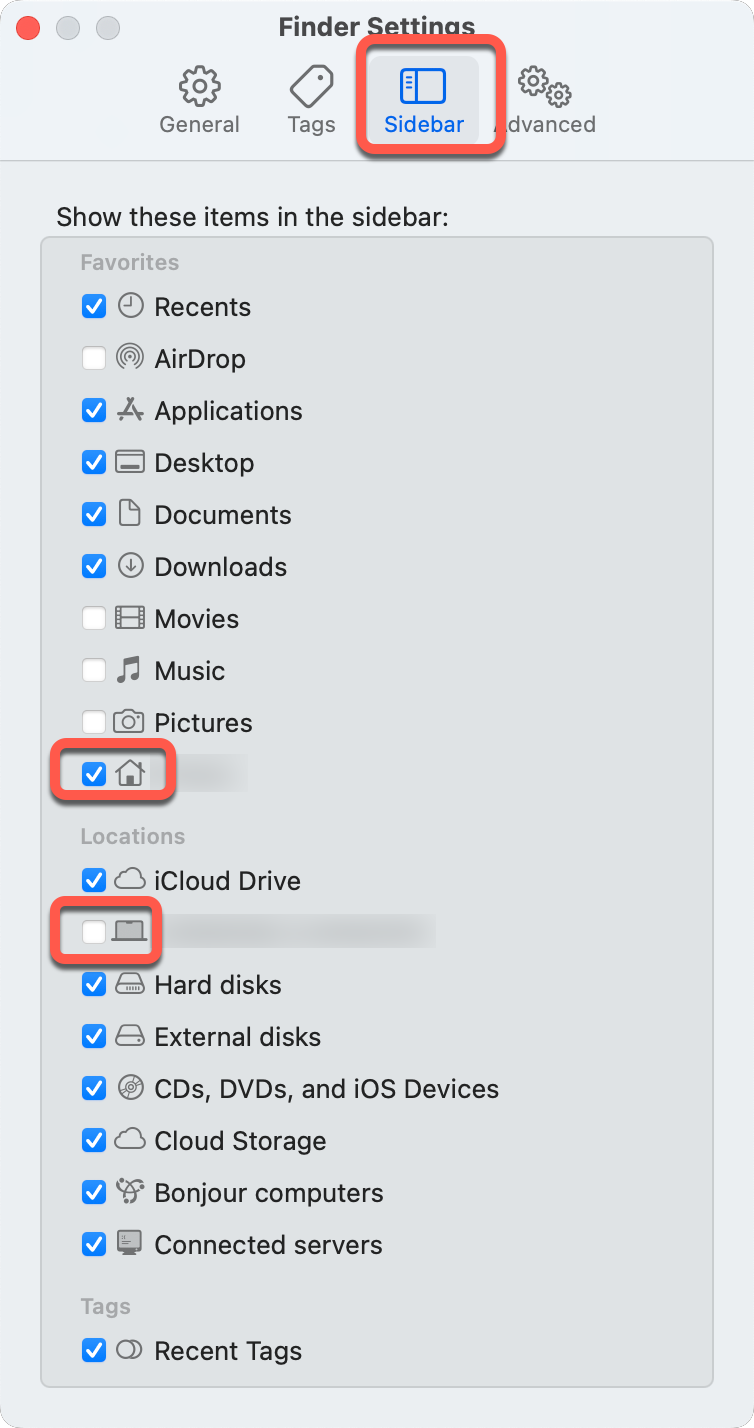
Show the user home directory and drive root
- Open Finder
- In the Finder menu select Settings
- Select the Sidebar tab
- In the Favorites section select the checkbox next to the home icon
- If you want to see all mapped drives, in the Locations section select the name of the hard drive
Prevent Microsoft Outlook to send the message with Command-Enter
To prevent Outlook to send the email when you accidentally press Command-Enter, associate the Send action with a zero length character:
- Quit Microsoft Outlook
- Execute in the terminal
defaults write com.microsoft.Outlook NSUserKeyEquivalents -dict-add "Send" "\U200B"
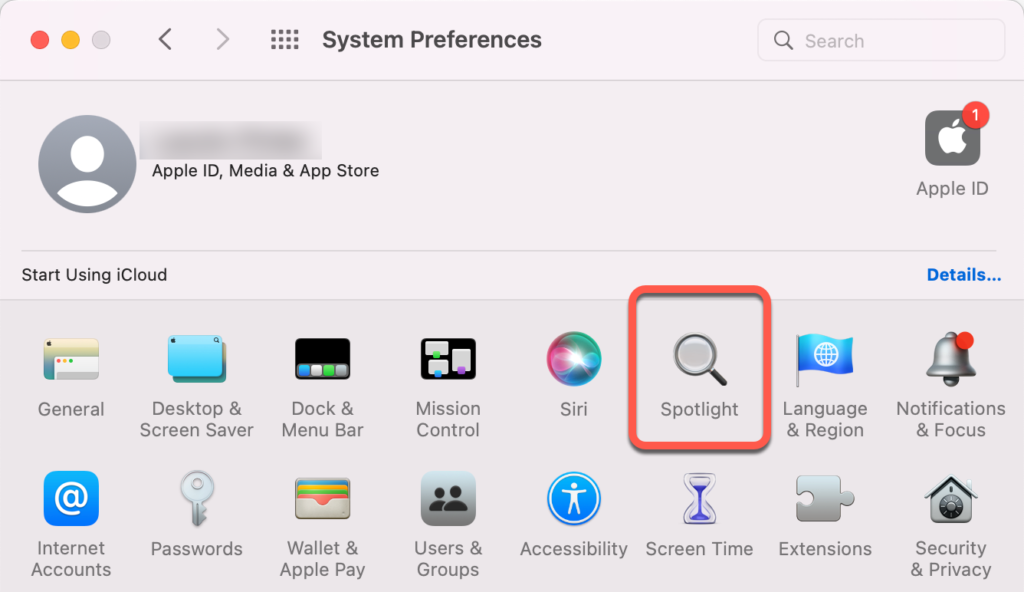
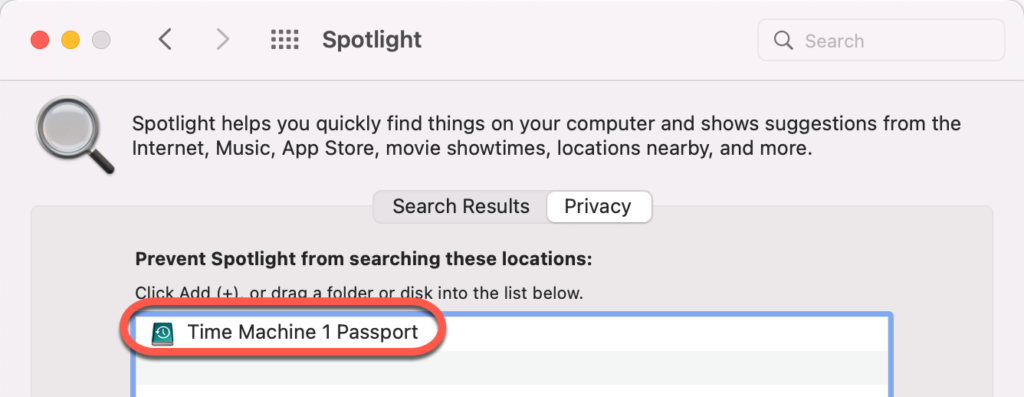
Stop Spotlight indexing the Time Machine drive
Spotlight helps to search for files by indexing drives. To speed up the Time Machine operations prevent Spotlight indexing the Time Machine drive.
- Connect the Time Machine drive to the computer.
- In System Preferences select Spotlight
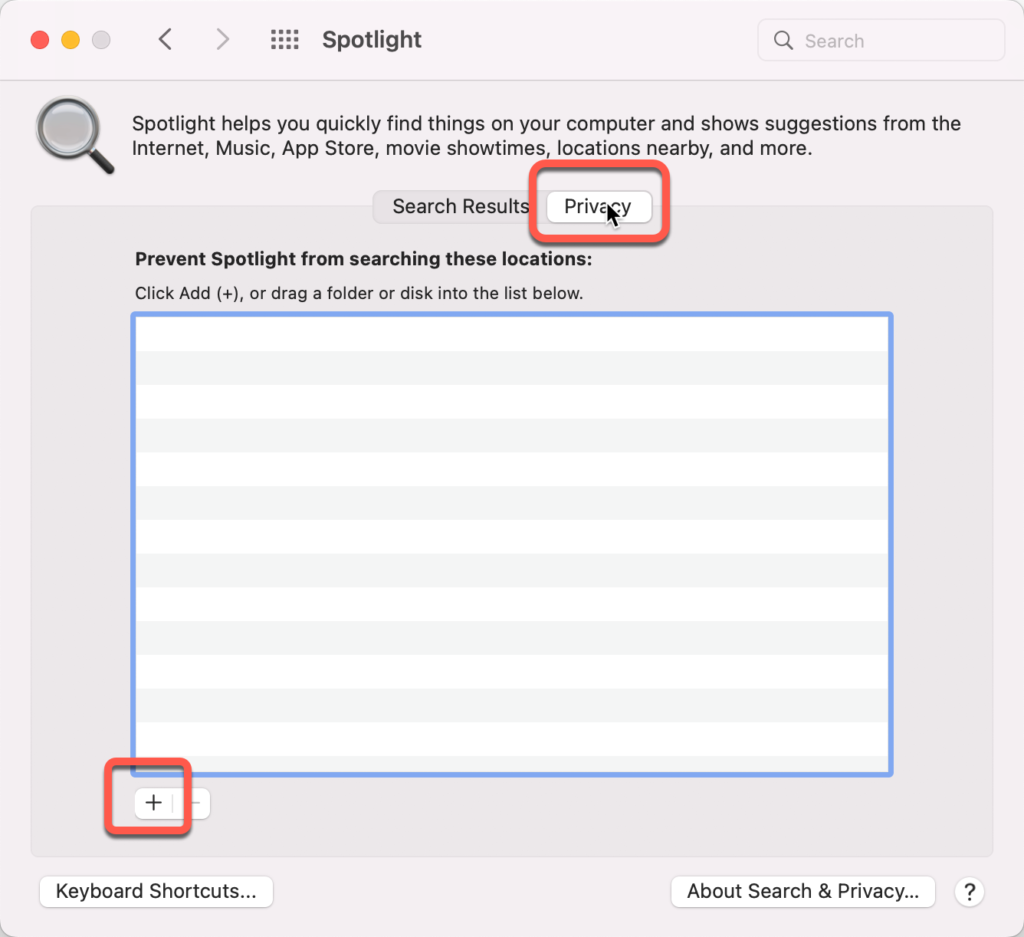
- On the Privacy tab click the Plus sign
- In the locations section select the Time Machine drive and click the Choose button
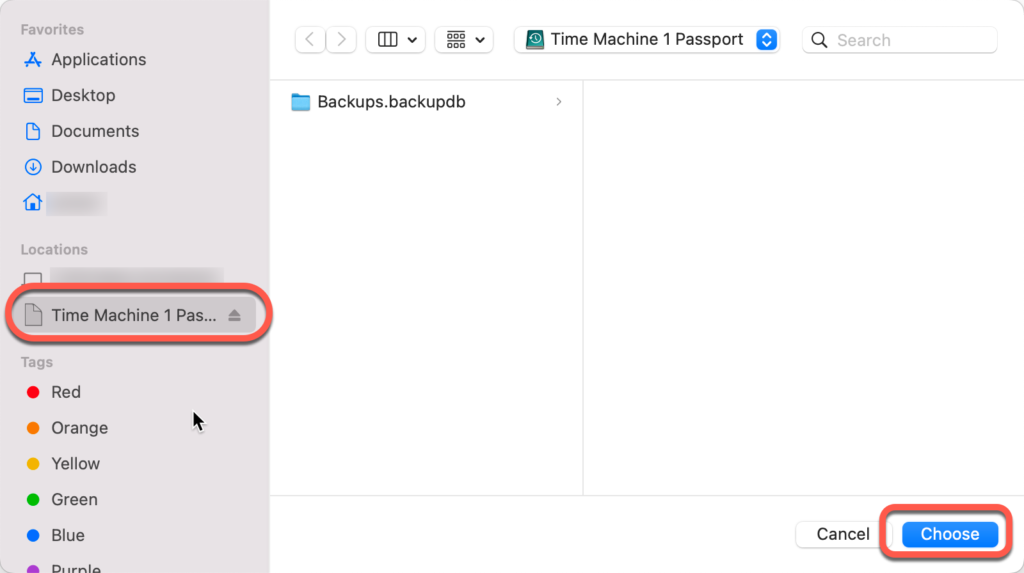
- The list should contain the Time Machine drive
Homebrew
Homebrew is a package manager, it can install packages on your Macintosh that apple does not provide, like a few utilities below.
Installation
Installation instructions are at http://brew.sh/
To add Homebrew to the path, so you can execute it from any terminal window execute
echo 'eval "$(/opt/homebrew/bin/brew shellenv)"' >> ~/.zprofile
eval "$(/opt/homebrew/bin/brew shellenv)"
List outdated software
- To list installed software that has new versions available, execute
brew outdated
Update installed software
- To update (upgrade) all software that has new versions, execute
brew upgrade
Uninstallation
To uninstall Homebrew if you don’t need it later, execute
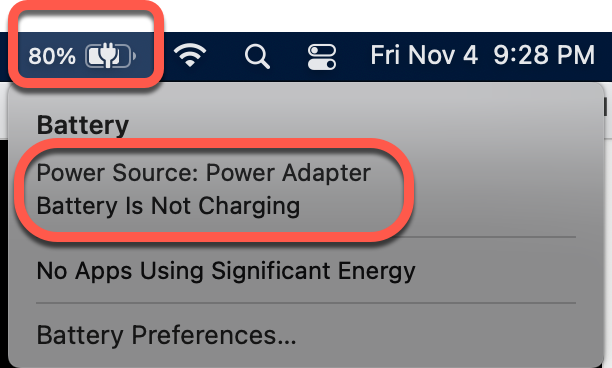
/bin/bash -c "$(curl -fsSL https://raw.githubusercontent.com/Homebrew/install/HEAD/uninstall.sh)"Limit battery charging to 80%
To prolong the life of the battery of your Macintosh, you can install a utility to stop battery charging at 80%.
- Install BCLM from https://github.com/zackelia/bclm
- If you don’t have ownership of Homebrew, before installation execute
sudo chown -R $(whoami) /usr/local/var/homebrewsudo chown -R $(whoami) /usr/local/Homebrew/ - The installation steps are currently
brew tap zackelia/formulaebrew install bclmsudo bclm write 77sudo bclm persist - Check the set value with
bclm read
- If you don’t have ownership of Homebrew, before installation execute
- Turn off Optimized battery charging in System Preferences to give full control to the tool.

- You may need to reboot the computer for the process to start monitoring the battery.
- The charging will stop around 80%. It may goes above 80% with a few percents, but at least the battery is not fully charged.
After software update
The system software update usually resets the upper charging limit to 100%. After system update execute in a terminal
sudo bclm write 77
sudo bclm persist
bclm read
UTC Clock in the menu bar
This feature does not work reliably on newer machines with the notch on the top of the screen for the camera. Most likely when there is not enough room in the Menu Bar, the UTC clock is not displayed, but still hides other icons in the Menu Bar.
xBar is a plugin manager that can display plugins in the menu bar. One of them is World Clock that can display multiple clocks in a drop down of the menu.
Install xbar
- Navigate to https://xbarapp.com/
- Click the Download xbar for macOS button
- Download and run the .dmg file to install the application
- Move the xbar application to the Applications folder
- Launch xbar form the Launcher
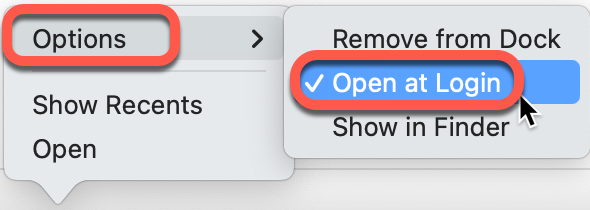
- Right-click the icon in the task bar and select Options, Open at Login
- Restart the computer for the app to appear in the Menu Bar.
Add World Clock to xBar
-
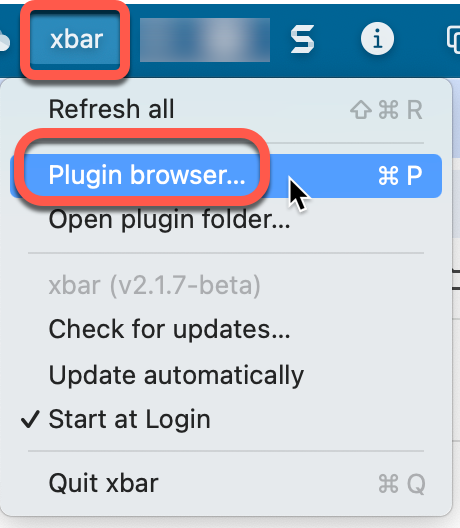
- Click xbar in the Menu Bar

- Select the Plugin browser
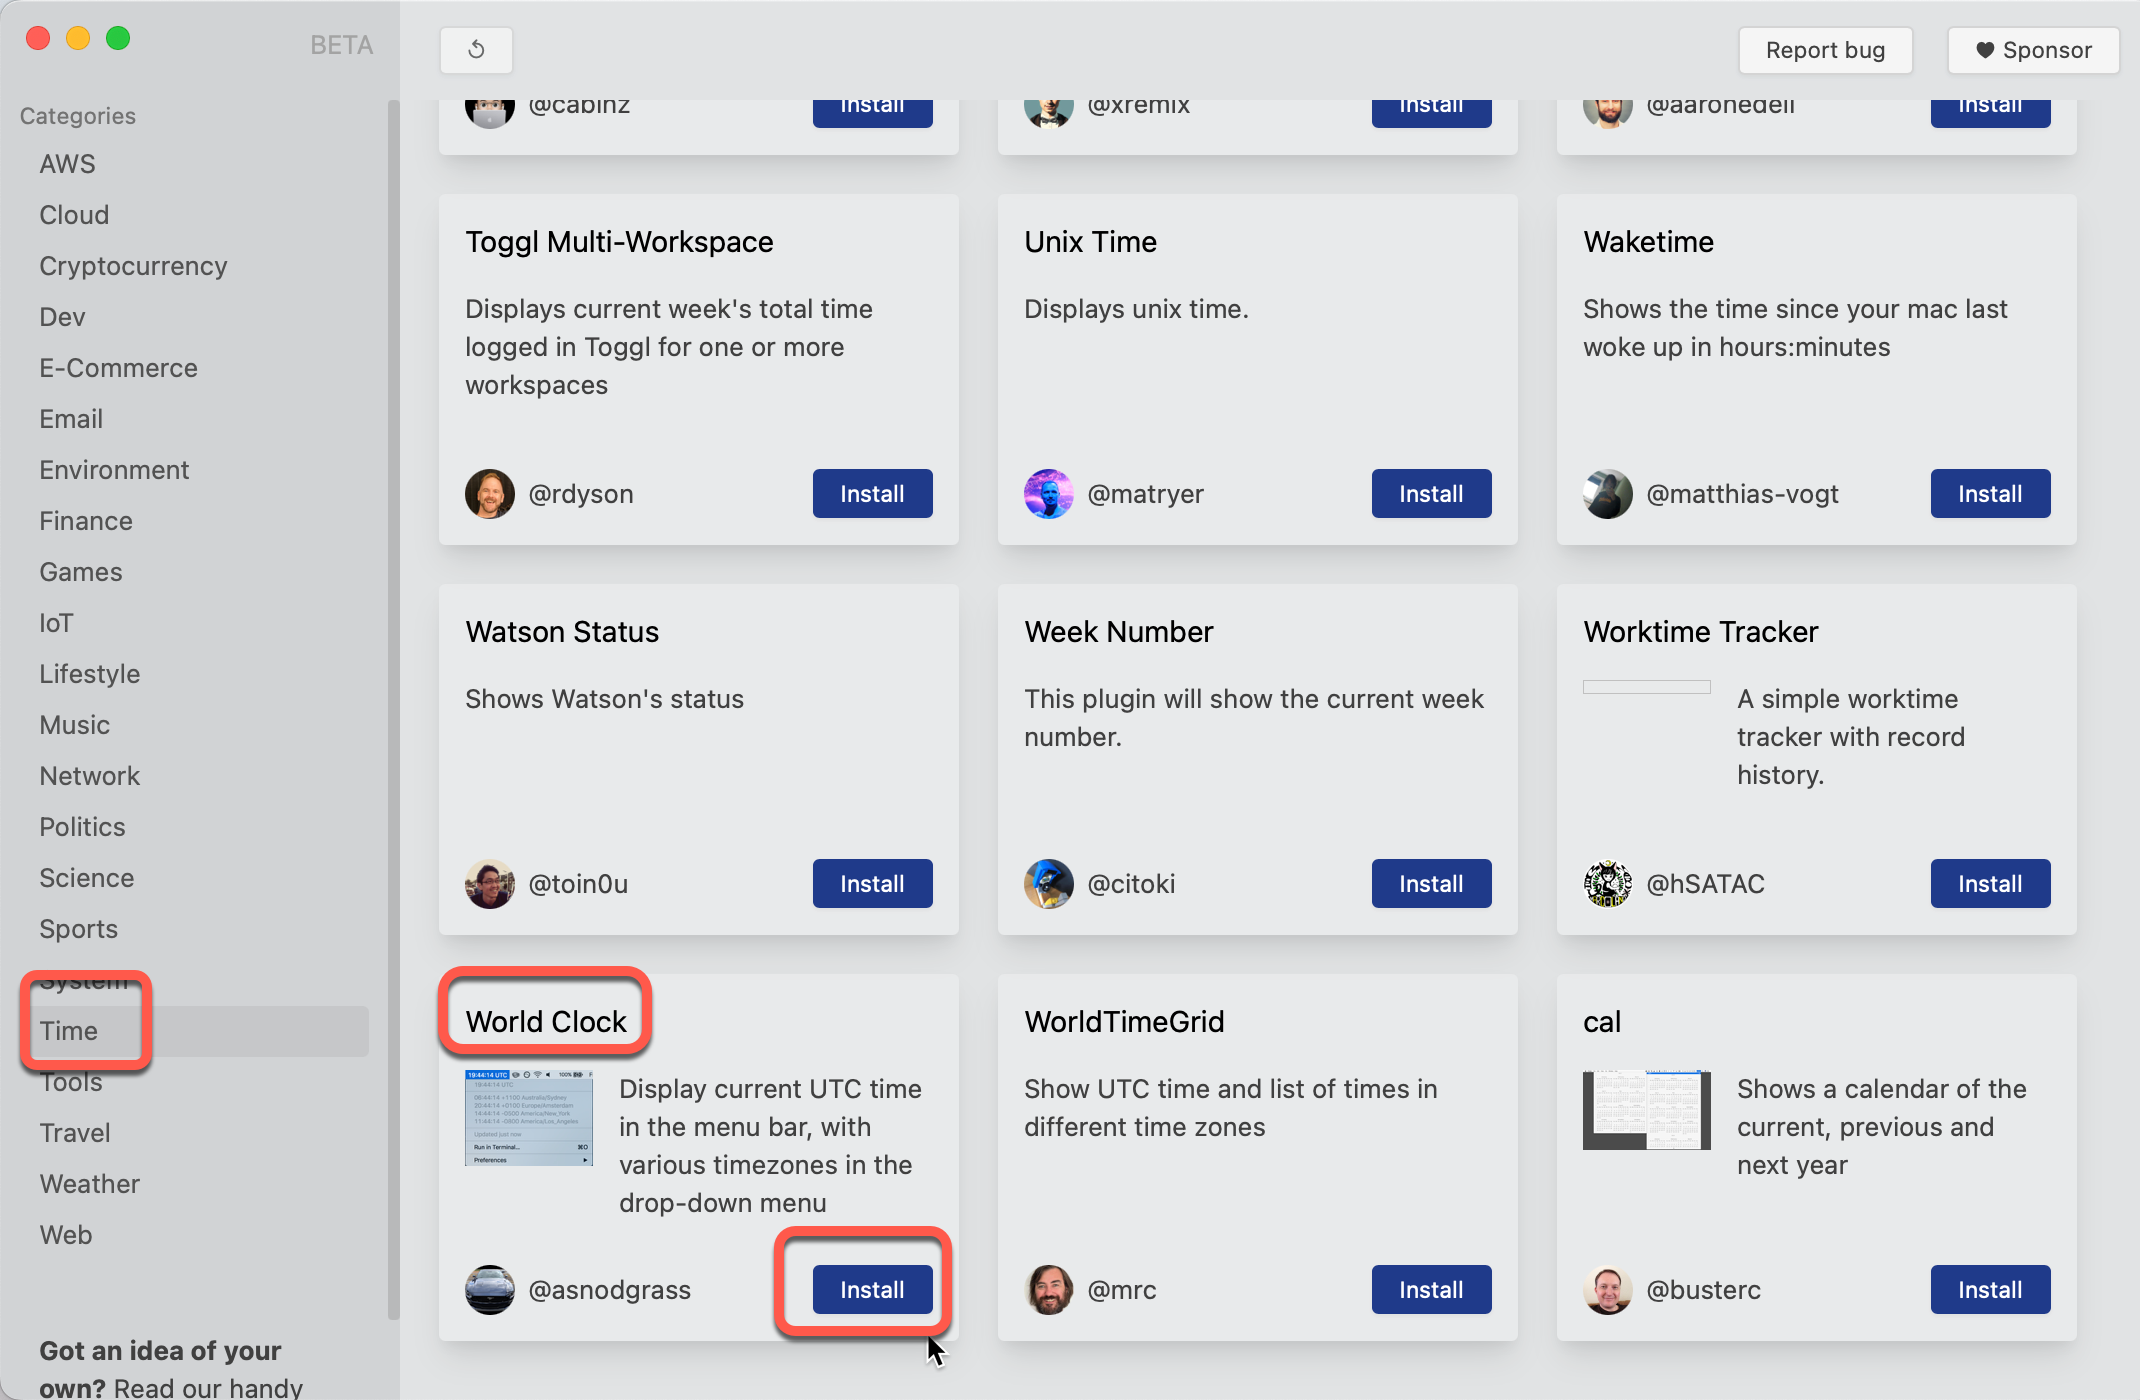
- On the Time page click the Install button in the World Clock panel
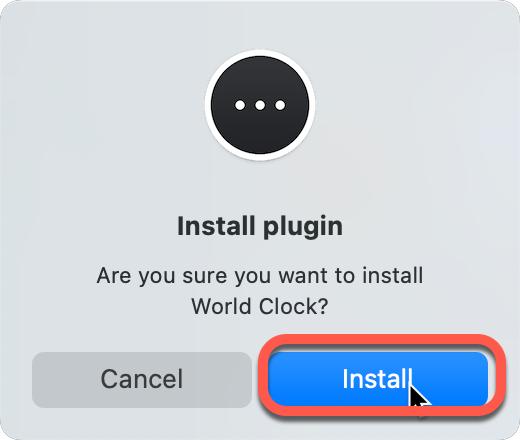
- Click the Install button on the pop-up
- Click xbar in the Menu Bar
Customize World Clock
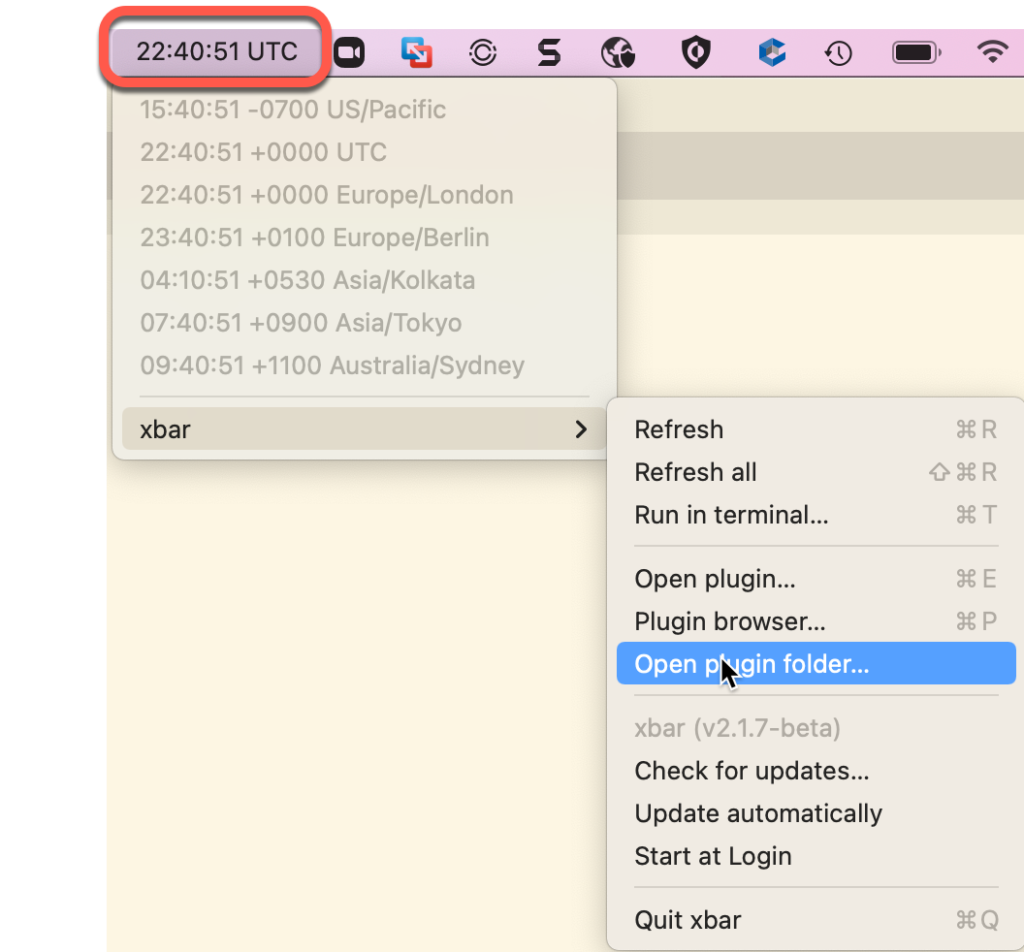
- To open the plugins folder click the UTC clock, select xbar, Open plugin folder…
- Open the 001-worldclock.1s.sh file in a text editor
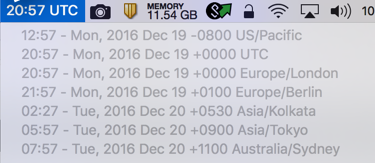
To change the displayed timezones, edit the ZONES variable in the file:
ZONES="US/Pacific UTC Europe/London Europe/Berlin Asia/Kolkata Asia/Tokyo Australia/Sydney"
To change the display format, edit the data formats.
- To remove the seconds from the menu bar, delete the :%S from the format line
date -u +'%H:%M UTC'
To add the day of the week and date to the clocks in the World Clock drop down
add
- %a for the day of the week
- %Y for the four digit year
- %b for the name of the month
- %d for the date
- %z for the time zone offset
echo "$(TZ=$zone date +'%H:%M - %a, %Y %b %d %z') $zone"
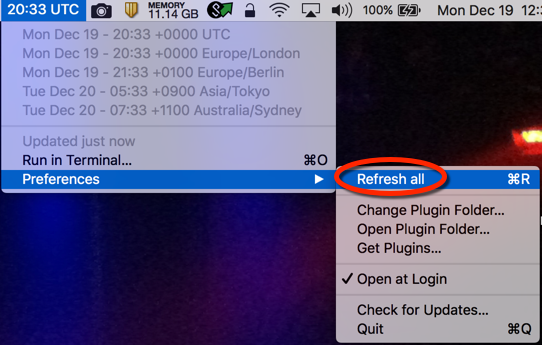
To refresh the dropdown formats after making changes in the config file
- Click the World Clock in the menu bar
- Select Preferences, Refresh all
Disk Inventory X
This utility displays the graphical representation of file sizes and helps to find the biggest files.
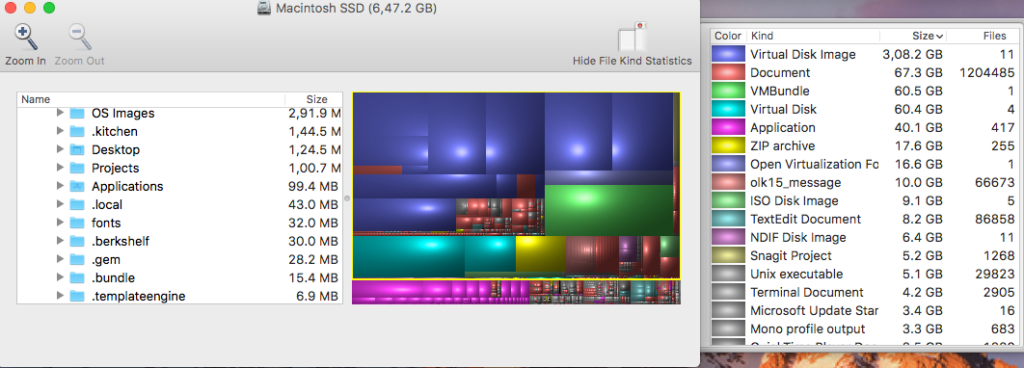
- Download it from http://www.derlien.com/
System information in the menu bar
Stats is a free open source software to display system information in the menu bar including
- CPU usage and temperature
- Memory usage
- Network and hard drive usage
To install it, navigate to https://github.com/exelban/stats
Next:
Back:
to the Tutorials page