Packer is a free, open-source application from Hashicorp. It can generate a server image based on an existing one, and configure it for your special needs. You can use the generated image when you launch a server instance in the cloud or on your local workstation.
Install Packer
- Download Packer from https://www.packer.io/downloads.html,
- Unzip the downloaded ZIP file,
- Create a version-specific folder and a symbolic link based on Keep multiple versions of applications on Macintosh.
- Place the packer application into the version-specific folder you just created.
Packer script
Packer reads a .json file to generate the new server image.
AMI ID
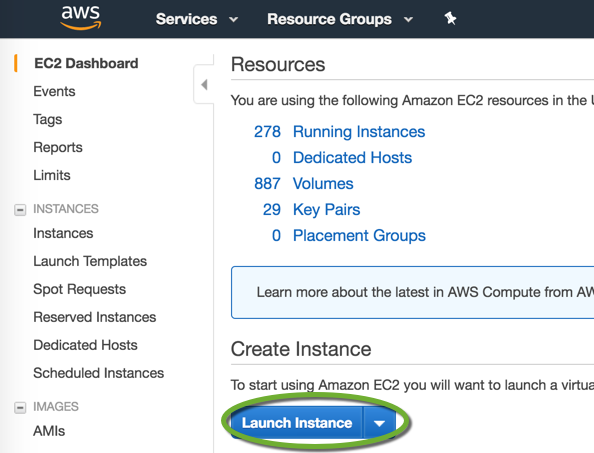
To find the latest AMI IDs log into the Amazon AWS Console, select EC2 and click the Launch button. On the left side click Quick Start to see the images for
- Amazon Linux
- SUSE Linux
- Red Hat Enterprise Linux
- Ubuntu Server
- Microsoft Windows Server
For CentOS images, see the “Official CentOS Linux : Public Images” section at https://wiki.centos.org/Cloud/AWS The AMI IDs are organized by region.
Username
It is important to use the correct ssh_username for each operating system:
Linux
RHEL: ec2-user
Amazon Linux: ec2-user
CentOS: centos
Ubuntu: ubuntu
Windows
any “winrm_username” and “winrm_password”
The PowerShell script in the user data file, specified in the “user_data_file” attribute, sets the initial username and password with the
cmd.exe /c net user /add ...
command.
The Administrator password is set with the
cmd.exe /c net user Administrator ...
command.
IMPORTANT!!!
For Packer to be able to connect to the server, set the same username and password in the “winrm_username” and “winrm_password”, “elevated_user”, and “elevated_password” attributes of the .json file.
AMI Name
To allow the Chef Kitchen EC2 driver to read the OS version of the image, include the version in the “Name” as follows.
The Test Kitchen Git repository has the following at https://github.com/test-kitchen/kitchen-ec2
Note that the image_search method requires that the AMI image names be in a specific format. Some examples are:
- Windows-2012
- Windows-2012r2
- Windows-2012r2sp1
- RHEL-7.2
It is safest to use the same naming convention as used by the public images published by the OS vendors on the AWS marketplace.
Sample acceptable names are
- my_windows-2012r2_base-01
- my_amzn-ami-hvm_base-01
To find the name of the AMI
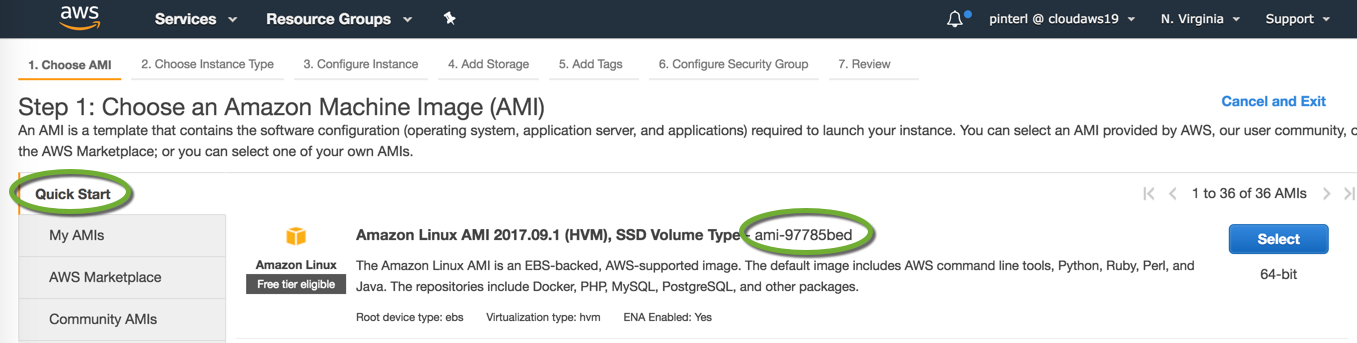
- In the AWS Console select EC2, and click the Launch Instance button
- On the left side select Quick Start, and find the AMI ID of the image you want to start with.

- Navigate back to the EC2 console, select AMIs, in the drop-down select Public images
- Search for the AMI by ID
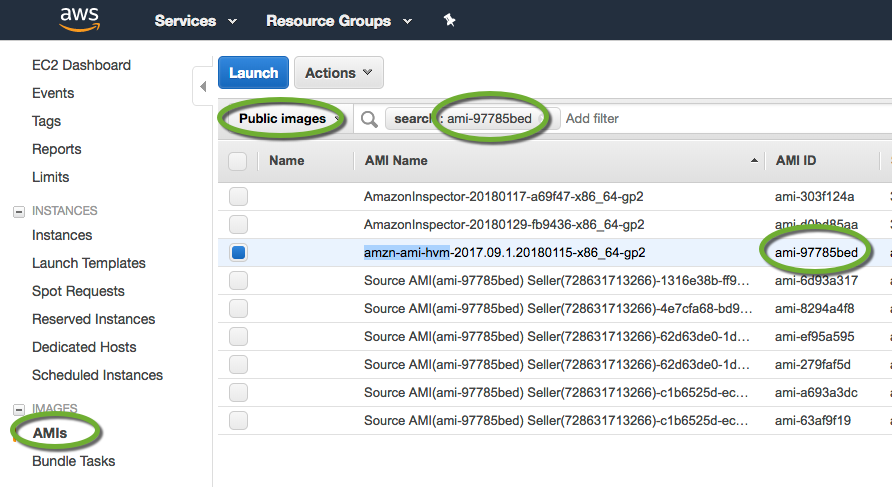
- Make sure you copy the name of the AMI with the same ID.
Generate the server image with Packer
- Open a Bash window,
- Navigate to the folder of the Packer JSON script,
- Execute the following command. Packer will read the default AWS credentials from ~/.aws/credentials file on your Macintosh or Linux workstation. On Windows, the file is at C:\Users\YOUR_USER_NAME\.aws\credentials.
packer build MY_PACKER_SCRIPT.json
- To specify the AWS keys in the command line
packer build -var 'aws_access_key=<access key>' -var 'aws_secret_key=<secret key>' MY_PACKER_SCRIPT.json
- To specify the AWS keys in the command line
- The command window will display the ID of the generated image, or you can find it by name in the EC2 section of the AWS console under AMIs.
Share the generated server image with other cloud accounts
If you work in multiple cloud accounts you need to share the generated server image with other accounts
AWS
- Log into the AWS account you have used to generate the server image,
- On the left side of the EC2 section select AMI and find the new image by name of ID,
- On the Permissions tab click the Edit button,
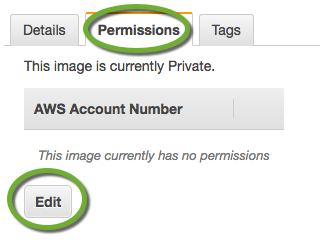
- Make sure the Private radio button is selected if you don’t want to share the image publicly,

- Enter the account number of the account you want to share the image with (see Find the AWS account number),
- Check the Add “create volume” permissions… checkbox,
- Click the Add Permission button,
- When you have added all accounts to share with, click the Save button.