To find the Drupal site version navigate to
SITE_URL/admin/reports/updates/update
The page shows the recommended module updates.
At the bottom of the page you will find the current Drupal version and the version of the recommended update.
Knowledge Base for IT Professionals, Teachers and Astronauts
To find the Drupal site version navigate to
SITE_URL/admin/reports/updates/update
The page shows the recommended module updates.
At the bottom of the page you will find the current Drupal version and the version of the recommended update.
If the Drupal site does not have a login page just navigate to
SITE_URL/user
If the menu does not have a logout button, navigate to
SITE_URL/user/logout
The Chef server maintains the list of registered nodes and clients in its database. When you launch a new instance with Chef you may encounter the following error message:
*** Input CHEF_CLIENT_NODE_NAME is undefined, using: IP-0AFE6965
...
*** Starting chef-client
*** Finished chef-client
Printing Log
...
[...] INFO: Client key C:\chef\client.pem is not present - registering
[...] INFO: HTTP Request Returned 409 Conflict: Client already exists
[...] INFO: HTTP Request Returned 403 Forbidden: error
[...] ERROR: Running exception handlers
[...] ERROR: Exception handlers complete
[...] FATAL: Stacktrace dumped to C:/chef/cache/chef-stacktrace.out
[...] FATAL: Please provide the contents of the stacktrace.out file if you file a bug report
[...] FATAL: Net::HTTPServerException: 403 "Forbidden"
Cause:
In this case the CHEF_CLIENT_NODE_NAME already exists in the client database.You can search for it from a Bash window.
Solution:
Add a line to the Chef configuration to remove the existing node with the same node name
If you use Terraform to launch server instances and configure Chef, add this line to the Chef provisioner:
recreate_client = true
To delete nodes from the Chef server:
Use the knife command to search for the existing node from a Bash window.
To find the node in the Chef server database
knife search node '*:IP-0AFE6965'
To find the client in the Chef server database
knife search client '*:IP-0AFE6965'
If any of them found, those are leftovers from a previous launch. AWS reuse the IDs, so you have to remove the nodes from the Chef server database when you terminate the instances. To delete the unnecessary entries use the following commands:
knife node delete 'IP-0AFE6965'
knife client delete 'IP-0AFE6965'
To remove the terminated instances from the Chef server database you can also use the Chef web interface.
The GitHub repositories usually contain a README.md file to describe how to use the project. The GitHub web site has a simple editor, but it has a few limitations
One of the simplest ways to edit the README.md is to use the Atom editor.
As you type in the editor window the preview pane will show the live review of the file.
For the Markdown syntax visit https://guides.github.com/pdfs/markdown-cheatsheet-online.pdf
When you deploy and application in Microsoft Visual Studio with ClickOnce, you need to sign the installer with a key.
To sign the project Visual Studio needs to use the signtool. If the ClickOnce feature is not enabled in Visual studio, it displays the following error message:
An error occurred while signing: SignTool.exe was not found at path C:\Program Files (x86)\Microsoft SDKs\Windows\v7.0A\bin\signtool.exe
To install the ClickOnce feature and the signtool
When you have been able to successfully sign your Click Once applications in the past and suddenly you get the error message
An error occurred while signing: Failed to sign bin\Debug\app.publish\….exe. SignTool Error: No certificates were found that met all the given criteria.
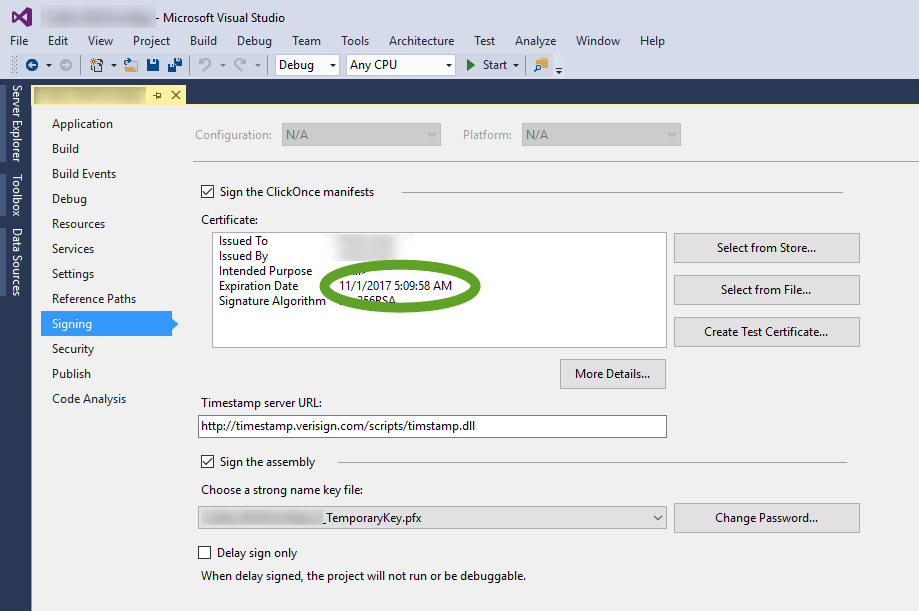
it is possible that the certificate you used to sign your app has expired. To check the validity of the certificate

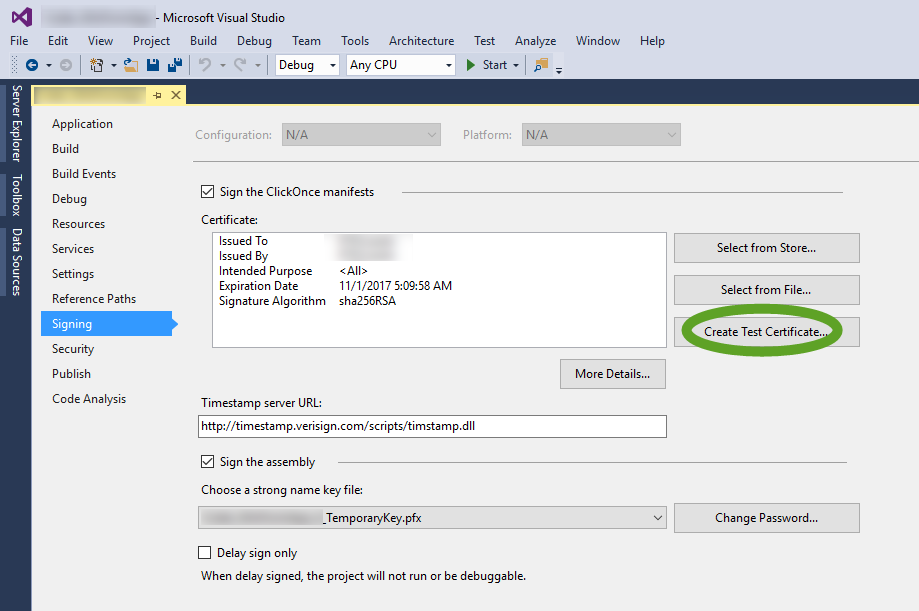
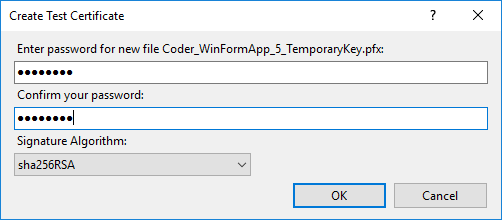
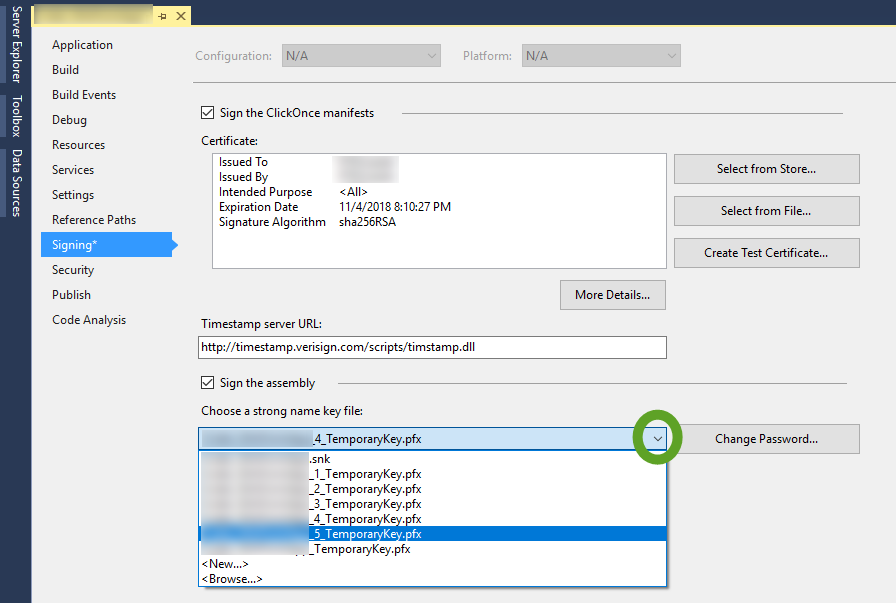
To create a new certificate


When you move your Visual Studio solution to another workstation you may encounter the following error message:
System.Data.Entity.Core.MappingException was unhandled by user code
HResult=-2146232032
Message=Schema specified is not valid. Errors:
: error 2062: No mapping specified for instances of the EntitySet and AssociationSet in the EntityContainer …
Source=EntityFramework
In this case it may help if you re-import the database objects into the .edmx file.
To import all objects again:
If you re-import the tables, but do not delete the stored procedures, functions, and function imports you may get the following error message:
HResult=-2146233079
Message=The function import ‘Tobacco_WebEntities.spGetAgeGroupId’ cannot be executed because it is not mapped to a store function.
Source=EntityFramework
When you have already set up the project signing of the C# application for ClickOnce deployment, and move the solution to another workstation you may get the following error message when you build the solution:
Severity Code Description Project File Line Suppression State
Error Cannot import the following key file: .....pfx. The key file may be password protected. To correct this, try to import the certificate again or manually install the certificate to the Strong Name CSP with the following key container name: VS_KEY_....
We get this message, because the new workstation does not know the key file password. To solve this problem, we have to save the key file password on the new workstation.
To make your solution work again
It is important to keep the TeamCity agent names unique. If you launch a TeamCity agent with a name that is already used by another agent that is connected to the TeamCity server, the new agent will not show up in the Unauthorized agent list.
To change the name of an agent, change the “name” value in the conf/buildAgent.properties file.
To access the file you need to log into the box.
On a Linux agent
On a Windows agent
The location of TeamCity can be different depending on the configuration of the box.
In the previous parts of this tutorial we have launched instances (servers) in the cloud, but those were created by Test Kitchen, running on our workstation. Those instances are as good as they can be, but the cookbook did not reside on the Chef server.
To launch pre-production and production instances in the cloud, first we need to upload the cookbook to the Chef server. In Beginner’s Guide to DevOps Engineering part 4. Connect to the Chef server we have already connected our workstation to the Chef server.
To make your cookbook available for all the servers of the organization we will upload the cookbook to the Chef server.
knife cookbook upload COOKBOOK_NAME --freeze
Don’t forget to add the –freeze option to the end to protect the version of the cookbook from accidental changes.
There are many ways to launch servers in a scripted way, we are going to review a few options. One is to use RightScale, a Cloud Management Platform, that can manage servers in multiple cloud environments.
CAT files are Ruby like scripts that describe the configuration of the instance. It contain the name of the deployment the server should be placed it, the cloud attributes to assign security groups, regions, availability zones, set the drive size, specify security keys. The easiest way to configure a server is to copy an existing RightScale Self Service CAT file and update it with the new values.
If this is the first CAT file in your organization, get help from RightScale support and get a sample file from them.
If your organization already has a library of CAT files
to the Tutorials page
If you use Terraform in the corporate environment your company most likely has multiple AWS accounts. One for pre-production, one for production.
To be able to work in multiple AWS accounts, add those keys to the credentials file at C:\Users\YOUR_USERNAME\.aws
[aws01]
aws_access_key_id = MY_ACCESS_KEY_FOR_AWS01
aws_secret_access_key = MY_SECRET_KEY_FOR_AWS01

[aws02]
aws_access_key_id = MY_ACCESS_KEY_FOR_AWS02
aws_secret_access_key = MY_SECRET_KEY_FOR_AWS02

[default]
aws_access_key_id = MY_ACCESS_KEY_FOR_AWS01
aws_secret_access_key = MY_SECRET_KEY_FOR_AWS01
We will use Terraform to create security groups and load balancers in AWS.
When you are reusing existing Terraform configurations
terraform get -update
terraform plan
terraform apply
More info on Terraform at https://www.terraform.io/docs/providers/index.html
Launching production instances in the cloud in Beginner’s Guide to DevOps Engineering part 7.
to the Tutorials page