AI agents use AI models to manage tasks and interact with other software.
OpenClaw
OpenClaw (formerly Clawdbot/Moltbot) is an open-source, autonomous AI agent that runs locally on a user’s computer or server, operating 24/7 to manage tasks and interact with applications. Unlike passive chatbots, it acts on behalf of the user to manage files, browse the web, send emails, and integrate with tools like Telegram, Slack, and GitHub, featuring long-term memory to maintain context across tasks.
Installation
The following command installs everything the application needs to run and perform all tasks:
In a terminal execute
curl -fsSL https://openclaw.ai/install.sh | bashThe security disclaimer contains the following important message:
Run regularly
openclaw security audit –deep
openclaw security audit –fix
Learn more
– https://docs.openclaw.ai/gateway/security
Configure OpenClaw
Execute
openclaw onboard --install-daemonI understand this is personal-by-default and shared/multi-user use requires lock-down. Continue?
● Yes
Setup mode
● QuickStart
Model/auth provider
● Skip for now
Filter models by provider
● lmstudio (1 model)
Select channel (QuickStart)
● Skip for now
Search provider
● Skip for now
Configure skills now?
● No
Enable hooks?
◻ Skip for now
Gateway service already installed
● Restart
How do you want to hatch your bot?
● Hatch in Terminal
Config file location
The OPenClaw config file on Ubuntu is at ~/.openclaw/openclaw.json
Install the OpenClaw gateway
openclaw gateway installRunning OpenClaw
Terminal User Interface
openclaw gateway --port 18789
openclaw tui
Browser User Interface
In one terminal window start the OpenClaw gateway
OPENCLAW_DISABLE_BONJOUR=1 # To fix error in OpenClaw 2026.4.24
openclaw gateway start --force
In another terminal start the dashboard UI
openclaw dashboardThis will open the default web browser at local URL http://127.0.0.1:18789/#token=…
A session token is automatically appended to the URL to provide access to the gateway.
Linux system performance monitoring tools
To monitor the Linux system performance we can install useful tools
Mission Center
Windows task manager-like graphical user interface to monitor the CPU, GPU, memory, network, disk usage. Install it from the Ubuntu App Center
LM Studio
LM Studio provides an interface to select, configure, and run AI models locally.
Installation
Download the LM studio installer. The AppImage to install the graphical user interface, or the Daemon to use the command line interface from the Terminal.
- Navigate to LM Studio
- Select the Desktop App or the Daemon
- Click the Download button
On Linux (Ubuntu)
Install Fuse
Newer Ubuntu releases do not include FUSE (Filesystem in Userspace) to runAppImages. This causes the error message
dlopen(): error loading libfuse.so.2
AppImages require FUSE to run.
You might still be able to extract the contents of this AppImage
if you run it with the –appimage-extract option.
See https://github.com/AppImage/AppImageKit/wiki/FUSE
for more information
Install FUSE with
sudo apt update
sudo apt install libfuse2t64
Install LM Studio
Make the downloaded file executable. Open the Terminal and execute
cd ~/Downloads
chmod +x ./LM-Studio-*.AppImage
Run LM Studio
./LM-Studio-*.AppImage --no-sandboxConfiguration
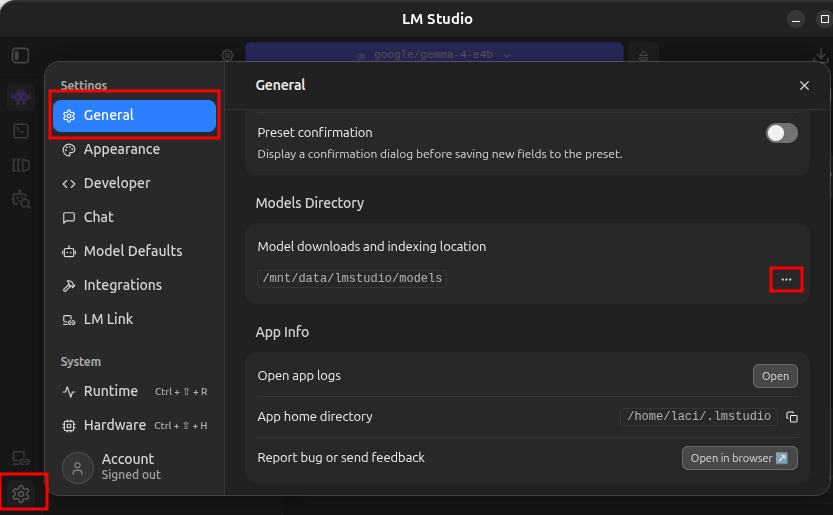
Model download and indexing location
If your computer has multiple hard drives, you can configure LM Studio to load and index models at a custom location.
- In LM Studio click the gear icon in the lower left corner, on the General tab click the ellipses (…) next to Model downloads and indexing location and select the new location.
Expose the models to OpenClaw
To use the local AI models from OpenClaw, we need to expose those from LM Studio
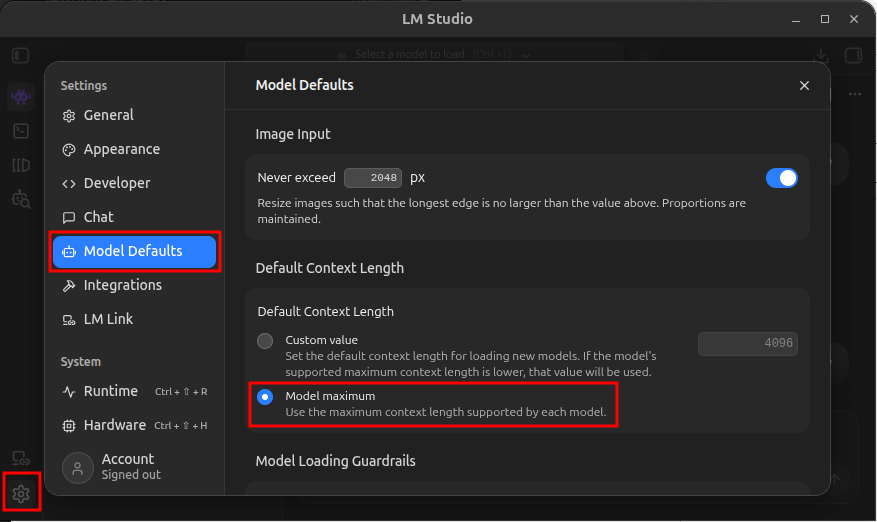
Set the context size
To allow OpenClaw to fully utilize the model context sizes, set the default to the model maximum.
- In LM Studio click the gear icon in the lower left corner, on the Model Defaults tab in the Default Context Length section select Model Maximum
Script the start of the LM Studio AI agent server
To be able to start the server any time, save in the /usr/local/bin/start_lm_studio_server.sh file
#!/bin/bash

# Start the LM Studio service
lms server start --port 1234
Make the file executable withchmod +x /usr/local/bin/start_lm_studio_server.sh
and execute the file to start the serverstart_lm_studio_server.sh
Check the server and the installed model
curl http://localhost:1234/v1/modelsAn example of the output
{
“data”: [
{
“id”: “google/gemma-4-e4b“,
“object”: “model”,
“owned_by”: “organization_owner”
},
{
“id”: “text-embedding-nomic-embed-text-v1.5”,
“object”: “model”,
“owned_by”: “organization_owner”
}
],
“object”: “list”
Configure OpenClaw to use LM Studio as the model source.
The bold text is the ID of the model from above. Execute
openclaw onboard \
  --non-interactive \
  --accept-risk \
  --auth-choice lmstudio \
  --custom-base-url http://localhost:1234/v1 \
  --lmstudio-api-key "$LM_API_TOKEN" \
  --custom-model-id google/gemma-4-e4b
Configure OpenClaw to use LM Studio as the model provider and restart the OpenClaw gateway
openclaw config set agents.defaults.memorySearch.provider lmstudio
openclaw gateway restart
To automate the LM Studio server start create a systemd service
Create the service file
cd /etc/systemd/system
sudo touch lm_studio_server.service
sudo nano lm_studio_server.service
Save the following in the file
[Unit]
Description=Start LM Studio server
After=network.target

[Service]
ExecStart=start_lm_studio_server.sh
Restart=always

[Install]
WantedBy=multi-user.target
Enable the service
sudo systemctl daemon-reload
sudo systemctl enable lm_studio_server.service Running AI models locally
System performance monitoring
When AI models run locally, it is important to see how our system behaves, how much load the model puts on the resources.
Local AI model managers
LM Studio
LM Studio is a user interface to select and configure locally ran AI models. See LM Studio
AI Models
Stable Diffusion AI image generator
Flameshot unable to capture screen
Ubuntu uses Wayland, and Flameshot needs permissions to capture the screen. To fix the error on Ubuntu 26
Flameshot unable to capture screen
- Install Flatpack with
sudo apt install flatpak - Set the missing permissions with (this is a long command, execute it as one line)
flatpak permission-set screenshot screenshot org.flameshot.Flameshot yes
Japan travel tips
If you travel to Japan, these tips can help to make your journey smoother.
Carry some cash
Cash is still very widely used in modern Japan. Some vendors don’t accept credit cards. Even if cards are acepted, many small vendors don’t take American Express
Many parks and gardens only sell tickets for cash. Those are usually 500 JPY for adults.
Suica card
Get the Suica card or use the Suica app on your phone. You need 500 JPY cash to buy the Suica tap card at train and subway stations. This allows you to ride the subway and city buses, assign your Shinkansen express train ticket to it, pay for luggage storage lockers, buy some park tickets, and food at the railway and subway stations from vending machines and from food vendors. It looks like the Japanese government wants to avoid credit card transaction fees, so they developed their own payment system.
To get the Suica card
At airports you can get the red Suica Welcome card for free, in the city you can only get the green one for 500 JPY.
At railway stations find the machine with the black sign for Tickets and Commuter Pass
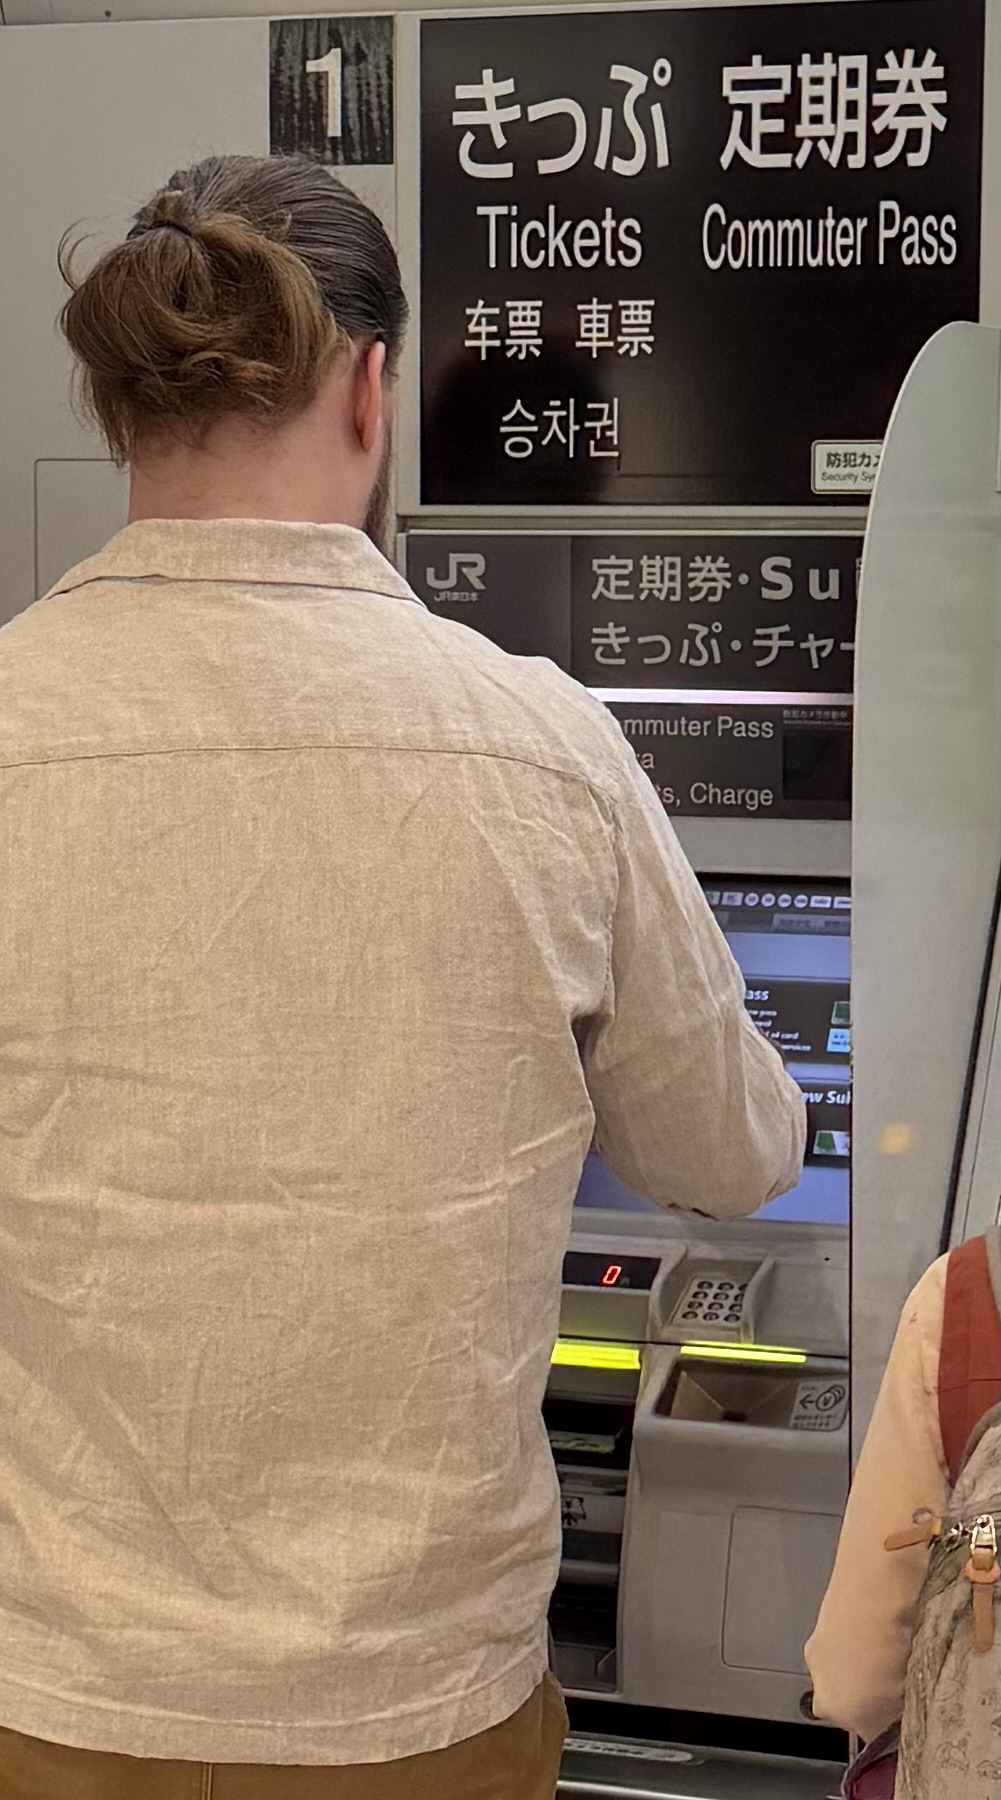
Select the “Blank card” option on the screen, and pay 500 JPY cash to get the plastic card. You cannot use the card fee for travel or purchases. The machines accept larger bills and return the difference in cash, no credit card is accepted. In a separate transaction charge the card with cash only. A typical subway ride is around 250 JPY, so plan accordingly.
The card fee is refunded when you return the card at the end of your trip.
Check the opening hours
Many parks and gardens are closed on Mondays, some of them, on Tuesdays too.
In the hotel
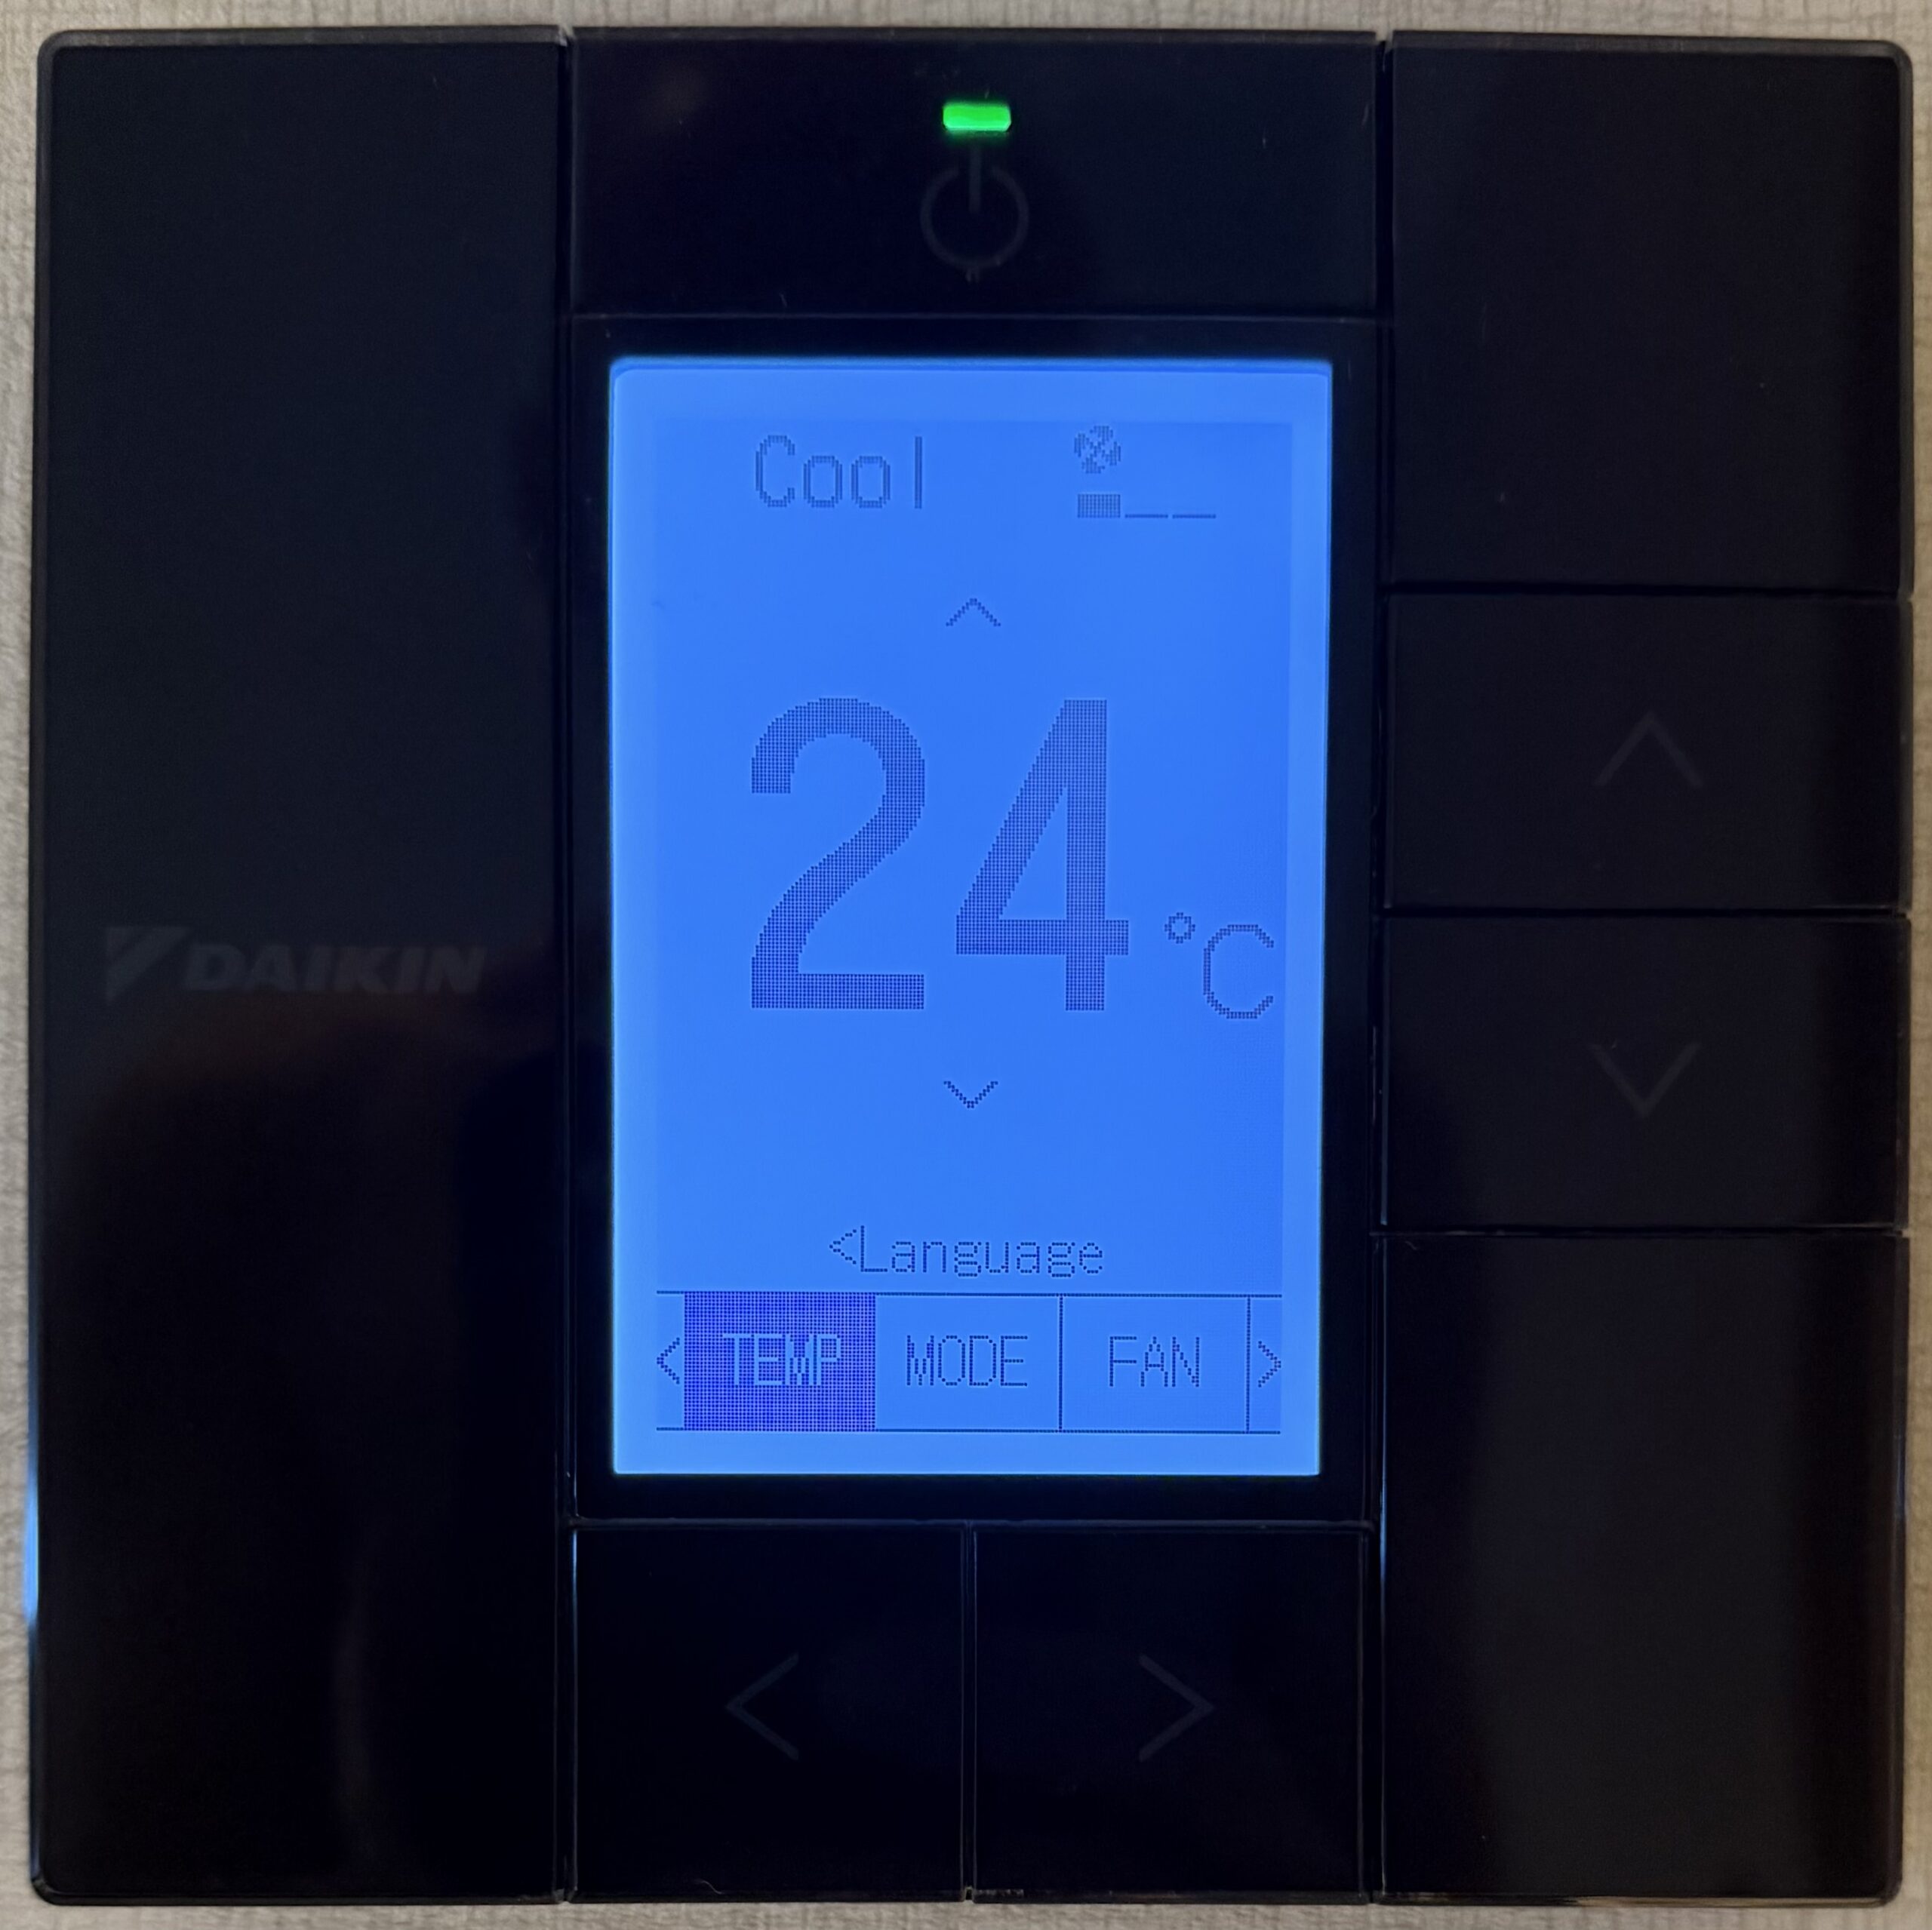
Turn on the thermostat
When you put your key card into the slot next to the door, the lights come up, and the TV turns on, but the heating and cooling is still off. The on/off button is usually on the top of the thermostat. Of course every country outside of the US use the metric system for temperature. Get familiar with the conversion.
Debugging web applications in the Visual Studio Code Integrated Browser
Visual Studio Code version 1.112.0 introduced the Integrated Browser that supports web application debugging entirely within Visual Studio Code.
To set up the debugging configuration see Integratee Browser
Debugging Vitest JavaScript and TypeScript unit tests
Node.js has multiple unit testing frameworks, one of the most popular for web applications is Vitest. If a unit test fails, debugging is the best way to find the problem. To debug Vitest JavaScript and TypeScript unit tests in Visual Studio Code
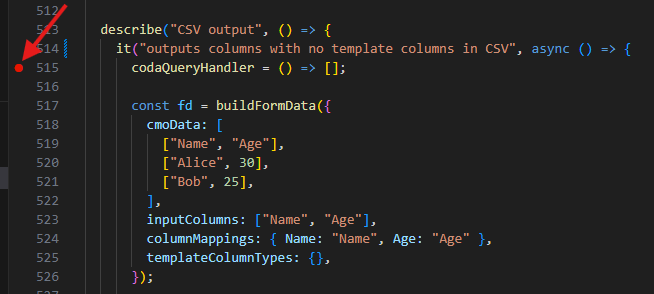
Set the breakpoint
- In the unit test file set the breakpoint at the failing line by clicking the margin of the code
Open the JavaScript Debug Terminal
- Press CTRL-SHIFT-P (CMD-SHIFT-P on Mac) and on the top of the screen select JavaScript Debug Terminal
- In the dropdown on the top select the directory to open the terminal in
Start the debugger
- In the terminal window execute the command
cd PATH_TO_THE_APPLICATION && pnpm vitest run app/routes/THE_UNIT_TESTFILE_NAME.ts -t "THE_NAME_OF_THE_UNIT_TEST_IN_THE_it_STATEMENT"When the test reaches the breakpoint, the execution stops, and the variable values are available by hovering over them and on the left side of the screen.
Set up Easy Auth with Microsoft Azure Entra ID
The Microsoft Azure Entra ID provides federated authentication and authorization services for applications running in the Azure Cloud. Easy Auth enables application to use Single Sign On (SSO) services transparent to the user to detect the identity of the user of the application. To set up Easy Auth
- Open the Microsoft Azure management portal at https://portal.azure.com/
There are two ways to set up Easy Auth for an Azure Container App: automatically from the Container App or manually using Entra ID by an administrator.
Automatic configuration ( does not require Azure Cloud account admin rights)
Configure the authentication
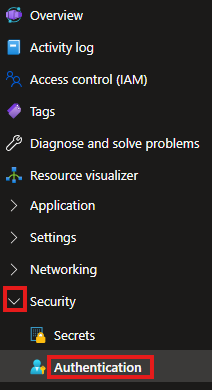
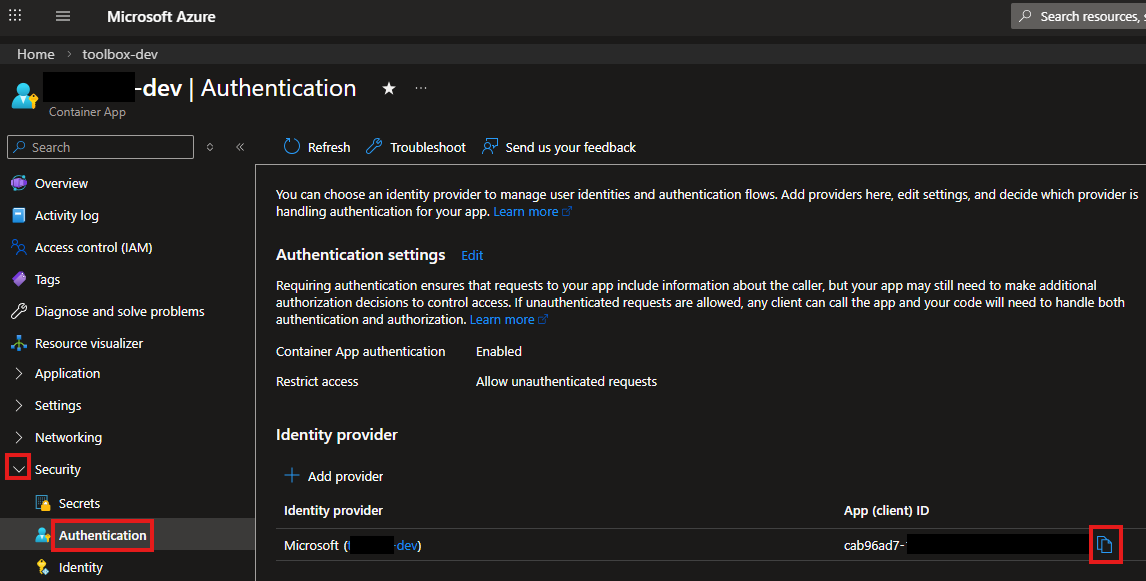
- On the Azure Container App page in the Security section select Authentication
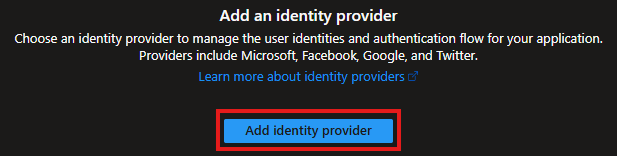
- On the page select the Add Identity Provider button
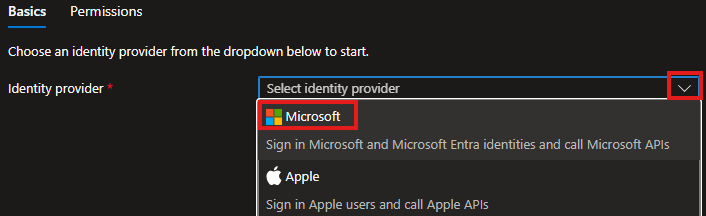
- In the list select Microsoft as the identity provider
- Configure the identity provider. Set the client secret expiration date
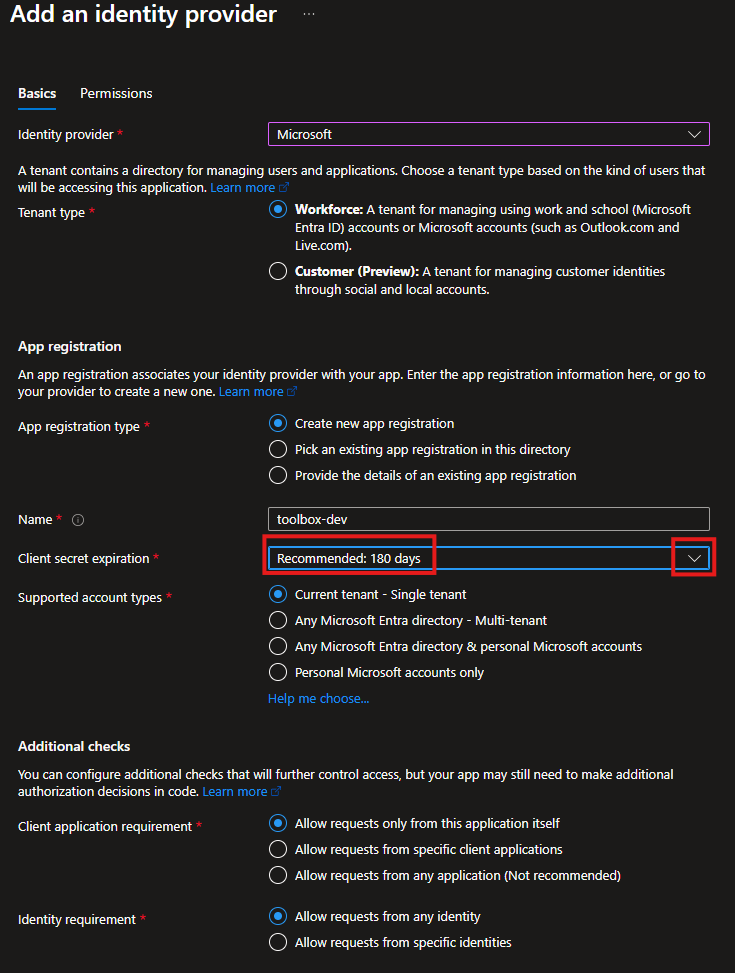
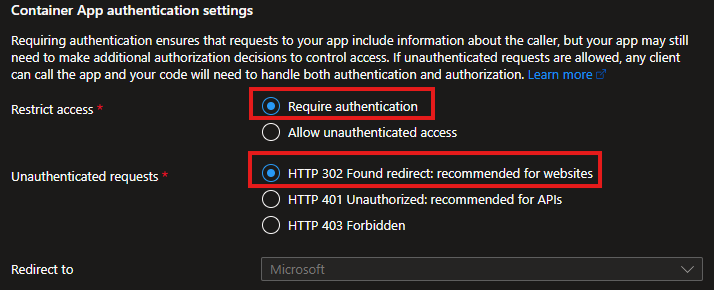
- To require users to authenticate when thay use the application elect Require authentication and for web applications leave HTTP 302 selected
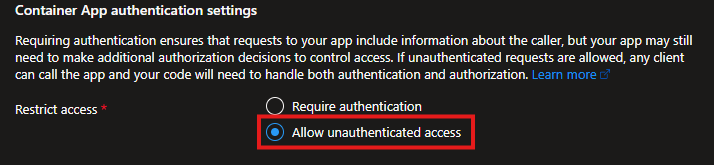
- To allow users to access the application without the login page, select Allow unauthenticated access. If this is an internal application and the users have already authenticated to access the network, the user information will be included in the web request header.
- To require users to authenticate when thay use the application elect Require authentication and for web applications leave HTTP 302 selected
- Click the Next: Permissions button to configure the Microsoft Graph permissions

- Keep the User.Read permission
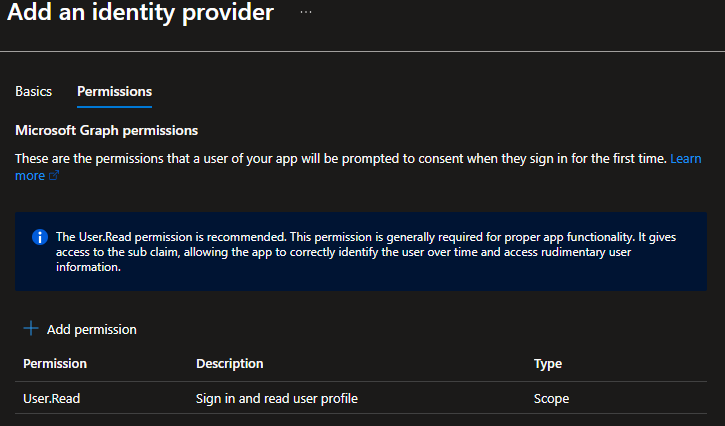
- Click the Add button to save the settings

- It takes a minute to generate all objects.
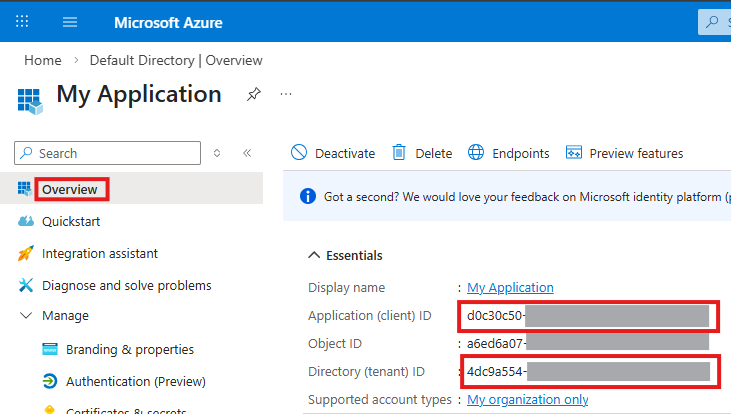
- The App (client) ID is on the Authentication page of the Security tab
Get the tenant ID
- Install the Azure CLI
- In the Terminal execute
az account show - The Tenant ID is displayed in the output
Manual configuration by an Azure Cloud account admin
Register the application
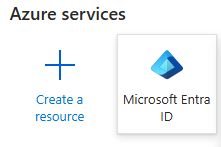
- On the main page select the Microsoft Entra ID icon
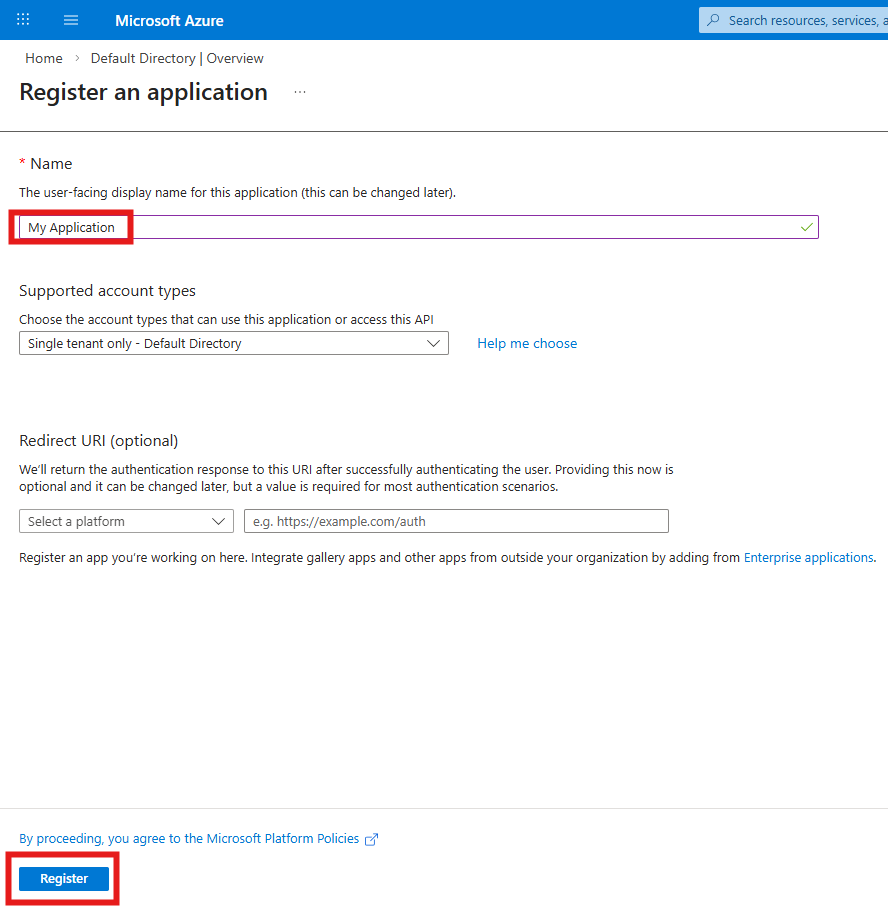
- Click the Add item in the header and select App Registration

- Enter the display name of the application. If the application does not use Azure Entra as the authentication provider, leave the Redirect URI empty and click the Register button
Set the permissions
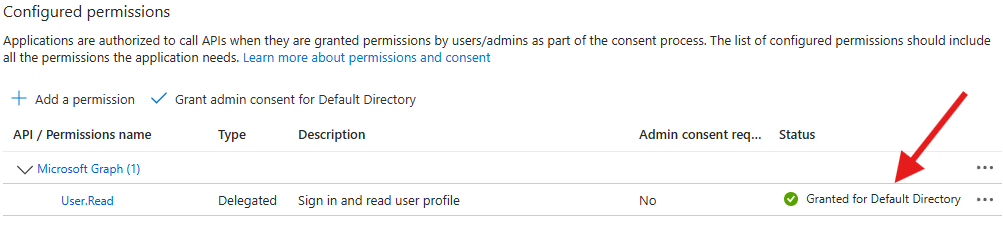
Make sure the Microsoft Graph User.Read permission is enabled
- On the left side open the Manage menu and select API permissions
- Make sure the Microsoft Graph User.Read permission is enabled

- If the Microsoft Graph User.Read permission is not enabled
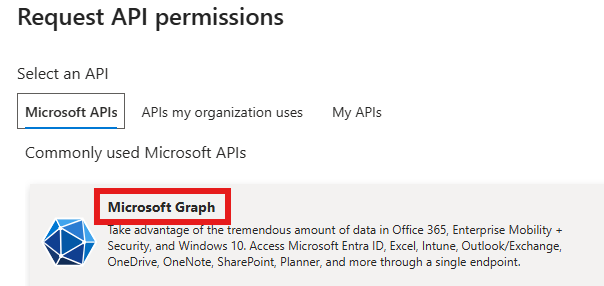
- Click the Add a permission option
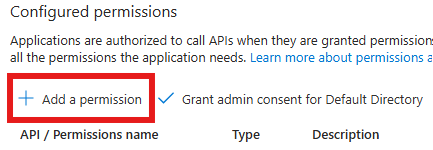
- Select the Microsoft Graph option
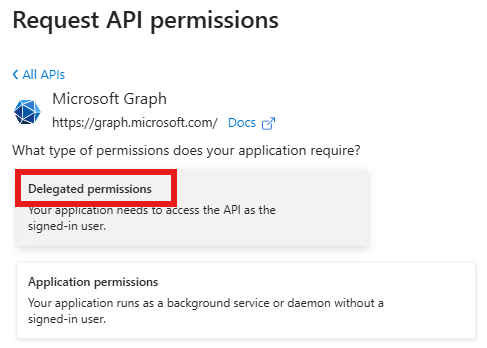
- Select Delegated permissions
- In the User section enable User.Read permission
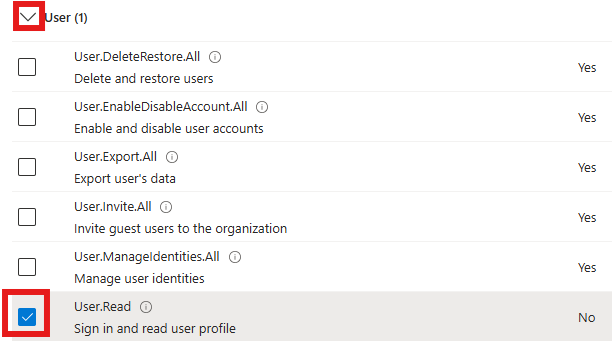
- Click the Add permission button at the bottom of the page

- Click the Add a permission option
- Click the Grant admin-consent for … button
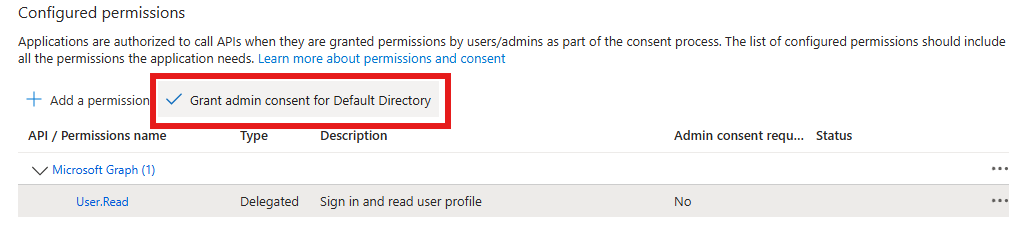
- Click the Yes button

- The status should be Granted for …
Use the Easy Auth feature in your application
Configure your Azure Container Apps application to use Easy Auth
- Copy the Application (client) ID and Directory (tenant) ID from the Overview page
In the Azure Container Apps deployment script update the application to use the Easy Auth feature with the authTenantId and authClientId values extracted above:
# Entra ID issuer URL for built-in authentication (Easy Auth)
authIssuer="https://login.microsoftonline.com/${authTenantId}/v2.0"

# Enable Entra ID (Azure AD) built-in authentication (Easy Auth)
            # This injects the X-MS-CLIENT-PRINCIPAL-NAME header with the user's UPN on every authenticated request.
            echo "Configuring Entra ID authentication..."
            az containerapp auth microsoft update \
                --name $applicationName \
                --resource-group $resourceGroupName \
                --client-id $authClientId \
                --issuer $authIssuer \
                --yes
Extract the user information in the application
In the loader() function of the React Router 7 (Remix) web application read the “x-ms-client-principal-name” header value. It will contain the email address of the user.
export async function loader({ request }: Route.LoaderArgs) {
  let userName = "";

  // 1. Check for Azure AD / Entra ID auth header (production)
  const principalName = request.headers.get("x-ms-client-principal-name");
}
For more information on configuring Azure Container Apps for Easy Auth see Authentication and authorization in Azure Container Apps