Key bindings
| Key | Effect |
| S | Rotate part up |
| W | Rotate part down |
| A | Rotate part left (flat) |
| D | Rotate part right (flat) |
| Q | Rotate part left |
| E | Rotate part right |
| Shift + W/S/A/D/Q/E | Rotate parts in 5° instead of 90° steps |
| Space | Reset part rotation |
| ` (back quote) | Search part |
| Delete | Delete selected part |
| 1 | Place Mode |
| 2 | Offset Mode |
| 3 | Rotate Mode |
| 4 | Root Mode |
| F | In Place mode: Toggle Symmetry between vessel or parent part |
| F | In Offset mode: Toggle between absolute or load centered offset |
| F | In Rotate mode: Toggle between absolute or relative rotation |
| R | Toggle Symmetry Method between mirror or radial |
| X | Cycle symmetry settings (next) |
| Shift + X | Cycle symmetry settings (previous) |
| C | Toggle Angle Snap |
| Enter | Reset staging list |
| Ctrl + Z | Undo the last action |
| Ctrl + Y | Redo the last action |
| Mod (hold) | Disable surface attach/exclusively use node attach |
| Shift + Left-click | Move the entire ship The “Shift + Left-click” on any part of the ship to grab the entire craft, and release the mouse button to move it. Left-click again to release it. |
| Control + Left-click | Navigate to clicked part in the part list |
| Mod + Left-click | Duplicate part or assembly in VAB |
Placing Parts
To place the part to the correct location align the white dot to the parent where the part should be placed.
- For successful staging, make sure the solid rocket boosters are attached to the radial decouplers.
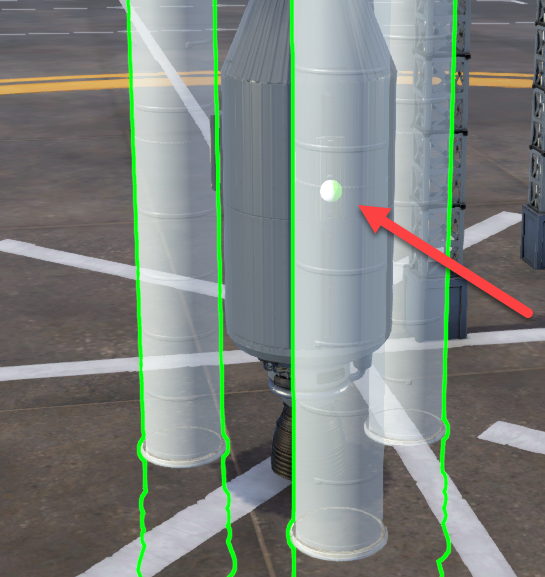
No matter where you grab the booster, the white dot always appears in the middle, so place one radial decoupler where the middle of the booster will be.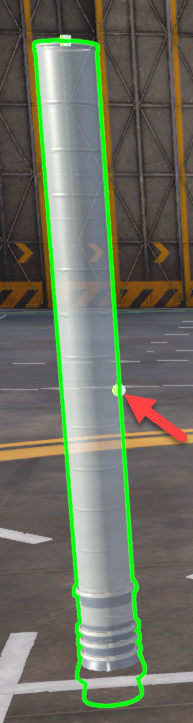
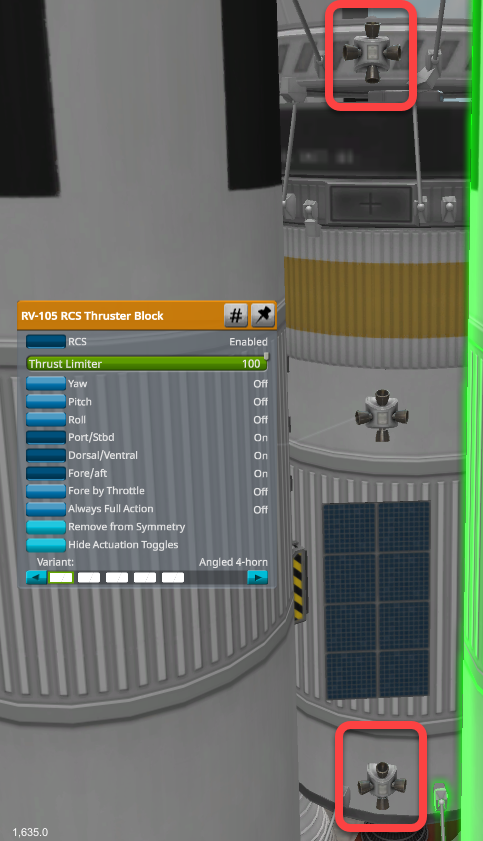
RCS
Place RCS blocks with 3 or 4 symmetry at the top and bottom of the craft equidistant from the Center of Mass (CoM). If more RCS blocks are needed, place them close to the Center of Mass (CoM).
Save on monopropellant
If your vessel has reaction wheels, you don’t need to waste fuel to rotate the craft. We can select what actions will the RCS system perform.
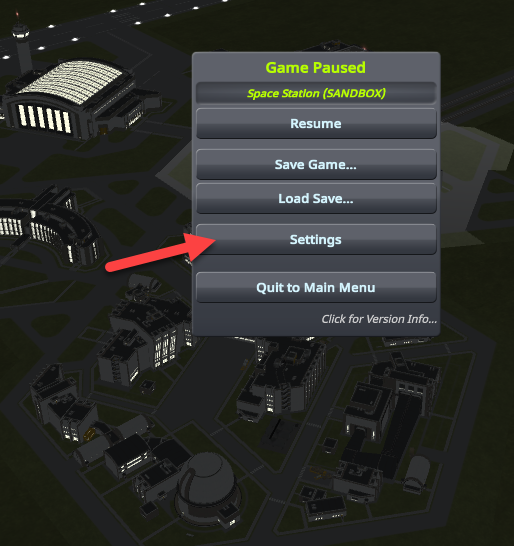
Enable Advanced Tweakables
- In the space center press ESC to open the pause menu, and select Settings
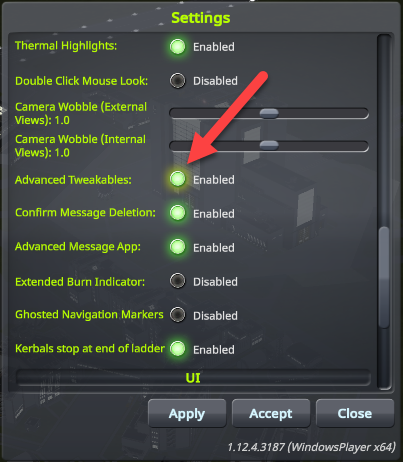
- Scroll down and enable Advanced Tweakables, and click the Accept button
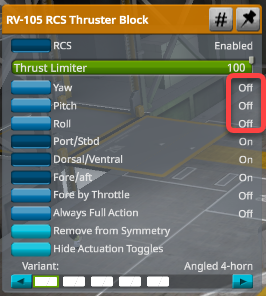
Disable the rotation functions
- Right-click the RCS truster block and select Show Actuation Toggles
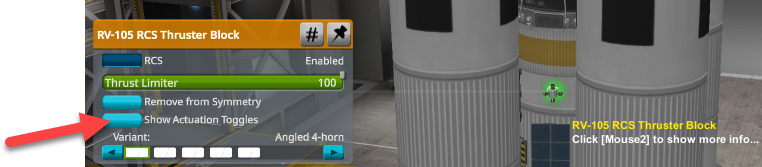
- Disable Yaw, Pitch, Roll
- If you used symmetry to place the trusters, the others in the same group will be adjusted, but you still need to set up the rest of the groups of the craft.
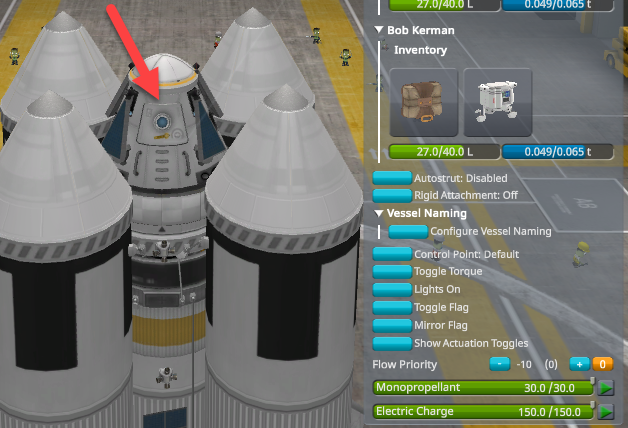
- As the Cupola has its own RCS trusters, configure those too
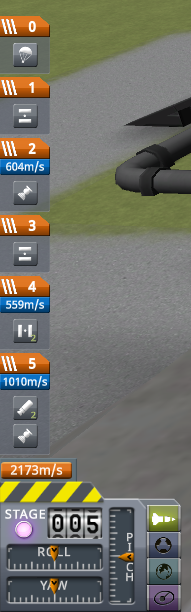
Staging
Stage 0 is for the parachute, the largest number is for the boosters.
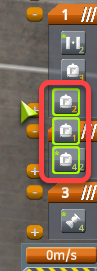
Breaking up groups with symmetry
When you place parts with symmetry, those move together when you rearrange them in staging. To break up the symmetry groups
- Click the part you don’t want to move to unselect it
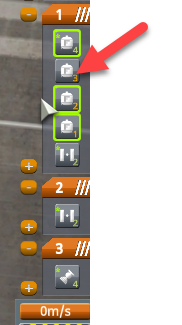
- Drag the rest of the (still selected) parts to the new stage
Spacecraft alignment
As you enter the VAB, you are standing on the West side of the VAB, facing East. When the pod is placed on the spacecraft, the astronauts (and the automatic probe cores) are facing North, so you have to yaw right for the Eastern gravity turn. Rotate the pod 90 degrees with “Q” in the VAB to face East, so steering can be done with the up and down controls, and maneuvers are going to be more intuitive in orbit. If the hatch of the Command Pod, or the Cupola, or the label of the Probe Core is facing you (West) in the VAB, it is in the correct position.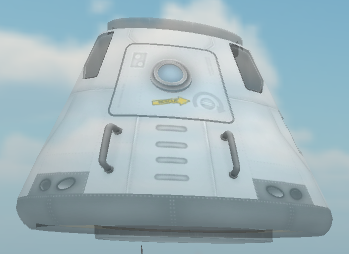
![]()
When you save a module as a Subassembly, it will always be inserted facing North (hatch facing South), so you should rotate it 90 degrees with “Q”.
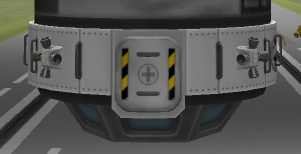
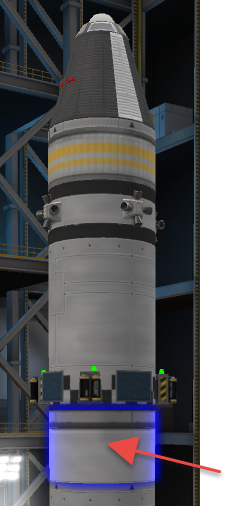
Fairings
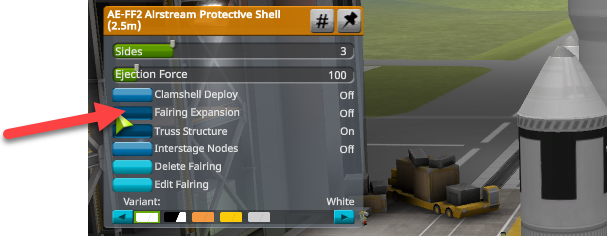
Turn off expansion animation
By default Protective Shells open when you mouse over them. It is designed to reveal their cargo, but can be unnecessary when used as custom aerodynamic nose cones. To temporarily disable the animation
- Right-click the fairing and click the Fairing Expansion button to turn it off.
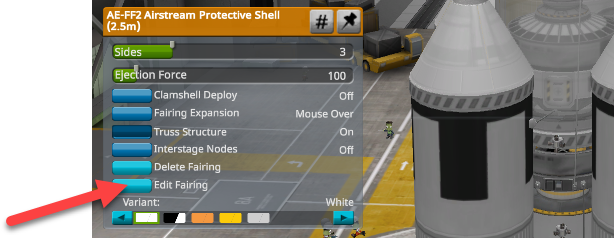
Edit the fairing
- To edit the shape of the fairing, click the Edit Fairing button.
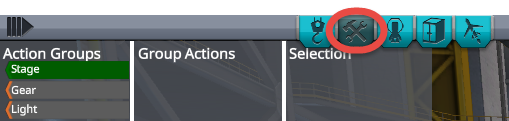
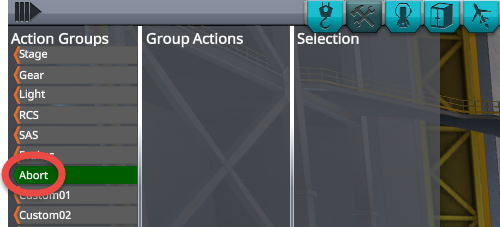
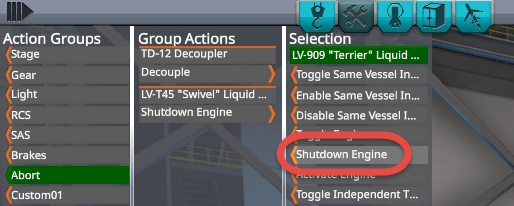
Flight abort
To safely abort a flight assign actions to the Abort action group. When you click the abort handle next to the altimeter or press the Backspace key the action group items will be executed. To open the parachute, press the space bar multiple times to advance through the staging sequence.
- Select Action to create an Action Group
- Select the Abort action group
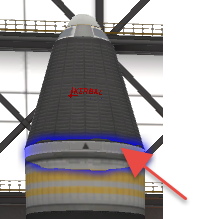
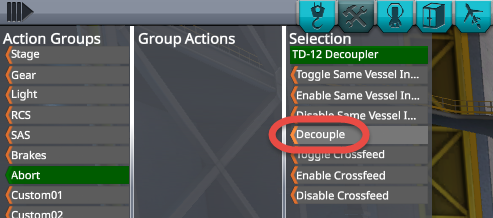
- Click the coupler under the pod
- Add the Decouple action to the group
- Select all liquid engines
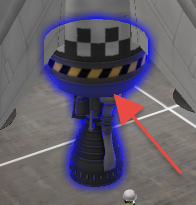
- And add their Shutdown Engine actions to the group

- Select the engine of the upper stage in the fairing and add the Shutdown Engine action to the group
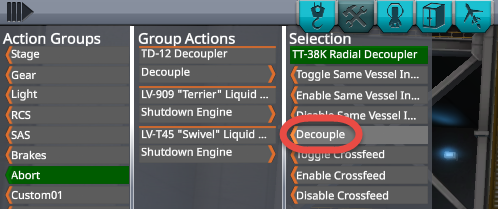
- Select the radial decouplers of the solid rocket boosters. If placed with symmetry, it is enough to select one of them.

- Add the Decouple action to the group
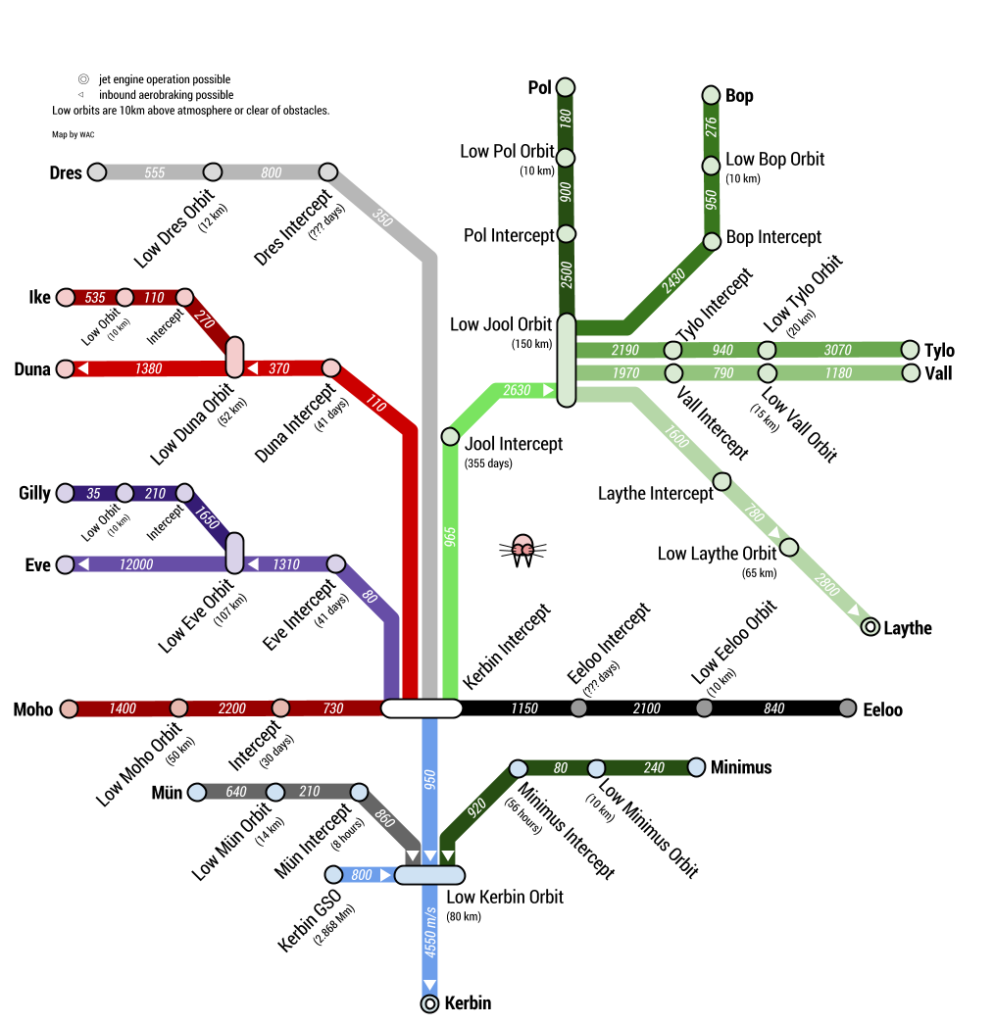
Propulsion design
To reach celestial bodies you need to provide the necessary Delta V to the mass of your spacecraft with your engines.
This cheat sheet, by Vaier from https://steamcommunity.com/sharedfiles/filedetails/?id=2477535173, can help to calculate the necessary engine power.
Engine selection
Use the ISP value to select the right engine for the right environment. Some engines perform better at sea level (ASL), and some in a vacuum (Vac.)
For boosters, use the engine designed for both, ASL and Vac.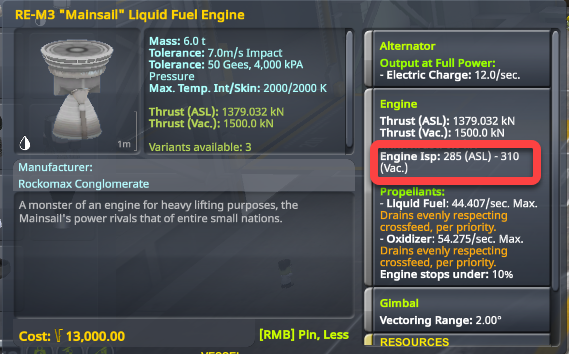
For orbiters, use the engine designed for vacuum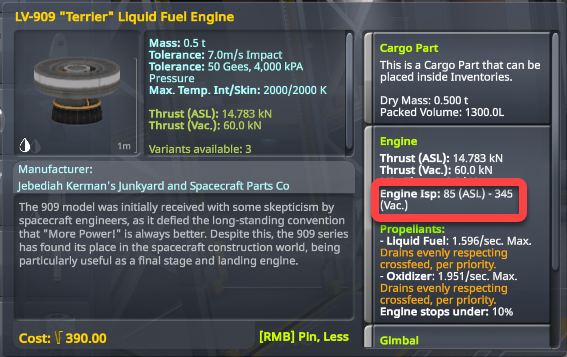
Delta-v
To check the delta-v of the vessel, first, open the Delta-v panel at the bottom of the screen, and select Vacuum. Make sure NOT to add the orbital stage value to the booster stage’s Delta-v. Temporarily you can reduce the thrust of the upper stage engines to zero to use the red total value at the bottom, but don’t forget to turn them on again.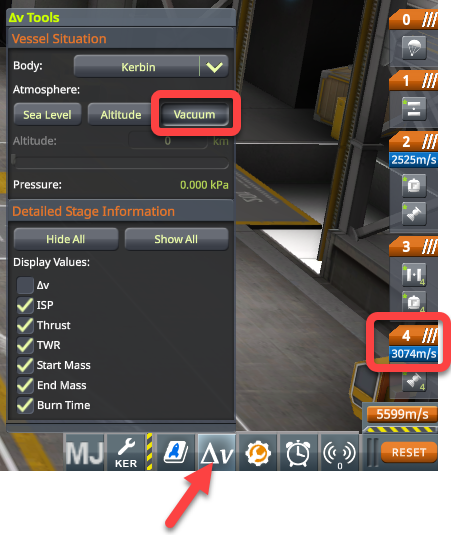
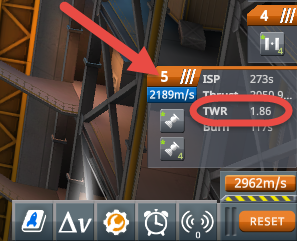
Trust weight ratio
The optimal thrust-to-weight ratio for boosters is around 1.5 – 3. Once in orbit, less than 1 is enough for speed changes. The less the TWR, the longer burn is needed.
- To display the thrust-to-weight ratio click the orange tab of the stage.
Typical TWRs
Sea level: 1.3 – 1.35
Upper stage booster: 2.05 – 2.15
Orbital vehicles: below 1 is fine
Subassemblies
We can save modules of the spacecraft as subassemblies. We can build a complete space station in the VAB, select modules connected by docking ports, and save them as subassemblies. To launch the modules individually, we load a spacecraft to launch it, and place the module on top of it from the subassembly list.
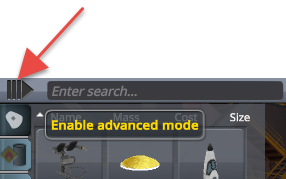
- In the Vehicle Assembly Building enable Advanced mode
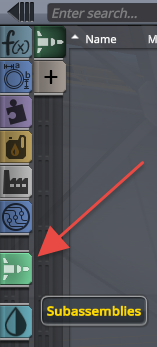
- Click the Subassemblies button
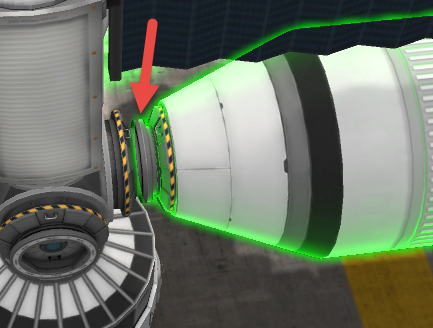
- Left-click the docking port of the module and release the mouse button to grab it.
- As the mouse still moves the module click the Subassembly Drop Zone with the left mouse button.
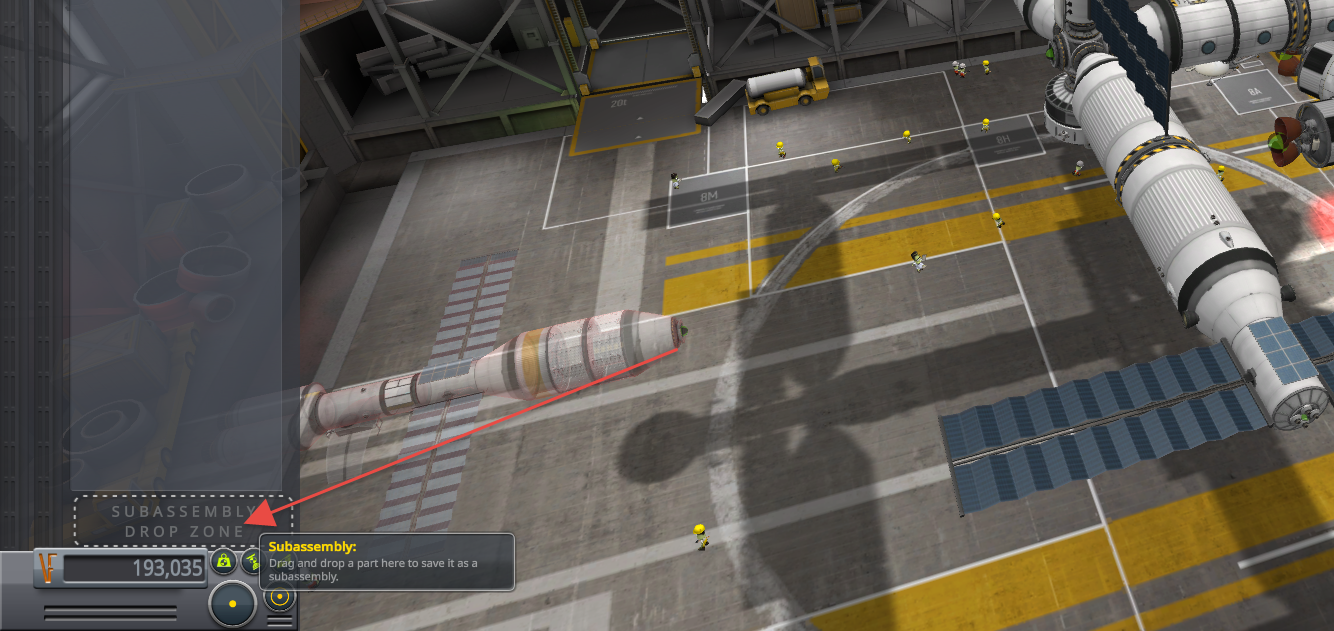
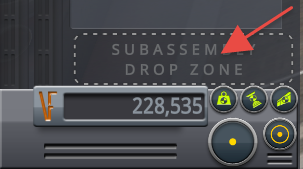
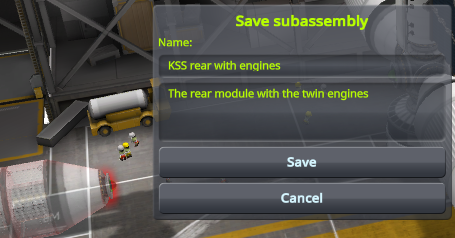
- The subassembly save dialog opens, enter a name and description
Autostruts
Autostruts are struts, but can automatically be attached to three relative parts:
- Heaviest Part (WARNING this can change as fuel is used up during flight, and as a result of docking)
- Root part (the first part of the vessel construction)
- Grandparent Part (for a solid fuel booster attached to a fuel tank with a radial coupler, the fuel tank is the grandparent part)
To see autostruts, enable the visibility in the Debug menu, see Visualize Autostruts
You can add autostruts to vessels in orbit:
- Right-click the part and cycle through the autostrut attachment options by clicking the Autostrut button. In this example we have selected the Root Part
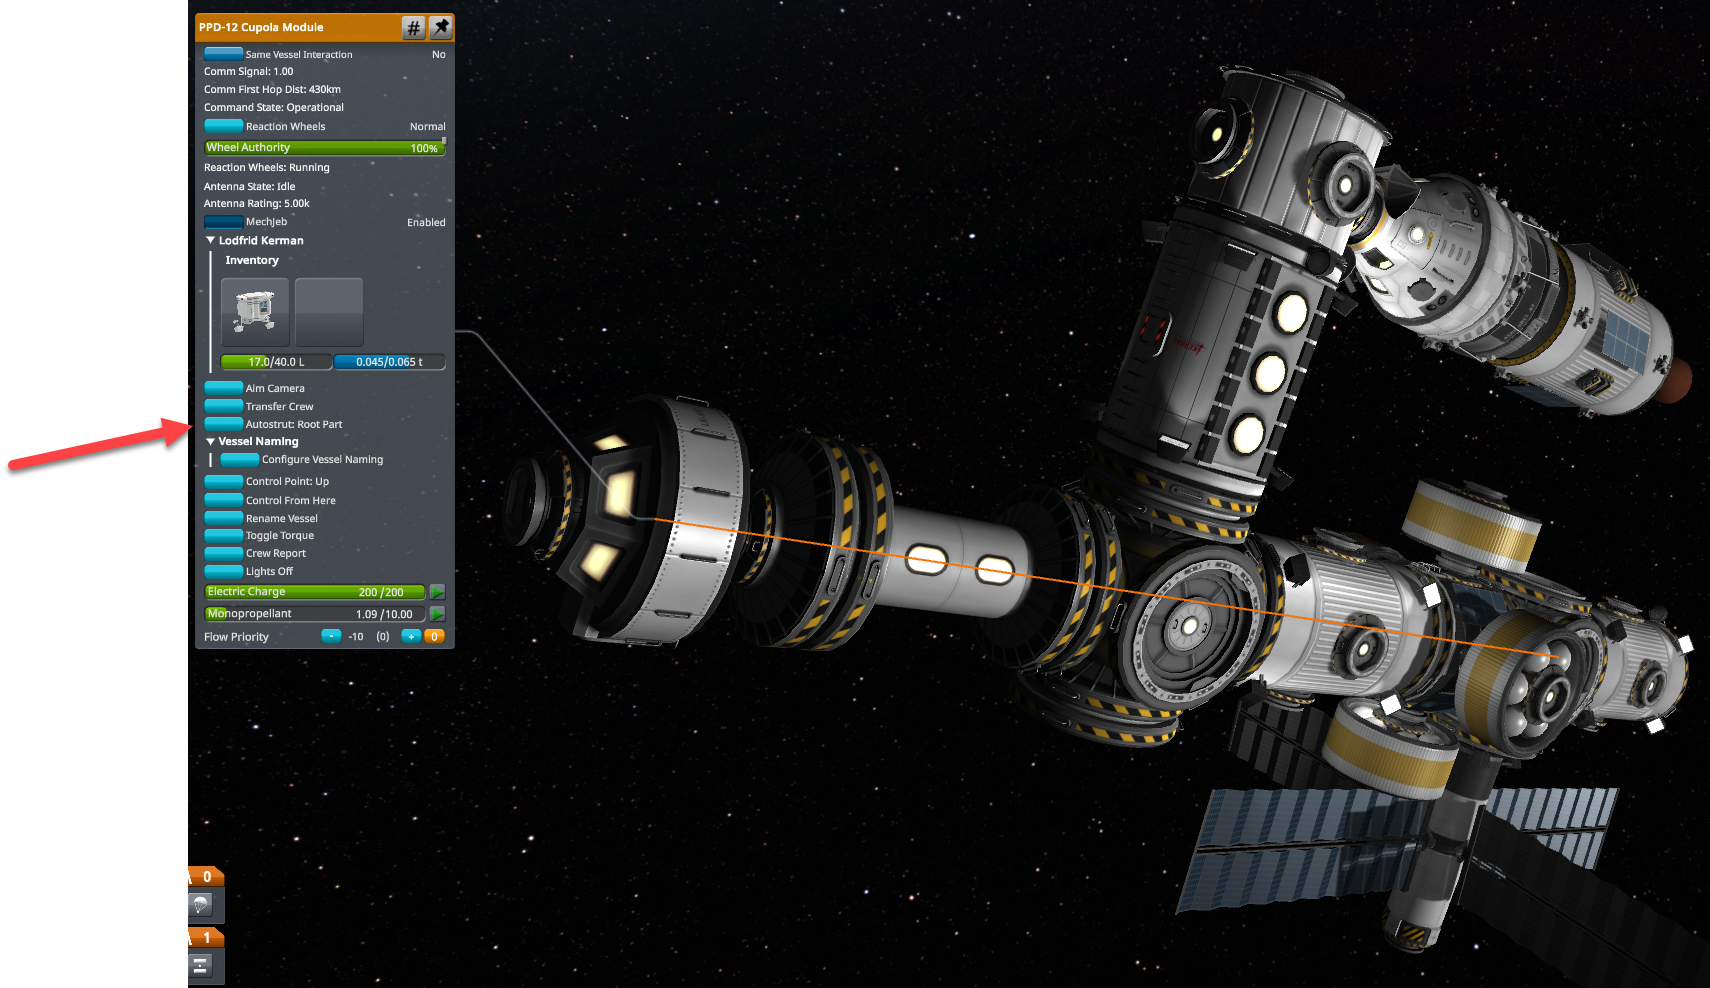
WARNING: It can cause wobbling in large structures, like space stations.
More information
The Kerbal Space Program wiki provides great information on spacecraft building and control.