Skip to content
Pinter Computing

Knowledge Base for IT Professionals, Teachers, and Astronauts

Pinter Computing

Knowledge Base for IT Professionals, Teachers, and Astronauts

  • Home
  • Programming
  • DevOps
  • Project Management
  • Software and Hardware
  • Miscellaneous
  • Egyebek
  • About
  • Experience
  • Education
  • Contact
  • Home
  • Programming
  • DevOps
  • Project Management
  • Software and Hardware
  • Miscellaneous
  • Egyebek
  • About
  • Experience
  • Education
  • Contact
Close

Search

Home/Knowledge Base/EVA construction in Kerbal Space Program
Knowledge Base

EVA construction in Kerbal Space Program

By Laszlo Pinter
January 4, 2023 2 Min Read
0

To attach parts to spacecraft in orbit you can transport the parts in the cargo hold of your vessel, dock to it and do the upgrade.

Take a ladder

Besides the part, take a mobility enhancer (ladder), so the Kerbal has something to hold on to, and a junior docking port with you to temporarily dock the vessel.
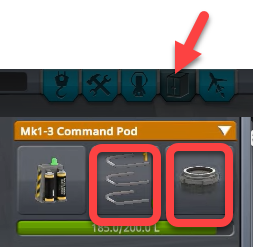
Crew

For construction in orbit, you need an engineer on board.

EVA

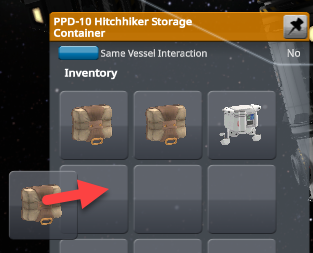
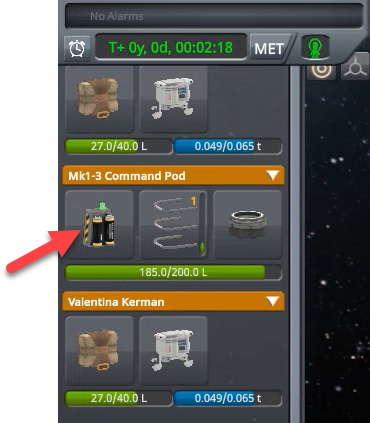
Make sure the astronaut only has the necessary equipment in their inventory. By default they have a parachute and an EVA pack in this order. If you take them outside for an EVA they take the parachute, and if they let go the hatch, lost forever. For EVA gave them only the EVA pack.

  • Right-click the module the astronaut is in
  • Move the EVA pack to the first place in the inventory
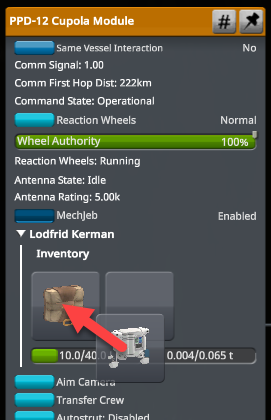
  • Move the parachute to another module

Construction

Approach the vessel (see https://pinter.org/archives/13067) and start an EVA with the engineer.

The astronaut has access to inventories in closeby vessels, so keep both vessels close to each other.

You can practice orbital construction on the launch pad and the runway.

  • Make sure the Kerbal in EVA is in a stable position, preferably grabbing one of the vessels, as during construction you cannot control them, and they can drift away.
  • Click the Build icon on the toolbar on the left side.
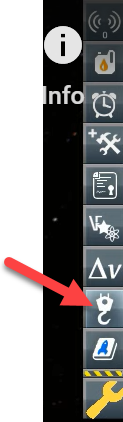
  • Grab a part from the inventory and place it on the target vessel.
  • Rotate the parts with the A S D Q W E buttons, use the left Shift for fine rotation. Hold Alt to snap to nodes on the vessel.

Tutorial video

Author

Laszlo Pinter

Follow Me
Other Articles
Previous

Ooni Pizza Oven Tips and Tricks

Next

Getting to the Mun and back in Kerbal Space Program 2

No Comment! Be the first one.

Leave a Reply Cancel reply

Your email address will not be published. Required fields are marked *

Search

Last Changes

  • DevOps Engineering part 1. (Mac) - Make your Macintosh easier to use June 25, 2026
  • Japan travel tips June 22, 2026
  • How to stop the rain and snow in Cities: Skylines II June 20, 2026
  • Cities: Skylines II Developer Mode June 20, 2026
  • 'CSII_MANAGEDPATH' has incorrect path(s) when building Cities: Skylines II mod June 20, 2026

Tags

.NET .NETcore 3Dprinting ASP.NET Core AutodeskInventor AWS C# Chef cloud DevOps Docker EntityFramework Games Git Go iOS iPad iPhone iPod Java Kubernetes Linux MacOSX MSSQL MVC Node.js Packer PowerShell Python RDS RightScale Ruby security Splunk TeamCity Terraform TestKitchen Tomcat Ubuntu Vagrant VirtualBox VisualStudio Windows WordPress Xcode

Recent Comments

  • Zengei László on MyHeritage családfa exportálása és küldése emailben
  • Raúl Castillo on DynDns update error
  • MICHAEL on Windows Media Player 12 cannot find the album information
  • Nargis on Configure Epson ET-3850 scanning on Windows 11
  • Venczelné Zemen Erika on Delta S2302 termosztát programozása

–

  • Log in
  • Entries feed
  • Comments feed
  • WordPress.org
Copyright 2026 — Pinter Computing. All rights reserved.