Terraform is a very powerful, free command-line tool to launch servers in any cloud or virtual machine environment. Hashicorp, the creator of Terraform just introduced the paid Terraform Enterprise server, that orchestrates the execution of the Terraform scripts.
Octopus is another tool that added Terraform orchestration functionality in version 2018.3
In this example, we will set up a Multi-Tenant Octopus project to launch servers in AWS with Terraform scripts and configure them with Chef.
Quick Links
Terraform script location
Create a GitHub repository for the Terraform script
GitHub is the most flexible way to store the Terraform scripts. Octopus can download and execute the same script in multiple Octopus projects. This eliminates the code duplication and makes the scripts available for execution from the command line.
Create a GitHub user with read access to the repository
If the GitHub repository is private, Octopus will need a way to access it with a username and password.
Tag the source code version, Octopus needs a version to refer to the version of your script
git tag 1.0.0
git push --tags
Automation with Octopus
We will create a Multi-Tenant Octopus project to be able to use the same Octopus project for multiple server types in multiple AWS environments.
We will create
- an Octopus project group to hold the AWS launch projects,
- a generic Octopus project to launch an AWS EC2 instance,
- an operating system specific Octopus project that calls the generic project
- environments for each AWS account, application, application environment,
- tenants for each server.
Create the Environments
- On the Infrastructure Octopus page select Environments
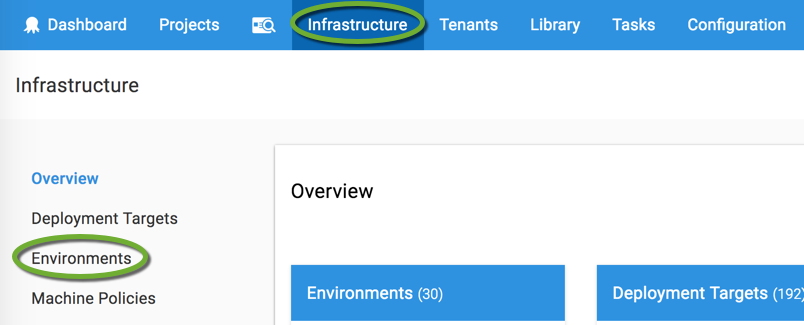
- On the Environments page click the ADD ENVIRONMENT button

- Create the environments you need (aws-dev, aws-qa, aws-uat, aws-prod)
Create a Lifecycle
The lifecycle governs how the project is promoted between environments.
- On the Library Octopus page select Lifecycles
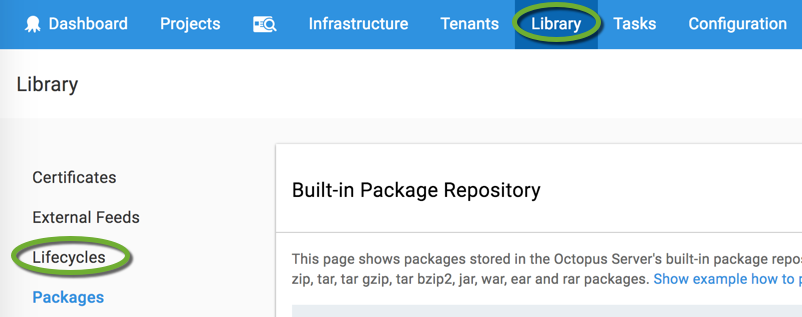
- Click the ADD LIFECYCLE button

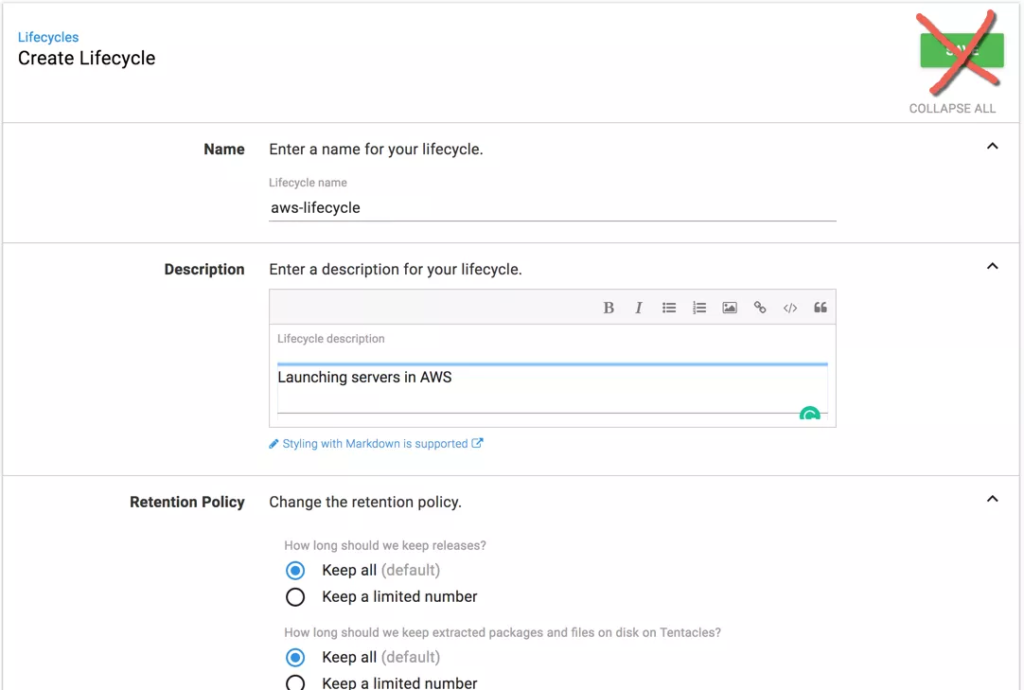
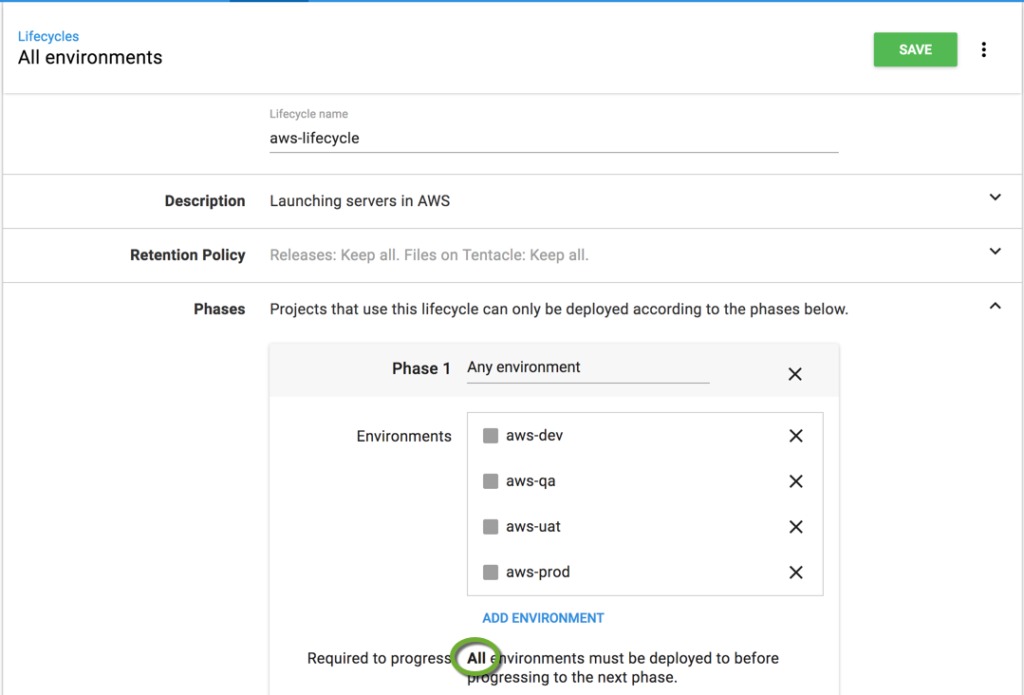
- Enter the name and description of the Lifecycle and click the ADD PHASE button

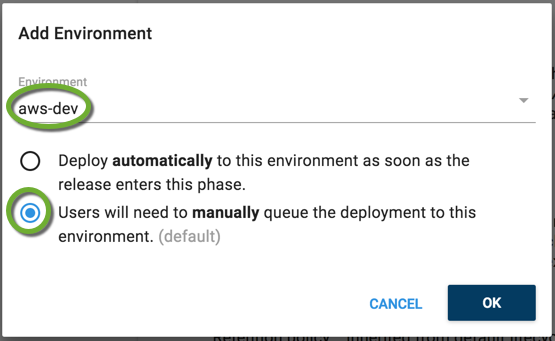
- Enter a name for the Phase and click the ADD ENVIRONMENT link to select the environment
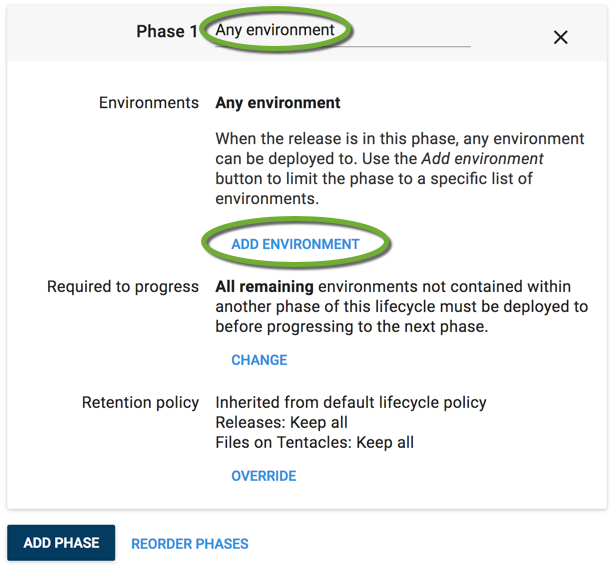
- Select the environment and the Users will need to manually… radio button
- Keep the All environments must be deployed… and click the Save button.
Create a project group
The project group holds your launch projects together.
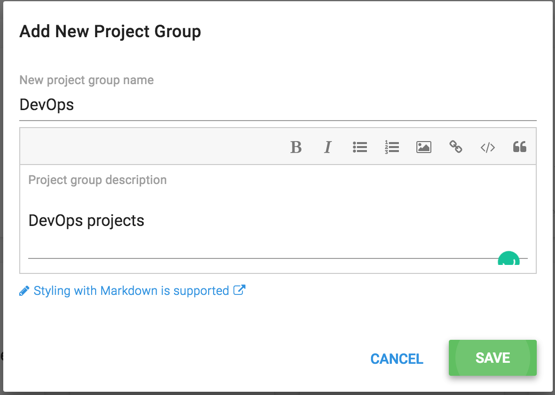
- On the Projects Octopus page select ADD GROUP

- Enter a name and description for the project group
Create a GitHub feed
This feed will allow Octopus to connect to GitHub
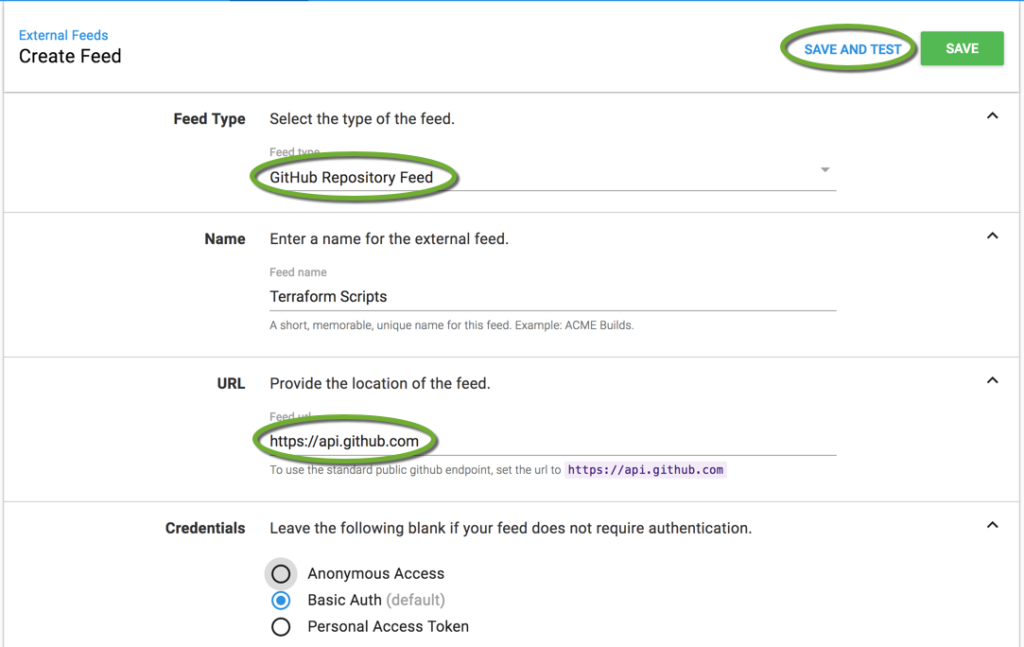
- On the Library Octopus page select External Feeds

- Click the ADD FEED button

- Select the GitHub Repository Feed type, enter a name and copy the recommended URL. Add the GitHub user’s name and password you have created above, and click the SAVE AND TEST link

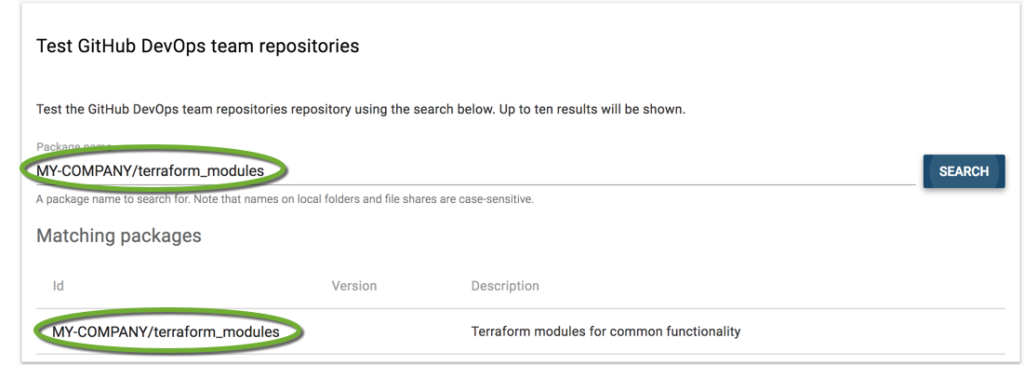
- Enter the complete name of your Terraform repository and click the SEARCH button to make sure Octopus has access to the private repository. If you do not specify the full path of the repository, the search will display public repositories with similar names.
Store an AWS account reference in Octopus
AWS accounts store the credentials to connect to Amazon Web Sevices
- On the Infrastructure page select Accounts
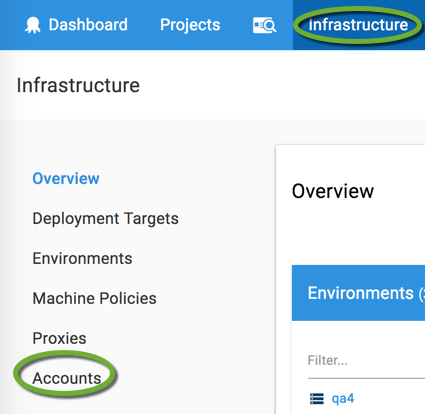
- In the Amazon Web Services section click the ADD ACCOUNT button and select the account type

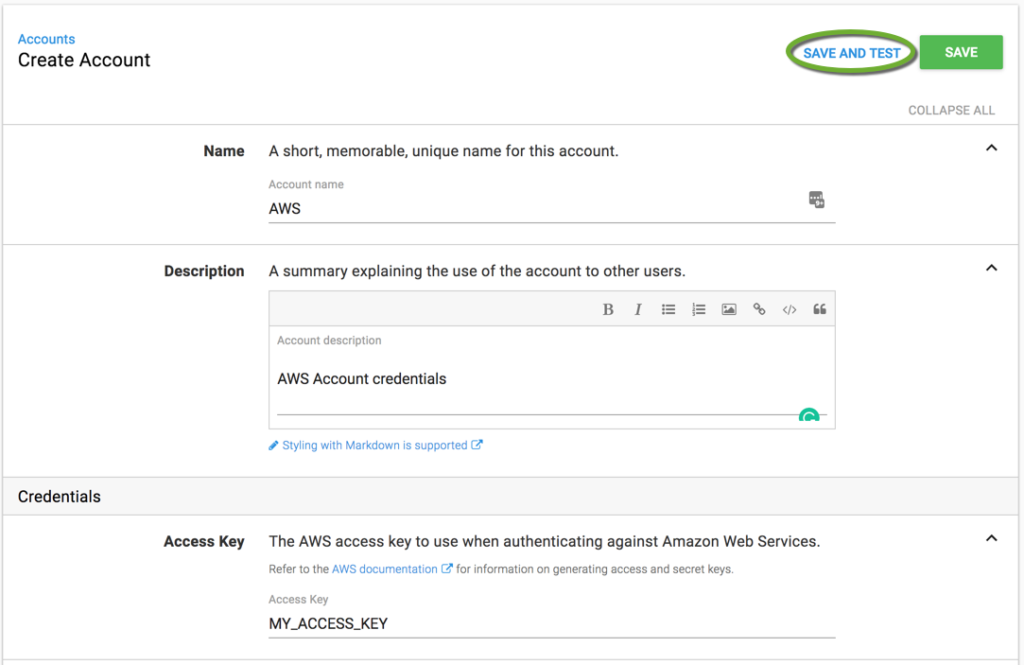
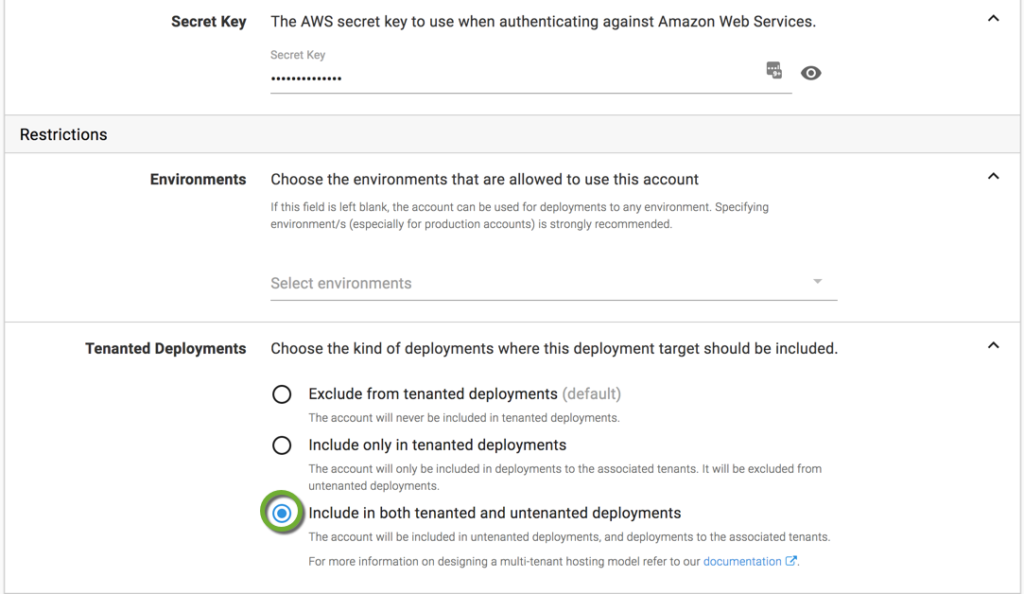
- Enter a name, description, Access Key and Secret Key for the account. Enable the usage in tenanted and untenanted deployments, and click the SAVE AND TEST link.

Store SSH Keys in Octopus
Store your private keys in Octopus, so you can reference them in your variables.
- On the infrastructure page select Accounts
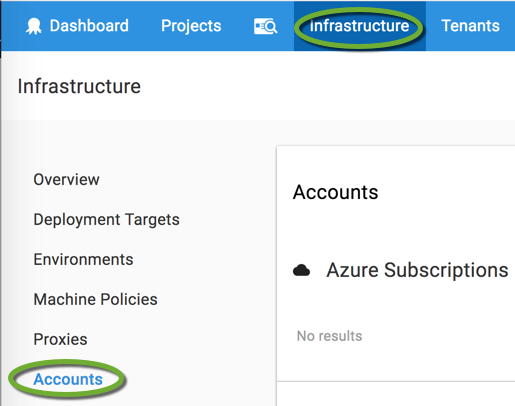
- In the SSH Key Pairs section click the ADD ACCOUNT button

- Enter the SSH key name, the username, and click the up arrow to upload the SSH private key file to the Octopus server.
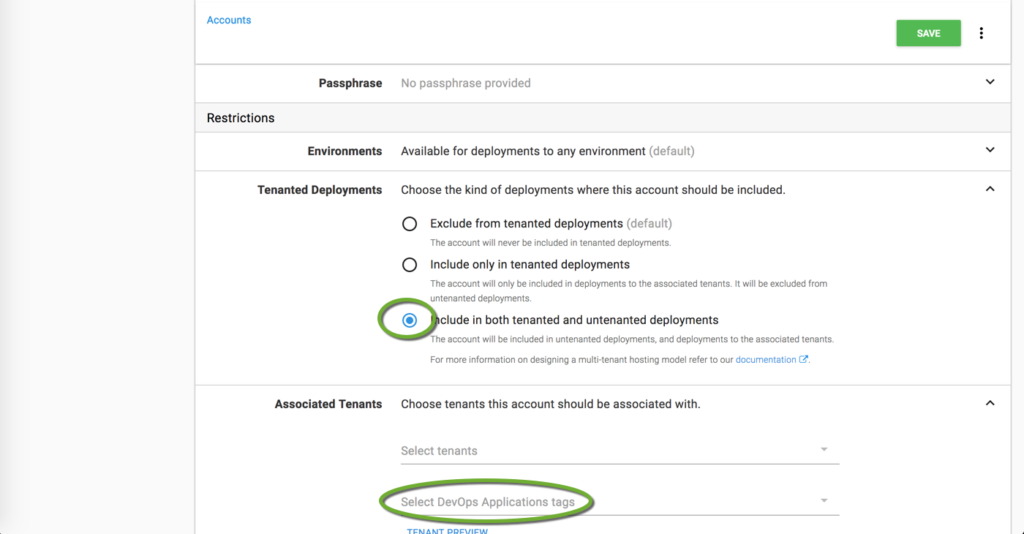
- Select the Include in both tenanted and untenanted deployments radio button.
- In the Associated Tenants section select the tenant groups you want to use the key for.
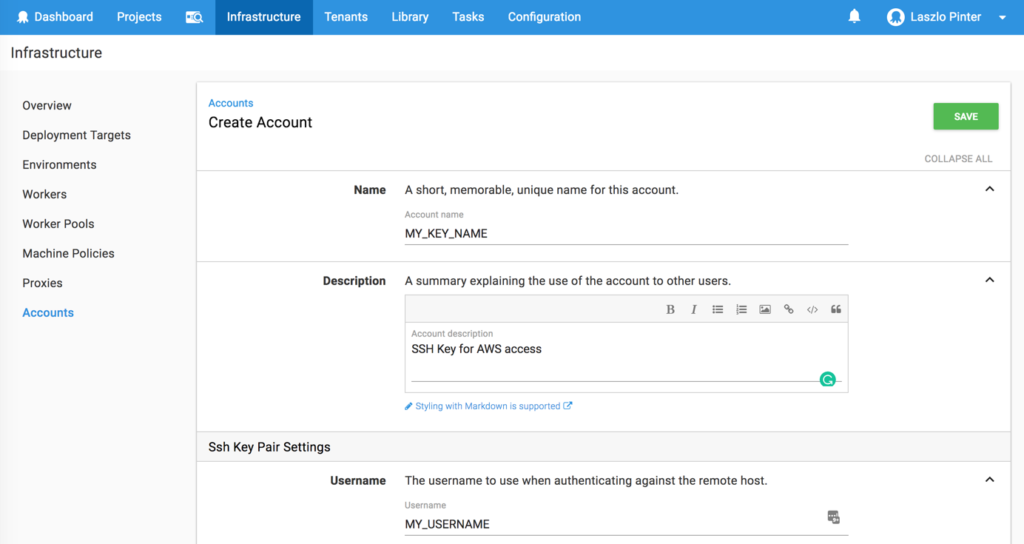
- Click the SAVE button to save the certificate in Octopus
Create a Project
The project contains the reference to the Terraform script to launch the server, the connection to the GitHub repository where the Terraform script is stored, and credentials to access the AWS account. The Terraform script and GitHub connection are going to be the same for every server launch, but the AWS account credentials have to be different for each AWS account. If you work with multiple AWS accounts, you need to create separate projects for each AWS account.
- On the Projects Octopus page scroll down to the DevOps project group and click the ADD PROJECT button

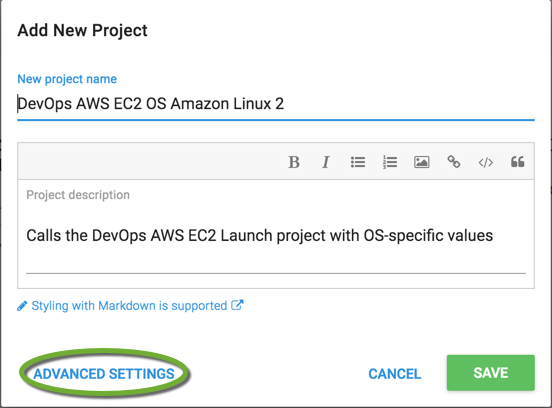
- Enter a name and description for the new project, and click the ADVANCED SETTINGS link
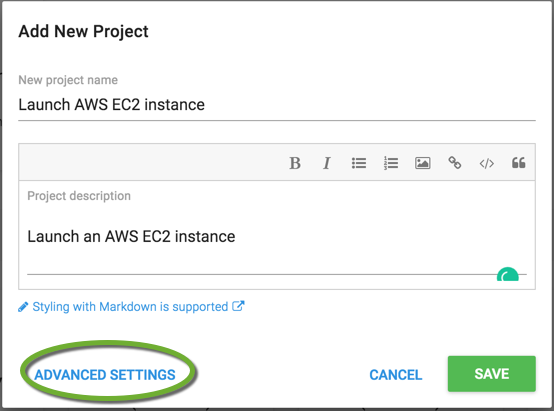
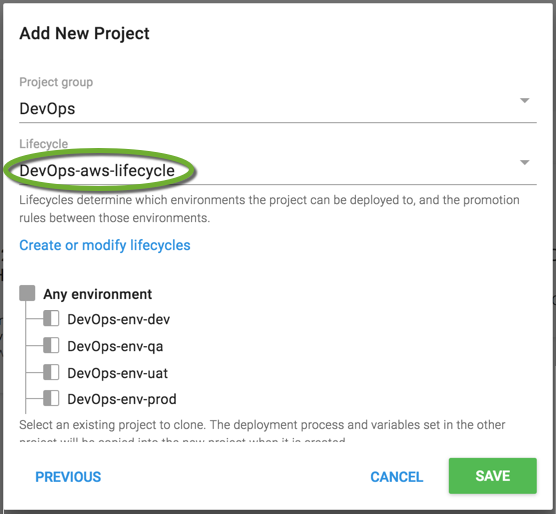
- Select the lifecycle you have created earlier, and click the SAVE button.
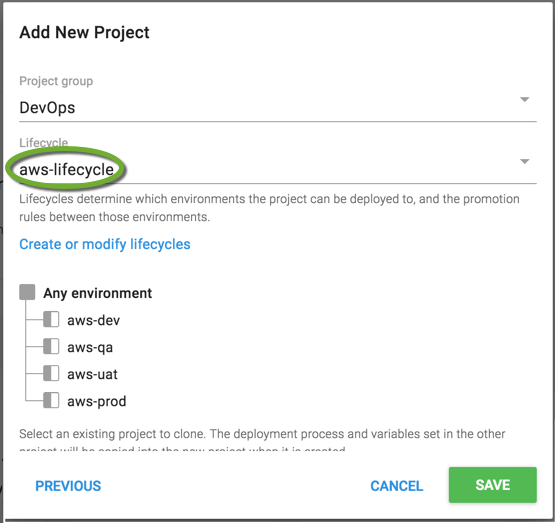
Create the launch process
- On the left side select the Process menu item
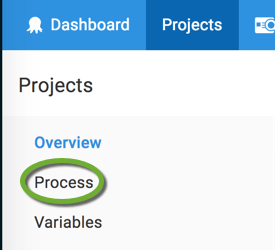
- On the Process page click the ADD STEP button

- Type “terraform” into the filter field and select Apply a Terraform template step
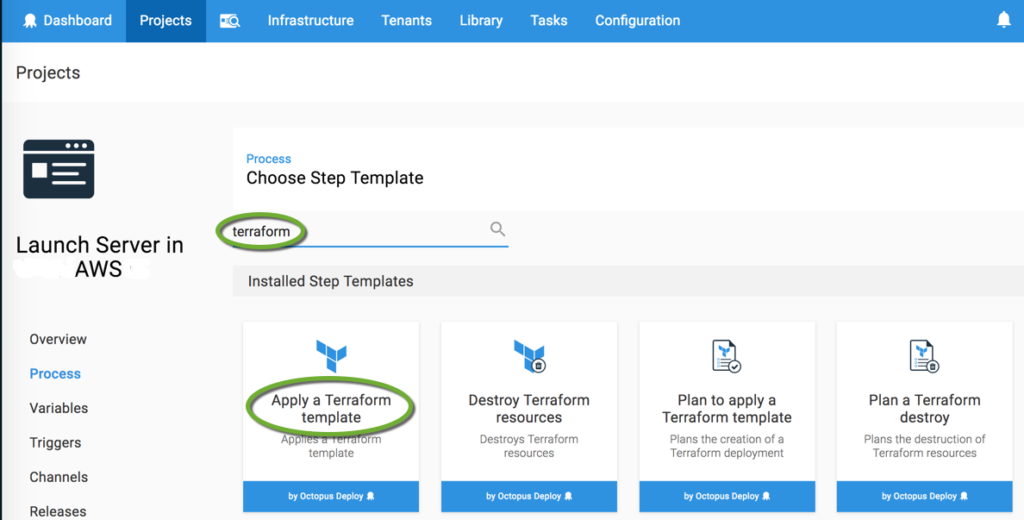
Create the variables
- In the project click the Variables menu item
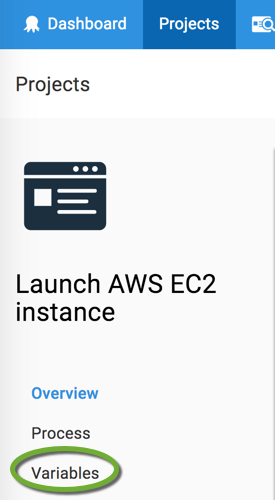
- Enter the name of the variable and click the value field

- Click the CHANGE TYPE link

- Select the Amazon Web Services Account type
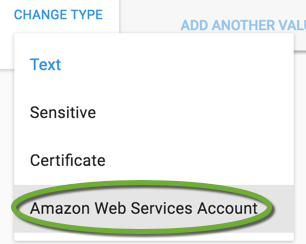
- Enter a description and select the AWS account you have created above, and click the DONE button.
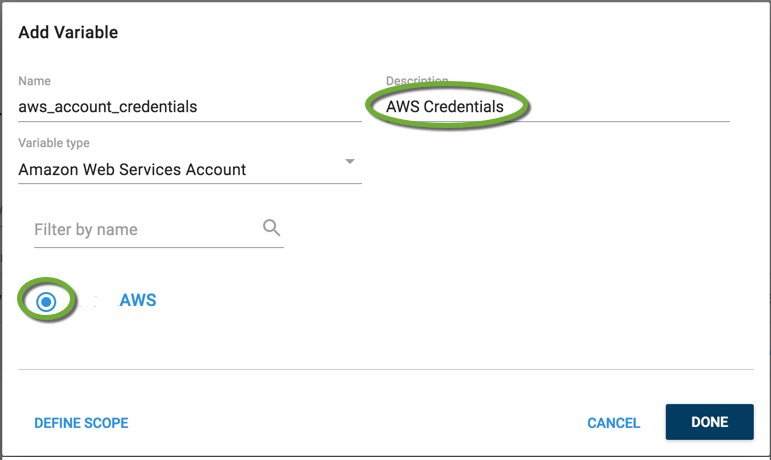
- Create the rest of the variables.
- Add prefixes to the variables that will be set in the OS-specific child project, in the tenant, environment, and target.
Update the variable names in the Terraform script
When we added prefixes to the project variables to show which component is responsible for setting it, we have changed the variable name. Update the Terraform script to reflect it.
ami = "#{os.instance_ami}"
Create an OS-specific child project that calls the generic parent project
There are values that are different for each operating system in each AWS account.
The AMI ID depends on the operating system and the application environment. We can test the new version of the operating system in the development environment, while we are still launching servers with the old, tested version for production.
The common, OS-specific security group ID is different in every AWS account. It depends on the AWS account and the operating system.
To be able to set the value of this variable based on the OS and the AWs account, or the OS and application environment, we need to create an OS-specific project that passes in the appropriate variable values to the generic project.
- On the Projects page scroll down to the DevOps project group and click the ADD PROJECT button

- Enter the name and description of the new project and click the ADVANCED SETTINGS link
- Select the DevOps-aws-lifecycle
- Click the Process menu item
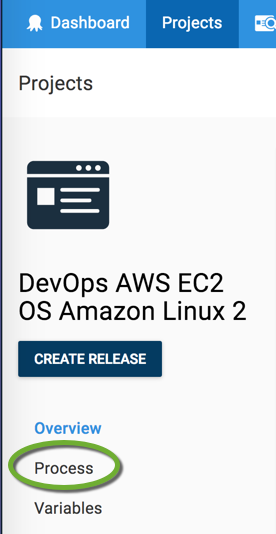
- Click the ADD STEP button

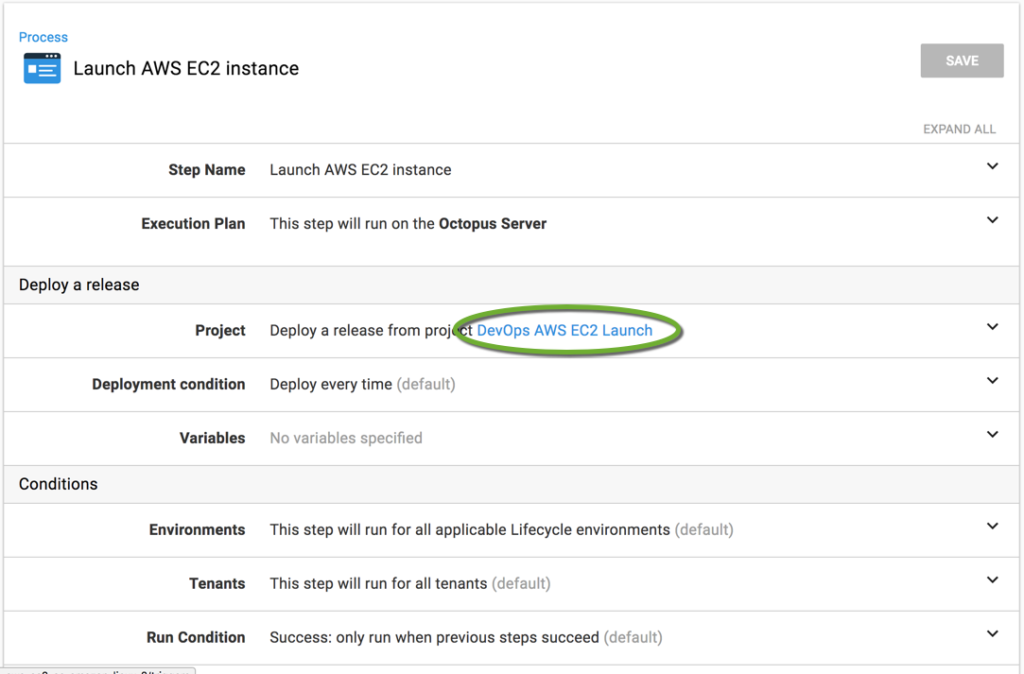
- Select the Deploy a Release step

- Enter the name for the step and select the generic AWS EC2 Launch project
Create variables
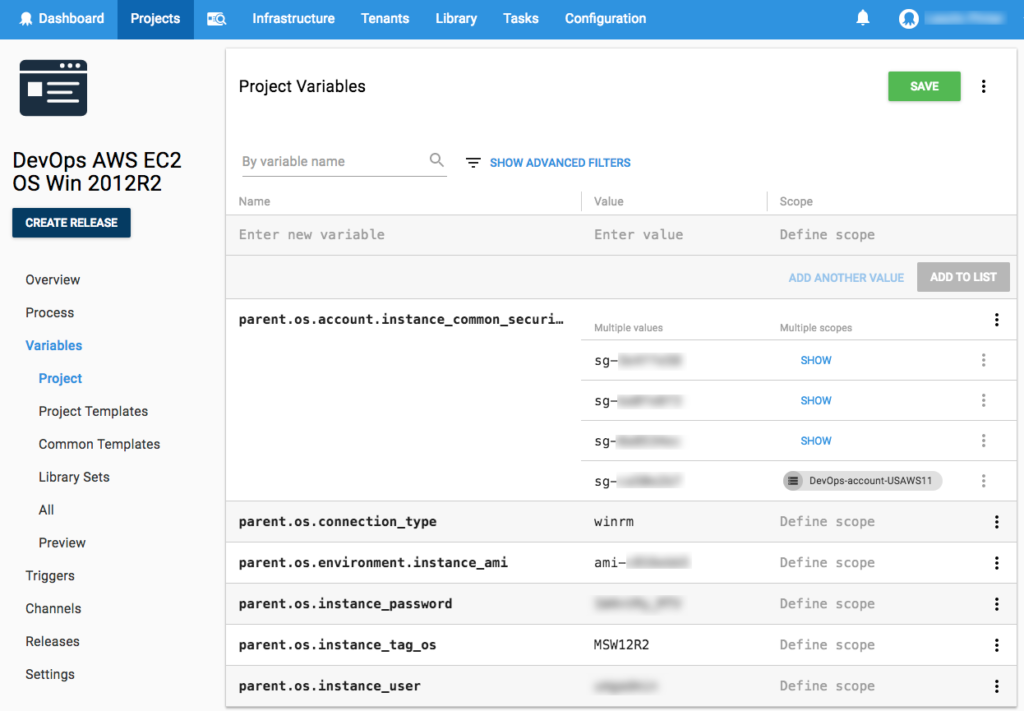
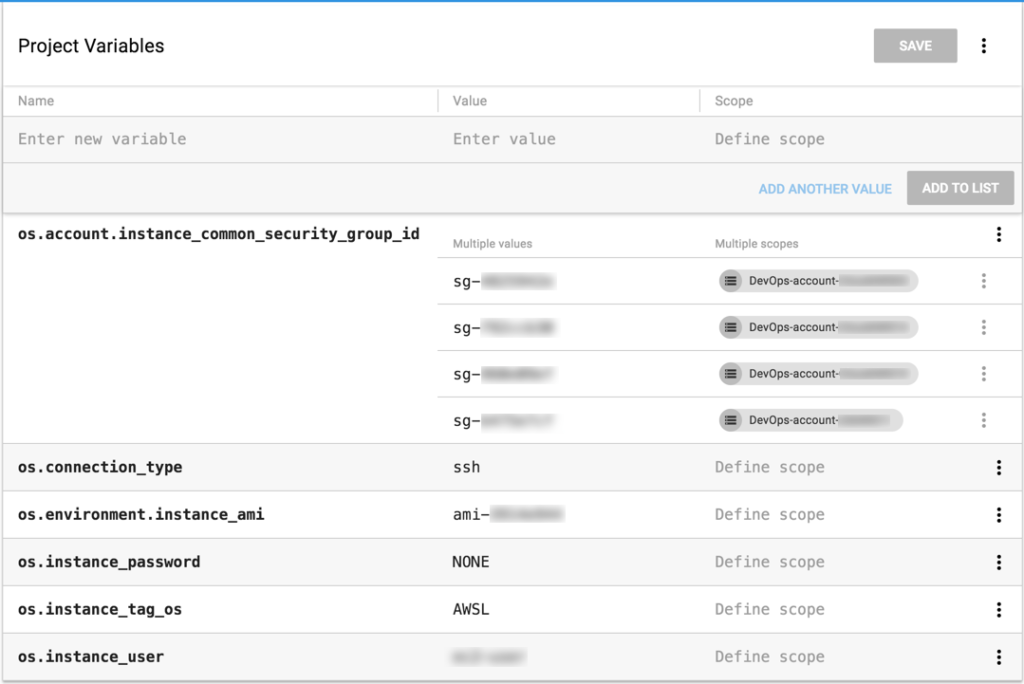
Set the OS-specific variables in the OS-specific child project. To avoid variable name collision later add the parent.prefix to the variables passed in from the child to the parent project.
Settings
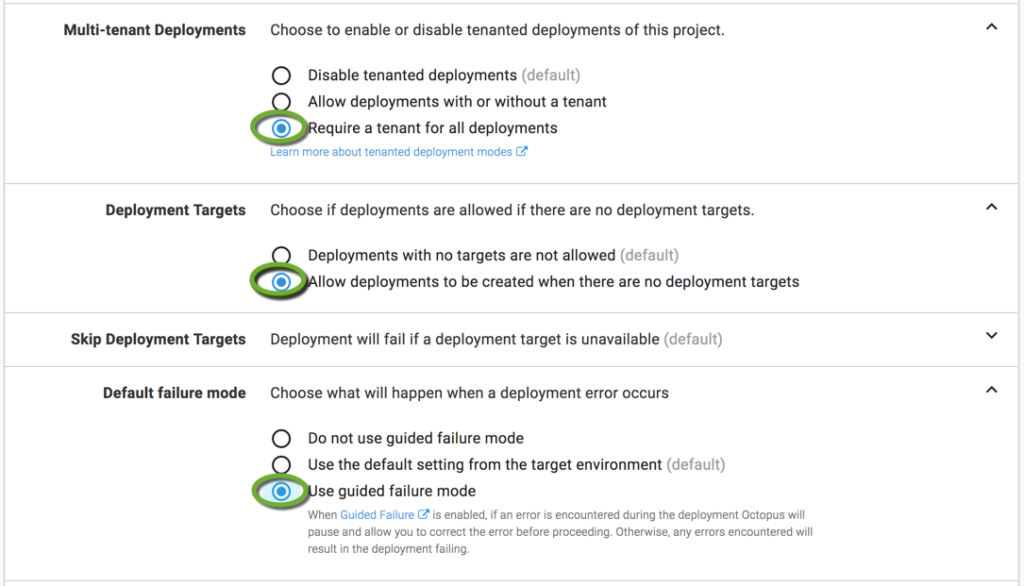
- Click the Settings menu item
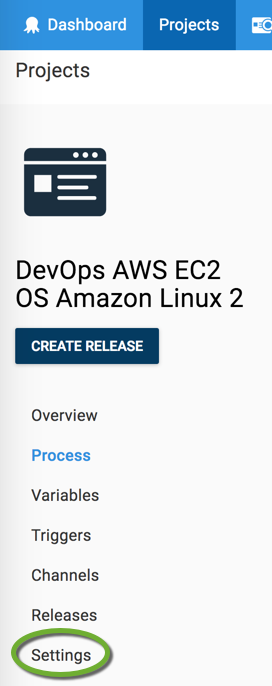
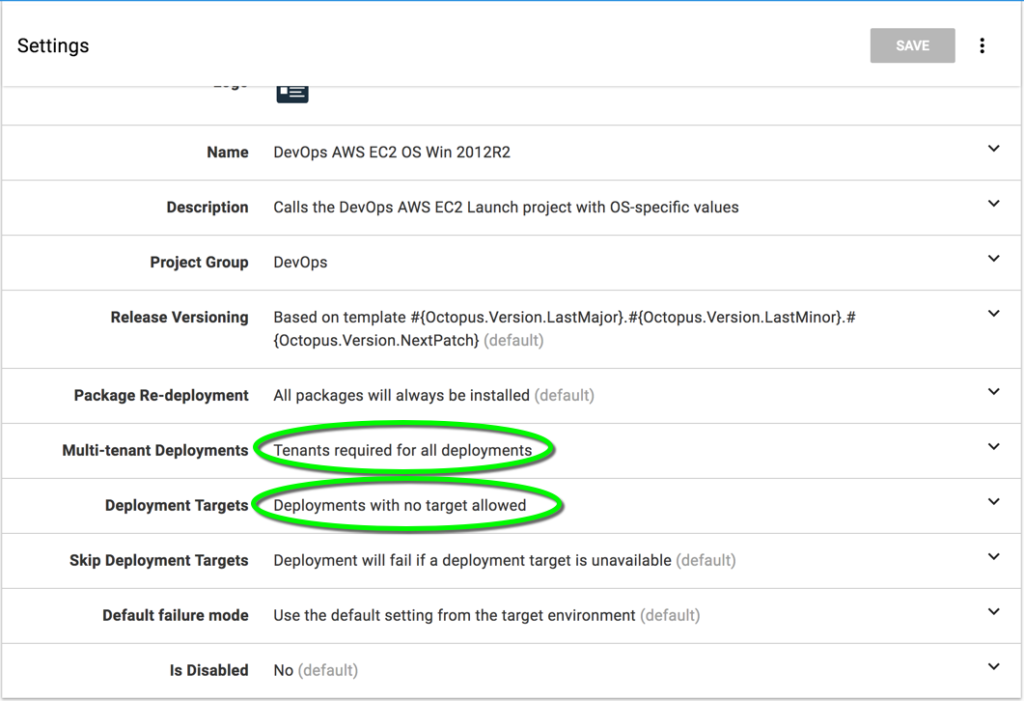
- Require tenant for the deployment, allow the deployment without target, and ask if there is an error. Chef raises an error when it reboots the server, so if the Chef cookbook contains the reboot resource, we need to accept the error for a successful deployment.
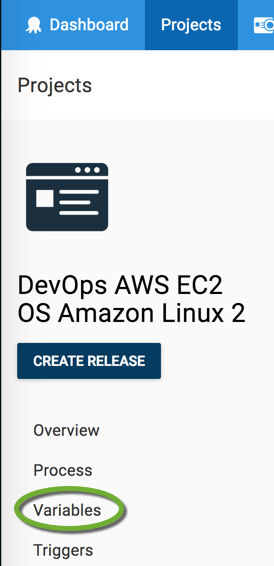
- Click the Variables menu item
- Add the OS-specific variables
Create Library Variable Templates
Library Variable Sets specify the variables that have to be set in a higher level component, like a tenant, environment, and target.
- On the Library Octopus page select Variable Sets
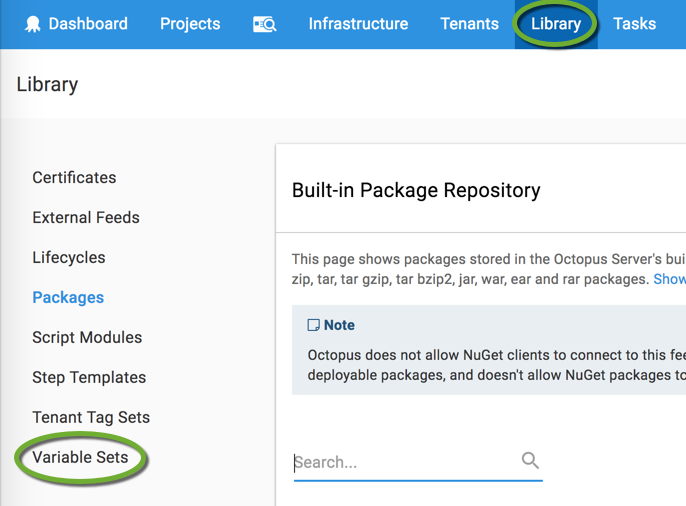
- On the Variable Sets page click the ADD NEW VARIABLE SET button

- Enter a name and description for the library variable set
- Click the VARIABLE TEMPLATES tab

- On the VARIABLE TEMPLATES tab click the ADD TEMPLATE link

- Add the variables to the Library Variable Template. For pre-defined choices use the Drop down control type. To avoid variable name collisions when we pass the variable values to the parent project later, add the “parent.” prefix to every variable.
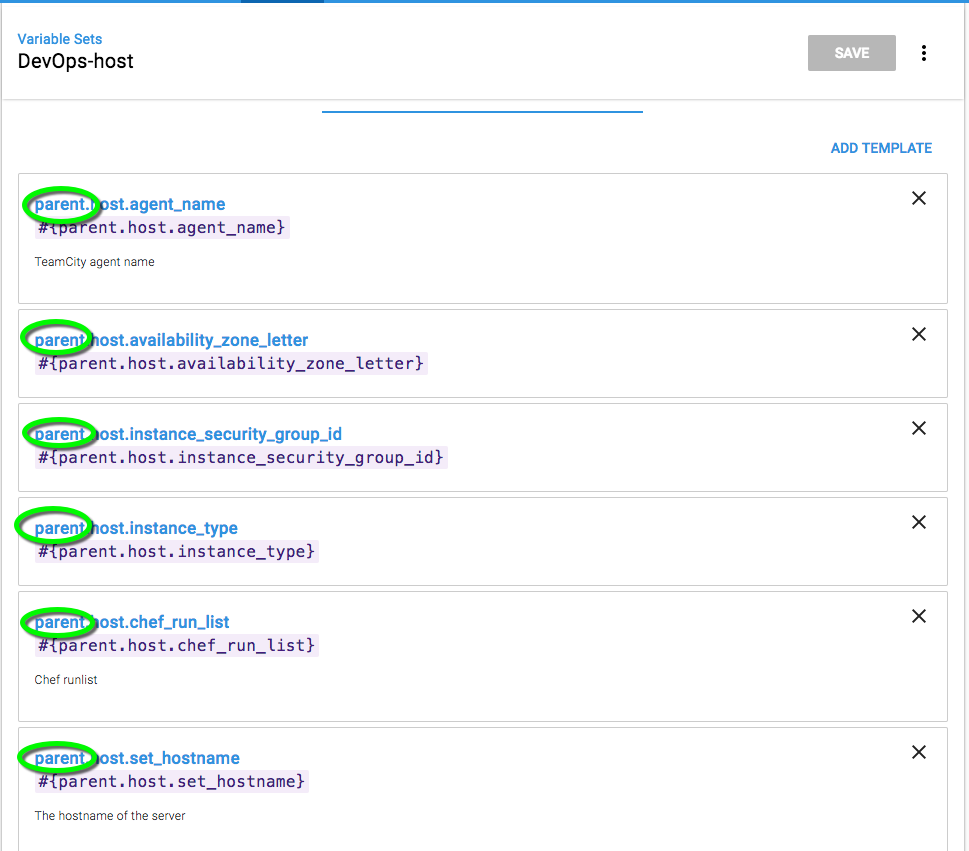

- Save the Library Variable Template
Add the Library Variable Templates to the OS-specific child project
Add the Library Variable Sets to the OS-specific project, so the tenants can set them with the instance-specific values.
- Open the project and select the Variables menu item
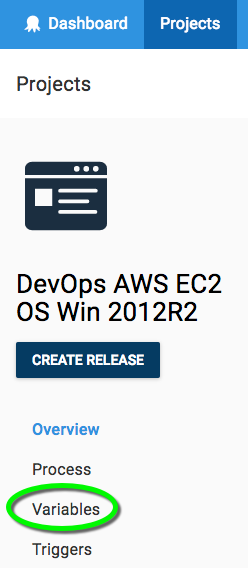
- Select the Library Sets menu item
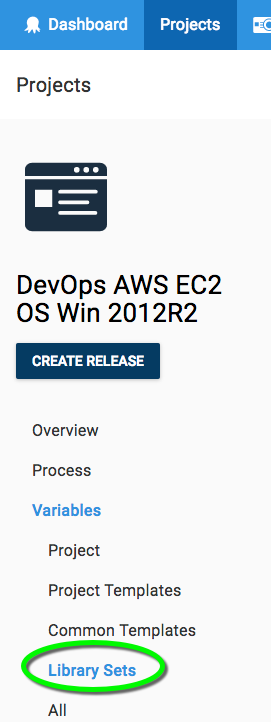
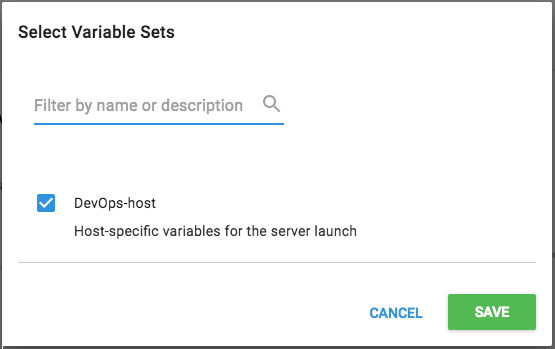
- Click the INCLUDE LIBRARY VARIABLE SETS button

- Select the newly created Library Variable Set
Pass the variables from the child project to the generic parent project
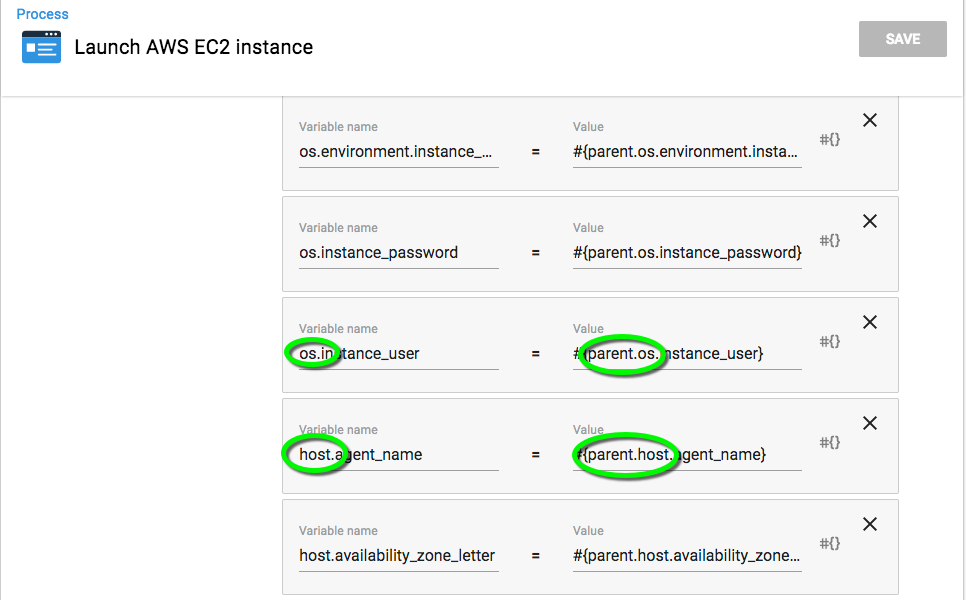
The child project can pass variables into the parent project. Select the variable to pass into the parent project. You need to do this in every child project that calls the common parent project.
- In every child project select Process
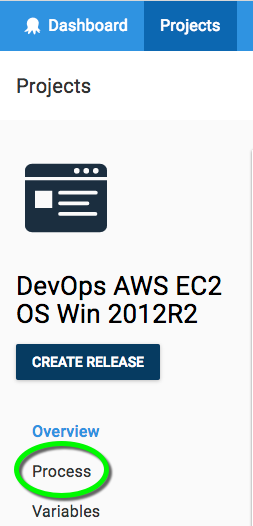
- Select the process that calls the parent project

- Click the Variables section
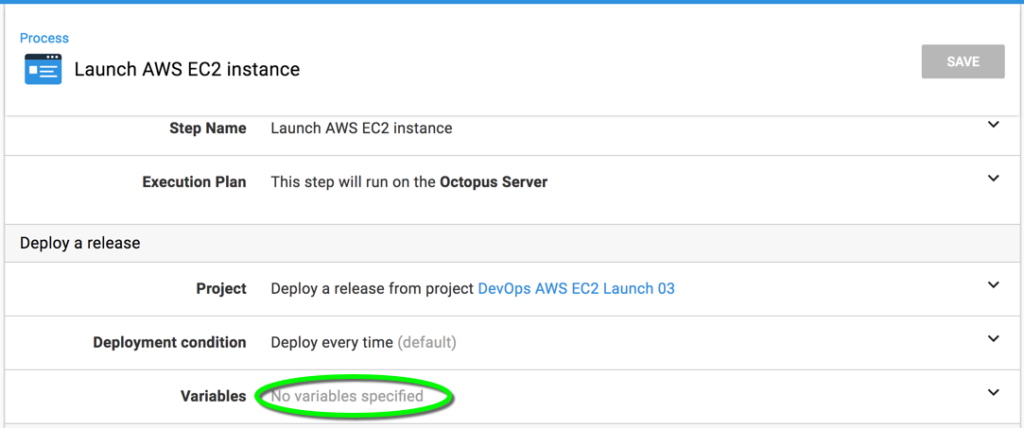
- Click the ADD VARIABLE link

- Add the OS-specific variables set in the child project and the host-specific variables defined in the Library Variable Template and set in the tenant.
Create a Tenant
Tenants are server types that use the same Octopus project. A tenant can be an application or a software development project where the servers share common attributes and run on the same operating system type, like all Linux, or all Windows, so the same Terraform script can launch them.
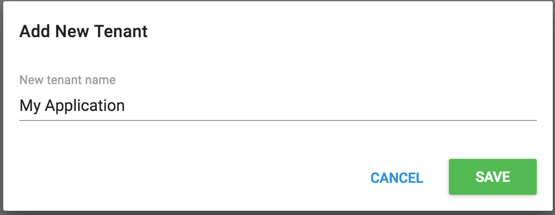
- In Octopus select the Tenants page and click the ADD TENANT button

- Enter the name of the new tenant
- Click the Setting button to select a logo for the tenant
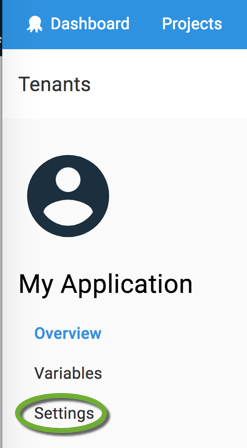
- Click the logo placeholder to open the region

- Click the file selection button to browse to a 100×100 image file

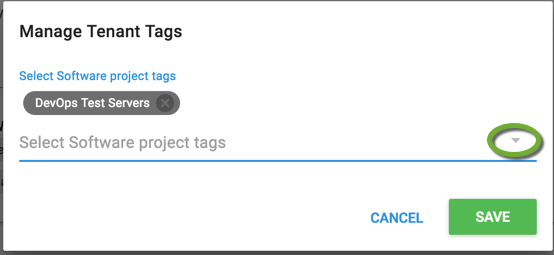
Tag the Tenant
Tags help you to organize your tenants.
- On the Library page select Tenant Tag Sets
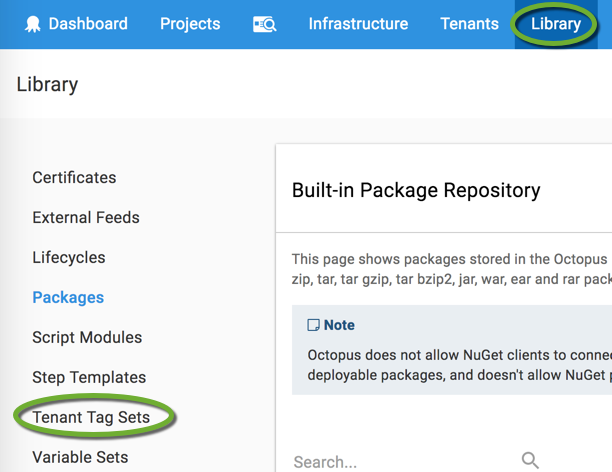
- Click the ADD TAG SET button

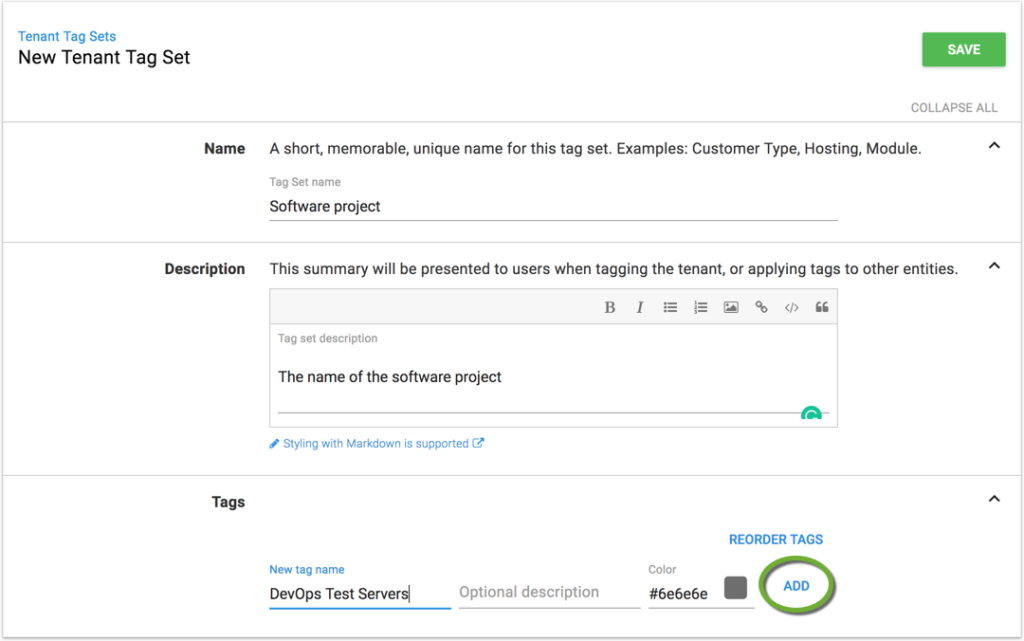
- Enter a name and description for the tag set, and create the first tag, and click the ADD link
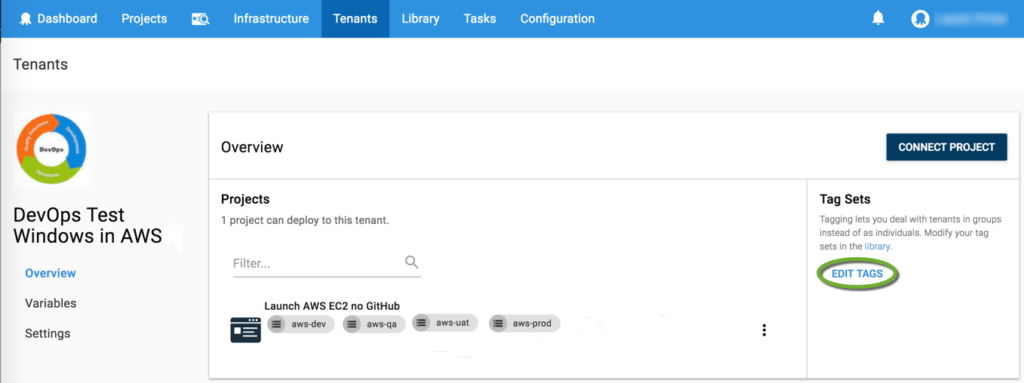
- Click the EDIT TAGS link to add tags to the tenant
- Click the small arrow to select the tags
Connect the Tenant to the project
- On the Tenants page select the tenant you want to add to the project
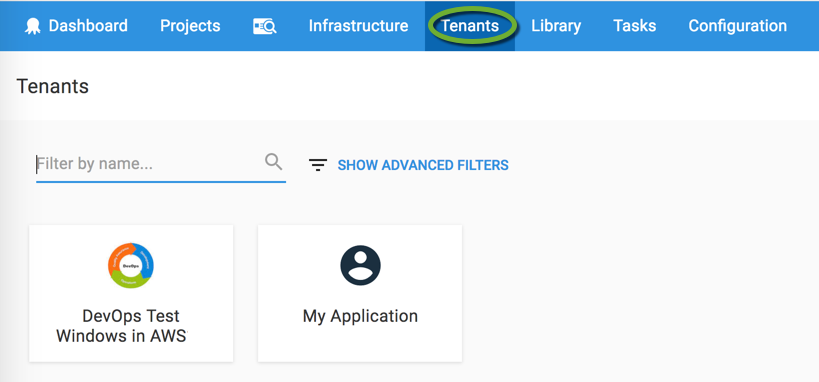
- Click the CONNECT PROJECT button

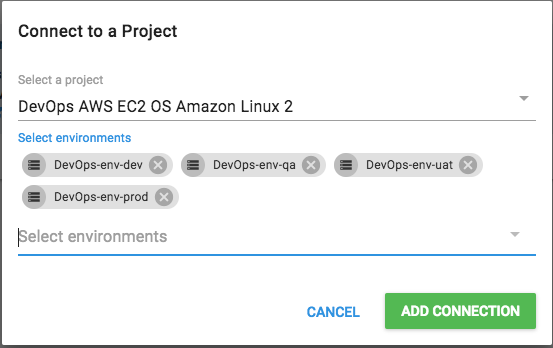
- Select the project and all environments you want to launch instances for this tenant (software project)
Set the tenant variable values
- On the Tenant page select Variables
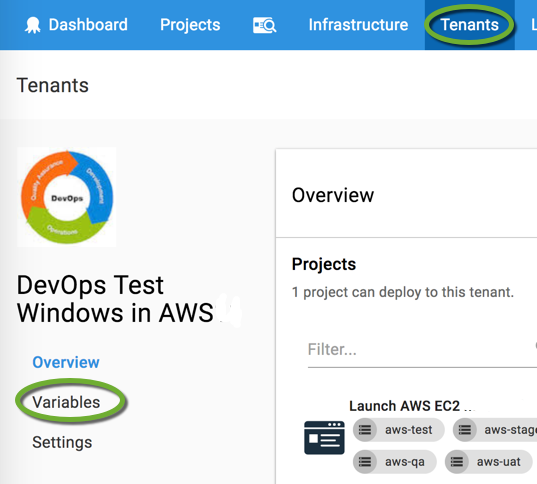
- Select the COMMON VARIABLES tab

- Click the name of the template to open it

- Set the value and click the Bind icon

- When all required variables are set, the SAVE button becomes available.
Create a deployment target (server)
Deployment targets are the servers we are launching. In enterprise settings, all servers have a standardized name that conforms to the company standards.
- In the

- Click the ADD DEPLOYMENT TARGET button

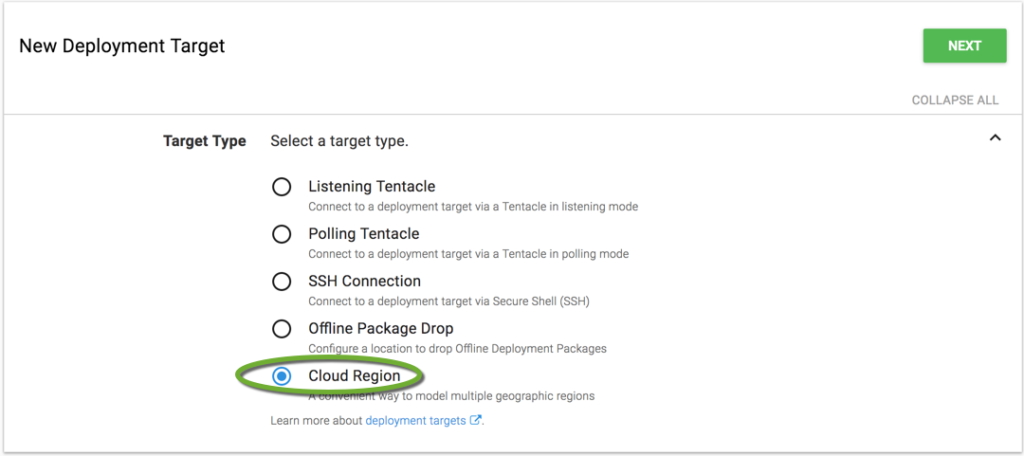
- Select the Cloud Region radio button
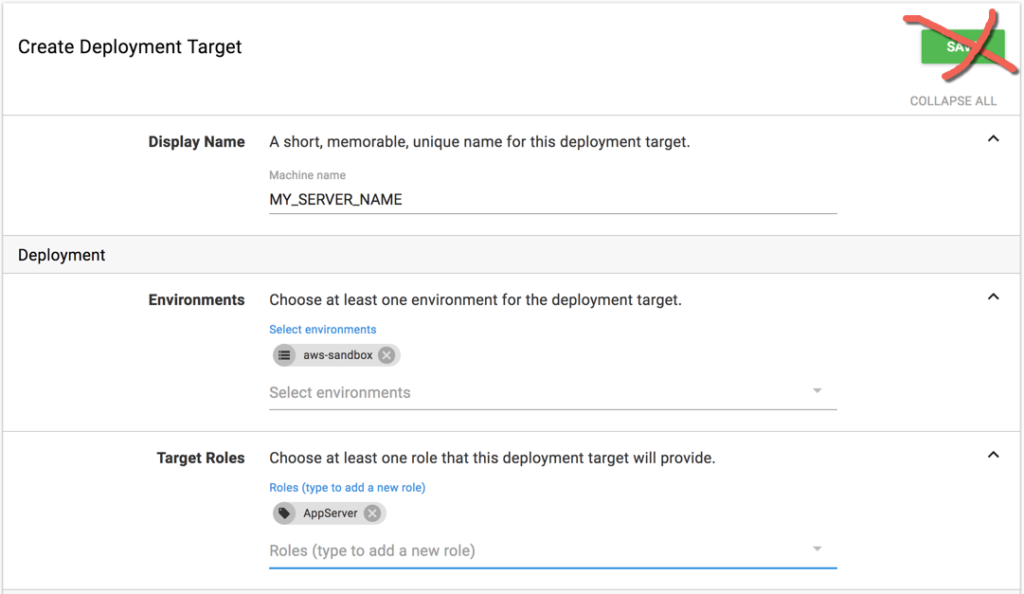
- Enter the server name, deployment and a role, and do not press the Save button yet
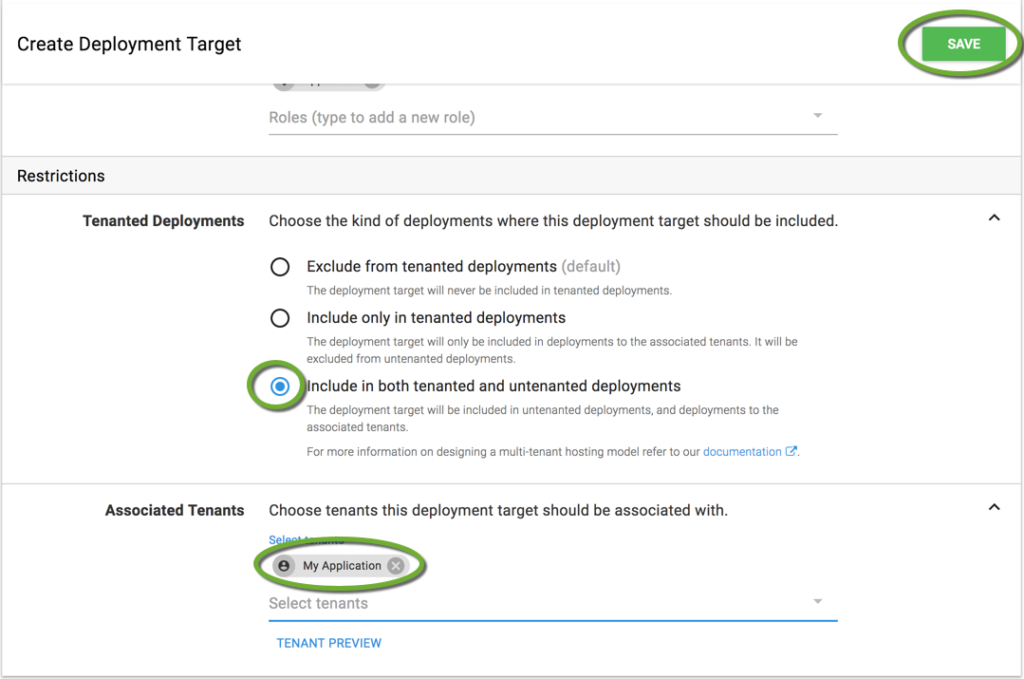
- In the Restrictions region select the Include in both tenanted and untenanted deployments radio button select the Tenant you have created.
Create project releases
If there was a change in the parent project, we need to create a release for the parent project and all child projects that call it.
Create a release of the generic parent project
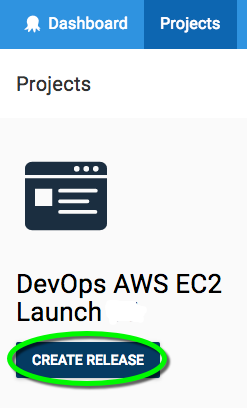
- On the project page click the CREATE RELEASE button
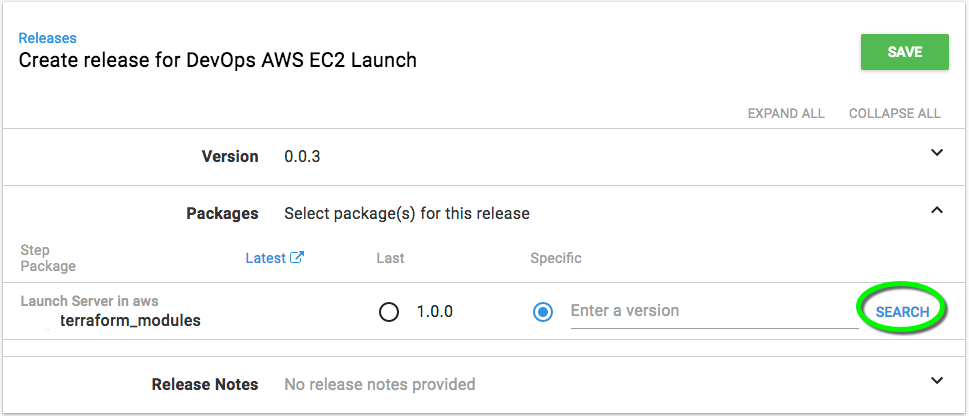
- If you use GitHub as the Terraform script source, the no version specified message displays in the Packages section

- Tag the GitHub repository. Octopus needs a version to link to a GitHub package.
git tag 1.0.0
git push --tags
- Click the SEARCH link to find the latest version of the repository
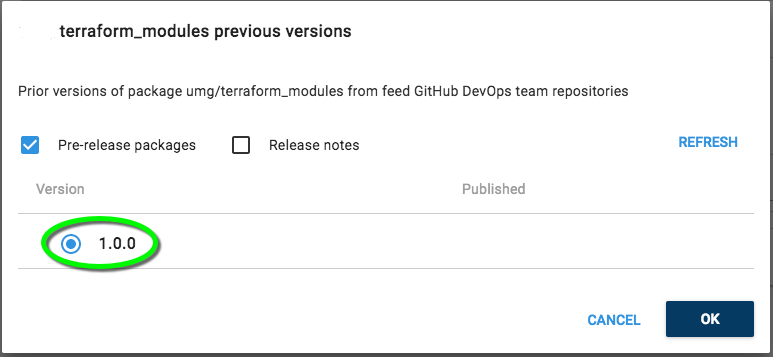
- Select the latest version of the GitHub repository
- Click the SAVE button
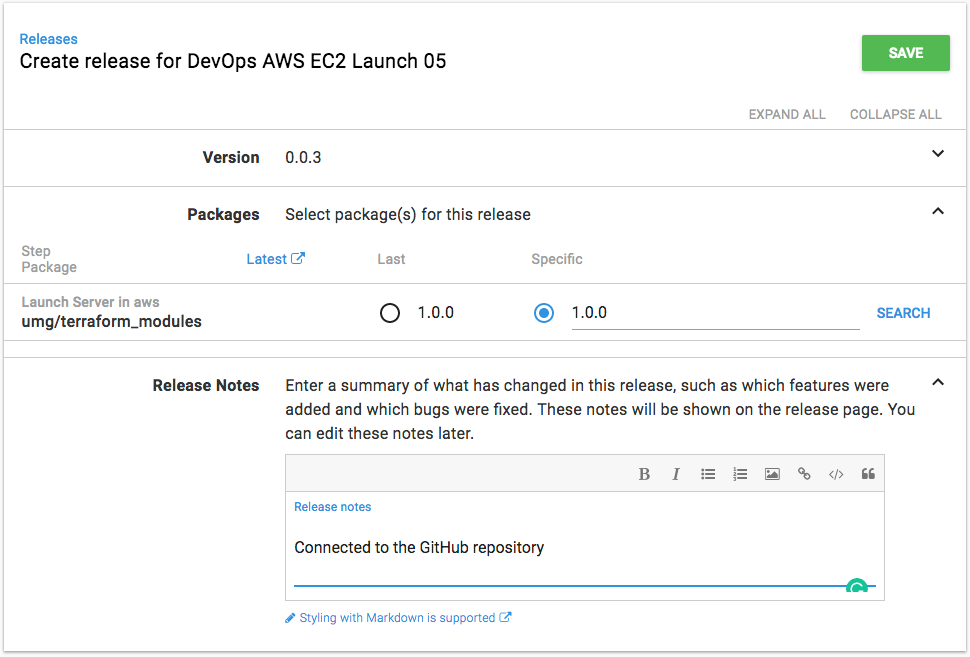
Create releases for the child projects
- Open the project
- Click the CREATE RELEASE button
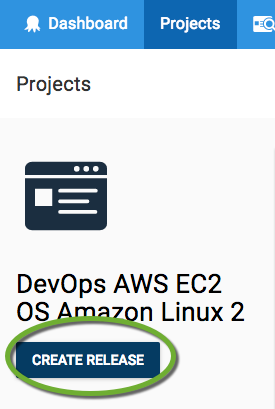
- Enter the Release Notes, so later you can identify this release

Deploy the server
- Open the OS-specific project
- Click the Releases menu item
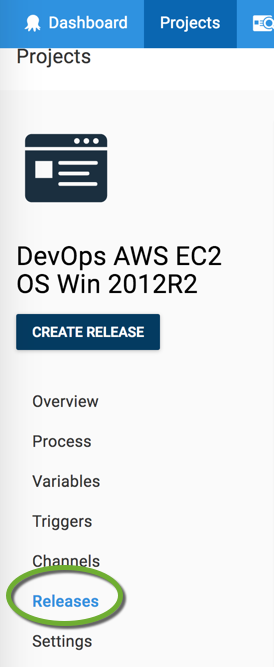
- Select the release

- Click the DEPLOY TO button and select the environment

- If the project was already deployed to an environment, that environment does not show up in the list, so click the ellipsis and select Delpoy To from the dropdown menu.
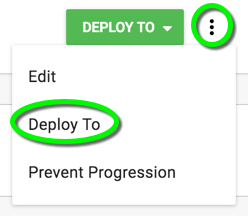
- Select the environment from the list

- If the project was already deployed to an environment, that environment does not show up in the list, so click the ellipsis and select Delpoy To from the dropdown menu.
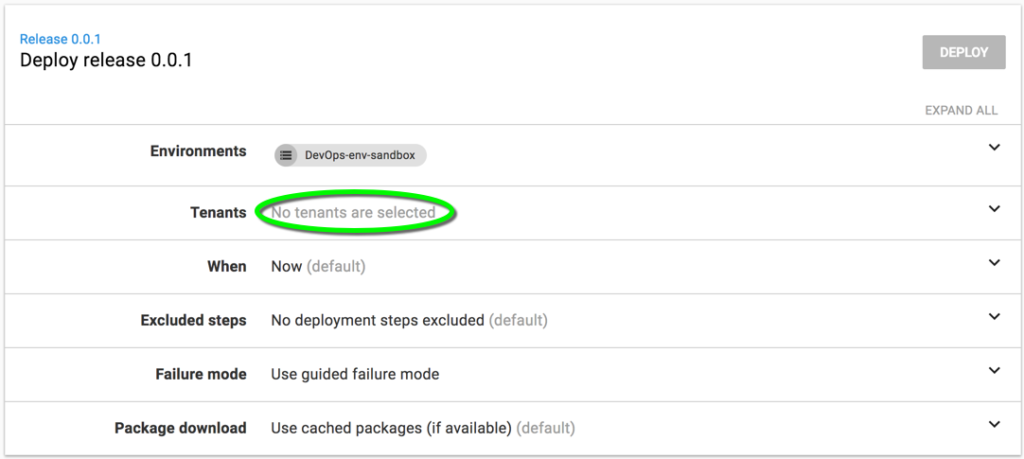
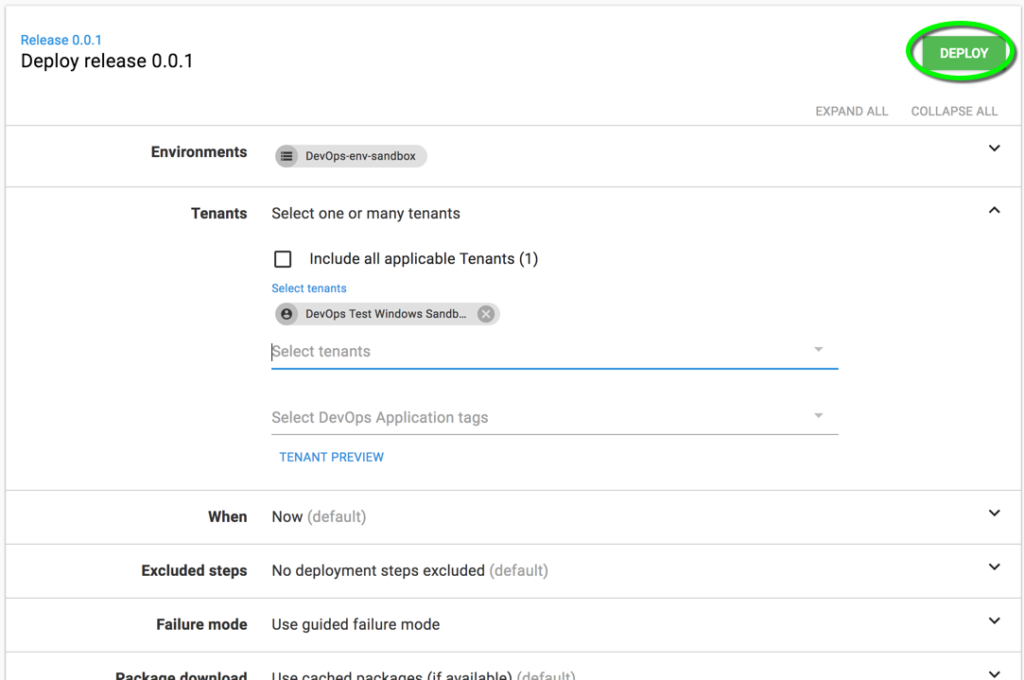
- Click the tenant section to select the tenant (server) to launch
- Click the DEPLOY button
Maintenance
Changing the Terraform script, adding new servers, operating systems, environments, and AWS accounts
Changing the Terraform script
The Octopus project release is tied to a specific Git tag (release). When we change the Terraform script in the Git repository we need to
- Create a new Git tag with
git tag 1.0.12
git push --tags
- Create a new release of the generic parent project. Make sure the generic parent project references the new tag:
- Open the project in Octopus,
- On the left side select Releases, and select the new generic parent project release,
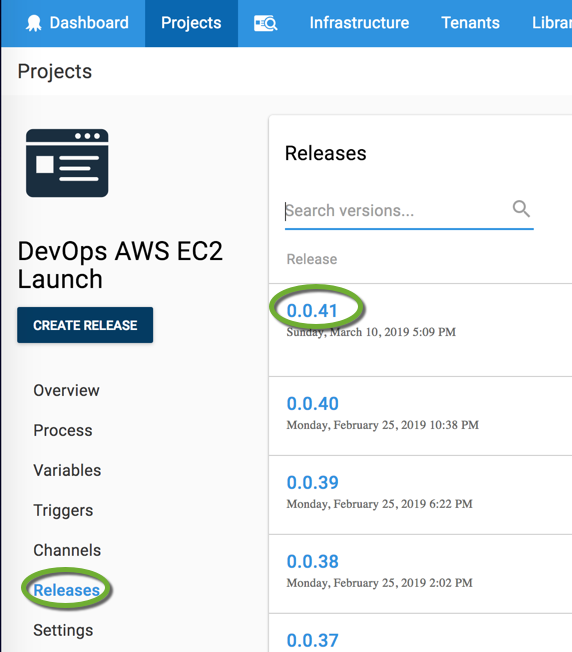
- Make sure the new generic parent project release references the new Git tag.
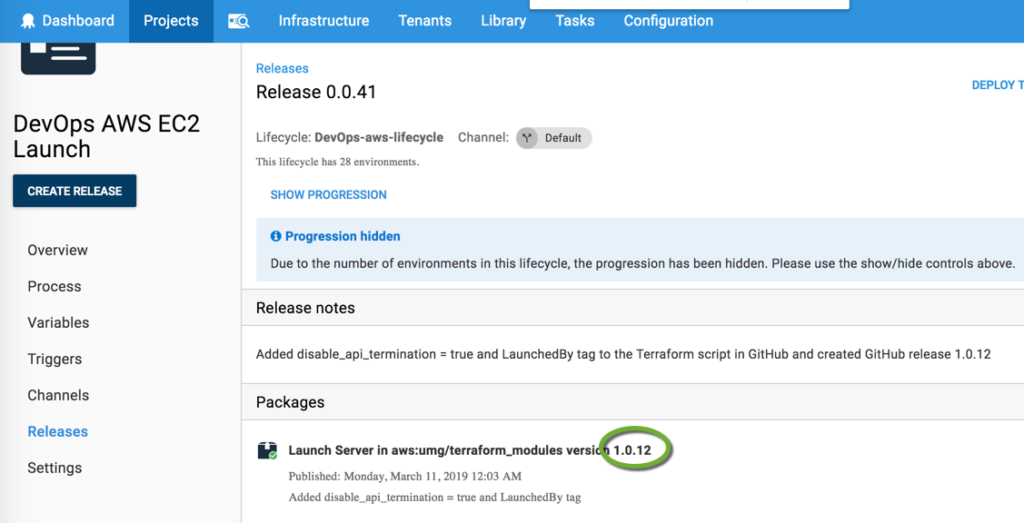
- Create a new release of every OS-specific child project that calls the generic parent project.
Adding new tenant variable
- Add the new variable to the Terraform script or JSON file
“set_external”: “#{host.set_external}” - Add the new variable to the generic parent project (host.set_external)
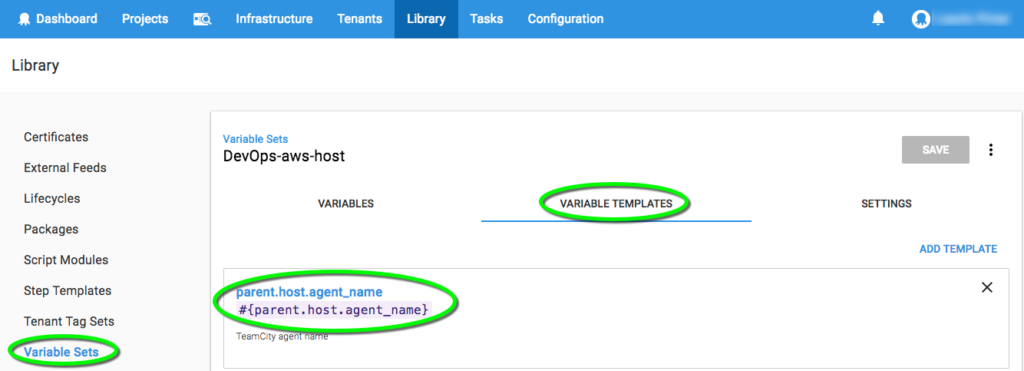
- Add the variable to the Library -> Variable Sets -> “DevOps-aws-host” -> Variable Templates
- Click the ADD TEMPLATE button
- Enter the Variable name ( parent.host.set_external )
- Control type: Single-line text box
- Enter UNDEFINED as the default value, so it will not throw an error until added to all tenants
- Click Add
- Click Save
- Populate the new variable value in the Tenant manually or during Tenant creation with your automation tool ( Octotenant )
parent.host.set_external - Add the variable assignment to the Variables section of the Process of every child project
host.set_external = #{parent.host.set_external}
New Server
- Create a new Tenant
New AMI
- Update the AMI in the OS-specific child project
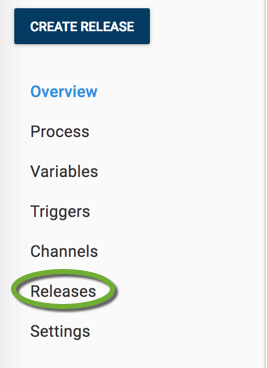
- Open the Releases page of the child project
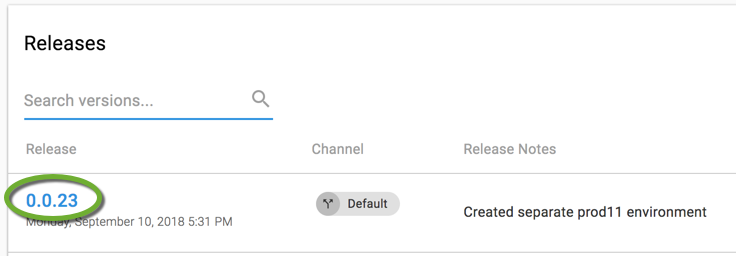
- Select the latest release
- Click the UPDATE VARIABLES link

New Application
- Create a new Tenant Tag in the “DevOps Applications” Tenant Tag Set
- Add the new Tenants to the Tenant Tag of the application
New Operating System
- Clone one of the DevOps AWS EC2 OS… projects
- Update the project settings, because those are not cloned
- Update the project variables for the new operating system
- Create a release of the new project
- Create new Tenants and link them to the new OS project
New Environment or AWS account
- Create the DevOps-env-[environment][account number] environment. See Create the Environments
- Infrastructure, Environments, ADD ENVIRONMENT
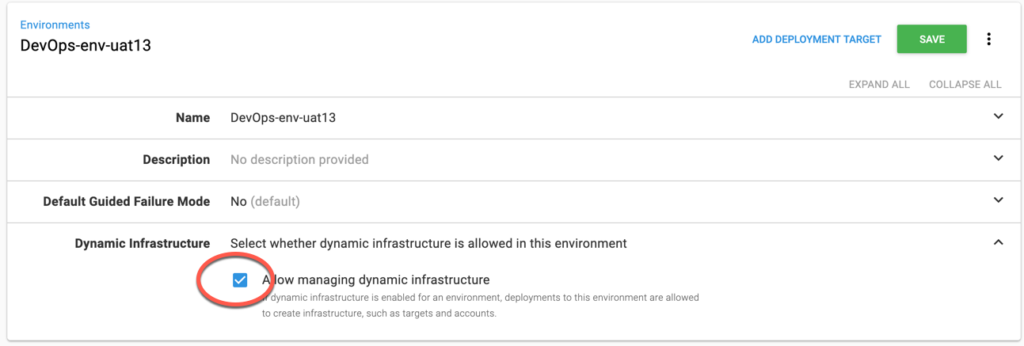
- Check the Dynamic Infrastructure -> Allow managing dynamic infrastructure checkbox
- Add the new environment to the “DevOps-aws-lifecycle”
- Library, Lifecycles, DevOps-aws-lifecycle
- Click Phase 1
- ADD ENVIRONMENT
- Keep Users will need to manually queue the deployment to this environment selected
- Click the SAVE button
- Add the new account if necessary. See Add AWS AccountStore an AWS account reference in Octopus above.
- Add the new environment to the variable scopes in
- the base project: “DevOps AWS EC2 Launch”
- account.aws_key
- account.aws_key_name
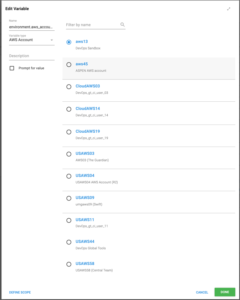
- environment.aws_account_credentials (zoom out to be able to see the Done button at the bottom of the popup)
- create a new environment.chef_environment
- environment.instance_tag_environment
- the base project: “DevOps AWS EC2 Launch”
- Create a new release of the “DevOps AWS EC2 Launch” base project that will be called by the OS specific projects
- Add the new environment to the variable scopes in all OS specific projects: “DevOps AWS EC2 OS…”
- parent.os.account.instance_common_security_group_id
- Create a new release of all updated OS specific “DevOps AWS EC2 OS…” projects.
- Add the new environment to the variable scopes in all OS specific projects: “DevOps AWS EC2 OS…”
New Chef Attribute
To pass in a new Chef attribute from the Tenant
- Add the new attribute to the chef_attributes.json file with variable substitution
{ "set_hostname": "#{host.set_hostname}", "agent_name": "#{host.agent_name}", "add_to_domain": "#{host.add_to_domain}" } - Add the new variable to the Library Variable Set’s Variable Template with the parent. prefix
- Add the new variable to the passed in variable list in every parent project process. See Pass the variables from the child project to the parent project
Troubleshooting
To save the variable values to the log add the following two variables to the project
| OctopusPrintVariables | True |
| OctopusPrintEvaluatedVariables | True |
For the change to take effect
Create a new release
or
Update the variable snapshot of the existing release
- On the Project -> Releases page select the latest release
- In the Variable Snapshot section click the SHOW link

- Click the UPDATE VARIABLES link

More info at https://octopus.com/docs/support/debug-problems-with-octopus-variables
