Calling a resource in the Chef recipe

During major Chef Client version upgrades, some instructions need to be changed based on the version of the Chef Client. For example, upgrading from version 12 to version 13, the “windows_task” resource requires a different action to make changes to existing scheduled tasks.

To call a Chef resource in your cookbook, you need another resource to call from. If you execute the notifies command by itself you get the error message:

NoMethodError
————-
undefined method `declared_key’ for “….[…]”:String

In this example, we call the “windows_task” resource to delay the execution of the chef-client by two hours to give enough time for the server configuration to complete. In Chef version 12 we need to set the action to “:change”, in Chef version 13, it needs to be “:create”.

if ( Chef::VERSION.to_f >= 13.0 )
  puts "Version 13.0 or higher"

  ruby_block "call delay chef-client" do
    block do
      # Do nothing, "block do" has to be here
    end
    notifies :create, "windows_task[delay chef-client]", :immediately
  end
else
  puts "Before version 13.0"

  ruby_block "call delay chef-client" do
    block do
      # Do nothing, "block do" has to be here
    end
    notifies :change, "windows_task[delay chef-client]", :immediately
  end
end

future_time = Time.now.utc + 7200               # Offset is in seconds: 2 hour delay
new_start_day = future_time.strftime('%m/%d/%Y')
new_start_time = future_time.strftime('%H:%M')

windows_task 'delay chef-client' do
  task_name 'chef-client'
  start_day new_start_day
  start_time new_start_time
  action :nothing
  guard_interpreter :powershell_script
  only_if "(Get-ScheduledTask | Where-Object {$_.TaskName -eq 'chef-client'}).TaskName.Length -gt 0"
end

 

Make decisions in your Chef recipe based on the version of the Chef Client

There are times when you have to make a decision in your Chef recipe, based on the version of the Chef Client installed on the node.

There are two ways to get the version of the installed Chef Client:

Chef::VERSION
node['chef_packages']['chef']['version']

To make a decision based on the installed Chef Client version

if ( Chef::VERSION.to_f >= 14.0 )
  puts "Version 14.0 or higher"
else
  puts "Before version 14.0"
end


Test your cookbook in Chef Test Kitchen against multiple versions of the Chef Client

In large environments, during the Chef Client version change, some older servers still run the prior version of the Chef Client, the newly created servers launch with the new version of the Chef Client.

It is very important to test your cookbooks with the old and the new versions of Chef Client.
To specify the Chef Client version for the Test Kitchen “converge” run, add the highlighted three lines to the provisioner section of the .kitchen.yml file:

provisioner:
  name: chef_zero
  product_name: chef          # Install the Chef Client
  product_version: 14.0.0   # Set the Chef Client version, default=latest
  install_strategy: always    # Forces the installation of the specified Chef Client version even if another version is installed

During “converge”, test kitchen will download and install the specified version of Chef Client.

Warning:

If the server image already has Chef Client installed, and the installed Chef Client version is newer than the specified version in the kitchen.yml file, Test Kitchen downloads the specified earlier version, but executes the already installed newer version.

Open the system drive of an AWS instance you cannot log into

If you cannot log into an AWS instance and want to inspect files on it, you can detach the volume from the lost instance and attach it to another instance as the secondary drive.

Create a new instance

  1. Create a new AWS instance and log into it,
  2. Make a note of the Instance ID of this new instance,
  3. In the AWS console find your lost instance, that you cannot log into, by IP address or server name,
  4. Using the AWS console stop the lost instance,
  5. Make a note of the Instance ID of the stopped instance.

Detach the root volume from the stopped lost instance

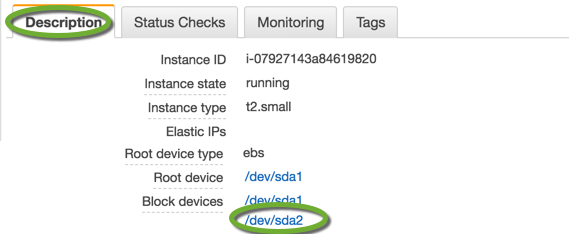
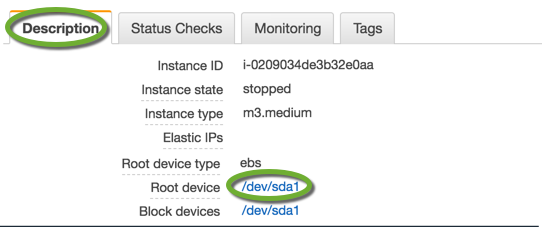
  1. On the Description tab click the name of the root device
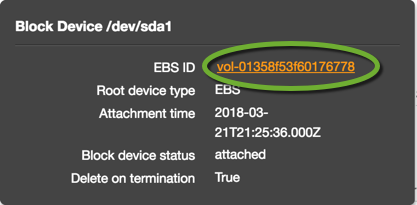
  2.  In the popup click the EBS ID
  3. Make a note of the volume ID,
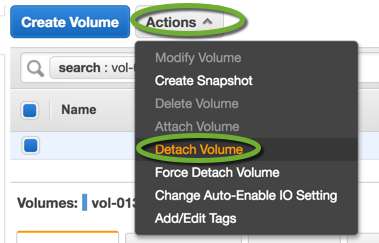
  4. Click the Actions button and select Detach Volume.

Attach the volume to the new instance

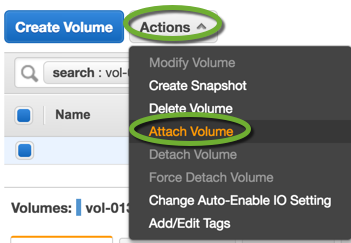
  1. On the same, detached root volume page, click the Actions button and select Attach Volume,
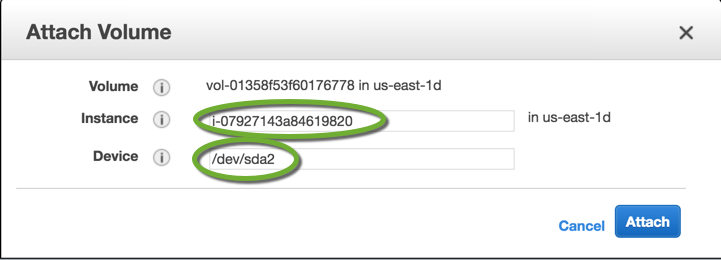
  2. Search for the new instance by Instance ID and enter a name for the device
  3. On the Description tab of the new instance, the second drive appears,

Assign a drive letter to the attached drive

  1. Log into the new instance,
  2. On the toolbar click the Server Manager icon,
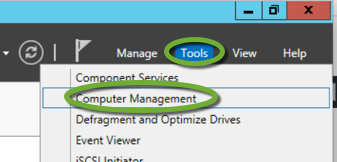
  3. In the Tools menu select Computer Management,
  4. On the left side select Disk Management,
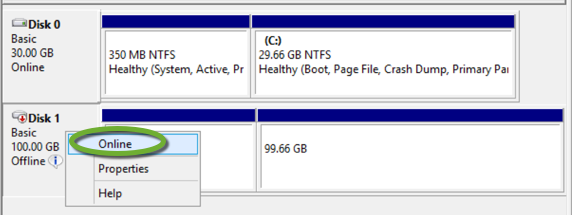
  5. Right-click the second disk and select Online,
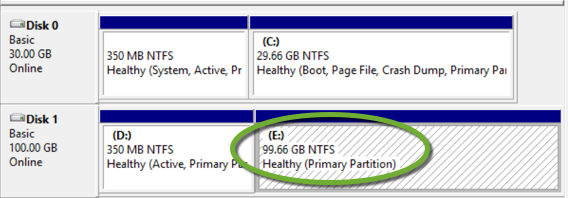
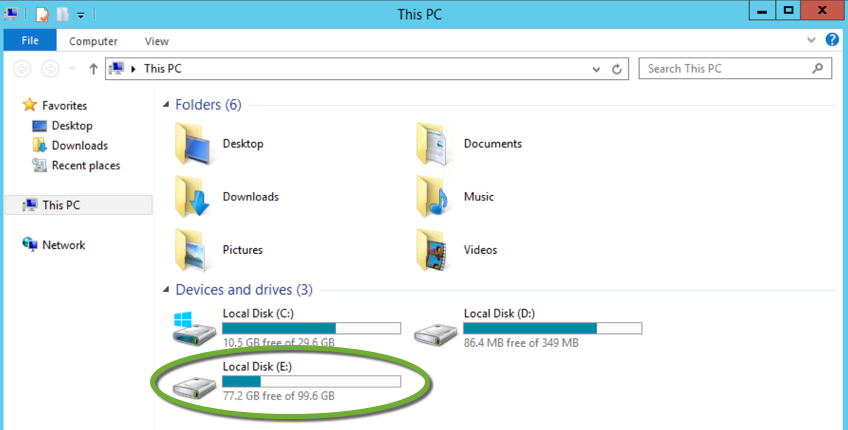
  6. The partitions of the attached volume automatically get the drive letters. The primary partition received the letter E:
  7. The drives show up in Windows Explorer too.

Debugging a Packer build

Packer can configure a server instance and create an image of it.

If you need to examine what Packer is doing, you can run Packer in debug mode and RDP into the instance to view files and other settings.

Open the firewall

  1. In the “builders” element add a line to the Packer template to execute a configuration file:
    "user_data_file": "bootstrap-aws.txt",
  2. Create the bootstrap-aws.txt file in the same directory where your Packer template is located,
  3. Add lines to the bootstrap-aws.txt file to create an administrator user, enable the Remote Desktop connection, and open the firewall for the RDP port:
    # Administrator user
    cmd.exe /c net user /add MY_USERNAME MY_PASSWORD
    cmd.exe /c net localgroup administrators MY_USERNAME /add
    
    # RDP
    cmd.exe /c netsh advfirewall firewall add rule name="Open Port 3389" dir=in action=allow protocol=TCP localport=3389
    cmd.exe /c reg add "HKEY_LOCAL_MACHINE\SYSTEM\CurrentControlSet\Control\Terminal Server" /v fDenyTSConnections /t REG_DWORD /d 0 /f

Build in debug mode

  1. Execute the build with the -debug option:
    packer build -debug win2012.json

Open the RDP port in the temporary security group

During the build, Packer will prompt you to press enter before major steps.

  1. When the IP address of the instance is displayed on the screen, search for the temporary security group’s name by
    Creating temporary security group for this instance
  2. In the AWS console search for the security group and add a new inbound rule to open port: 3389 for the Remote Desktop Connection:

Connect to the instance

  1. Find the IP address of the instance on the screen,
  2. Start a Remote Desktop connection to the instance,
  3. Use the administrator username and password specified in the bootstrap-aws.txt file.

Log locations

  1. The EC2 log file on the instance is at
    C:\Program Files\Amazon\Ec2ConfigService\Logs\Ec2ConfigLog.txt


Create a new server image for a RightScale server template

The RightScale server templates publish server images to launch. It is advisable to create your own server image because the cloud providers can remove their published images anytime. If you generate your own image, you control the lifecycle of those.

Create your own server image

  1. Use Packer to create a new server image.
    1. Install RightLink.
      1. On Windows
            1. Create a PowerShell script and save it as install-rightlink.ps1
              $wc = New-Object System.Net.Webclient
              $wc.DownloadFile("https://rightlink.rightscale.com/rll/10/rightlink.install.ps1",
                 "$pwd\rightlink.install.ps1")
              Powershell -ExecutionPolicy Unrestricted -File rightlink.install.ps1
            2. Execute it from the Packer template
              "provisioners": [
                {
                  "type": "powershell",
                  "pause_before":"10s",
                  "scripts": [
                  "install-rightlink.ps1"
                  ]
                }
              ]
    2. For more information see “Create Custom Images with RightLink” at  http://docs.rightscale.com/rl10/getting_started.html
  2. Make the image public, so RightScale can see it
    1. Open the AWS console
    2. On the EC2 Dashboard select AMIs
    3. Find the image by AMI resource ID
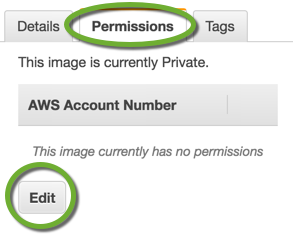
    4. On the Permission tab click the Edit button
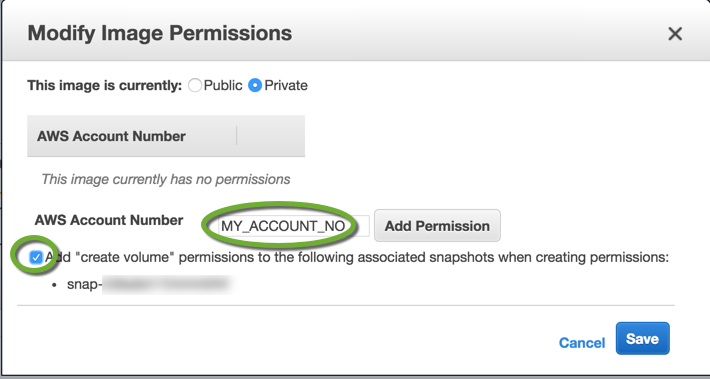
    5. Keep the image private, but share it with the AWs account you create the server template in.

Attach the image to your RightScale server template

Make sure the image is visible in RightScale.

It can take 30 minutes for the new image to appear in the list.

  1. Open the RightScale Cloud Management console
  2. In the upper right corner select the account you want to work in,
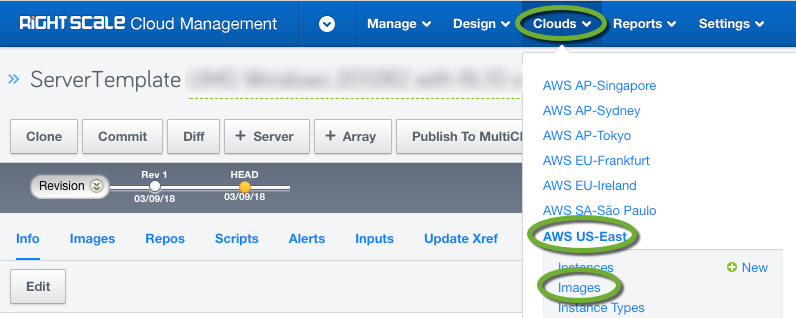
  3. In the Clouds menu find the region where you created the image and click the Images link
  4. Search for the image

If you have an existing MultiCloud image and want to update the server image in it

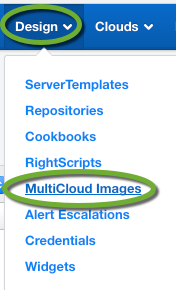
  1. In the Design menu select the MultiCloud Images link
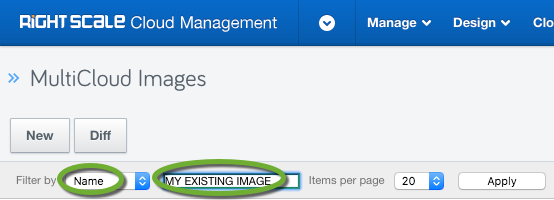
  2. Find the existing image by name
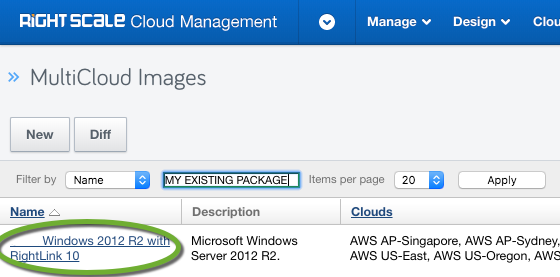
  3. Click the name of the image to open it
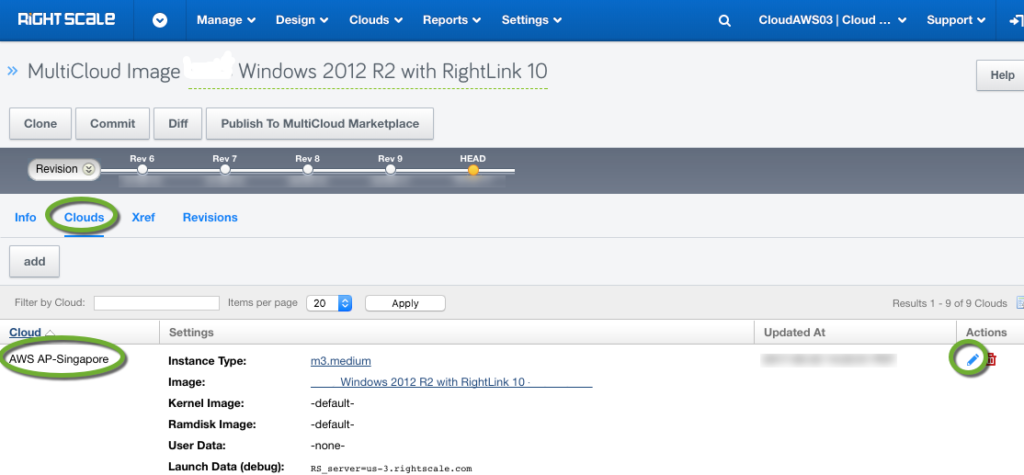
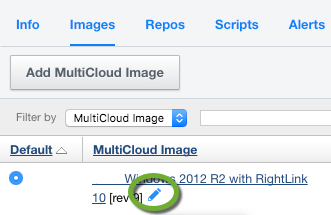
  4. On the Clouds tab select region, you are working in and click the pencil icon
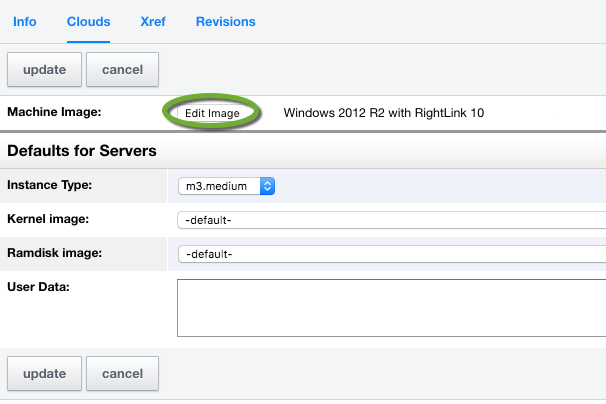
  5. Click the Edit Image button
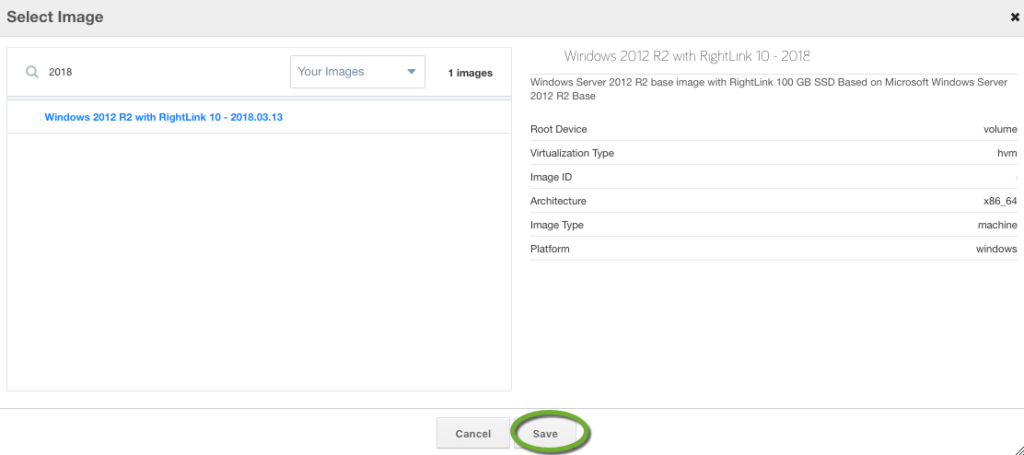
  6. Type a part of the name of the new server image you have just created to find it
  7. Click the name of the image to select it
  8. Click the Save button to add it to the MultiCloud image
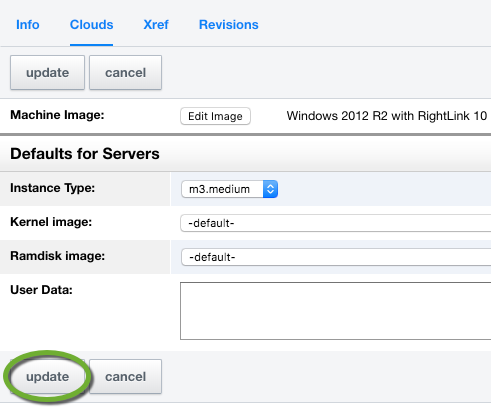
  9. Click the Update button to save the MultiCloud image

Test the new MultiColud Image

Set the MultiCloud image version in the Server Template

Test the new MultiCloud image by TEMPORARILY using the HEAD revision of the Server Template and the MultiCloud image

To test the new image TEMPORARILY select the HEAD revision of the MultiCloud image to be used by the Server Template

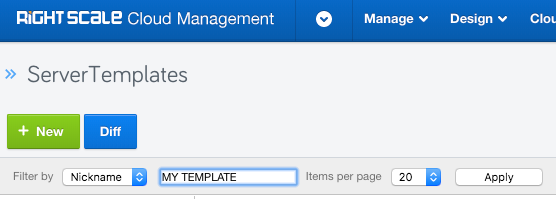
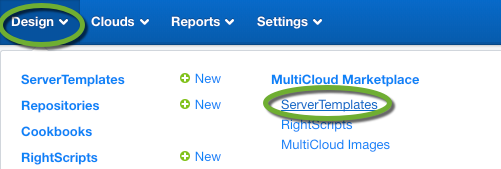
  1. In the Design menu select the ServerTemplates link
  2. Find your Server Template
  3. Click the name of the template to open the info page
  4. Select the HEAD revision of the Server Template
  5. On the Images tab click the pencil to set the revision of the MultiCloud image to use
  6. TEMPORARILY select the HEAD revision for the MultiCloud Image and click the green check mark to save the selection.

In your CAT file set revision 0 to use the HEAD revision of the Server Template

Launch a new server using Self Service with the HEAD revision of the Server Template


Create the new version of the MultiCloud Image

When you have successfully tested the new MultiCloud Image create a new version of it.

  1. Find your MultiCloud Image in Desing, MultiCloud Images
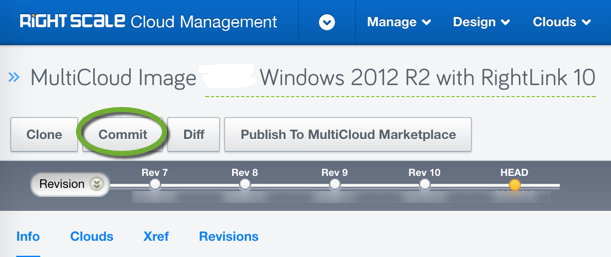
  2. Click the Commit button and enter a description for the change

Create the new version of the Server Template

Save a new version of the Server Template

  1. Find your Server Template in Design, ServerTemplates
  2. Click the Commit button

Publish the Server Template

  1. Select the last revision and click the Publish to MultiCloud Marketplace button
  2. Keep it private
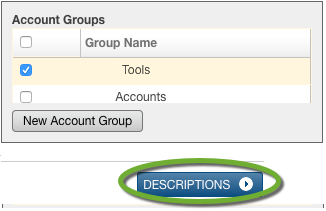
  3. Select the account group to share with and click the DESCRIPTIONS button
  4. Click the PREVIEW button
  5. Click the PUBLISH button

Import the Server Image to the other accounts you use

To be able to use the new version of the Server Image switch to the other accounts and import the template

  1. In the Design menu under MultiCloud Marketplace select the ServerTemplates link
  2. Enter a portion of the Server Template name in the Keyword box and click the GO button
  3. Click the name of the template
  4. Click the Import button

If you want to use a new MultiCloud image in the Server Template

To create a new MultiCloud image


Add the new MultiCloud image to the server template

  1. Open the RightScale Cloud Management console
  2. In the Design menu select ServerTemplates
  3. Find your server template
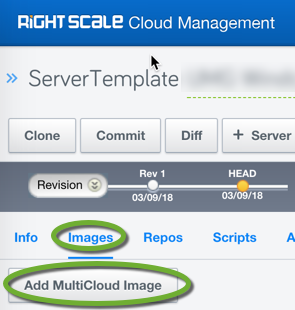
  4. On the Images tab click the Add MultiCloud Image button

windows_task, ArgumentError: invalid date

When the windows_task resource is called to “create” a Windows Scheduled Task that already exists, an error message is returned. In the past, the “modify” action was responsible for the modification of the scheduled tasks, since Chef 13 the “create” action would update the task if exists.

ArgumentError: …[…] (…:… line …) had an error: ArgumentError: windows_task[…] (… line …) had an error: ArgumentError: invalid date

C:/opscode/chef/embedded/lib/ruby/gems/2.4.0/gems/chef-13.6.4-universal-mingw32/lib/chef/provider/windows_task.rb:507:in `strptime’
C:/opscode/chef/embedded/lib/ruby/gems/2.4.0/gems/chef-13.6.4-universal-mingw32/lib/chef/provider/windows_task.rb:507:in `parse_day’
C:/opscode/chef/embedded/lib/ruby/gems/2.4.0/gems/chef-13.6.4-universal-mingw32/lib/chef/provider/windows_task.rb:239:in `convert_user_date_to_system_date’
C:/opscode/chef/embedded/lib/ruby/gems/2.4.0/gems/chef-13.6.4-universal-mingw32/lib/chef/provider/windows_task.rb:99:in `action_create’

It looks like Chef tries to get a date from the existing scheduled task, and cannot parse it successfully.

As we currently cannot update existing tasks, we need to put a guard into the windows_task resource to prevent the execution if the task exists.

 
startup_task_name = 'chef-client-at_startup'

windows_task "create #{startup_task_name}" do
  task_name "#{startup_task_name}"
  ...
  guard_interpreter :powershell_script
  only_if "(Get-ScheduledTask | Where-Object {$_.TaskName -eq "#{startup_task_name}"}).TaskName.Length -eq 0"
end