Skip to content
Pinter Computing

Knowledge Base for IT Professionals, Teachers, and Astronauts

Pinter Computing

Knowledge Base for IT Professionals, Teachers, and Astronauts

  • Home
  • Programming
  • DevOps
  • Project Management
  • Software and Hardware
  • Miscellaneous
  • Egyebek
  • About
  • Experience
  • Education
  • Contact
  • Home
  • Programming
  • DevOps
  • Project Management
  • Software and Hardware
  • Miscellaneous
  • Egyebek
  • About
  • Experience
  • Education
  • Contact
Close

Search

Home/Knowledge Base/Create a React web site
Knowledge Base

Create a React web site

By Laszlo Pinter
April 4, 2023 2 Min Read
0

The React framework adds components on top of HTML and JavaScript to create dynamic one-page web applications. It does not have routing and data handling capabilities, to create a full stack web application use Next.js or Remix.

Configure the development environment

  • Install npm
  • Make sure npx is available on your workstation
    npx comes with npm 5.2 and higher

Create the React web site skeleton

Create the web site skeleton

  • Create a parent directory for the project
    • To create a TypeScript project
      • Open a terminal. We will add –template typescript to the end of the command to use typescript
        npx create-react-app MY_WEB_SITE_NAME --template typescript
      • To convert an existing app to TypeScript see https://create-react-app.dev/docs/adding-typescript
    • To create a non-TypeScript project
      • Execute in a terminal
        npx create-react-app MY_WEB_SITE_NAME
  • For more information visit https://create-react-app.dev/docs/getting-started

View the new React web site

  • Step into the web application directory
    cd MY_WEB_SITE_NAME
  • Start the web application
    npm start
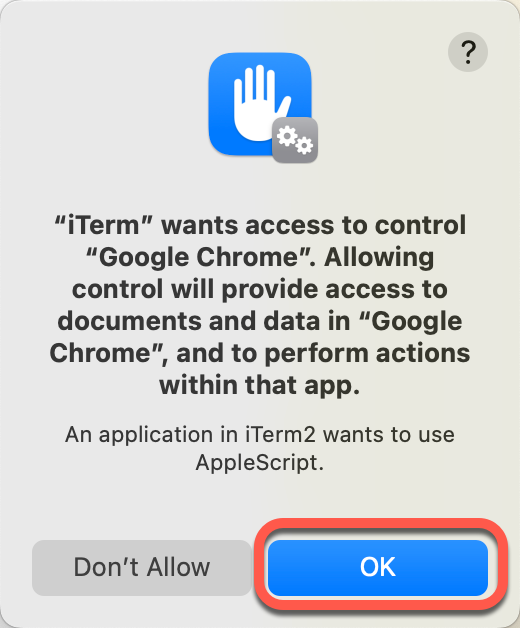
  • If asked, allow iTerm to control Google Chrome
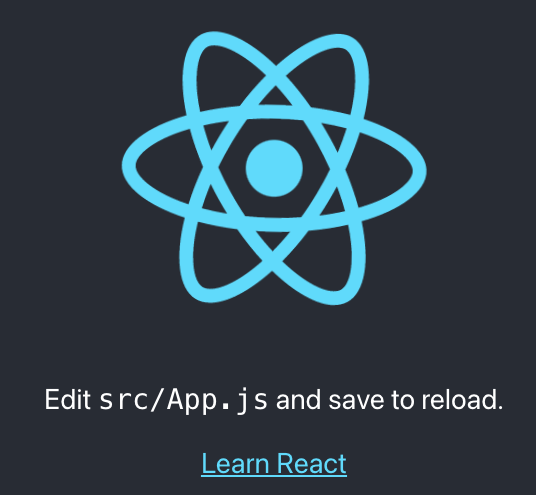
  • Your React application loads in a new browser window at http://localhost:3000/
Test the application

By default the test are related to the changes made since the last Git commit.

  • If running, stop the application by pressing CTRL-C
  • Open the terminal in the application directory
    cd MY_WEB_SITE_NAME
  • Execute the test
    npm test

Deploy the application

Build the application

The application build process creates the minified version of the site in the “build” directory

  • To build a minified bundle of the application execute
    npm run build
Author

Laszlo Pinter

Follow Me
Other Articles
Previous

Using GitHub Copilot on the workstation

Next

Create a Next.js React web site

No Comment! Be the first one.

Leave a Reply Cancel reply

Your email address will not be published. Required fields are marked *

Search

Last Changes

  • DevOps Engineering part 1. (Mac) - Make your Macintosh easier to use June 25, 2026
  • Japan travel tips June 22, 2026
  • How to stop the rain and snow in Cities: Skylines II June 20, 2026
  • Cities: Skylines II Developer Mode June 20, 2026
  • 'CSII_MANAGEDPATH' has incorrect path(s) when building Cities: Skylines II mod June 20, 2026

Tags

.NET .NETcore 3Dprinting ASP.NET Core AutodeskInventor AWS C# Chef cloud DevOps Docker EntityFramework Games Git Go iOS iPad iPhone iPod Java Kubernetes Linux MacOSX MSSQL MVC Node.js Packer PowerShell Python RDS RightScale Ruby security Splunk TeamCity Terraform TestKitchen Tomcat Ubuntu Vagrant VirtualBox VisualStudio Windows WordPress Xcode

Recent Comments

  • Zengei László on MyHeritage családfa exportálása és küldése emailben
  • Raúl Castillo on DynDns update error
  • MICHAEL on Windows Media Player 12 cannot find the album information
  • Nargis on Configure Epson ET-3850 scanning on Windows 11
  • Venczelné Zemen Erika on Delta S2302 termosztát programozása

–

  • Log in
  • Entries feed
  • Comments feed
  • WordPress.org
Copyright 2026 — Pinter Computing. All rights reserved.