Create an iPhone, iPod or iPad app – Part 4 – Deploy the app to an Apple device
In the prior parts of the series we have created a simple iOS application and tested it in the iOS Simulator. The real gratification comes when we can see our own app on a real device, an iPhone, iPod or iPad. In this article we will deploy the app to an Apple device.
Get an Apple Developer account
You have to apply for a developer account to be able to deploy your app to an Apple device. The subscription fee is $99 + tax per year.
To open a developer account go to developer.apple.com
Once you receive the iOS Developer Program activation code via email you are ready to deploy the app to a real device.
The email contains an activation code, that is also a link to activate your account. Once you activated the account wait 5 minutes before trying to set up your device in Xcode. The Apple system needs some time to recognize the account activation.
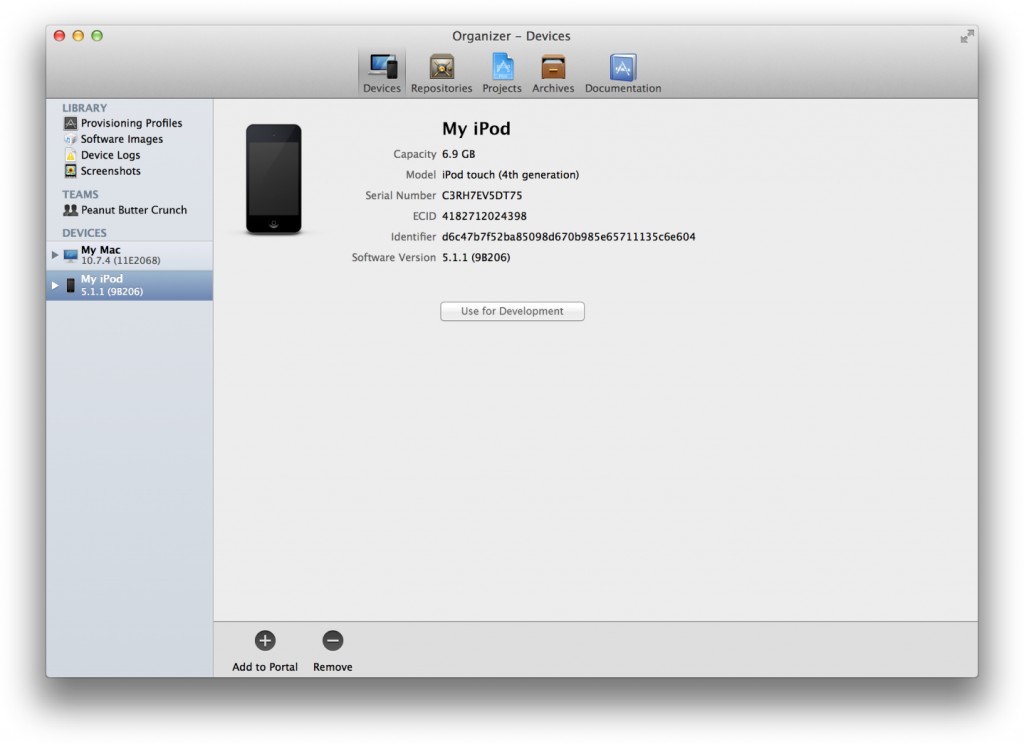
Set up your Apple device
- Start Xcode
- Unlock your Apple device with the pass code
- Connect the Apple device to the Macintosh computer
- Open the Device organizer by clicking the Organizer button in the upper right corner of the Xcode screen
- Select the device on the left side
- Click the Use for Development button in the middle of the screen
If the button is not visible click the Add to Portal button at the bottom of the screen
- Enter your Apple Id and password that you used to register as an Apple developer
- Xcode will offer you to generate security certificates, allow the application to do that
- At the end of the certification generation process save the certificates on your computer, so you will be able to carry them to another Mac to develop on that machine too.
- Close Xcode to force the application to get the latest certificate information from the Apple Developer web site
Deploy the application on the Apple device
- Unlock your Apple device with the pass code
- Connect the Apple device to the Macintosh computer
- Start Xcode and open the project you want to deploy to the device
- In the Product menu select Scheme -> Edit Scheme… to open the scheme editor
- Select your device in the Destination pop-up menu
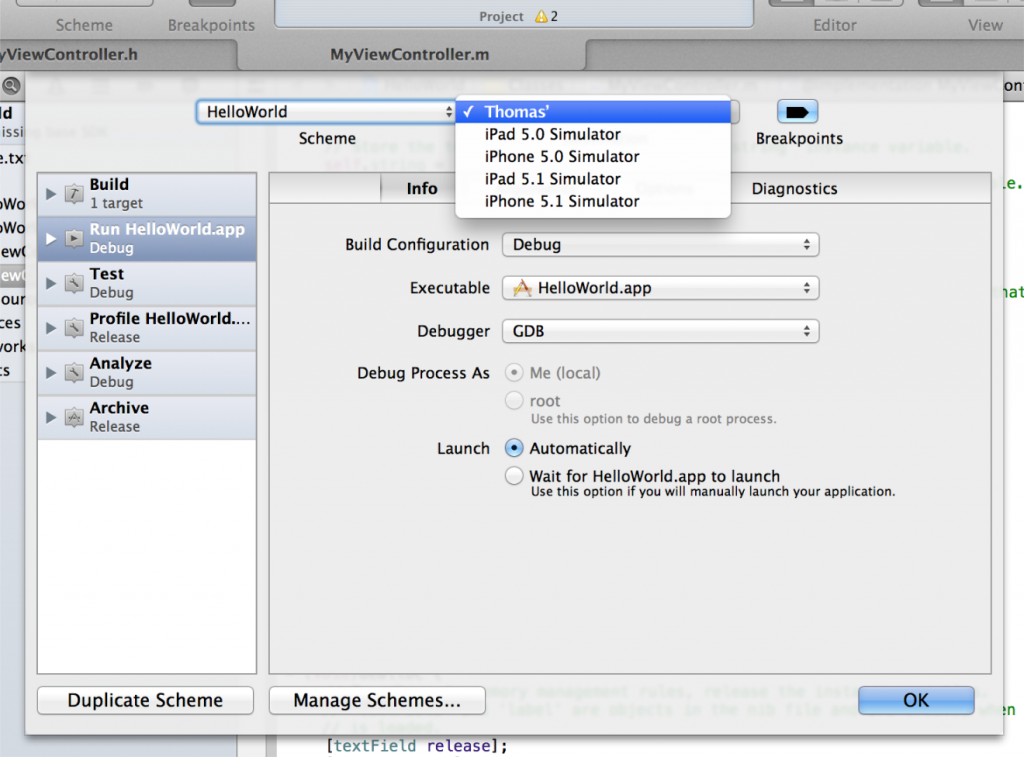
- Click OK to close the schema editor
- Click the Run button in the upper right corner of the screen
You may get the following error message:
“Code Signing Error. A valid provisioning profile matching the application’s Identifier … could not be found”
Follow the steps in the answer at http://stackoverflow.com/questions/16155613/a-valid-provisioning-profile-matching-the-applications-identifier-could-not-be
- A new icon appears on the screen of your Apple device. Tap it, now you can run your brand new application on your own device!