How to migrate the DevOps development environment to another workstation

Git

Move the Git repositories to a new workstation

If you want to move Git repositories to your new workstation

  • Commit and push all repositories to GitHub on the old workstation,
  • Copy the folders from your old workstation to the new,
  • Execute the following command in all Git repositories on the new workstation.
    git reset --hard

Terraform

Copying Terraform scripts from a Windows workstation

If the Terraform scripts reference modules, terraform creates symbolic links to those modules in the .terraform/modules directories. When you try to copy those symbolic links on a Windows machine the copy process stops. To copy the Terraform scripts

  • Start Windows explorer in the folder above the Terraform script folders,
  • Search for .terraform,
  • In the search result list delete the .terraform folders.

Test Kitchen

If you migrate between Windows and Macintosh you need to update a few paths, because the two operating systems store user specific files at different places.

The ssh_key location in the .kitchen.yml file should start with

  • On Macintosh: ~/aws_keys/
  • On Windows: C:\Users\YOUR_USER_NAME\aws_keys\

DevOps Engineering part 1. (Mac) – Make your Macintosh easier to use

Enable the right-click

To be able the right-click on the mouse

  1. Open settings.
  2. Enable Secondary click for the mouse and the trackpad.

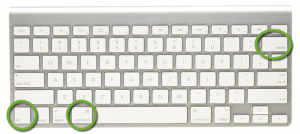
Disable caps lock

If you never write emails with all capital letters, and many times a day accidentally press the caps lock key, you can disable it.

  1. Open the Keyboard settings
  2. On the Keyboard tab click the Modifier Keys… button
     
  3. Assign the Caps Lock key to No action

Remove Siri from the control strip

If you don’t use Siri on your Mac, there is no reason for Siri to occupy space on the control strip above the keyboard.

  1. Open the Keyboard settings
  2. On the Keyboard tab click the Customize Control Strip button
  3. Move the mouse below the bottom of the screen to highlight the Siri icon on the control strip, and drag it from the control strip up to the screen.

How to lock the screen

On High Sierra ( macOS 10.13 ) and later

  1. Press the Cmd-Ctrl-q key combination to lock the screen.

On earlier macOS versions

To be able to lock the screen from the menu bar:

  1. In Finder search for Keychain Access and start it,
  2. In the Keychain Access menu select Preferences,
  3. Check the Show keychain status in menu bar checkbox,
    This will place a lock icon in the menu bar.

To lock your screen

  1. Click the lock icon in the menu bar
  2. Select Lock Screen

Show the full path in Finder

  1. Open Finder
  2. In the View menu select Show Path Bar
    Finder will show the full path of the current folder at the bottom of the window. 

To jump to a folder shown in the path bar just double click it.

Show hidden files and folders

  1. Open the terminal and execute the following line
    defaults write com.apple.finder AppleShowAllFiles YES
  2. For the change to take effect relaunch Finder.
    • Press the ‘Option/Alt’ key, right click on the Finder icon in the dock and click Relaunch

Show the battery charge percentage

Before Monterey ( macOS 12 )

  1. Click the battery icon in the toolbar
  2. Select Show Percentage

In Monterey or later

  1. In System Preferences select Dock & Menubar
  2. On the left side scroll down to Battery Menu Bar and select Show Percentage

Apple Id without credit card

If you don’t have an Apple Id, create one. To obtain one without a credit card, you need to create the account in an older version of iTunes. In version 12.7 Apple removed the access to the App Store.

  1. Downgrade iTunes on your Mac to version 12.6. Follow the instructions at http://osxdaily.com/2017/09/17/downgrade-itunes-12-7-to-itunes-12-6/
  2. Start iTunes 12.6 on your Macintosh,
  3. Click the drop-down menu in the upper left corner,
    apple-id-01
  4. If Apps is visible, select it, otherwise click Edit Menu
    • Select Apps, and click Done to display it in the drop down.
      apple-id-02
  5. Search for a free app in the App Store and start to download it,
    apple-id-03
  6. Create a new Apple Id and select None for credit card type.

Show the user home directory and drive root

  1. Open Finder
  2. In the Finder menu select Preferences
  3. Select the Sidebar tab
  4. In the Favorites section select the checkbox next to your user name
  5. In the Locations section select the name of the hard drive

Prevent Microsoft Outlook to send the message with Command-Enter

To prevent Outlook to send the email when you accidentally press Command-Enter, associate the Send action with a zero length character:

  • Quit Microsoft Outlook
  • Execute in the terminal
    defaults write com.microsoft.Outlook NSUserKeyEquivalents -dict-add "Send" "\U200B"

Stop Spotlight indexing the Time Machine drive

Spotlight helps to search for files by indexing drives. To speed up the Time Machine operations prevent Spotlight indexing the Time Machine drive.

  • Connect the Time Machine drive to the computer.
  • In System Preferences select Spotlight
  • On the Privacy tab click the Plus sign
  • In the locations section select the Time Machine drive and click the Choose button
  • The list should contain the Time Machine drive

Homebrew

Homebrew is a package manager, it can install packages on your Macintosh that apple does not provide, like a few utilities below.

Installation

Installation instructions are at http://brew.sh/

List outdated software

  1. To list installed software that has new versions available, execute
    brew outdated

Update installed software

  1. To update (upgrade) all software that has new versions, execute
    brew upgrade

Uninstallation

To uninstall Homebrew if you don’t need it later execute

/bin/bash -c "$(curl -fsSL https://raw.githubusercontent.com/Homebrew/install/HEAD/uninstall.sh)"

Limit battery charging to 80%

To prolong the life of the battery of your Macintosh, you can install a utility to stop battery charging at 80%.

  • Install BCLM from https://github.com/zackelia/bclm
    • If you don’t have ownership of Homebrew, before installation execute
      sudo chown -R $(whoami) /usr/local/var/homebrew
      sudo chown -R $(whoami) /usr/local/Homebrew/
    • The installation steps are currently
      brew tap zackelia/formulae
      brew install bclm
      sudo bclm write 77
      sudo bclm persist
    • Check the set value with
      bclm read
  • Turn off Optimized battery charging in System Preferences to give full control to the tool.

  • You may need to reboot the computer for the process to start monitoring the battery.
  • The charging will stop around 80%. It may goes above 80% with a few percents, but at least the battery is not fully charged.

After software update

The system software update usually resets the upper charging limit to 100%. After system update execute in a terminal

sudo bclm write 77
sudo bclm persist
bclm read

UTC Clock in the menu bar

xBar is a plugin manager that can display plugins in the menu bar. One of them is World Clock that can display multiple clocks in a drop down of the menu.

Install xbar

  1. Navigate to https://xbarapp.com/
  2. Click the Download xbar for macOS button
  3. Download and run the .dmg file to install the application
  4. Move the xbar application to the Applications folder

Add World Clock to BitBar

  1. Launch xbar form the Launcher
    • Click xbar in the tool bar
    • Select the Plugin browser
    • On the Time page select the World Clock

Customize World Clock

  1. To open the plugins folder click the UTC clock, select xbar, Open plugin folder…
  2. Open the 001-worldclock.1s.sh file in a text editor

To change the displayed timezones, edit the ZONES variable in the file:

ZONES="US/Pacific UTC Europe/London Europe/Berlin Asia/Kolkata Asia/Tokyo Australia/Sydney"

To change the display format, edit the data formats.

  1. To remove the seconds from the menu bar, delete the :%S from the format line
date -u +'%H:%M UTC'

To add the day of the week and date to the clocks in the World Clock drop down

add

  • %a for the day of the week
  • %Y for the four digit year
  • %b for the name of the month
  • %d for the date
  • %z for the time zone offset
echo "$(TZ=$zone date +'%H:%M - %a, %Y %b %d %z') $zone"

To refresh the dropdown formats after making changes in the config file

  1. Click the World Clock in the menu bar
  2. Select Preferences, Refresh all

Disk Inventory X

This utility displays the graphical representation of file sizes and helps to find the biggest files.

  1. Download it from http://www.derlien.com/

System information in the menu bar

Stats is a free open source software to display system information in the menu bar including

  • CPU usage and temperature
  • Memory usage
  • Network and hard drive usage

To install it, navigate to https://github.com/exelban/stats

Next:

Back:

to the Tutorials page

OLD- DevOps Engineering part 1. (Win) – Make your Windows computer easier to use

Set up your computer

Display the file extensions

On Windows 11

  • Open the File Explorer
  • Click the arrow next to View and select Show
  • Mark File name extensions and Hidden items

On Windows 10

  • Open File Explorer
  • On the View tab select
    • File name extensions
    • Hidden items
      windows-03-show-file-extensions

On Windows 7

(if you accidentally run into an ancient machine)

  • Open Windows Explorer and select Organize
  • Select Folder and search options
    windows-02-show-file-extensions
  • On the View tab
    • Select Show hidden files, folders, and drives
    • Uncheck Hide extensions for known file types

To disable the Windows key

If you use a Macintosh computer you use the Command key all the time. Unfortunately, on the Windows keyboard you will always hit the Windows key. This can be very frustrating, as pressing the Windows key with any of the cursor keys will resize the window.

To disable the Windows key

  • Download the 64 bit version of PowerToys by Microsoft (currently PowerToysSetup-0.68.1-x64.exe) from https://github.com/microsoft/PowerToys/releases/tag/v0.68.1
  • Execute the installer file to install the application
  • Start Powertoys
  • On the left side select the Keyboard manager
  • Click the Open Settings button
  • Select Remap a key
  • Click the plus sign
  • On the left side select Win (Left), on the right side select Disable and click the OK button.
  • Click Continue Anyway

  1. 
    

Virtual Box

Download Virtual Box from https://www.virtualbox.org/wiki/Downloads and follow the instructions to install it.

At the time of writing, this was the section where the installer files were referenced

virtual-box-01-download

Run the downloaded installer file and accept all default values.

The installer starts the Virtual Box application.You can close it, we will use other tools to start it in the future.

To be able to launch 64 bit guest operating systems turn off Hyper-V in Windows Features

  1. In the Windows search box enter Windows Features and select Turn Windows Features on or off,
  2. Uncheck Hyper-V and click OK,
  3. Reboot the computer for the setting to take effect.

Configure VirtualBox

Networking

To share the connectivity of the host computer with the virtual machine, mainly if you use VPN

  1. In Virtual box click Settings
  2. Select Network
  3. Attach the network adapter to NAT

Copy and paste

To enable copy and paste between the virtual machine and the host ( your workstation )

  1. On the General tab of the Settings page select the Bidirectional shared clipboard

Shared Folders

Specify the shared folder on your workstation

  1. In the VirtualBox menu select Preferences
  2. On the Shared Folders tab click the + icon
  3. To share the entire system drive, select the C: drive of your workstation

Enable shared folders on the virtual machines

To enable the shared folders on the virtual machine and other configurations see Virtual machine configuration at VirtualBox


Vagrant

For Vagrant installation see Vagrant.


Ruby

  • Download Ruby from http://rubyinstaller.org/downloads
  • Install the 32 bit version, as the 64 bit version is fairly new and has compatibility issues. Download the latest Ruby installer. Pick the file that does not have the (x64) at the end.
  • Accept the default values but check Add Ruby executables to your PATH
    ruby-01-add-to-path

 Ruby Development Kit

The Ruby Development Kit is need for certain Ruby gems, so install it.

  • Download the Ruby Development Kit from the DEVELOPMENT KIT section of  http://rubyinstaller.org/downloads
  • If you have installed the 32 bit version of Ruby make sure you install the 32 bit version of the DevKit. Select the Development kit that matches the Ruby version you installed. At the time of writing the latest development kit is under “For use with Ruby 2.0 and above (32bits version only)
    • Run the installer to extract it to a permanent location (C:\RubyDevKit)
    • Open a command window in the C:\RubyDevKit folder
    • Run these commands in the command prompt to install it.
      • ruby dk.rb init
      • ruby dk.rb install
  • For more information see  http://github.com/oneclick/rubyinstaller/wiki/Development-Kit

Chef Development Kit

Terraform by Hashicorp

Install it with Chocolatey

  • Open a Git Bash window as administrator
  • Execute
    choco install terraform

or

Manual installation

  • Download Terraform from https://www.terraform.io/downloads.html
  • Unzip the downloaded package to C:\HashiCorp\Terraform
  • Add the Terraform directory to the path of the computer. It is not added automatically on 64 bit Windows.
    • In Windows Explorer right-click Computer and select Properties,
    • On the left side select Advanced System Settings,
    • At the bottom click the Environment Variables… button,
    • In the System Variables box select Path and click the Edit… button,
    • Add the following to the end of the Variable value. (Don’t forget to start with the semicolon as the separator).
      ;C:\HashiCorp\Terraform
  • To create RDS (Relational Database Service) instances in AWS, install the Amazon Web Services Command Line Interface (See instructions below)
  • Configure the GitBash window to run as administrator to be able to execute the “terraform get” command to get local modules during development
    • Right click the shortcut of the Bash window you use and select Properties
    • On the Compatibility tab check Run this program as an administrator

For more details see https://www.terraform.io/intro/getting-started/install.html

Graphviz

Graphviz is a Dependency Graph Visualization Software. We will use this utility to display the Terraform graphs.

  • Download from http://www.graphviz.org/Download..php
    There are really two dots in the address :-)
  • Execute the installer
  • You may need to add the location to the Path environment variable. Make sure you use the actual folder name, as it contains the version of the application.
    ;C:\Program Files (x86)\GraphvizX.XX\bin

AWS CLI

The Amazon Web Services command line interface installation will set up your workstation to launch instances in AWS from Test Kitchen. If you know you will work with AWS, see DevOps Engineering part 3. – Working with AWS for the AWS CLI installation.

Packer

We use Packer to create custom AWS AMIs that contain the fundamental configuration and applications that are common in every instance we launch.

Install with Chocolatey

  • Open a Git Bash window as administrator
  • Execute
    choco install packer

or

Manual Installation

  • Add the Packer executable or installation directory to the system path

Nice to have utilities

WinDirStat

Screenshot

WinDirStat is a disk utility to display the relative size of your files in a graphical interface and provide a tree view to help to find them.

Download it from https://windirstat.net/

Next:

Set up the DevOps development environment in Beginner’s Guide to DevOps Engineering part 2.

Back:

to the Tutorials page

Your session has timed out. Please try again. Code 5107 in the

To download apps from the Apple Store you need an Apple Id. If the app is free, you may not want to enter credit card information during the registration. If you try to create the Apple Id without the credit card in the App Store application, you may get the following error message:

Your session has timed out. Please try again. Code 5107

To create the Apple Id without a credit card

  • Start iTunes on your Macintosh,
  • Click the drop down menu in the upper left corner,
  • If Apps is visible, select it, otherwise click Edit Menu… in the same drop down,

    • To display Apps in the drop down, select the check box next to it.
  • On the top of the screen click the App Store button,
  • In the upper right corner search for a free app in the App Store and start to download it,
  • Create a new Apple Id and select None for credit card type.

`block in filter_instances’: undefined method `empty?’ for nil:NilClass (NoMethodError)

When you try to execute any of the “kitchen” commands in Chef Test Kitchen you may get the following error message.

lib/kitchen/config.rb:182:in `block in filter_instances': undefined method `empty?' for nil:NilClass (NoMethodError)

This happened in my cookbook, when I have removed the value from the “excludes:” option in the .kitchen.yml file, but left the “excludes:” option there alone.

To make your cookbook work in Chef Test Kitchen again, remove the empty “excludes:” option form the .kitchen.yml file

Failed to open file ‘…’ , error 2 and error 22

How to restore a MySQL database in Windows

To restore a MySQL database on a Windows machine:

  • Place the database backup file in the root directory of your C: drive (trust me, this will make your life easier)
  • Open the Command Prompt
  • Start the MySQL command prompt
  • mysql -u root -p

    This command will prompt you for the MySQL root password

  • Switch to the new database
    use db;
  • Import the database
    source C:/BACKUP_FILE_NAME.sql

    To avoid the Failed to open file ‘…’ , error 2 and error 22 error message
    You can have spaces in the name of the backup file, but not in the directory names in the path
    Do not use quotes around the file path
    Use forward slashes
    Do not end the command with semicolon (;)

The FastCGI process exited unexpectedly

When you install WordPress on a Windows machine you may get the following error message:

HTTP Error 500.0 - Internal Server Error
C:\Program Files (x86)\PHP\v5.5\php-cgi.exe - The FastCGI process exited unexpectedly

Detailed Error Information:
Module
 FastCgiModule
Notification
 ExecuteRequestHandler
Handler
 PHP55_via_FastCGI1
Error Code
 0x000000ff

The error message is misleading. If you open the Application events in the Event Viewer you may find the following

Faulting application name: php-cgi.exe, version: 5.5.38.0, time stamp: 0x578fc02c
Faulting module name: MSVCR110.dll, version: 6.3.9600.18233, time stamp: 0x56bb4e1d
Exception code: 0xc0000135
Fault offset: 0x0009d3c2
Faulting process id: 0xcec
Faulting application start time: 0x01d24603ad650d40
Faulting application path: C:\Program Files (x86)\PHP\v5.5\php-cgi.exe
Faulting module path: MSVCR110.dll

The key is the MSVCR110.dll

This DLL is part of the Visual C++ Redistributable for Visual Studio 2012 Update 4. Download the 32 bit version, even if you have a 64 bit operating system, from http://www.microsoft.com/en-us/download/details.aspx?id=30679

After the installation WordPress will start to work without reboot.


Serialize SSH and RSA private keys to store them in a Chef Data Bag

To send RSA private keys to instances, store them in encrypted data bags. The data bag item is a JSON file that contains keys and values inline.

Use base64 encoding

Base64 encoding converts binary data to ASCII format to represent special characters, like line breaks as ASCII text. The result will be larger, 8 / 6th of the original size, as every 8 bit ASCII character only represents 6 bits of data.

To convert a file to base 64 and save it as another file

cat test.pem | base64 > test.pem.base64

If we need the result on the computer’s clipboard to paste it into a field on the screen

cat test.pem | base64 | pbcopy

To use the encoded string we need to decode it in the Chef cookbook.

Replace the newline characters with \n

To place the multi-line RSA key into the value part of the JSON file, we need to replace the new line characters with the “\n” text.

In Atom

on Mac and Windows

  1. Open the RSA key file in Atom,
  2. Press Command-F on Mac, Ctrl-F on Windows to open the Find and Replace window,
  3. On the right side click the Use Regex button,
  4. In the search field enter
    \r\n
  5. In the replace with field enter
    \\n
  6. Press the Replace All button

In Visual Studio Code

on Mac and Windows

  • Press Command-F on Mac, Ctrl-F on Windows to open the Find dialog
  • Select the Use Regular Expression button
  • Enter \n into the find, \\n into the replace field

In Notepad++

on Windows

  • Open the RSA key file in Notepad++,
  • In the Search menu select Replace…,
  • Select Extended mode in the Search Mode section,
  • Enter \r\n to the Find what text box ( if the key was generated on a Windows computer using GitBash, search for \n )
  • Enter \\n  to the Replace with text box
  • Press the Replace All button

You can place the single line key into any encrypted Data Bag file. See Data Bags on Data Bag encryption.