I have used this fun, but very time consuming “analog” method before discovering the Image Overlay 2 mod described in Transfer streets to your city in Cities: Skylines using a PNG image file
Cities: Skylines is a great environment to build scale models of real cities. In this example, we will transfer the Pacific Electric Railway map of the Los Angeles area from 1947 to the Los Angeles area map by macmcginty. Once you subscribe to the Los Angeles map in the Steam Workshop, the map appears in your map list in Cities: Skylines as “New Map”.
The web page at https://www.pacificelectric.org/pacific-electric/maps/1947-pacific-electric-system-map/ contains the link to the high-resolution scan of the map in PDF format. We can use a Sharpie permanent marker and clear plastic sheets, or Snagit and a printer to transfer the street map to transparent film. We will also need blue painters tape to safely attach the transparencies to the frame of the computer screen.
Determine the zoom scale to use for the Areas view
- First, open the PDF file in Acrobat Reader to the able to switch out to Windows from the game
- Start Cities: Skylines
- Open the map in Cities: Skylines
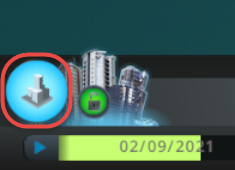
- Select the Areas view
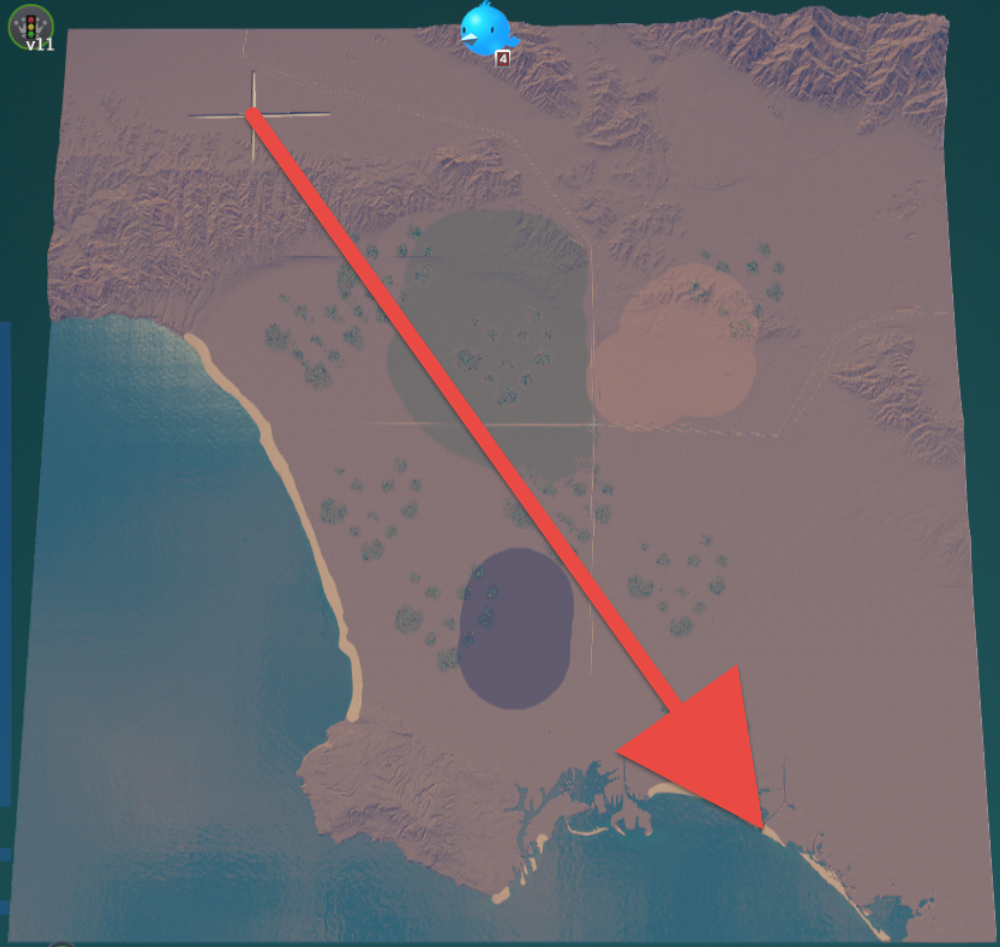
- Measure the distance of two map features in the Areas view
- Use Alt-Tab to switch to the Acrobat Reader
- Press CTRL-L for full-screen view
- Press CTRL-Y to set the zoom scale. Adjust the number to get the same distance of the two features on the PDF map, and write down the number (in my case60 %).
Determine the zoom scale for the edit view
- In Cities: Skylines press ECS to get back to the edit view
- Zoom all the way out with the mouse wheel
- Scroll to the top of the view and set the map to horizontal by holding the middle button (wheel) and moving the mouse left and right
- Set the tilt to zero by pressing the R key
- Measure the distance between two objects
- Switch back to Acrobat Reader and follow the steps above to determine the zoom scale (in my case 322%).
Transfer reference points to the game
First, we will transfer reference points to the game to be able to align the enlarged street layout of the urban areas.
By hand with permanent marker
You can use transparent film and Sharpie permanent marker to transfer the layout first to the film by hand and draw the streets later in the game.
- Open the map in Cities; Skylines
- Select the Areas view
- With blue painter’s tape attach a transparent film to the computer screen.
- With Sharpie draw the outline of the city and some terrain features to be able to align the film with the PDF map.
- Switch to Acrobat Reader, and set the already determined zoom scale for the Areas view (in my case60 %)
- Draw reference points on the transparent film
With printer
We can buy transparent laser or inkjet printable film to transfer the layout of the streets. Make sure to select the correct one for your printer type. If your printer is capable of printing on legal size, 8-1/2″ x 14″ paper, buy that size film, as it will provide a larger area to work with, and it better matches the aspect ratio of the widescreen computer monitors.
In this example, we will use Snagit to capture and print the street map to the transparent film, but you can use any screen capture and graphics program to do that.
- Open the street map in Acrobat Reader
- Press CTRL-L for full-screen view
- Press CTRL-Y to set the zoom scale you have determined above for the Areas view (in my case 60%).
- Scroll to the view that shows the same area as the region in Cities:Skylines
- Capture the full screen with Snagit or any other application
- Open the captured image
Determine the necessary print scale to match the image size on your screen
- Print the captured image on paper with 100 % scale
- Measure the distance between two reference points on your screen and on the paper
- Divide the measured distance on the screen by the measured distance on the paper to get the correct scale to match the screen size on the printout. (0.75 means 75% print scale)
- Set the calculated scale
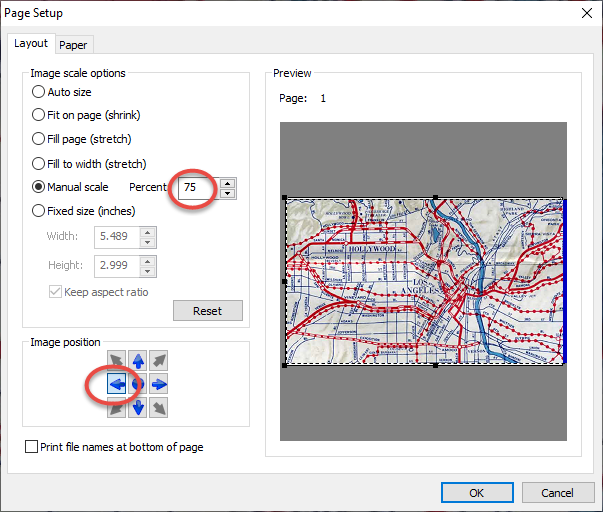
- Set the image position to left to make sure the left size of the captured image is visible on the printout
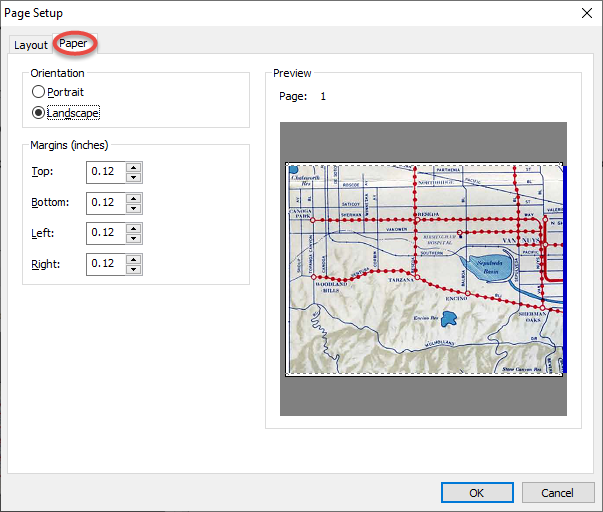
- On the Paper tab set the orientation to Landscape
- Print one more copy on paper to verify the correctness of the determined scale
Print the Areas view
- On the printer properties window set the
- paper source to the Rear Paper Feed Slot
- paper size of the transparency film (legal)
- orientation to landscape
- paper type to Premium Presentation Paper Matte
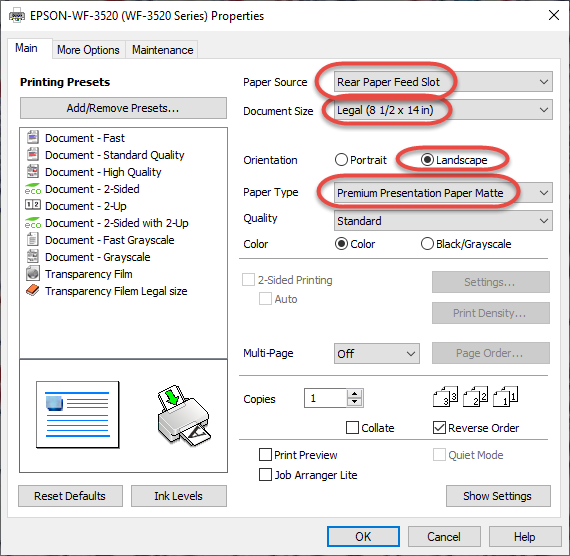
- If your printer driver has the functionality save the settings as a preset for the future.
- If the print preview indicates two pages, crop the image to fit on one sheet (in my case the max image height is 1050 pixels)
Transfer some terrain features to the game
- Switch back to the game
- With blue painter’s tape attach the transparent film to the computer screen and align it with the Areas view.
- By switching between the editor and the Areas view, use the Wide canal tool in the Landscaping, Water Structures menu, as it is highly visible on the Areas view, to transfer the reference terrain features to the game.
Transfer the street map to the game
- Open the street map in Acrobat Reader
- Press CTRL-L for full-screen view
- Press CTRL-Y to set the zoom scale you have determined above for the edit view (in my case 322%)
- Scroll to the area of your interest
If you use Sharpie
- With blue painter’s tape attach a transparent film to the computer screen.
- Copy the tram lines, major streets, and train tracks with Sharpie permanent marker to the transparent film.
If you use a printer
- Capture the view on the screen
- Crop the image if necessary
- Make sure the scale and print setting are correct (in my case 1050 pixels height, 75% print scale)
- Print the captured image on the transparency film
- Lay the print flat on the table and let the ink dry for a few minutes.
Draw the streets
- Switch back to the game
- In Cities: Skylines press ECS to get back to the edit view
- Zoom all the way out with the mouse wheel
- Scroll to the top of the view and set the map to horizontal by holding the middle button (wheel) and moving the mouse left and right
- Set the tilt to zero (looking down vertically) by pressing the R key
- With blue painter’s tape attach the transparent film to the computer screen.
- Align the film with the map in the game and draw the features in the game.