Skip to content
Pinter Computing

Knowledge Base for IT Professionals, Teachers, and Astronauts

Pinter Computing

Knowledge Base for IT Professionals, Teachers, and Astronauts

  • Home
  • Programming
  • DevOps
  • Project Management
  • Software and Hardware
  • Miscellaneous
  • Egyebek
  • About
  • Experience
  • Education
  • Contact
  • Home
  • Programming
  • DevOps
  • Project Management
  • Software and Hardware
  • Miscellaneous
  • Egyebek
  • About
  • Experience
  • Education
  • Contact
Close

Search

Home/Software Development/Programming Languages/Java/Package dependent Java JAR files into the project JAR file
Java

Package dependent Java JAR files into the project JAR file

By Laszlo Pinter
October 29, 2017 1 Min Read
0

When you execute your Java JAR file, you need to include all dependent JAR files in the “fat jar” file, so the Java virtual machine can find them at runtime.

Set up NetBeans to include the JAR files from the library

In NetBeans you need to add the list of dependent libraries to the build.xml file.

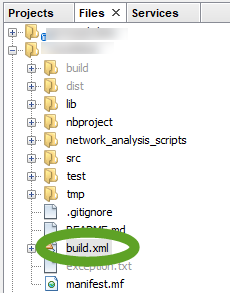
  1. On the Files tab double-click the build.xml file to open it in the editor,
  2. Add the lines below to the build.xml file before the </project> statement. Change the value of the second line to specify the name of your project.
    <target name="package-for-store" depends="jar">
        <property name="store.jar.name" value="MY_PROJECT"/>
        <property name="store.dir" value="store"/>
        <property name="store.jar" value="${store.dir}/${store.jar.name}.jar"/>
        <echo message="Packaging ${application.title} into a single JAR at ${store.jar}"/>
        <delete dir="${store.dir}"/>
        <mkdir dir="${store.dir}"/>
        <jar destfile="${store.dir}/temp_final.jar" filesetmanifest="skip">
            <zipgroupfileset dir="dist" includes="*.jar"/>
            <zipgroupfileset dir="dist/lib" includes="*.jar"/>
            <manifest>
            <attribute name="Main-Class" value="${main.class}"/>
            </manifest>
        </jar>
        <zip destfile="${store.jar}">
            <zipfileset src="${store.dir}/temp_final.jar"
            excludes="META-INF/*.SF, META-INF/*.DSA, META-INF/*.RSA"/>
        </zip>
        <delete file="${store.dir}/temp_final.jar"/>
    </target>
  3. Save the build.xml file.

Build the project

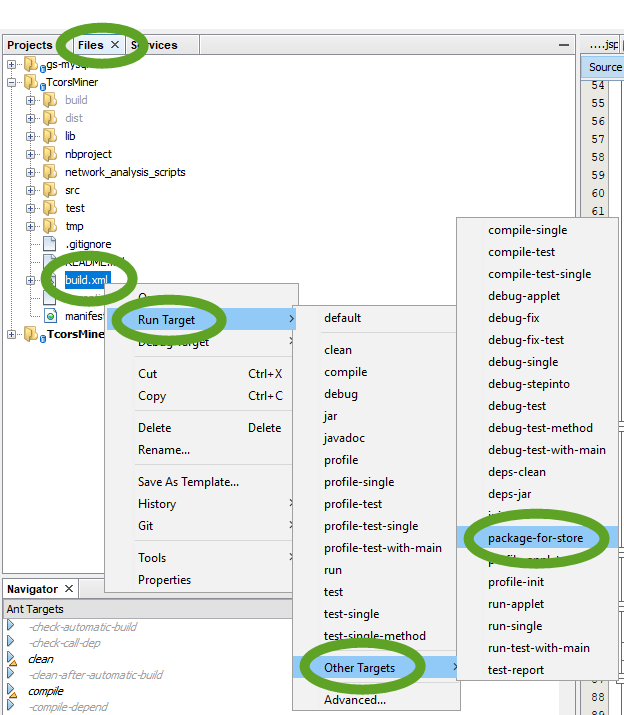
  1. Right click the build.xml file,
  2. Select Run Target > Other Targets > package-for-store
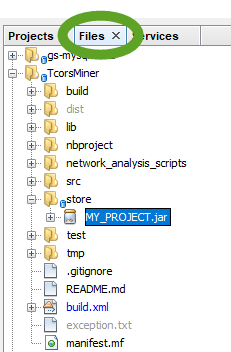
  3. The generated file is going to be located in the store directory.

Tags:

JavaNetBeans
Author

Laszlo Pinter

Follow Me
Other Articles
Previous

Restore Windows Server 2012 R2 from backup

Next

Chef NoMethodError, undefined method

No Comment! Be the first one.

Leave a Reply Cancel reply

Your email address will not be published. Required fields are marked *

Search

Last Changes

  • DevOps Engineering part 1. (Mac) - Make your Macintosh easier to use June 25, 2026
  • Japan travel tips June 22, 2026
  • How to stop the rain and snow in Cities: Skylines II June 20, 2026
  • Cities: Skylines II Developer Mode June 20, 2026
  • 'CSII_MANAGEDPATH' has incorrect path(s) when building Cities: Skylines II mod June 20, 2026

Tags

.NET .NETcore 3Dprinting ASP.NET Core AutodeskInventor AWS C# Chef cloud DevOps Docker EntityFramework Games Git Go iOS iPad iPhone iPod Java Kubernetes Linux MacOSX MSSQL MVC Node.js Packer PowerShell Python RDS RightScale Ruby security Splunk TeamCity Terraform TestKitchen Tomcat Ubuntu Vagrant VirtualBox VisualStudio Windows WordPress Xcode

Recent Comments

  • Zengei László on MyHeritage családfa exportálása és küldése emailben
  • Raúl Castillo on DynDns update error
  • MICHAEL on Windows Media Player 12 cannot find the album information
  • Nargis on Configure Epson ET-3850 scanning on Windows 11
  • Venczelné Zemen Erika on Delta S2302 termosztát programozása

–

  • Log in
  • Entries feed
  • Comments feed
  • WordPress.org
Copyright 2026 — Pinter Computing. All rights reserved.