DreamHost is one of the recommended WordPress hosting providers. The DreamHost website has an extensive knowledge base, but the necessary steps to move your live site from another provider are scattered over multiple pages at https://help.dreamhost.com/hc/en-us/articles/214693178-How-to-manually-migrate-WordPress-to-DreamHost.
These steps will guide you through the streamlined migration process.
At your old provider
Create a site and database backup of your site at the old provider and save them on your workstation.
At DreamHost
Create an account at DreamHost.
If you arrive at the DreamHost site from https://www.cnet.com/web-hosting/ you get 50% discount on your initial hosting plan terms. The price will increase to the regular amount when you renew your hosting contract after 1 or 3 years.
It can take DreamHost an hour to activate your account. You can log into the control panel, but you have to wait for the account activation to be able to set up your site.
Create a fully hosted site
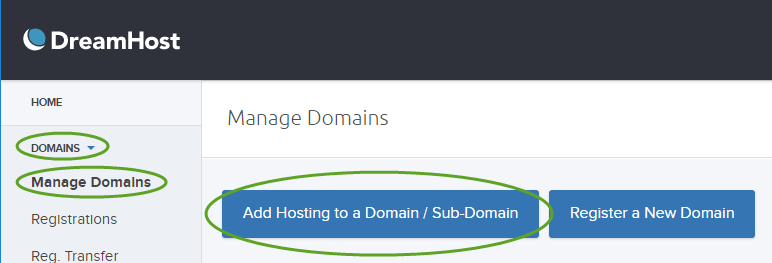
- In the DreamHost Panel select DOMAINS, Manage Domains and click the Add hosting to a Domain / Sub-Domain button
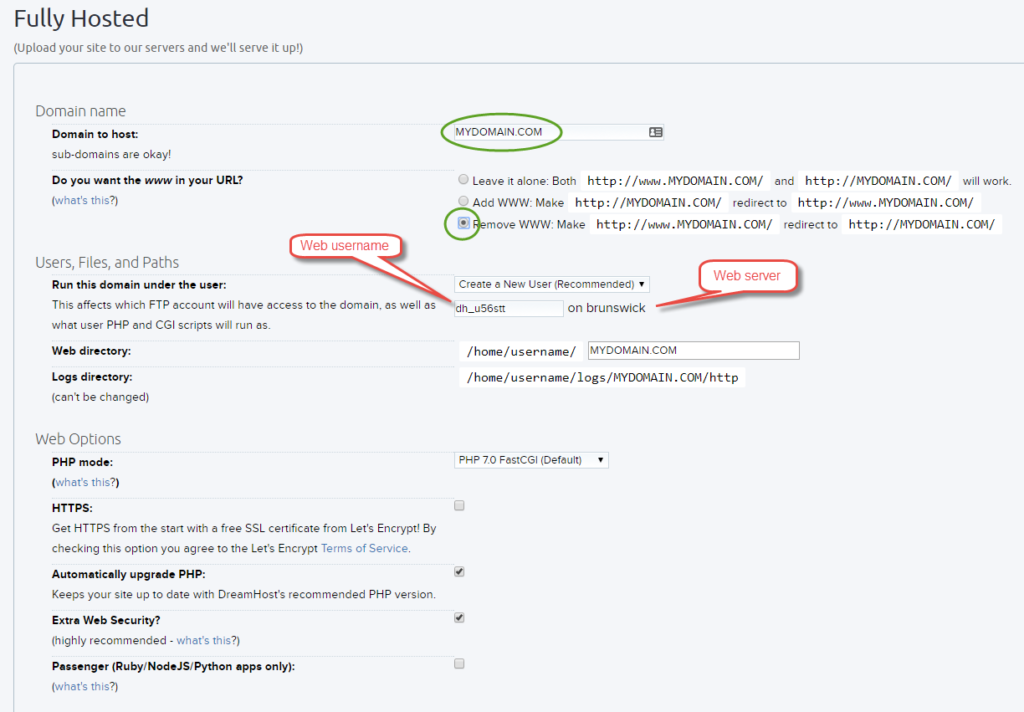
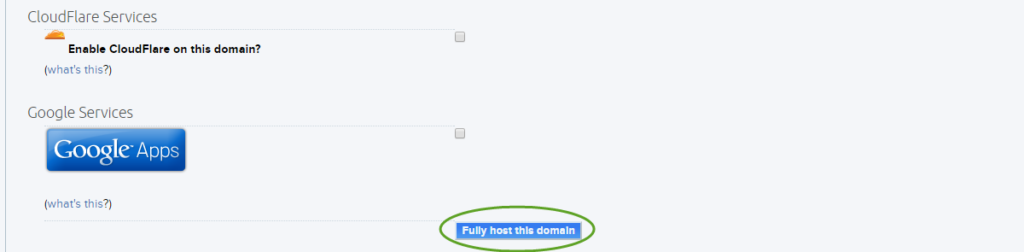
- Enter the name of your domain, select Remove WWW:… , and make a note of the Web username and Web server name. When you will upload the site, make sure you use the newly created Web username and Web server (+.dreamhost.com) with the SFTP protocol. (FTP will be disabled for that user). When you save your changes, the new username and password will display on the screen. Click the Fully host this domain button.
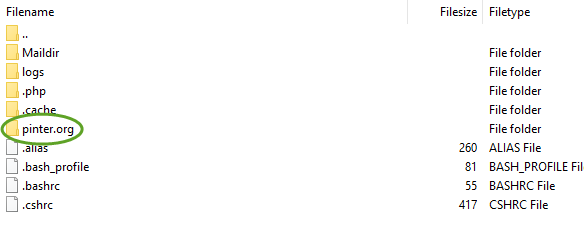
- DreamHost creates a directory for the new user in the home directory on the web server and a subdirectory for the website.
Temporary domain name
If you want to keep your existing domain name at the original location until the new site goes live at DreamHost, create a free temporary subdomain, MYDOMAIN.dreamhosters.com
- Return to the Manage Domains page and click the Add Hosting to a Domain / Sub-Domain button again,
- Scroll down to the Mirrored section. Enter a sub-domain name using dreamhosters.com, select your site from the drop-down, and click the Mirror this domain button.

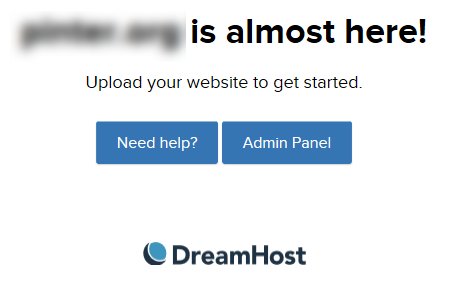
- Open a web browser and navigate to MYDOMAIN.dreamhosters.com. You should see this page:
Create a MySQL database
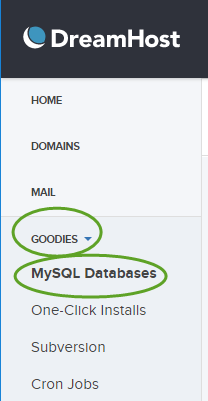
- On the left side select GOODIES and MySQL Databases
- If you use the temporary domain name, you need to use it for the database hostname too. If you move an existing WordPress site, for the easier configuration, you can keep the same database name, username, and password that you had at the old site.
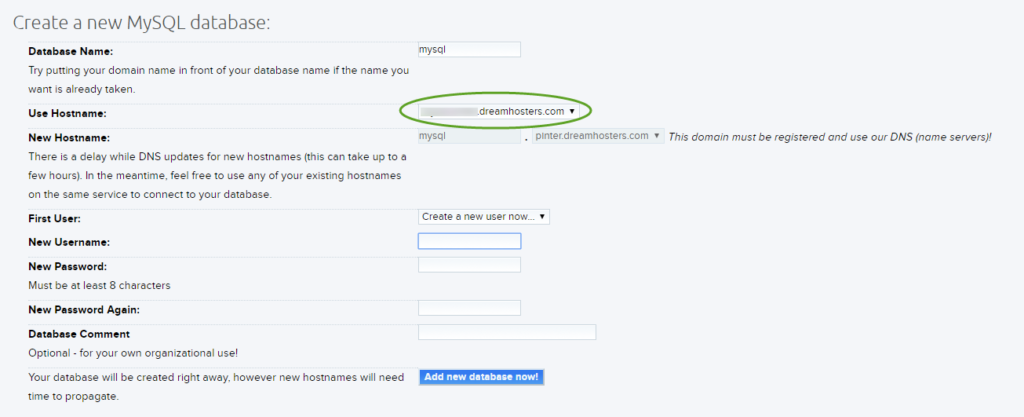
- Update the wp-config.php file on your workstation with the new values. Even if you keep the database name, username, and password values, the DB_HOST will be different, because the site is now at a different provider.
define('DB_HOST', 'mysql.MY_DOMAIN_NAME.dreamhosters.com');
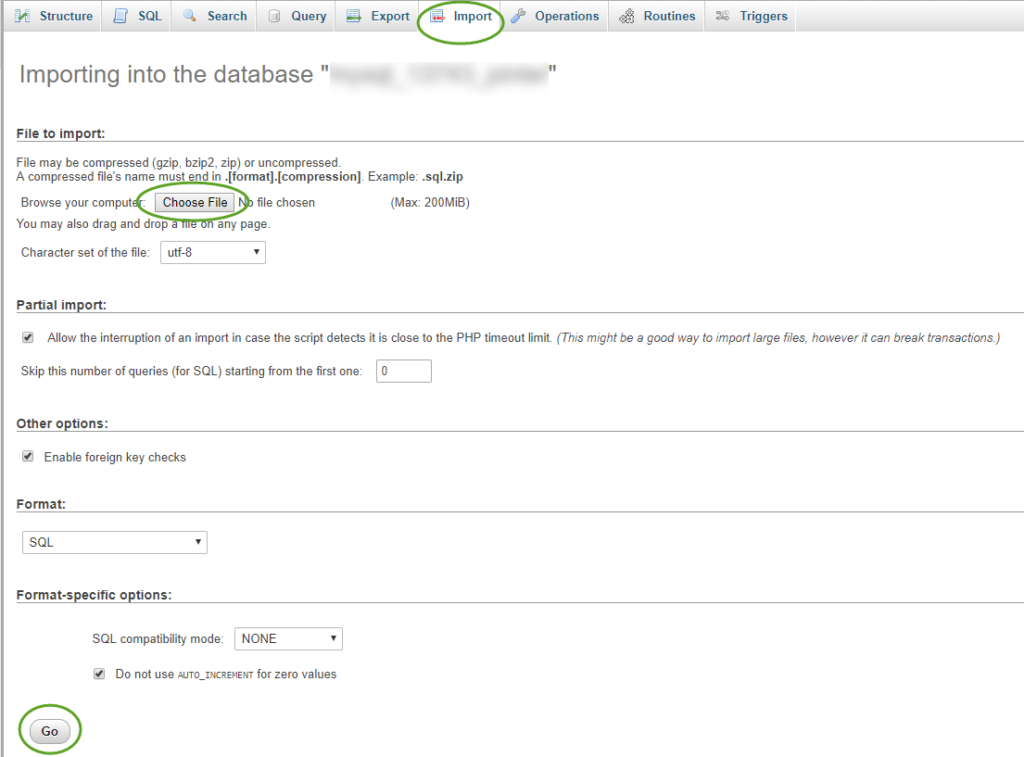
Import data into your database
- On the left side select GOODIES, MySQL Databases, and in the middle select phpMyAdmin next to the database name

- Make sure the SQL script on your workstation starts with the database selection command. If the instruction is missing, add the line:
USE MY_DATABASE_NAME;
For some reason, the MySQL Workbench cannot interpret the encoding of the SQL file, use a better text editor to edit the file, otherwise international characters in the data will be corrupted.
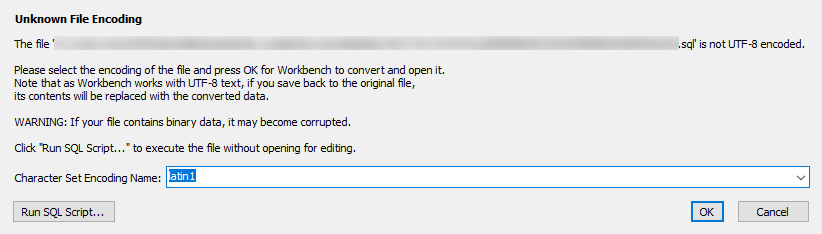
The Microsoft SQL Server Management Studio is perfect for this purpose. - On the Import tab click the Choose File button to select the database backup SQL file on your workstation and click the Go button
Update the site URL in the database to match the temporary website address
With the user interface
On the phpMyAdmin web page
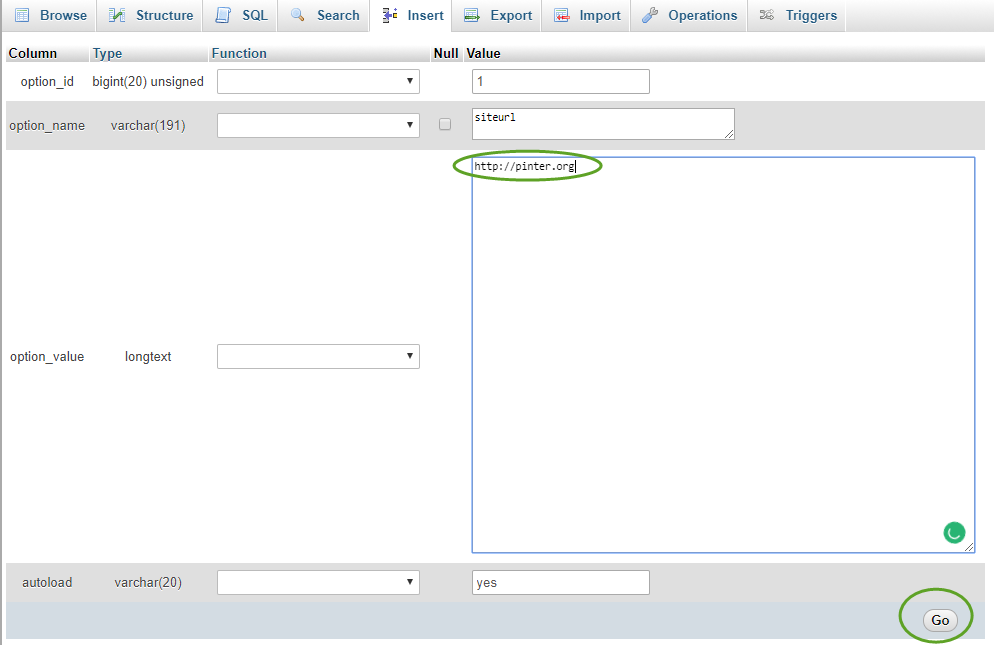
- Select the Browse tab, on the left side select your WordPress database, and in the database click the wp_options table.
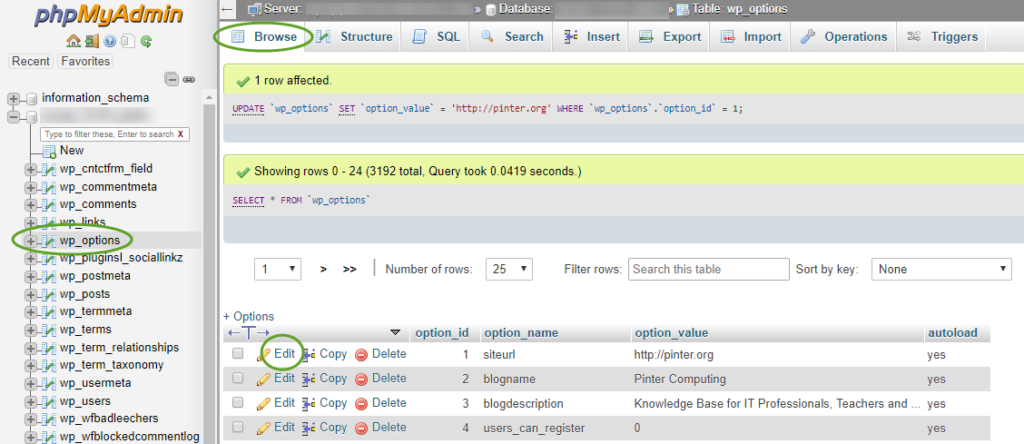
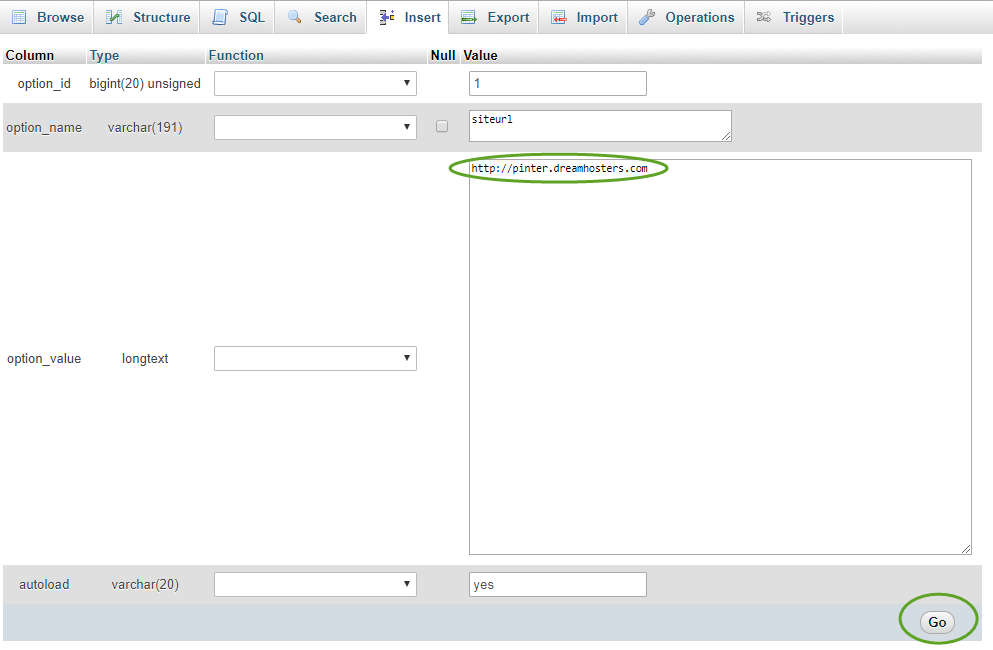
- Click the Edit link in the siteurl row. This will automatically open the Insert tab,
- Update the siteurl value in the wp_options table and click the Go button,
- Do the same with the home row.
With an SQL query
update MY_DATABASE_NAME.wp_options set option_value = 'http://MY_SITE_URL' where option_name = 'siteurl'
update MY_DATABASE_NAME.wp_options set option_value = 'http://MY_SITE_URL' where option_name = 'home'
Upload the WordPress site files to the new web server
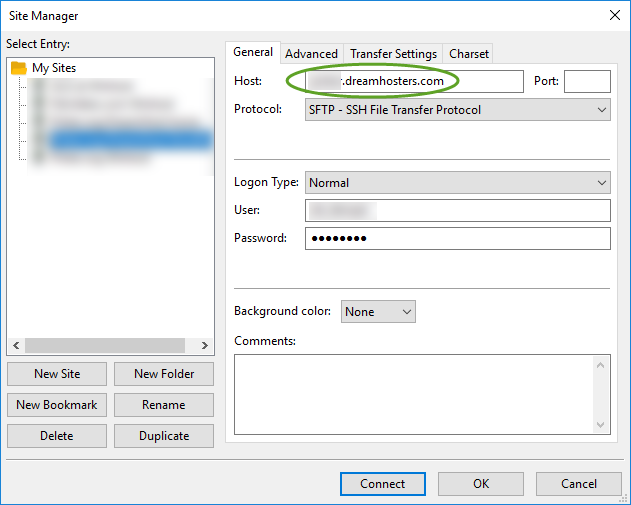
Use an FTP client to upload the files to the site. The site host user only has SFTP rights, so make sure you configure your FTP client accordingly. Use the web address, username, and password that you used, when you set up the fully hosted website above.
To rebalance the load between their web servers, DreamHost time-to-time moves websites from one server to the other. Use the subdomain we created above, to access the FTP directory, as it will always point to the correct web server.
- If you use FileZilla, create a new site for the web user, and select the SFTP protocol,
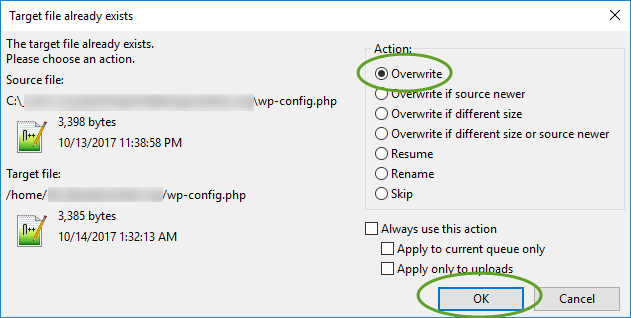
- Make sure you update the wp-config.php file with the new database connection values, and upload it to DreamHost,
Test your new site
The home page of the new site should be accessible at the MYDOMAIN.dreamhosters.com address we created above.
When you click on any of the post titles, you may get the following error message
Not Found
The requested URL /archives/… was not found on this server.
Additionally, a 404 Not Found error was encountered while trying to use an ErrorDocument to handle the request.
Update the permalinks
The WordPress database still contains the absolute locations of your HTML files and images. To refresh the permalinks of your site
- Log into your WordPress site,
- On the left side select Settings, Permalinks, and click the Save Changes button.
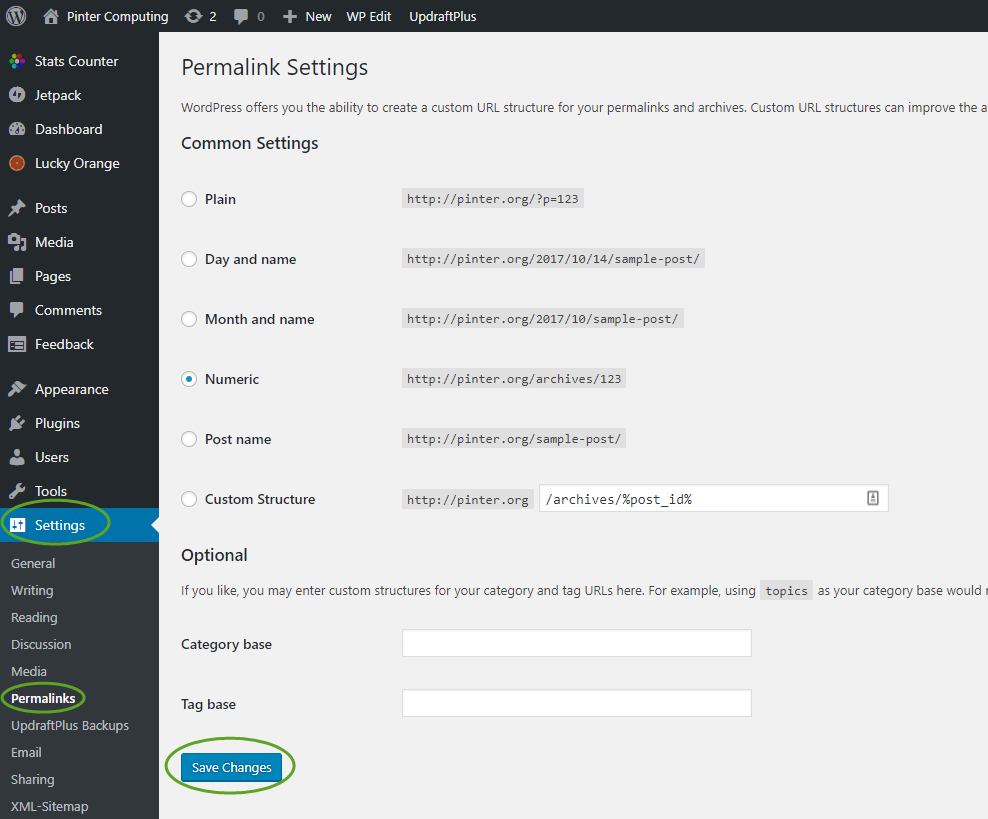
- After a few seconds the site should start to work.
Point your domain name to the new site
When you have successfully tested your new site, you can point your domain name to the DreamHost webserver. The DreamHost knowledge base will help you at https://help.dreamhost.com/hc/en-us/articles/215412347-Updating-your-DNS-after-your-WordPress-site-has-been-migrated-to-DreamHost
IMPORTANT: If you use your domain name to connect to Office 365 or other services, do not switch to the DreamHost name servers. Use “Option #2 — Pointing your A records” on the DreamHost knowledge base page above, to set the IP address of your website in the DNS record.
Configure WordPress to use the final domain name
To be able to test our site with the temporary subdomain we have updated the database. Now it is time to change the value back.
- Open the MySQL management utility
- Select the Browse tab, on the left side select your WordPress database, and in the database click the wp_options table.
- Click the Edit link in the siteurl row. This will automatically open the Insert tab,
- Update the siteurl value in the wp_options table and click the Go button,
- Do the same with the home row.
With an SQL query
update MY_DATABASE_NAME.wp_options set option_value = 'http://MY_SITE_URL' where option_name = 'siteurl'
update MY_DATABASE_NAME.wp_options set option_value = 'http://MY_SITE_URL' where option_name = 'home'
Test your site with your domain name
The home page of your WordPress site should load without error. If you get the error again:
Not Found
The requested URL /archives/… was not found on this server.
Additionally, a 404 Not Found error was encountered while trying to use an ErrorDocument to handle the request.
Update the permalinks again. See Update permalinks above