Cannot restart the Atlassian Confluence service on Windows

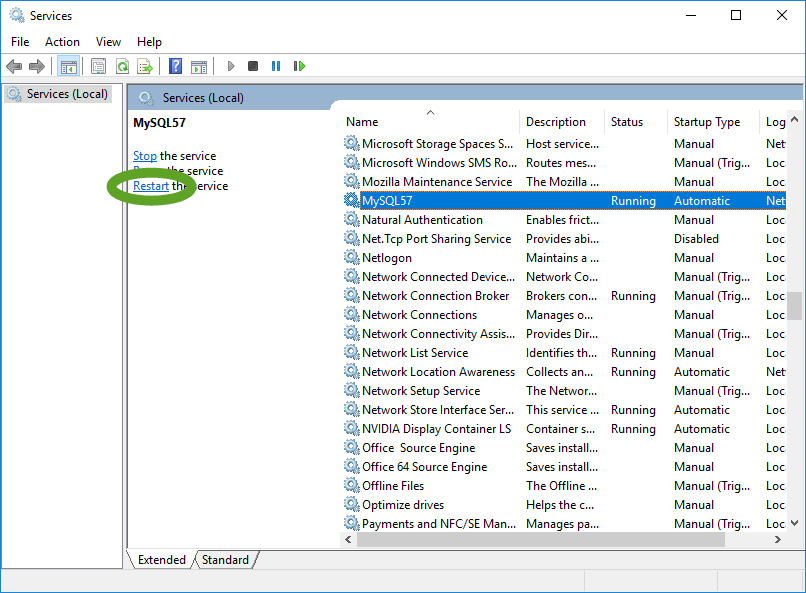
When the Atlassian Confluence wiki is installed on a Windows server, it frequently becomes unavailable. Sometimes it is possible to restart the Atlassian Confluence Windows service, but most of the time the Stop phase times out with:

Windows could not stop the Atlassian Confluence service on Local Computer.
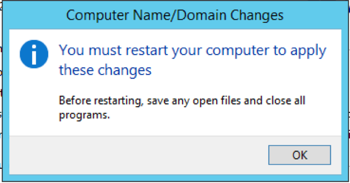
Error 1053: The service did not respond to the start or control request in a timely fashion.

To make Atlassian Confluence work again

  1. Open Task Manager,
  2. End the tomcat…exe process,
  3. Start the Atlassian Confluence Windows service.

Splunk lookups

Lookups provide readable information to users, so they don’t have to understand the returned codes in the reports.

Lookups are defined for a specific app, and not accessible from other apps.

Lookup options

Lookup code, description (input, output) values can be defined in multiple ways

  1. Comma delimited text file (csv),
  2. Search results saved as lookup table,
  3. External script or command,
  4. Splunk DB Connect application,
  5. Geospatial lookups,
  6. KV Store collection.

Create a lookup data .csv file

Save the lookup values in a “.csv” file on your workstation, with comma separated input and output values:

code,description
1,Success
2,Failure
3,Error …

To import a lookup table

Upload the data to the Splunk server

  1. In the Settings menu select Lookups,

  2. In the Lookup table files row click Add new,
  3. Select the Destination app where the lookup table will be available,
  4. Browse to the data file on your workstation,
  5. Enter the Destination filename for the uploaded file on the Splunk server,
  6. Click Save to upload the file to the Splunk server.

Import the data to the Splunk server

  1. In the Settings menu select Lookups again,
  2. Click Lookup definitions,
  3. Make sure the correct App context is selected in the drop-down, and click New,
  4. Make sure the correct Destination app and Lookup file are selected. Enter a name for the lookup definition, and keep File-based selected,
  5. Click Save.

Verify the imported lookup table

  1. Click the Splunk icon in the upper left corner to return to the home page,
  2. Click Search & Reporting,
  3. In the New Search field enter the following command with the “Name” you have entered on the Lookup definitions page to see the table of lookup values.
    | inputlookup MY_LOOKUP_NAME

Using lookup

Pipe the data into the lookup command to convert code to description

sourcetype=... | lookup products_lookup productId as productId OUTPUT product_name as ProductName

Pipe the result forward to the stats command for further processing

sourcetype=... | lookup products_lookup productId as productId OUTPUT product_name as ProductName | stats count by ProductName

Automatic lookup definition

If you want the lookup automatically appear in reports, create an automatic lookup definition.

  1. In the Settings menu select Lookups,
  2. Click Automatic lookups,

    1. Select the App context, and click New,
    2. Make sure the correct Destination app is selected where the lookup will be accessible,
    3. Create a name,
    4. Select the lookup table from the dropdown,
    5. In the Apply to section select the data type to use the lookup table for,
    6. In the Lookup input fields section enter the name of the code column in the lookup table and the code field name in the report.
    7. In the Lookup output fields section specify the display values.You can specify multiple fields using the Add another field link.
    8. If you want to overwrite existing field values, check the Overwrite field values checkbox.
    9. Click Save to save the lookup.


The Splunk Search Language (SPL)


Search Terms: see Searching in Splunk

Commands: tell Splunk what we want to do with the search result

  • Charts
  • Computing statistics
  • Formatting

Functions: explain how we want to chart, compute and evaluate the results

Arguments: variables we apply to the functions

Clauses: grouping and definition of results

Separator

Use pipes (|) to separate the components of the search language. The result of the component on the left is passed to the next component, no more data is read.

sourcetype=access_combined | top age | fields name

Editor features

  • Color coding
    • orange: Boolean operators and command modifiers
    • blue: commands
    • green: command arguments
    • purple: functions
  • If the cursor id behind a parenthesis, the matching parenthesis is highlighted
  • Hotkeys
    • Move each pipe to a new line: ⌘-\ (Mac) , ctrl-\ (Windows)

Commands

fields

Include and exclude fields from the search result. Separate the fields with space or comma.

  • Include fields. Happens before field extraction, can improve performance.
sourcetype=access_combined | fields status, clientip
  • Exclude fields (use negative sign after the word fields). It only affects the displayed result, no benefit to performance.
sourcetype=access_combined | fields - status, clientip


table

Retains the data in a tabulated format. Separate the fields with a comma.

  • Field names are the table column headers.
sourcetype=access_combined | table status, clientip


rename

Renames table fields fo display. Use space to separate the fields.

  • Wrap the name in quotes if the name contains space,
sourcetype=access_combined
| table status, clientip
| rename clientip as "IP Address"
status as "Status"
  • In subsequent components, we need to use the new name of the field, because that is passed forward by the pipe separator.
sourcetype=access_combined
| table status, clientip
| rename clientip as "IP Address"
| fields - "IP Address"


dedup

Removes duplicate events that share common values. Separate the fields with space.

sourcetype=access_combined
| dedup first_name last_name 
| table first_name last_name


sort

Ascending or descending order of the results.

  • Ascending order. The default order is ascending, the plus sign (+) also causes ascending sort.
sourcetype=access_combined
| table first_name last_name
| sort first_name last_name
  • Descending order
    • If there is a space between the minus sign and the field name, the descending order applies to all specified fields:
      sourcetype=access_combined
      | table first_name last_name
      | sort - age wage
    • If there is no space between the minus sign and the field name, the descending order only applies to that field:
      sourcetype=access_combined
      | table first_name last_name
      | sort -age wage

limit argument

To limit the number of events returned, use the limit argument.

sourcetype=access_combined
| table first_name last_name
| sort -age wage limit=10


top

Finds the most common values of the given fields in the result set. Used to render the result in graphs.

sourcetype=vendor_sales
| top Vendor

Automatically provides the data in tabular form and displays the count and percent columns, and limits the results to 10.

limit clause

  • Set the desired number or results.
sourcetype=vendor_sales
| top Vendor limit=20
  • To get all results, use limit=0
sourcetype=vendor_sales
| top Vendor limit=0
  • You can add more fields to the list separated by space or comma.
index=main sourcetype=access_combined_wcookie 
| top JSESSIONID, file
  •   Change the title of the count and percentage columns.
index=main sourcetype=access_combined_wcookie 
| top JSESSIONID file countfield = "Product count" percentfield = "Product percent"
  • Control the visibility of the count and percent fields.
index=main sourcetype=access_combined_wcookie 
| top JSESSIONID file showcount = True/False showperc = True/False

Add count and percent numbers for not within the limit.

index=main sourcetype=access_combined_wcookie 
| top JSESSIONID file useother = True/False

  • Specify the display value of the OTHER row:
index=main sourcetype=access_combined_wcookie 
| top JSESSIONID file otherstr = "Total count"

by clause

Top three product sold by each vendor

sourcetype=vendor_sales
| top product_name by Vendor limit=3


rare

Shows the least common values of the field set.

Has the same options as the top command.


stats

Produces statistics of the search results.

Stats functions

count

  • The number of events matching the search criteria.
index=main sourcetype=access_combined_wcookie 
| stats

  • To rename the “count” header us “as”
index=main sourcetype=access_combined_wcookie 
| stats count as "Total files"
  • Use “by” to group the result
index=main sourcetype=access_combined_wcookie 
| stats count as "Total files" by file

  • Add more fields with comma
index=main sourcetype=access_combined_wcookie 
| stats count as "Total files" by file, productId

  • Add a field to the count function to count events where the field is present
index=main sourcetype=access_combined_wcookie 
| stats count(file) as "Total files"

  • Compare the count to the total number of events
index=main sourcetype=access_combined_wcookie 
| stats count(file) as "Total files", count as "Total events"


distinct_count or dc

Count of unique values for a field.

index=main sourcetype=access_combined_wcookie 
| stats distinct_count(file) as "Total files"

index=main sourcetype=access_combined_wcookie 
| stats distinct_count(file) as "Total files" by productId


sum

Returns the sum of the numerical values.

index=main sourcetype=access_combined_wcookie 
| stats sum(bytes)


  • Count the events and sum the value
index=main sourcetype=access_combined_wcookie 
| stats count(file) as "Total files" sum(bytes)

  • Group the sum and count values by a field. These must be within the same pipe to work on the same set of data.
index=main sourcetype=access_combined_wcookie 
| stats count(file) as "Total files" sum(bytes) by productId


avg

Returns the average of numerical values.

index=main sourcetype=access_combined_wcookie 
| stats avg(bytes) as "Average bytes"

  • Group the values by a field
index=main sourcetype=access_combined_wcookie 
| stats avg(bytes) as "Average bytes" by productId

  • Add count to the table
index=main sourcetype=access_combined_wcookie 
| stats count as "Number of files" avg(bytes) as "Average bytes" by productId


list

Lists all values of a given field.

index=main sourcetype=access_combined_wcookie 
| stats list(file) as "Files"

  • Group the list of values by another field, but lists all repeated values.
index=main sourcetype=access_combined_wcookie 
| stats list(file) as "Files" by productId


values

Works like the list function, but returns the unique values of a given field.

index=main sourcetype=access_combined_wcookie 
| stats values(file) as "Unique Files"

  • Group the unique values by another field
index=main sourcetype=access_combined_wcookie 
| stats values(file) as "Unique Files" by productId


Create 3D models based on pictures

To create a 3D model based on a picture of the original object

  1. Start a 2D sketch
  2. On the Sketch tab Insert section select Image
  3. Browse to the image and place it on the canvas
    1. To move the image, drag the center with the mouse,
    2. To rotate the image, grab it in the lower left, lower right or upper right corners,
    3. To scale the image, grab it at the top or bottom edge. The aspect ratio is preserved.

Working with solid bodies in Autodesk Inventor

To move a freeform solid body

  1. Select the solid in the part drawing
  2. In the context-sensitive icon menu select Edit Freeform, or in the browser right-click the freeform and select Edit Freeform
  3. On the Freeform tab select Edit Form
  4. On the Edit Form popup page click the Body button
  5. Select the freeform solid
  6. Move the solid with the arrows


Subtract solids from each other

When you create a design where you need to mount an object on another, attach two objects to each other, or leave room for another object, model both objects and subtract one from the other. This will create the perfect interface for the connection.

Autodesk Inventor can subtract two independent solids from each other. The two solids cannot have any references to each other, so we cannot use the Project Geometry to project one of the objects to a plane to guide the creation of the other.

Create separate solid bodies

If the product is not too complex, it is easier to build the entire product in one drawing. Most of the time this will only yield one solid. The combine command requires at least two separate solids to work with, so to separate the parts of the design to individual solids

  1. Build the product with multiple parts in the same drawing,
  2. Save the combined design file as …_all_parts.ipt,
  3. Delete the part that represents the first solid,
  4. Save the file as …_second_part.ipt,
  5. Undo the delete steps, and delete the second part,
  6. Save the file as …_first_part.ipt,
  7. On the Manage tab select Derive and select the file of the second part to import it into the drawing.
    This step inserts second part as a separate solid.

Subtract the solid bodies

  1. Create the object that will serve as the “tool” to cut into the object,
  2. Position the object on the tool to cut into,
  3. On the 3D Model tab select Combine,
  4. On the Combine popup window click the Base button,
  5. Select the solid to be trimmed,
  6. Click the Toolbody button,
  7. Select the solid to be used as a cut tool,
  8. Click the Cut button,
  9. If you want to keep the cut tool in the drawing check the Keep Toolbody checkbox,
  10. Click the OK button to proceed with the cut.

Berks update fails with ‘Missing artifacts’ error message

When you add cookbooks as dependencies with the “depends” statement to the metadata.rb file of your Chef cookbook, to be able to test your cookbooks in Chef Test Kitchen, you also have to specify the location of those cookbooks in the Berksfile file.

For all the cookbooks that are available on the Chef Supermarket, one line

source "https://supermarket.chef.io"

is sufficient to specify their location. If a cookbook is only available at GitHub, specify the location with

cookbook 'COOKBOOK_NAME', git: 'git@github.com:PATH_TO_COOKBOOK.git'

If the cookbook is available on the local drive of the workstation, specify the path with

cookbook 'COOKBOOK_NAME', path: '../COOKBOOK_FOLDER_NAME'

Use the above relative path if all of your cookbooks are under the same cookbooks directory.

If a reference to a Chef cookbook is missing from the Berksfile file, the following message appears when you execute berks update.

Unable to satisfy constraints on package …, which does not exist, due to solution constraint (… = …). Solution constraints that may result in a constraint on …: [(… = …) -> (… >= …)]
Missing artifacts: ...
Demand that cannot be met: (… = …)
Unable to find a solution for demands: … (…)

Searching in Splunk

When you are building the search criteria, click the field and value in the search result to add it to the search.


Wildcard character

  • * (asterisk) one or multiple characters

Exact phrases

  • Use ” (double quotes)

Search for quotes

  • \” (use backslash to escape quotes if you want to search for quotes)

Keywords in the search bar are case sensitive!

Boolean keywords are

  • AND (if omitted, it is implied)
  • OR
  • NOT

Order of boolean evaluation

  1. Inside parentheses ()
  2. NOT
  3. OR
  4. AND

Operators

  • =
  • !=
  • >
  • >=
  • <
  • <=

Examples

  • soourcetype=access_combined

Best search practices

Search in a time range

  • s  Seconds
  • m   Minutes
  • h  Hours
  • d  Days
  • w  Weeks
  • mon  Month
  • y  Year
  • @  Round down to the nearest unit

Examples

  • -30s  In the last 30 seconds
  • -30m@h  Round to the last hour. If the event was run at 5:42, events from 5:00 are returned
  • earliest=-2 latest=-1h  From two hours ago to one hour ago
  • earliest=05/12/2017:12:00:00  From an absolute date and time

Indexes

If the data is organized by multiple indexers, specify the index where the data is stored

Examples

  • index=main