Configure Epson ET-3850 scanning on Windows 11

Install the Epson ET-3850 scanner driver and scanning utility

  • Download the Scanner Driver and Epson Scan Utility from the Driver section.
    • for Epson ET-3850 – Scanner Driver and Epson Scan 2 Utility v6.5.28.0 (or later)
  • Double-click the downloaded file and install the application

Connect to the Epson ET-3850 scanner

  • Start the Epson Scan 2 Utility
  • On the Scanner Settings window click the Enable Editing button
  • Click the Yes button on the Access Control popup to allow changes to your device
  • Click the Add button
  • On the Add Network Scanner window enter a name for the scanner, click the the IP address, and click the Add button
  • On the Scanner Settings window click the OK button
  • Close the Epson Scan 2 Utility window with the X in the upper right corner

Scan with the Epson ET-3850 scanner

  • Start the Epson Scan 2 application

GIMP moves the wrong layer

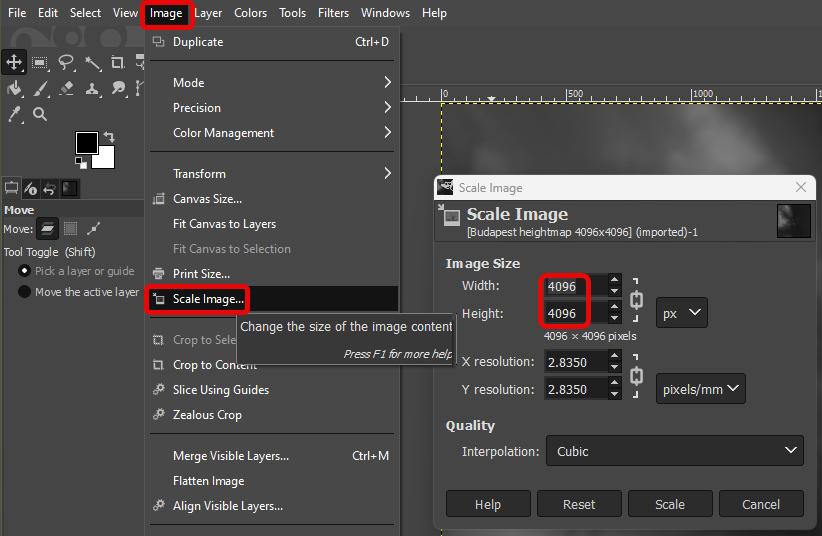
When you try to move a layer with a transparent logo or text in GIMP, sometimes the background layer moves.

By default the Move Tool selects the layer of the dragged pixel regardless of which layer is selected. The tool only selects the correct layer if the pixel has at least 25% opacity. If the pixel’s opacity is less than that, it selects the layer under it, usually the background layer.

To force the Move Tool to move the selected layer, select Move the active layer in the tool options, or press Shift while dragging the layer.

ReferenceError: json is not defined

Remix uses the loader function to provide a behind the scenes API for the browser side script to supply data in JSON format. The function should return serialized data using the json instruction. When you get the error message:

ReferenceError: json is not defined

Add this line to the top of the script

import { json } from "@remix-run/node";

Initial url (undefined) does not match URL at time of hydration

React web applications pre-render the pages during application build for faster display and “hydrates” them with the client side javascript to make them interactive and to display data. This error can have causes:

Initial url (undefined) does not match URL at time of hydration

An installed NPM module

  • npm install styled-components caused the infinite redraw of the index page.

Rotating pizza stone for the Ooni Koda 12 pizza oven

Pizza is awesome, we have never found anyone who does not like it. The Ooni Koda 12 gas fired pizza oven can fully bake a 12 inch pizza in 3 minutes, but we need to rotate it every 20-30 seconds to bake it evenly and avoid burning it on one side. The rotating pizza stone solves the problem and bakes the perfect pizza in 3 minutes.

Materials

Tools

  • 11 mm drill bit to drill into the stainless steel bottom of the oven.
  • Hack saw to cut the stainless steel shaft.
  • Sharp ceramic/tile drill bit to drill a dent into the center of the pizza stone to keep it in place on the top of the shaft.
  • File to round the tip of the fork and smooth the edge of the cut shaft.

The construction

  1. With a 3 mm Allen key remove the match holder from the bottom of the Ooni Koda 12 pizza oven.
  2. Drill an 11 mm diameter hole into the center line of the oven, 15 mm from the center line of the match holder’s threaded holes.
  3. With a file, round the tips of the rotisserie forks to avoid any injuries during construction and usage.
  4. Flatten the fork to support the pizza stone.
  5. On a flat surface align the arms of the fork, so the shaft stands straight up.
  6. Using the stainless steel washers attach the middle slots of the motor bracket to the bottom of the oven using the holes and screws which held the match extender. The 11 mm hole at the bottom of the oven should align with the center of the notch on the bracket.
  7. With a sharp tile drill make a 3 mm deep, 5 mm diameter dent at the center of the round pizza stone. This will keep the pizza stone centered on the shaft.
  8. Insert the tip of the shaft into the dent in the center of the pizza stone, and mark the position of the hole in the center of the fork.
  9. Drill a few mm dent in the shaft with 4, 5, and 6 mm drill bits to guide the screw of the fork.
  10. Place the straightened fork in the oven, push the shaft through it from the bottom. Align the screw with the dent in the shaft and tighten it.
  11. Temporarily place the pizza stone on top of the shaft, to make sure the tip of the shaft can reach into the dent at the center of the pizza stone.
  12. Draw a line on the shaft at the bottom of the motor bracket.
  13. The final length of the shaft should be 22 mm longer to reach into the hole in the motor enclosure.
  14. Cut the shaft at the second mark with the hack saw, and smooth the edges with the file.
  15. Insert the shaft into the hole at the bottom of the oven, align the screw of the fork with the dent on the top of the shaft and tighten it.
  16. Lift the shaft, slide the motor into the bracket with the cable facing the rear, and insert the shaft into the motor enclosure.
  17. Place the pizza stone on top of the shaft. Insert the tip of the shaft into the dent at the bottom of the pizza stone.


Baking the perfect pizza

We have a few suggestions to make sure your pizza is as good as it can be.

  • Put rice flour on your work surface when you put the toppings on the pizza. Rice four has higher combustion temperature, so it does not burn in the oven.
  • Use the Ooni slotted aluminum pizza peel. The dough does not stick to it, and does not burn in the oven, like the wooden peels.

Pre-heat the pizza stone

  • Turn on the motor to heat the pizza stone evenly,
  • Light the gas heater, set it to high and heat the center of the pizza stone to 400 °C (750 °F).

Bake the pizza 

  • Set the gas heater to low,
  • Temporarily stop the motor and place the pizza at the center of the pizza stone,
  • Start the motor as soon as you can to avoid burning one side of the pizza,
  • Remove the fully baked pizza with the pizza peel while the motor is on.

Before you bake the next pizza

During baking, the pizza stone will cool down to close to 260 °C  (500 °F), so the bottom of the next pizza will not bake properly. Before you bake the next pizza

  • Keep the motor on to heat the pizza stone evenly,
  • Remove most of the rice flour from the pizza stone with a heat resistant tool, so it does not burn during stone re-heating,
  • Set the gas heater to high and re-heat the center of the pizza stone to 400 °C (750 °F),
  • Don’t forget to set the gas heater to low again before you place the next pizza into the oven!

How to convert PostgreSQL array column to scalar column type

If your PostgreSQL database table contains “timestamp with time zone []” or “timestamp without time zone []” type columns and you want to convert them to “timestamp with time zone” or “timestamp without time zone” type, add the USING directive to the ALTER COLUMN command to tell PostgreSQL how to convert the array to the scalar value. In this example we will pick the first element of the array:

ALTER TABLE public.application
	ALTER COLUMN last_updated_date TYPE timestamp with time zone USING last_updated_date[0]

TypeError: Cannot destructure property ‘…’ of ‘useLoaderData(…)’ as it is null.

React web applications (Next.js, Remix) use React hooks to transfer data between the server side and browser side code. Remix uses the loader() function to run code on the server to produce data for the web page, and the

const { posts } = useLoaderData<typeof loader>();

instruction in the browser code to receive it.

When the compiler throws the TypeScript error:

TypeError: Cannot destructure property ‘…’ of ‘useLoaderData(…)’ as it is null.

add || {} to the end of the line to provide a default value:

const { incidents } = useLoaderData<typeof loader>() || {} ;

Migrating a Next.js web application to Remix

  • Open a terminal window in the parent directory of your future web application
  • Initialize the Remix application with
    npx create-remix
  • Use the up and down arrow keys of the keyboard to select between the options.
    • The answer to the “Where would you like to create your app?” question will create the directory for the new application (./MY_NEW_APP)
    • To the “What type of app do you want to create?” question
      • “A pre-configured stack ready for production” sets up a production ready fully configured application based on the answer to “Which Stack do you want?”
        See https://remix.run/stacks for information on the stacks.
      • To set up a Remix application without additional frameworks, select “Just the basics”
    • Select the “Express Server” deployment target for high performance Docker container (EKS) deployments.
    • It is highly recommended to use TypeScript for production-grade applications.
  • CD into the new application and read the README.md file for deployment instructions.

Application configuration

At this point Remix version 1 is “forward compatible”. It already contains the version 2 features, and you can start to use them before the official release. To enable the version 2 features in version 1

  • Make sure the module.exports = { section of the “remix.config.js” file contains the following lines:
  future: {
    v2_errorBoundary: true,
    v2_headers: true,
    v2_meta: true,
    v2_normalizeFormMethod: true,
    v2_routeConvention: true,
  },

Migration notes

Referencing files

Instead of @ use ~ to refer to the root of the site, and export the reference as a function, beca

Change 

import styles from '@/styles/footer.css'

to

import styles from '~/styles/footer.css'

Routing

Use the dot notation to specify the page hierarchy. See Route nesting in Remix version 2

Linking to other pages

Place your .tsx files into the /app/routes directory. Use dot notation to mark the routing level.

For simple links use the HTML <a /> command to link to pages. Start the URL with / to refer to the root of the site.

<a
  href="/about"
  rel="noreferrer"
>
  About
</a>

<a target="_blank"
  href="https://remix.run/docs"
  rel="noreferrer">
  Remix Docs
</a>

Images

Place the images into the /public directory and refer to them with path relative to the public directory

<img src="my-logo.png"/>

For more functionality use <Image /> from react-image at https://github.com/Josh-McFarlin/remix-image to resize, convert, adjust and cache images.

<Image
  src="my-logo.png"
  responsive={[
    {
      size: { width: 100, height: 100 },
      maxWidth: 500,
    },
    {
      size: { width: 600, height: 600 },
    },
  ]}
  dprVariants={[1, 3]}
/>

CSS Style Sheets

Place style sheet files into the /app/styles directory. Create is if it does not exist.

Shared (global) styles

Create the global style sheet

For global CSS code create the /app/styles/global.css file and place commonly used style instructions there.

Reference the style sheet in the app/root.tsx file

Add the following code to the app/root.tsx file. Make sure the App() function contains the <Links /> component in the <head> section to generate the <link rel=”stylesheet” href=”… /> HTML instructions in every page header.

// Import LinksFunction to make the <Links/> component work
import type { LinksFunction } from "@remix-run/node";

// Import the global style sheet available for all pages
import styles from "~/styles/global.css";

// Expose the style sheet to the application
export const links: LinksFunction = () => {
  return [
    {
      rel: "stylesheet",
      href: styles,
    },
  ];
};

// The <Links /> component will create the <link ... HTML instruction in the <head> of all pages to load the style sheet
export default function App() {
  return (
    <html lang="en">
      <head>
        ...
        <Links />
        ...
      </head>
      <body>
        ...
      </body>
    </html>
  );
}

Page specific styles

IMPORTANT: The <Link /> component has to be in the <head> section of the App() function in the app/root.tsx file to generate the <link rel=”stylesheet” href=”… /> HTML instructions in every page header. See Reference the style sheet in the app/root.tsx file above.

Place the code shown below into the route. Style sheet loading does not work from the component. In the example below, even if the <Header /> or <Footer /> component use the style, we need to place the import and const statements into the app/routes/about.tsx file. Use the <div className=”my-css-class”> syntax to reference the class in the CSS file.

import Header  from './_header';
import Footer  from './_footer';

// ========================================
// Import the page specific style sheet

// Import the style sheet
import styles from "~/styles/_footer.css";

// Import the LinksFunction
import type { LinksFunction } from "@remix-run/node";

// Expose the imported stylesheet to the <Links /> module
export const links: LinksFunction = () => {
  return [
    {
      rel: "stylesheet",
      href: styles,
    },
  ];
};

// ========================================

// The browser script
export default function About() {
  return (
    <>
      {/* Display the Header component */}
      <Header/>

     <div className="my-css-class">About the site</div>

      {/* Display the Footer component */}
      <Footer/>
    </>
  )
}

Route styles

If the style sheet is imported in the page, Remix uses route specific style sheet loading.

If you load  a style sheet into app/routes/dashboard.tsx with

import styles from "~/styles/dashboard.css";

export function links() {
  return [{ rel: "stylesheet", href: styles }];
}

and into app/routes/dashboard.accounts.tsx with

import styles from "~/styles/accounts.css";

export function links() {
  return [{ rel: "stylesheet", href: styles }];
}

The app/routes/dashboard.accounts.tsx page will actually load both

  • ~/styles/dashboard.css and
  • ~/styles/accounts.css

For more information see Styling in Remix

Server Side Rendering (SSR)

If a feature does not render correctly on the server, like react-select, because of its use of emotions, use <ClientOnly /> from  remix-utils at https://github.com/sergiodxa/remix-utils. Create a placeholder for the ClientOnly component, in this example a 32 wide <div />, to be able to predict the location on the final page. 

import Select from "react-select"
import { ClientOnly } from "remix-utils"

const CustomDropdown = () => {
  return (
    <div className="w-32">
      <ClientOnly>
        <Select />
      </ClientOnly>
    </div>
  )
}

Application logic

IMPORTANT:

Remix simplifies the data transfer between the server side and browser side script, but we need to place the browser side code into the route. loader() and action() functions do not work in components, so we cannot use React tabs to switch between pages. All pages have to have their own URLs. 

In Next.js the entire script, saved in the pages directory, ran in the browser. The entire script saved in the pages/api directory ran on the server. We had to make an explicit call from the browser script to the API script to send and request data using the React “useState” hook.

In Remix the loader and action functions or the browser script run on the server, and have direct access to the database, the export default function…() { runs in the browser.

Place the

  • server side files (to access the database, and process data) in the app/models directory

app/models/post.server.ts file

export async function getPosts() {
  // Get all posts from the database
  ...  
  return postList;
}

export async function getPost(slug: string) {
  // Get a post from the database
  ...
  return post;
}

export async function createPost(
  post: Pick<Post, "description" | "title">
) {
  // Create the post in the database
  ...
  return result;
}
  • browser side files (to generate the pages) in the app/routes directory

Place the code shown below into the route. loader() and action() functions do not work in the components. 

app/routes/posts.admin.tsx file

// Reference to the database access script
import { getPosts, getPost, createPost } from "~/models/post.server";

// Server side code to call the
//   getPosts() function to read data from the database
export const loader = async () => {
  return json({ posts: await getPosts() });
};

// Server side code to
//   receive the form data from the browser,
//   validate it,
//   and call the createPost() function
//   to save the data in the database 
export const action = async ({ request }: ActionArgs) => {

  const formData = await request.formData();

  const title = formData.get("title");
  const description = formData.get("description");

  // Error checking
  const errors = {
    title: title ? null : "Title is required",
  };
  const hasErrors = Object.values(errors).some(
    (errorMessage) => errorMessage
  );
  if (hasErrors) {
    return json(errors);
  }

  await createPost({ title, description });

  return redirect("/posts/admin");

};

// Browser side code
export default function PostAdmin() {

  // Remix hook receive data from the "loader()" function
  const { posts } = useLoaderData<typeof loader>();

  // Remix hook to send the form data to the "action()" function
  const errors = useActionData<typeof action>();

  // Generate the HTML
  return (
      <div>
          <ul>
            {posts.map((post) => (
              <li key={post.slug}>
                {post.title}
              </li>
            ))}
          </ul>
      </div>

      <Form method="post">
          <input type="text" name="title" />
          <input type="text" name="description" />
          <button type="submit" >Submit</button>
      </Form>
  );
}

For more information see  Migrating your React Router App to Remix

Cannot edit table rows in pgAdmin 4

If the table has no primary key, pgAdmin 4 cannot identify them, so disables the row insert and edit. Lock icons appear next to the column names, and the Add row button is disabled.

To be able to edit table rows in pgAdmin4, select the primary key column of the table.

  • Close the row editor window, as we will update the table properties
  • Right-click the table name and select Properties
  • On the Columns tab select a column as the Primary key, and click the Save button
  • Right-click the table name and select View/Edit Data, All Rows
  • The pencil icons show, that the data is editable, and the Add row button is available.

How to expose Next.js environment variables to the browser specific code

The Next.js React web application runs separate code on the server and in the browser. By default, the environment variables are only accessible in the server side script.

Warning: by exposing environment variables to the browser code you may reveal secrets. Make sure the exposed environment variables do not contain any secrets. If secrets are needed in the browser code, create an API page in the pages/api directory and fetch it from the browser code.

To use environment variables in the browser side script,

  • expose those in the next.config.js file
module.exports = {
  ...
  
  env: {
    // declare here all your variables
    MY_ENVIRONMENT_VARIABLE: process.env.MY_ENVIRONMENT_VARIABLE,
  }
};
  • Restart the server for the change to take effect !!!
  • Read the environment variable value from process.env in the browser specific file.
<div className={styles.footer} >
  Version: '2023-06-22_01' &nbsp;{process.env.ENVIRONMENT}
</div>